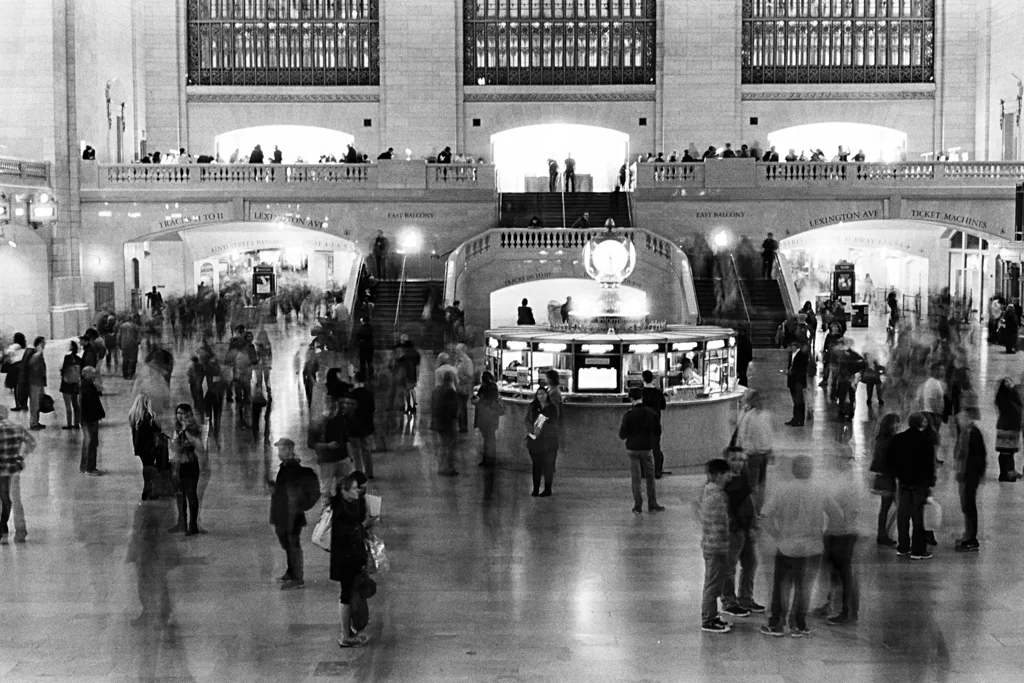
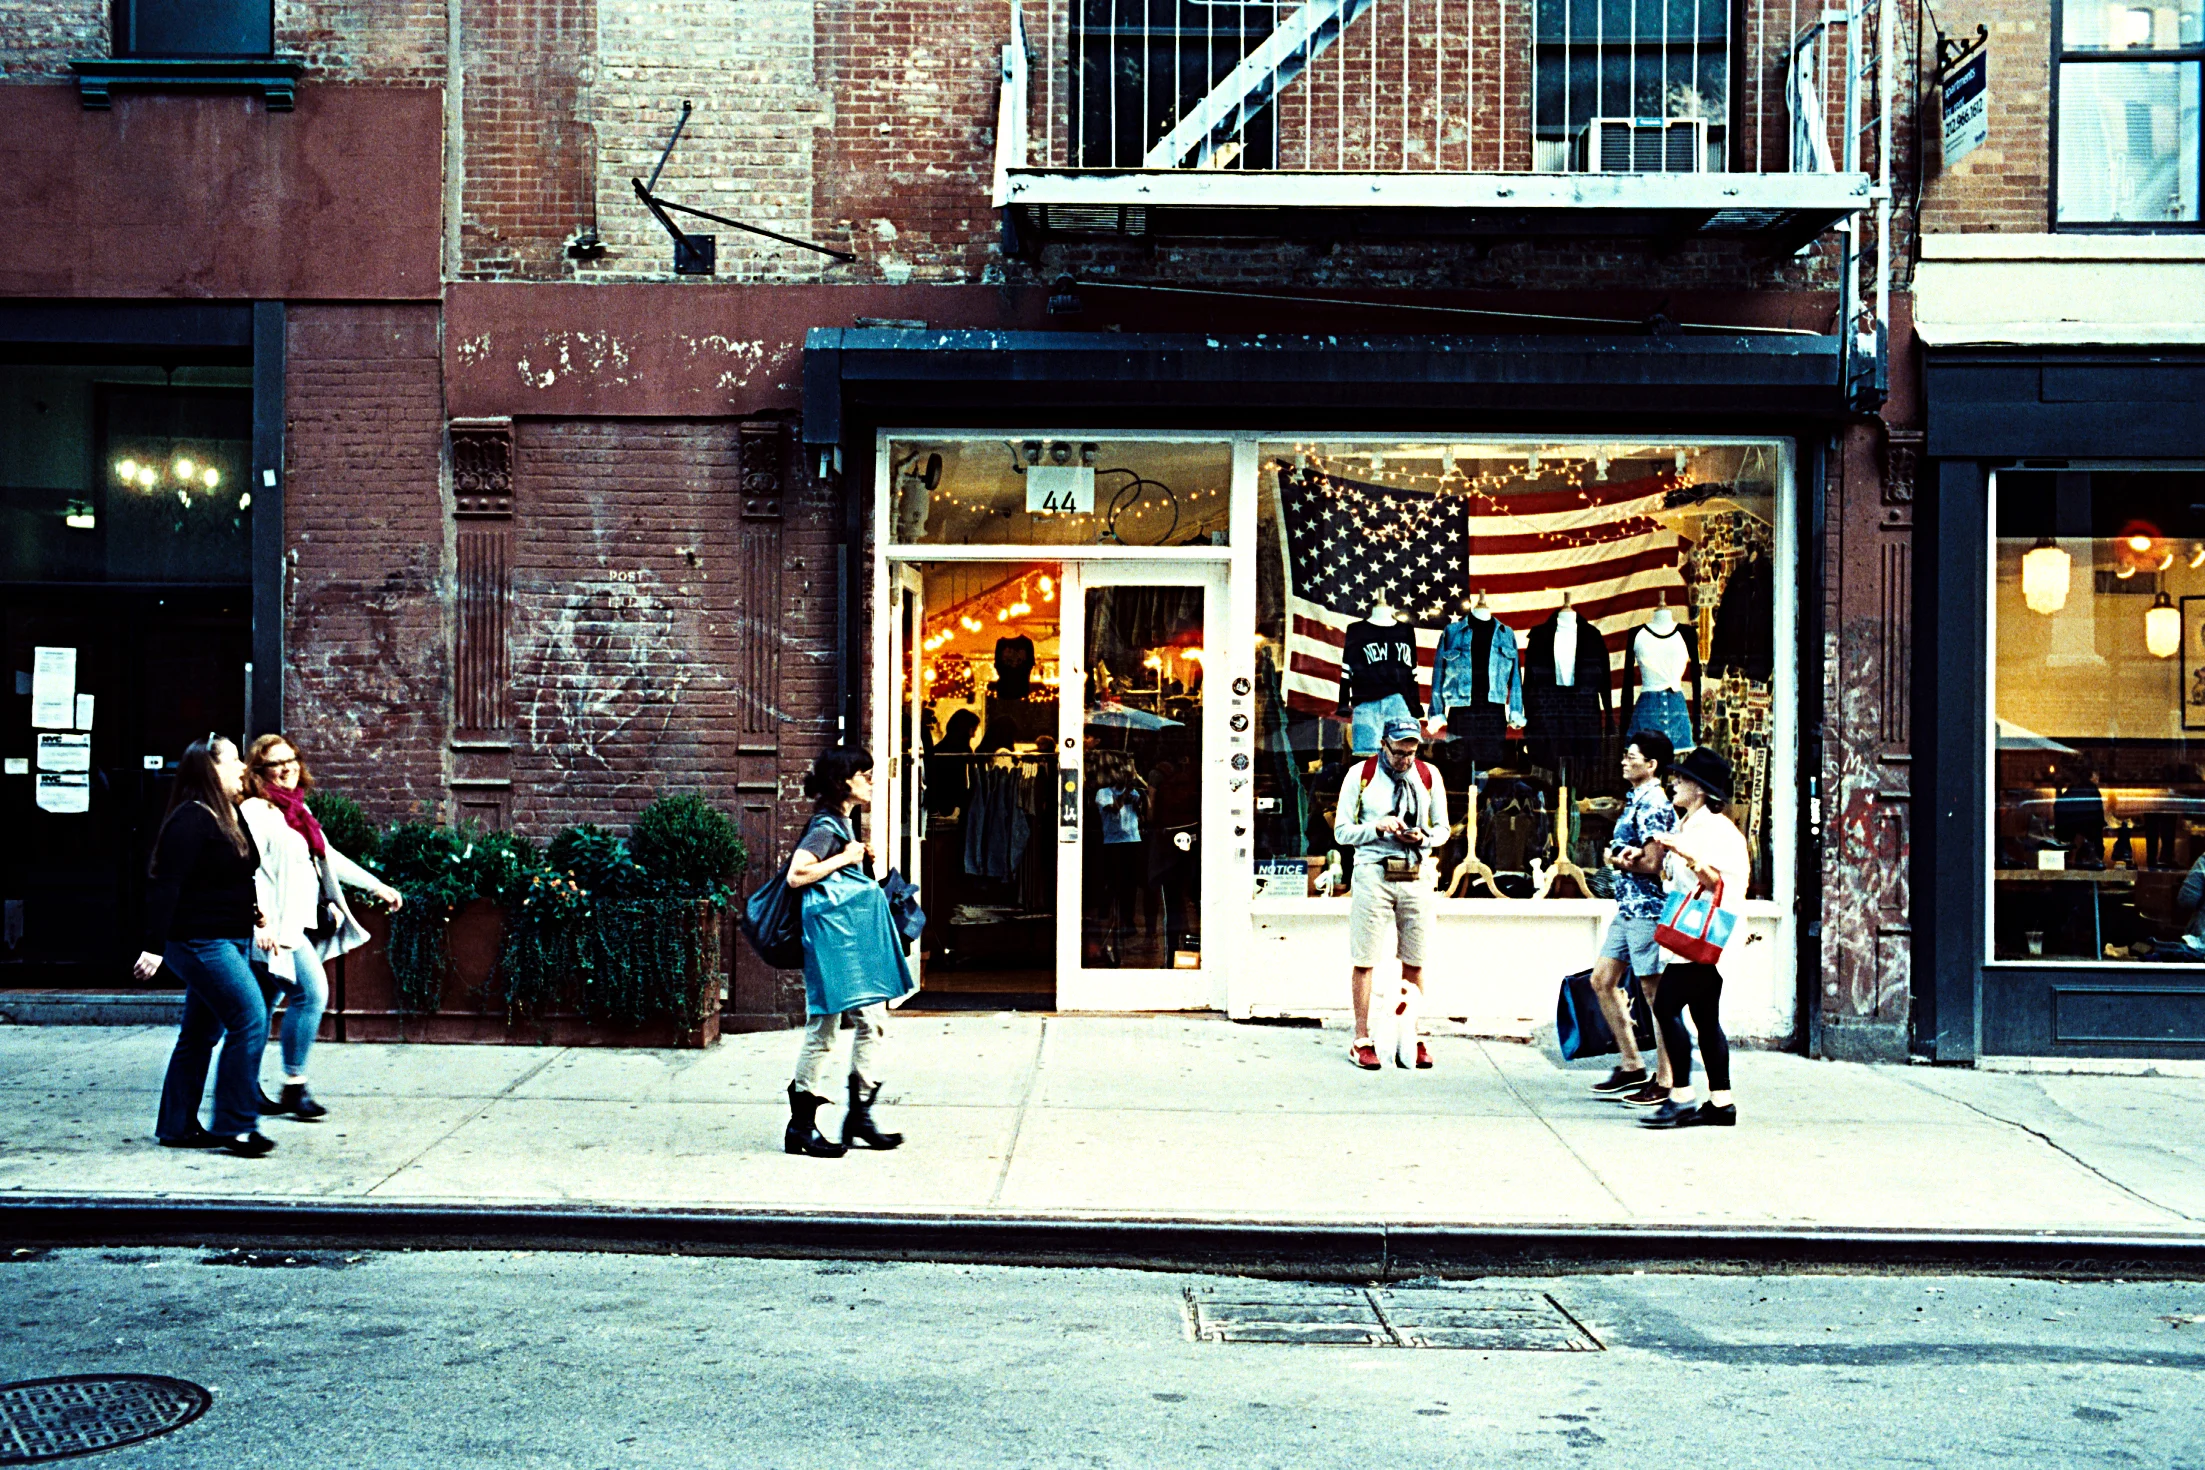
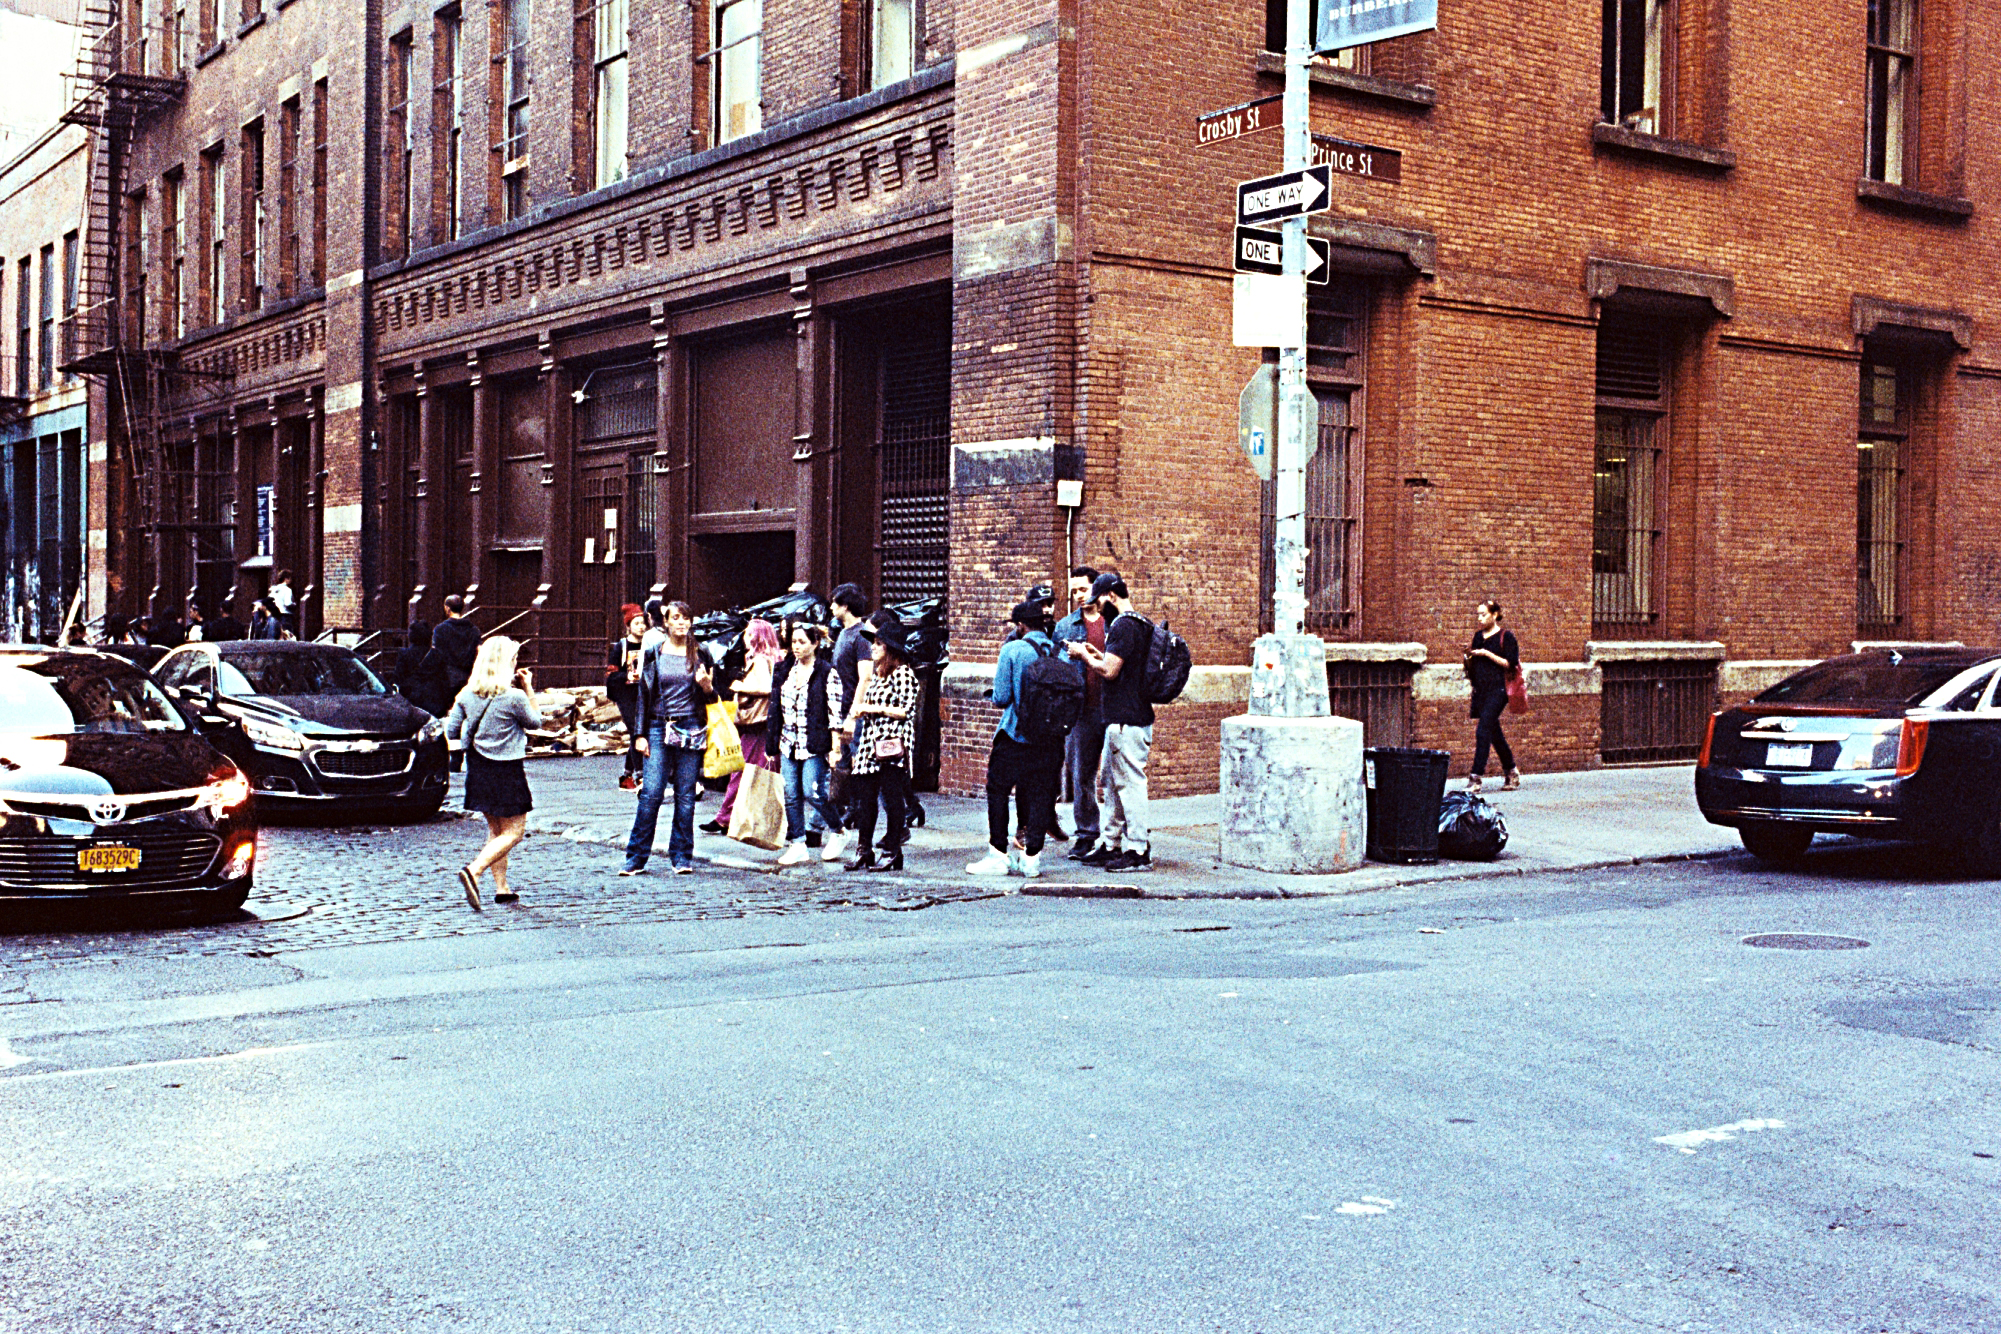
Random night on Tri-X
A few random snapshots taken on a November evening in and around Grand Central Terminal.
Camera: Leica MP
Lens: Zeiss Sonnar T*1,5/50
Film: Kodak Tri-x metered at 400
Processing: XTOL, pushed one stop
Scan: Pakon

A few random snapshots taken on a November evening in and around Grand Central Terminal.
Camera: Leica MP
Lens: Zeiss Sonnar T*1,5/50
Film: Kodak Tri-x metered at 400
Processing: XTOL, pushed one stop
Scan: Pakon


Shhhh... please do not disturb!
It never fails, right after Labor Day temperatures drop in the tri-state area. Gone are the warm and cozy days of summer. The drop is not extreme, but enough to remind you that the cold fall and winter days are fast approaching, waiting around the corner. The same applies to traffic, gone are the days of easy commutes into NYC.

It never fails, right after Labor Day temperatures drop in the tri-state area. Gone are the warm and cozy days of summer. The drop is not extreme, but enough to remind you that the cold fall and winter days are fast approaching, waiting around the corner. The same applies to traffic, gone are the days of easy commutes into NYC. The streets are jammed again with stressed drivers, school buses, and stop-and-go traffic due to stalled cars, construction or accidents. Leaving only ten minutes later than usual makes all the difference. Luckily sunshine, endless beaches, sanity and relaxation are only a short flight away.

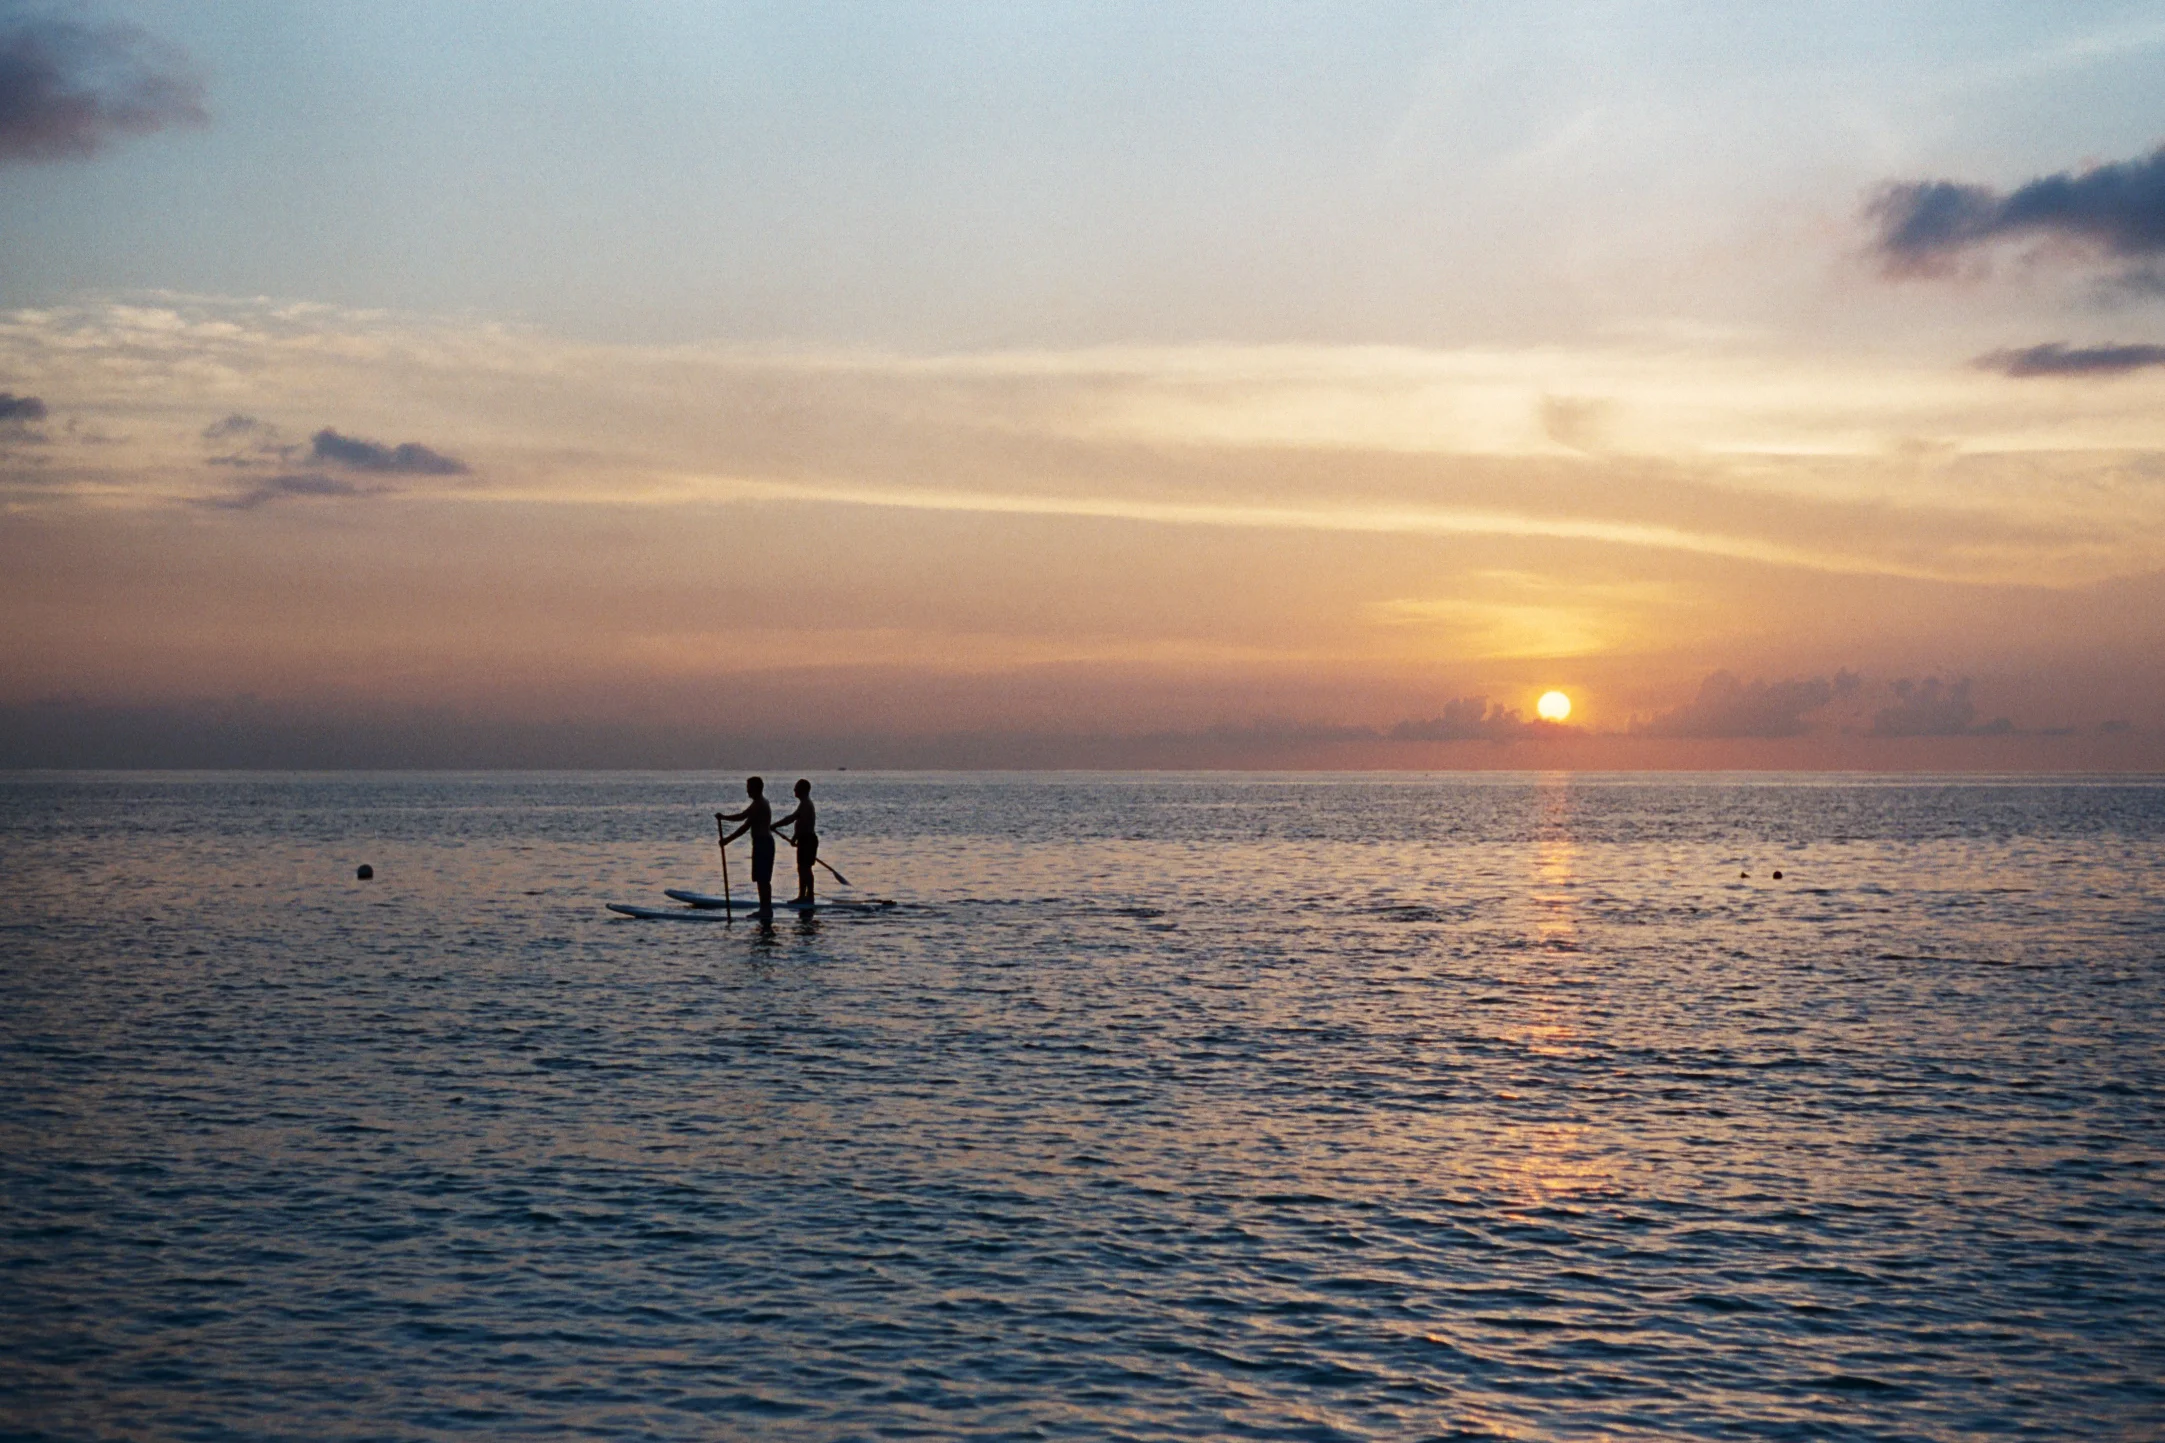
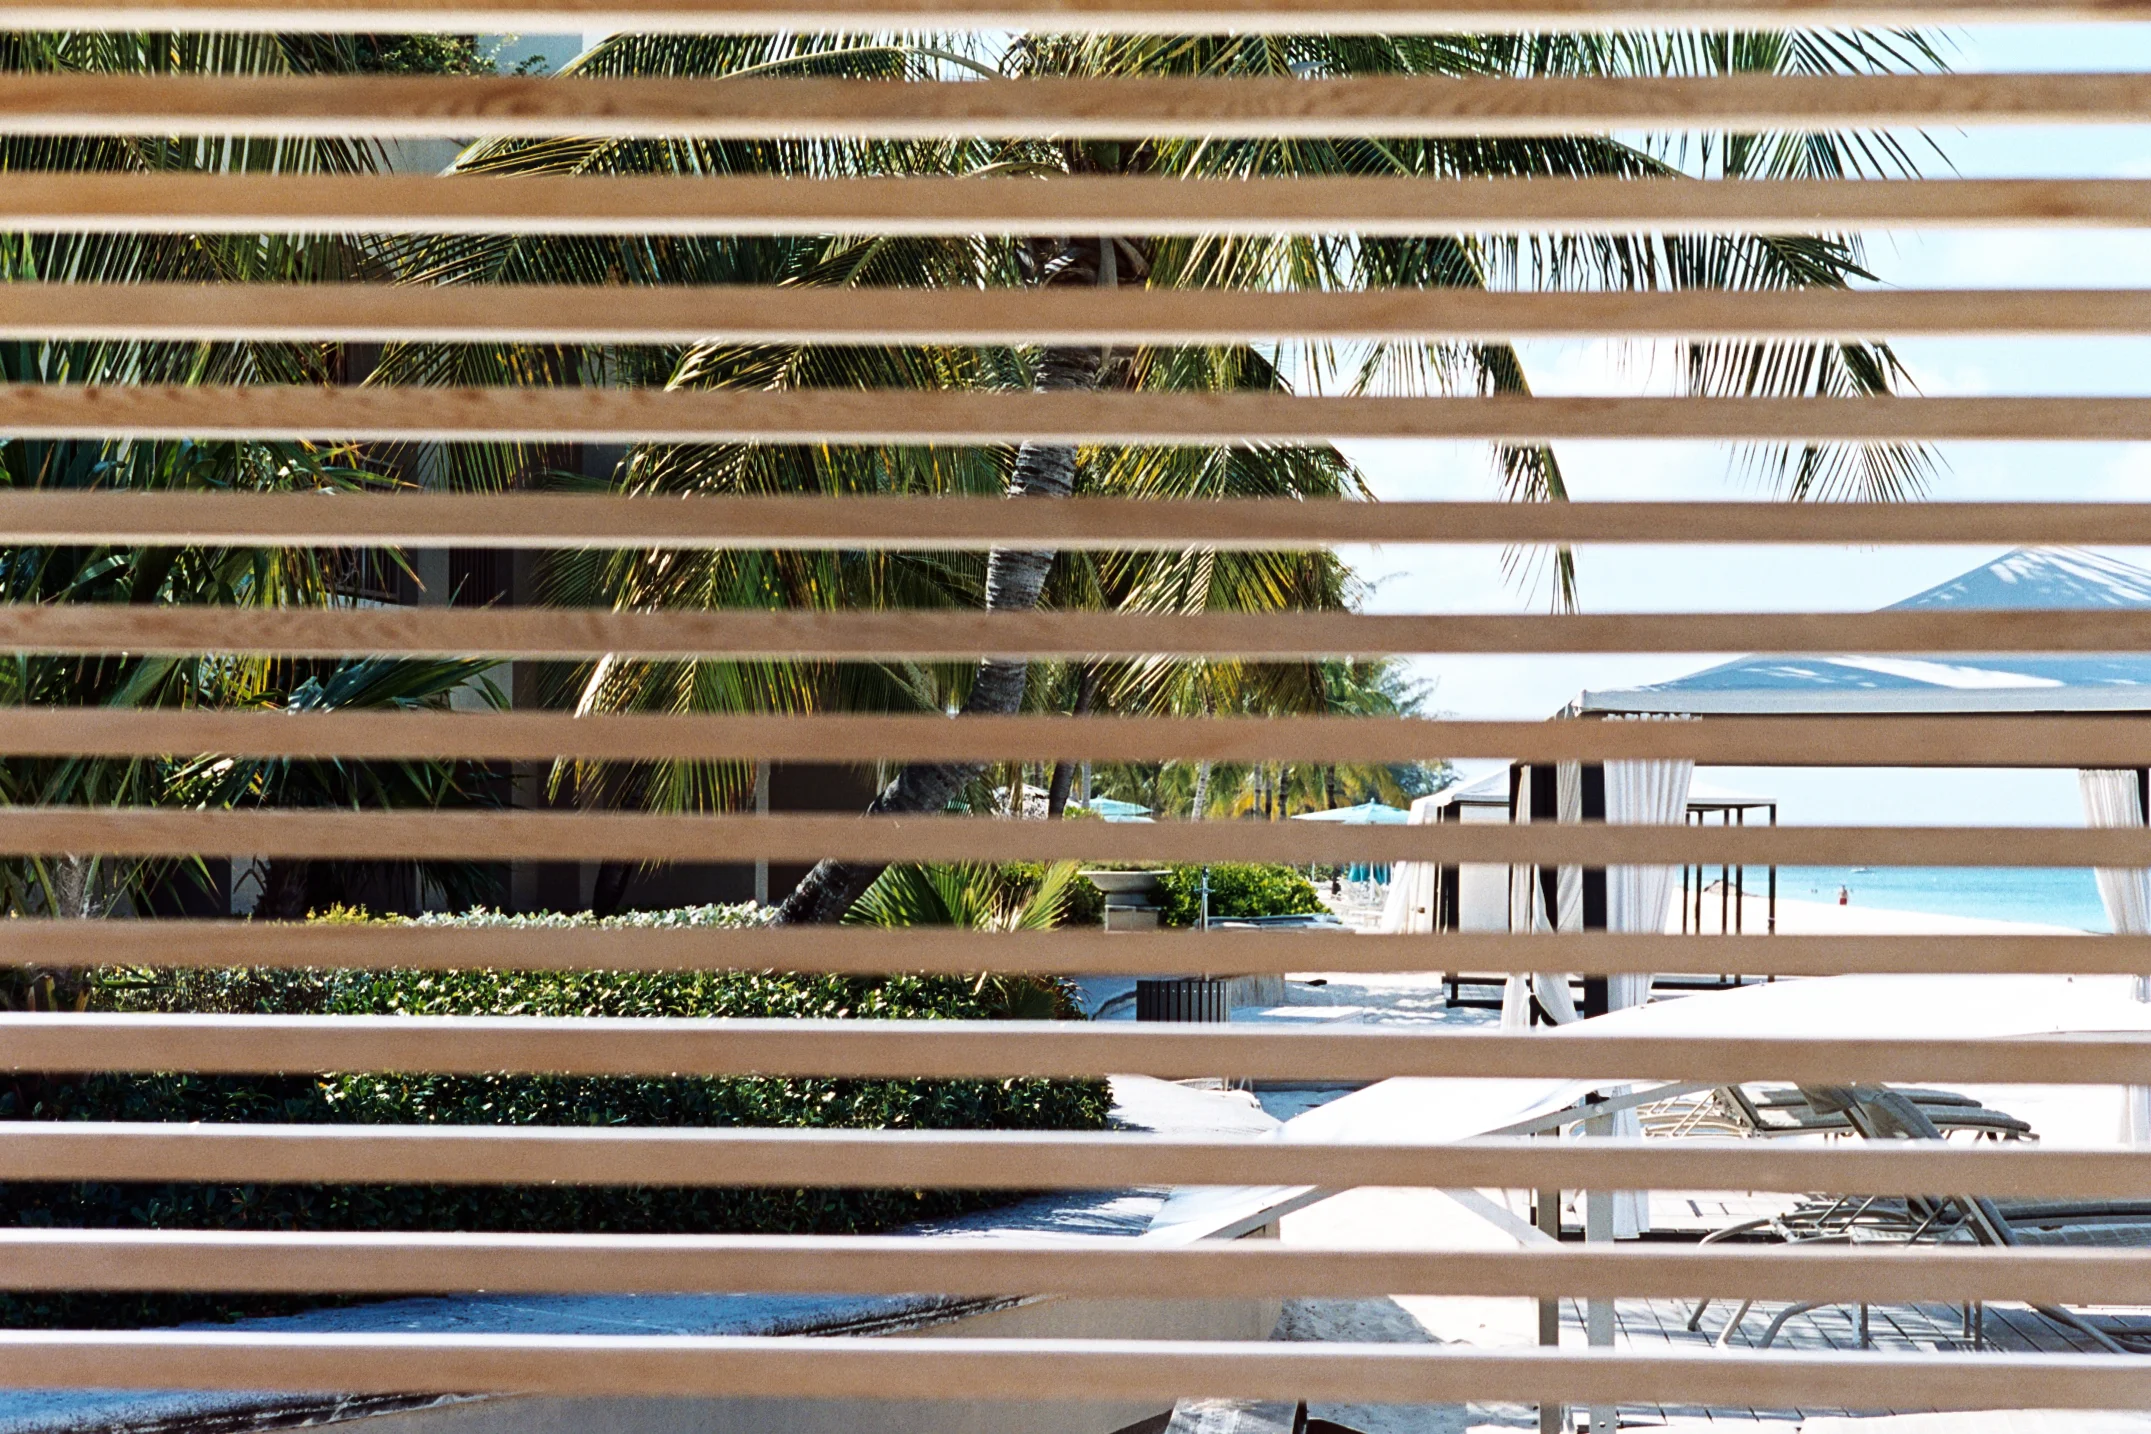
I decided to hop on a plane at JFK on a Thursday morning for a four-day getaway at the Ritz Carlton, Grand Cayman. Four hours later I was greeted with cocktails at check-in, and after a few minutes of formalities I wads off to soak up the sun and relax.

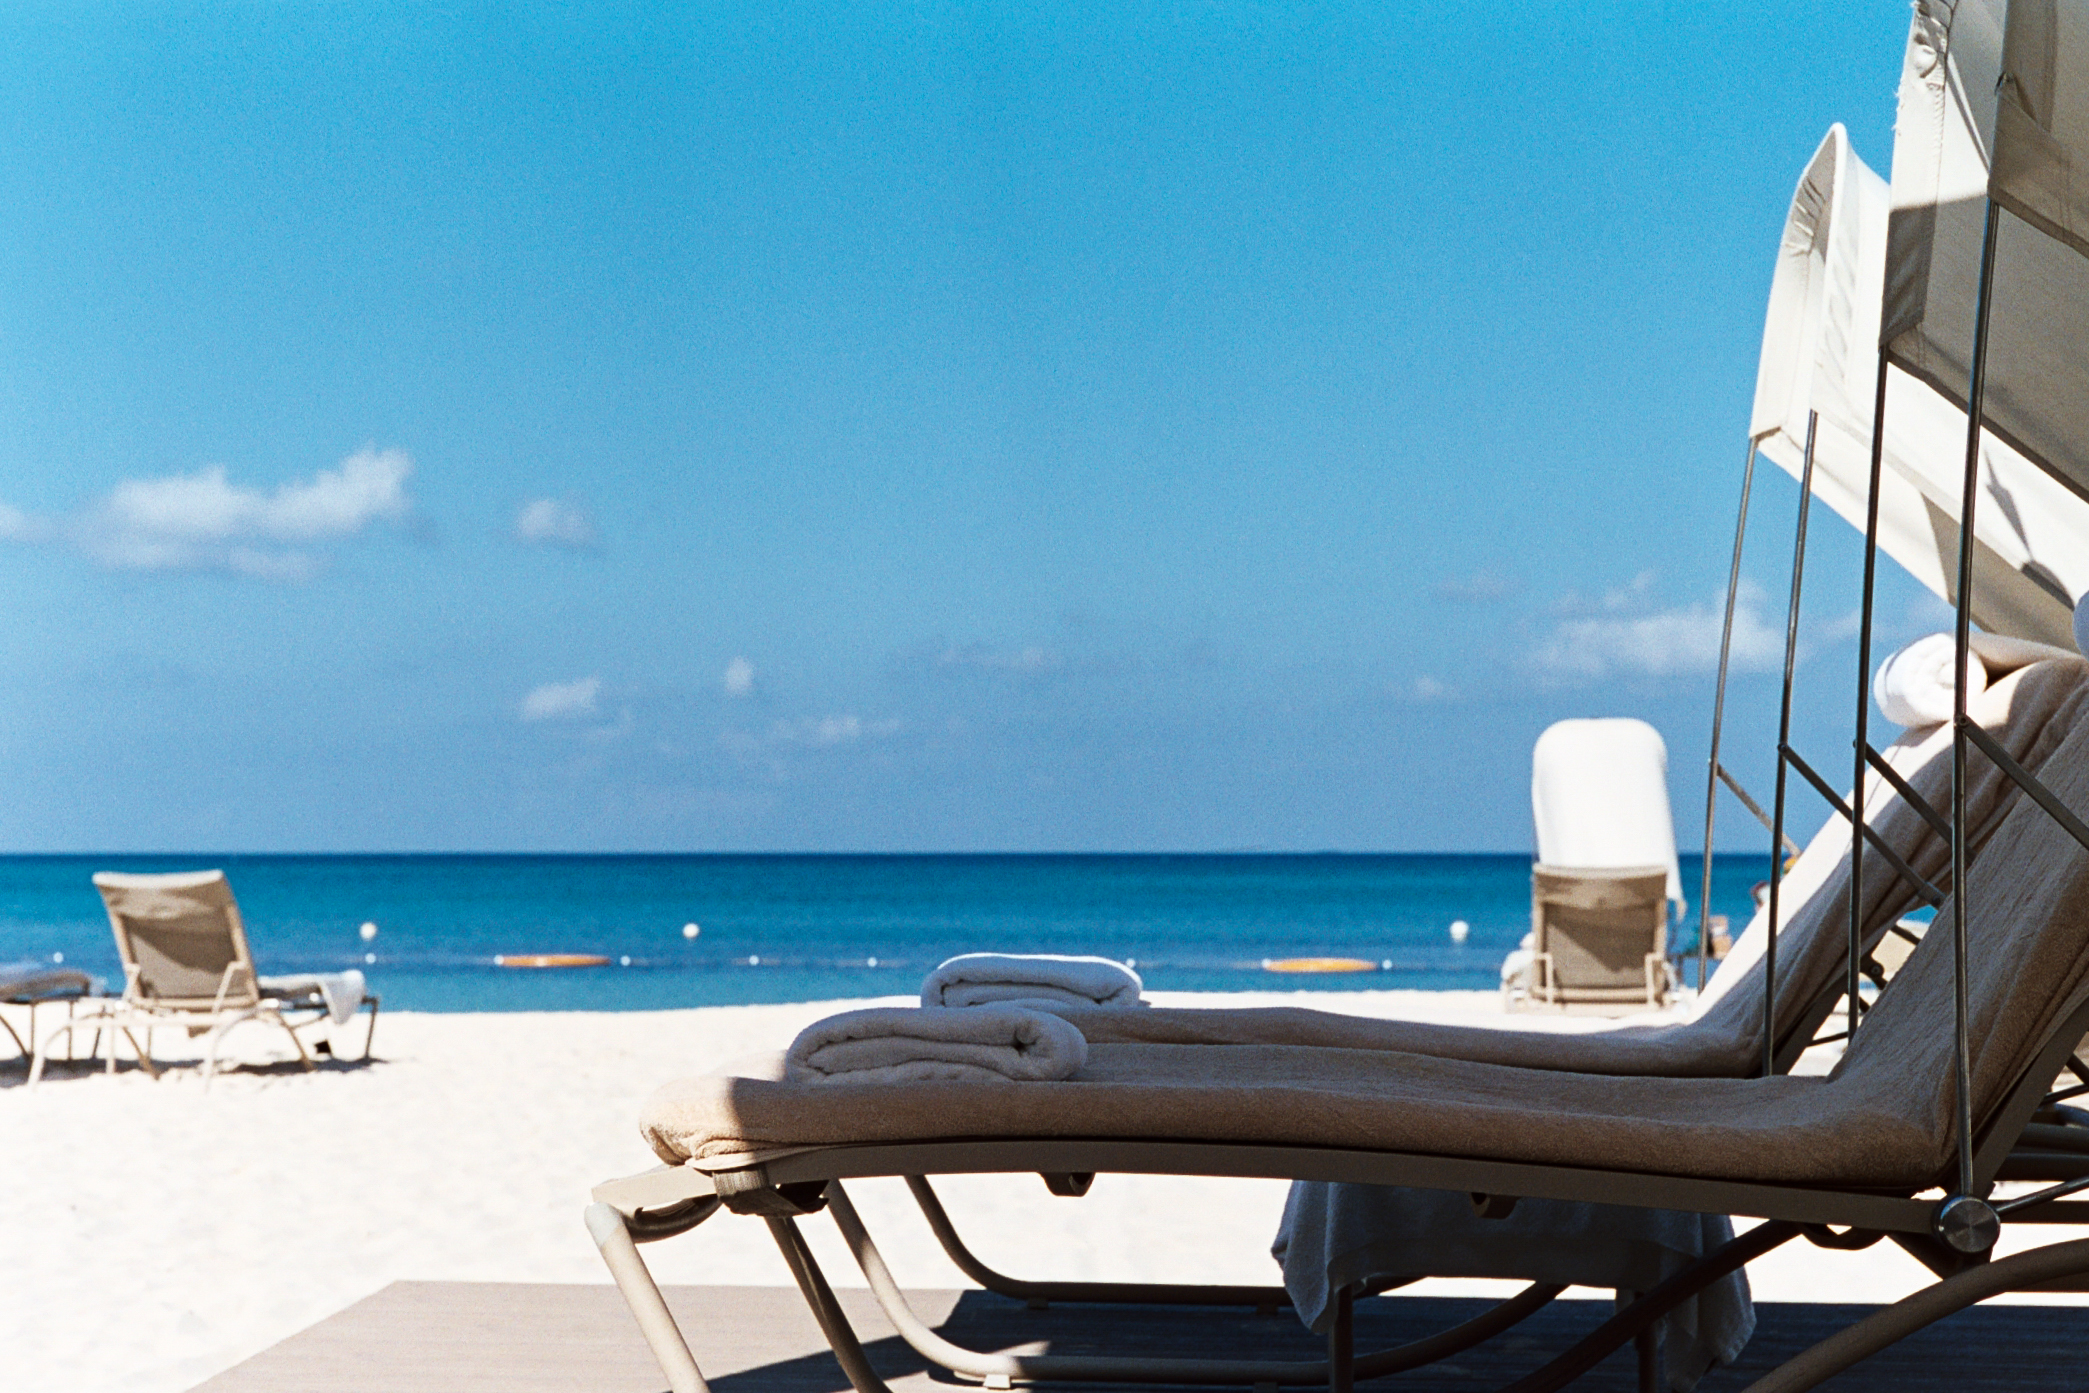
Somehow I missed to get away all summer. Work and other projects did their best to keep me bound to the NYC area for the most part of the summer and limited to short trips. To avoid any distraction whatsoever I decided to try my best to completely unplug from the digital world. I left my blackberry, iPhone, iPad and laptop at home. Armed with only a book, my trusted Leica M3 and a couple rolls of Kodak Portra 400 I was ready for some "Shhhh... please do not disturb" time.

The four days that I was out there and during the trip I did notice though how much hotels, airlines and restaurants try to ensure that you can stay connected non-stop. Free or paid WiFi seems to be available everywhere nowadays, even on the beach. What is sad though is that I also noticed multiples couples, young and old, at dinner tables that were glued to their smartphone screens instead of having a conversation with each other, or just taking in the Caribbean atmosphere and scenery. Somehow we need to learn to unplug from the digital world once in a while.

The photos were taken (or made, whatever you prefer) over the course of four days. I didn't venture too far away from the hotel, so all of them are in close proximity. All photos were taken with the Leica M3, Leica Summicron 2/50 Rigid and Kodak Portra 400. The film was rated at 200, and developed at home using the Tetenal C-41 presskit and scanned using the Pakon.
Sit back, relax and enjoy!


Cinestill + Bleach
Bleach bypass, as the name suggests, is simply skipping the bleach step when developing color film using C-41 chemicals. Skipping the bleach step results in higher silver retention in the film, essentially muting the colors and increasing the grain and contrast.

A couple of weeks ago I came across a photo on Cinestill's instagram stream that was developed using a process called "bleach bypass". Curious about the look and process I searched the web and found a couple more examples, as well as a short description of the process.
Bleach bypass, as the name suggests, is simply skipping the bleach step when developing color film using C-41 chemicals. Skipping the bleach step results in higher silver retention in the film, essentially muting the colors and increasing the grain and contrast. Similar to imposing a black and white image on the color image. Results vary depending on the film stock.
I thought I should give it a try using a roll (Cinestill 800T) that I shot in New York City on a September afternoon recently. Here is a summary of my workflow, as well as a few examples...
Home processing steps:
- 3 minutes 30 seconds in developer at 103 F (Tetenal C-41 press kit developer)
- 5 minute wash at 103 F
- 5 minutes in fixer at 103F (Ilford Black & White fixer)
- 5 minute wash
- 1 minute in stabilizer at room temperature (Tetanal C-41 press kit stabilizer)
Scanner:
- Pakon F135 (non-plus)
- Adjustments: Red +12, Green -5, Blue -5 (on average)
Scanning the photos at home was quite painful. The Pakon doesn't have a profile for Cinestill (or Kodak 500T) and the images have a heavy blue cast. Cinestill itself is already a "demanding" film depending on the light conditions and New York City (tall buildings, bright light and shade) doesn't make it any easier. The adjustments that I made, on average, were Red +12, Green -5 and Blue -5, as well as some Brightness and Contrast adjustments. I also tried scanning the photos on the Epson V600, however, there is no negafix profile. I tried a couple random ones, however, no luck. I also tried scanning it as a linear positive and then use ColorPerfect, however, no luck so far. Need to practice my scanning skills a bit more.


A Day Trip to Great Captain Island
Great Captain Island is a small, ~17 acres, and beautiful island right off the coast of Greenwich, Connecticut on the Long Island Sound. It’s a sanctuary because there are no cars or stores, just pure nature and it is entirely surrounded by water.

If you live in the New York City tri-state area (New York, Connecticut, New Jersey) and work in the city, or any large metropolitan area, then you are most likely familiar with the ritual of mass exodus from the big city on a Friday afternoon before a three day weekend. Especially, if it is the last three day weekend right before the end of summer and before kids head back to school.
Not sure who came up with the quote for insanity, some credit Einstein, but doing the same thing over and over again and expecting different results is something that comes to mind when you are stuck on an overcrowded train, or in the car in stop-and-go traffic on a Friday. So to avoid insanity on a sunny Friday afternoon before this year’s Labor Day weekend I decided to do something for my sanity instead, and stay at home and take a day trip out to Great Captain Island.

Great Captain Island is a small, ~17 acres, and beautiful island right off the coast of Greenwich, Connecticut on the Long Island Sound. It’s a sanctuary because there are no cars or stores, just pure nature and it is entirely surrounded by water. I am not sure how popular and crowed it is on the weekends, but today not more than 20 people were on the island.
To get here took quite a bit of effort and expense, but it is well worth it. The island is only accessible via ferry service from Greenwich harbor. The ferry service is seasonal and is dependent on the low/high tide schedule of the Long Island Sound. I was lucky enough that the island was accessible today.

The ferry ride costs $11 per person and tickets can be bought at the harbor/ferry. Parking by the harbor is $25 per day. However, first you need to head to the Greenwich town hall to get a park day pass (if you are not a Greenwich resident). The day pass is about $6. In fact, access to all of Greenwich's beaches is restricted to Greenwich residents and their guest, or require a day pass. So in total it costs about $42. Bring a couple of more people and at least the parking gets cheaper.

Random side note…
This is somewhat still foreign to me (a German who has lived in the U.S. for 15+ years), because in Germany or rest of Europe beaches and lakes are accessible by the public, and there are not as many restrictions. In the summer season (roughly Memorial Day through Labor Day) each city in Connecticut requires you to buy a day pass to access the beach which costs $6 per person or $25 per car. Good luck, and deep pockets, if you want to tour all of Connecticut’s beaches.

To make the most of your trip it is best to head out on the first ferry and take the last one off the island. The ferry runs about every 30 minutes to and from the island. The ferry schedule is posted online, as well as at the harbor and on the island itself. It is also possible (best to check and confirm details) to camp and spend the night on the island.


All photos were taken with the Leica M-A, Leica Summicron 2/35 and Kodak Portra 400. Film developed (c41 press kit) and scanned (pakon) at home.

Roadtrip
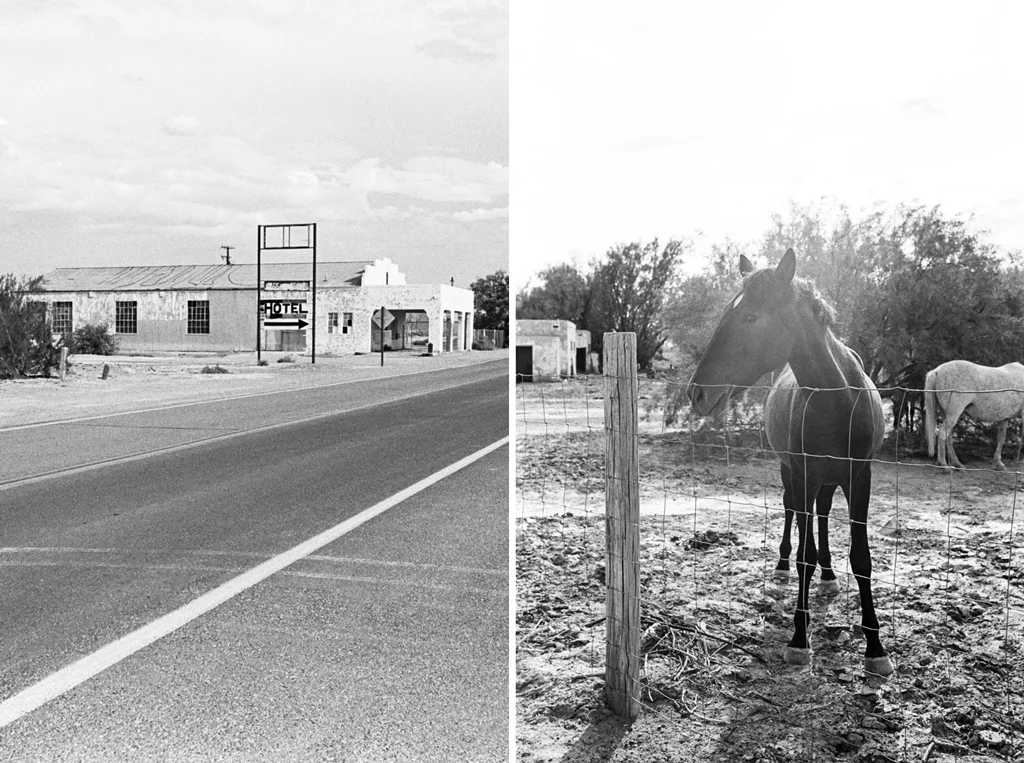
Inspired by Johnny Patience's Death Valley blog post back in April I jumped on the opportunity of a short trip to Las Vegas at the end of July. I am not into gambling at all, so I planned a couple of short roadtrips to places "relatively" close to Las Vegas.
Inspired by Johnny Patience's Death Valley blog post back in April I jumped on the opportunity of a short trip to Las Vegas at the end of July. I am not into gambling at all, so I planned a couple of short roadtrips to places "relatively" close to Las Vegas. In total I only spent, hold your breath, a full $1 on gambling. I figured, rather than blowing my money at the casino it would be more fun to rent a car and head out to explore nature and some of the state parks. Las Vegas for me is a "been there, done that, don't need to do it again" place. I can see why people like it, but it is not for me.
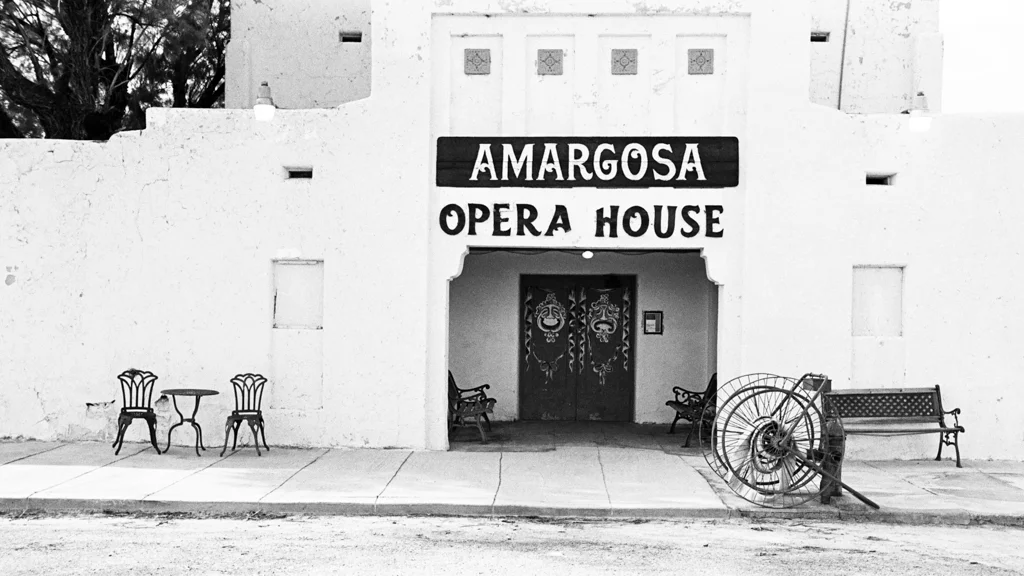
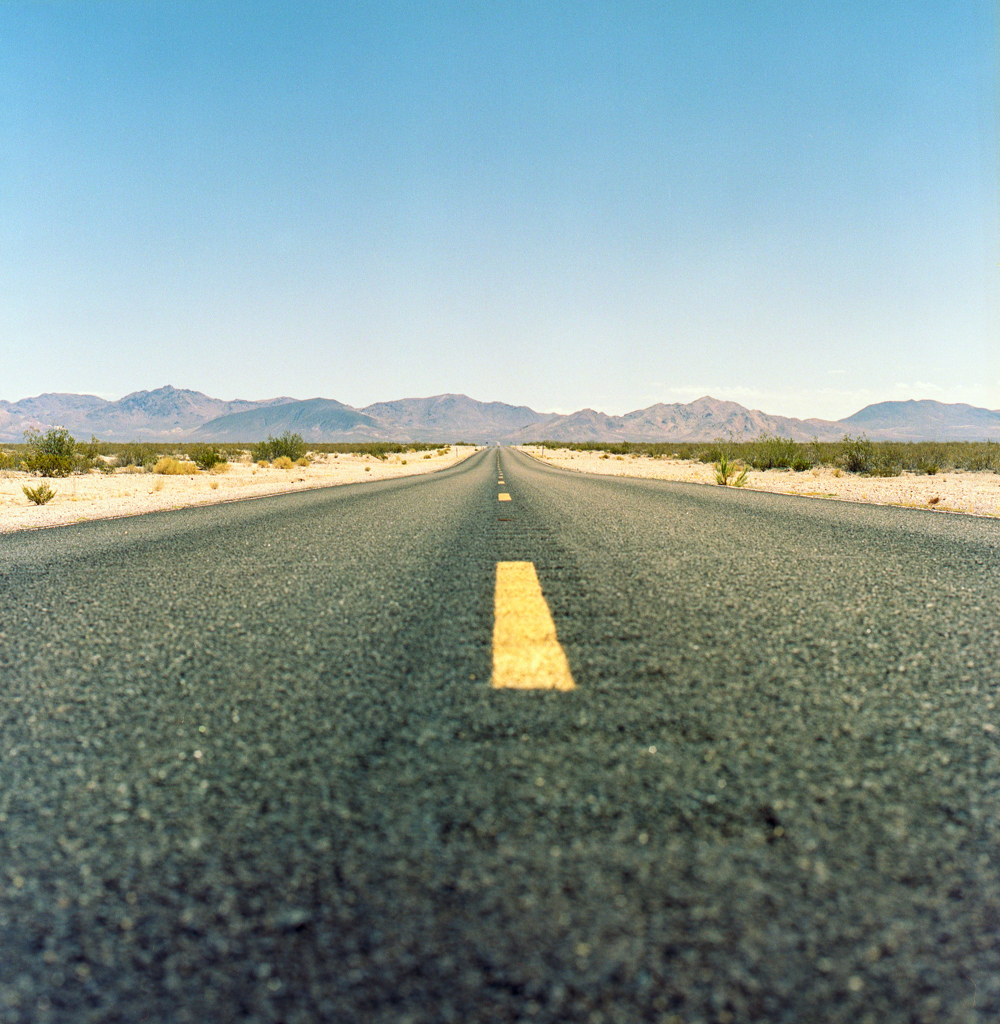
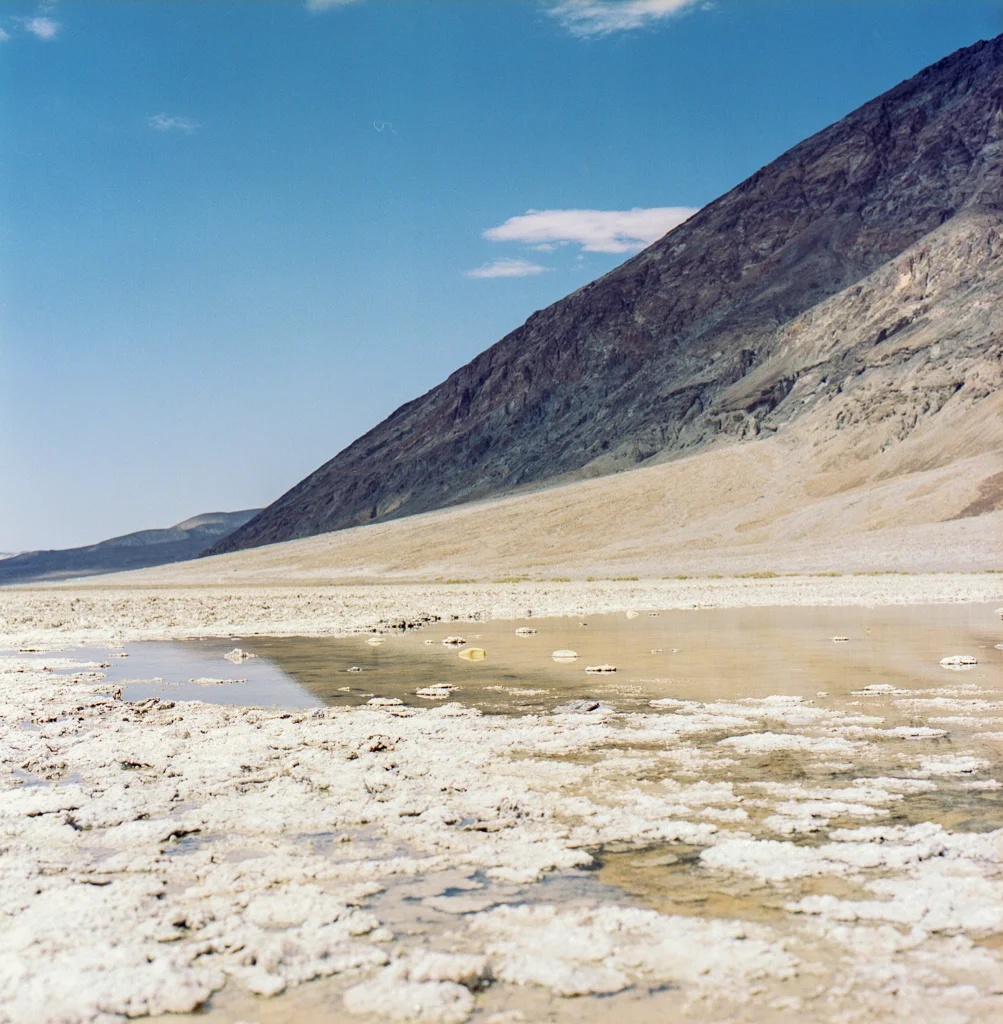
I arrived in Las Vegas late Tuesday night and picked up my rental car early Wednesday morning at our hotel (Aria). On day 1, Wednesday, I ventured out to Death Valley. As part of the trip I stopped by Rhyolite Ghost Town, Badwater Basin, Artitst's Drive and the Amargosa Opera House. In total I drove about 300 miles and was on the road all day. The distance may seem excessive, but the drive was quite nice and there is lots of nature to see along the way. I spent every day of the week working in New York City, so it was quite a nice change in scenery.
The only mishap I had happen to me on day 1 was that my Hasseblad gave up after my stop at the Badwater Basin. The heat, 120 degrees, must have been too much. I bought a couple of screwdrivers later in the day and was able to fix it. However, it meant that I was only able to capture half the day in colour (Kodak Portra 400). Before I was able to fix it I also bought a couple of 35mm colour film as backup. It's getting more and more difficult to find film on the road.
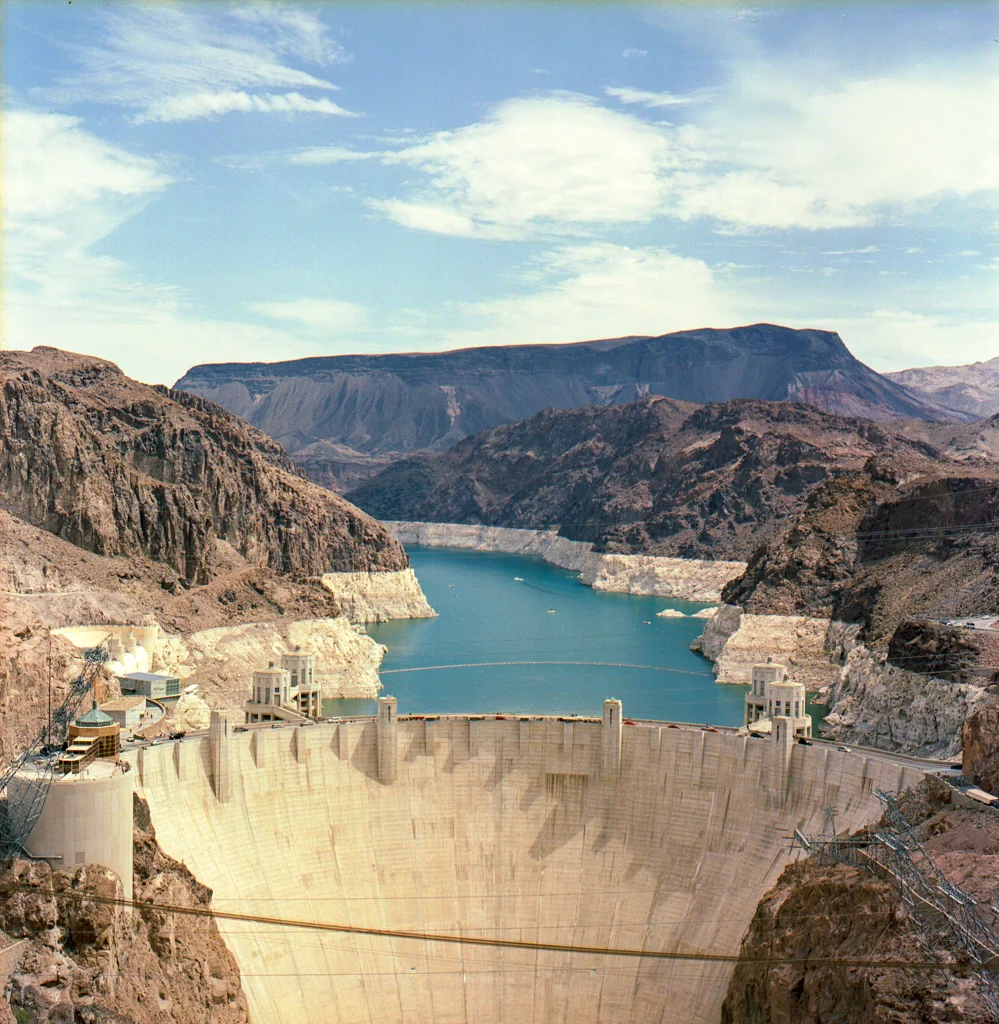
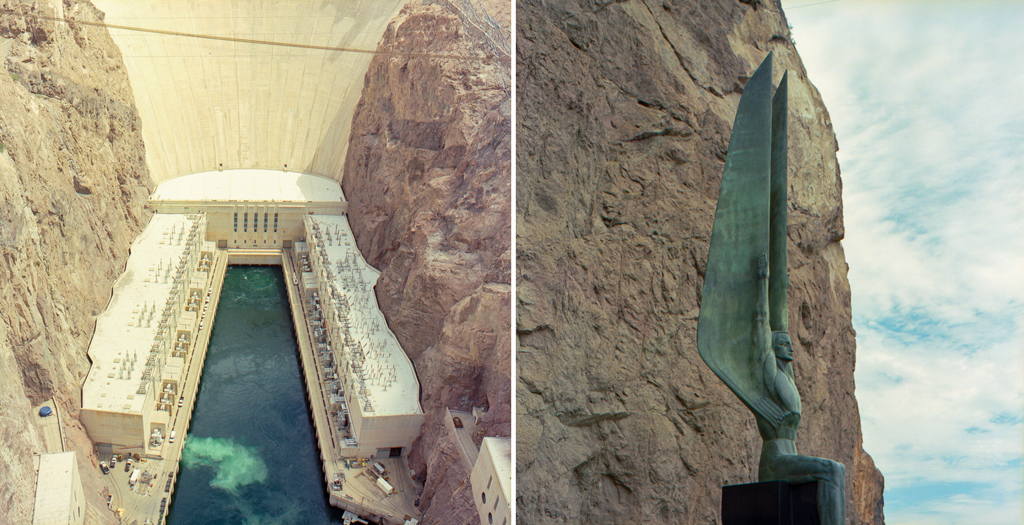
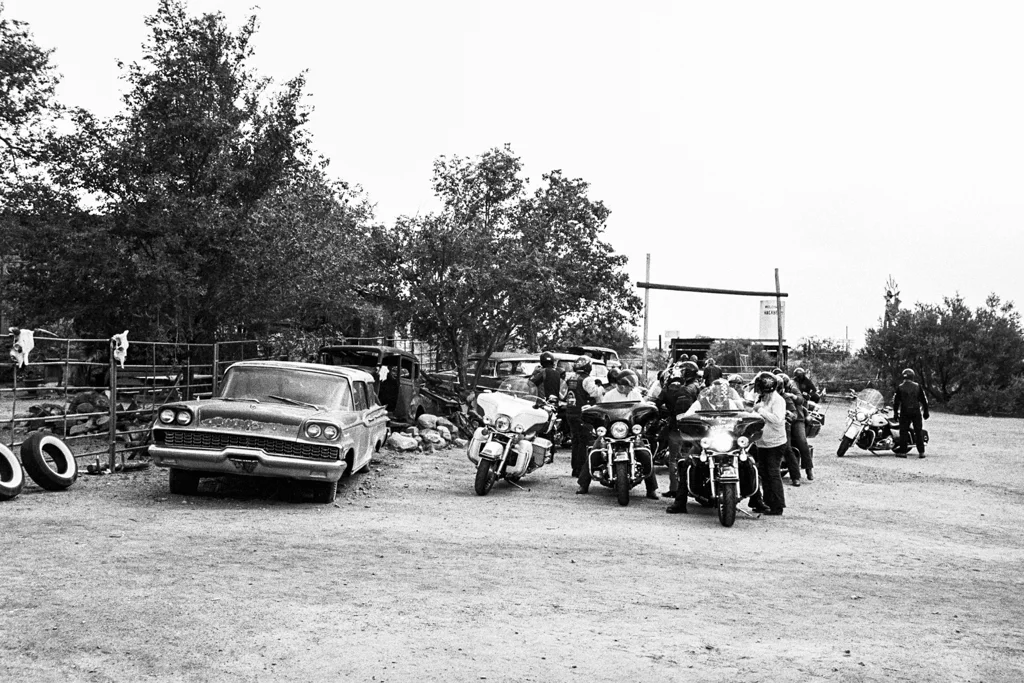
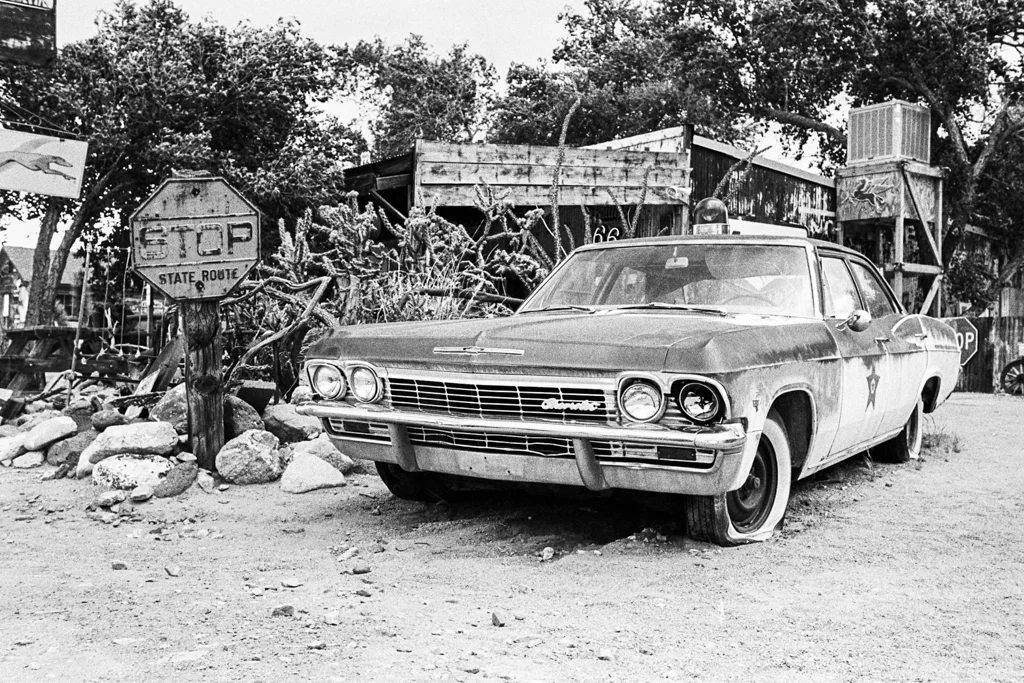
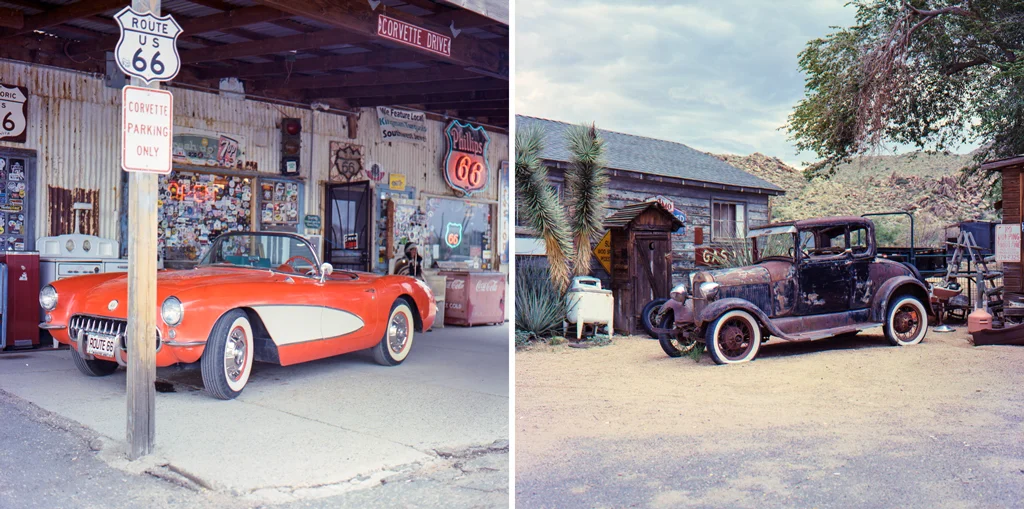
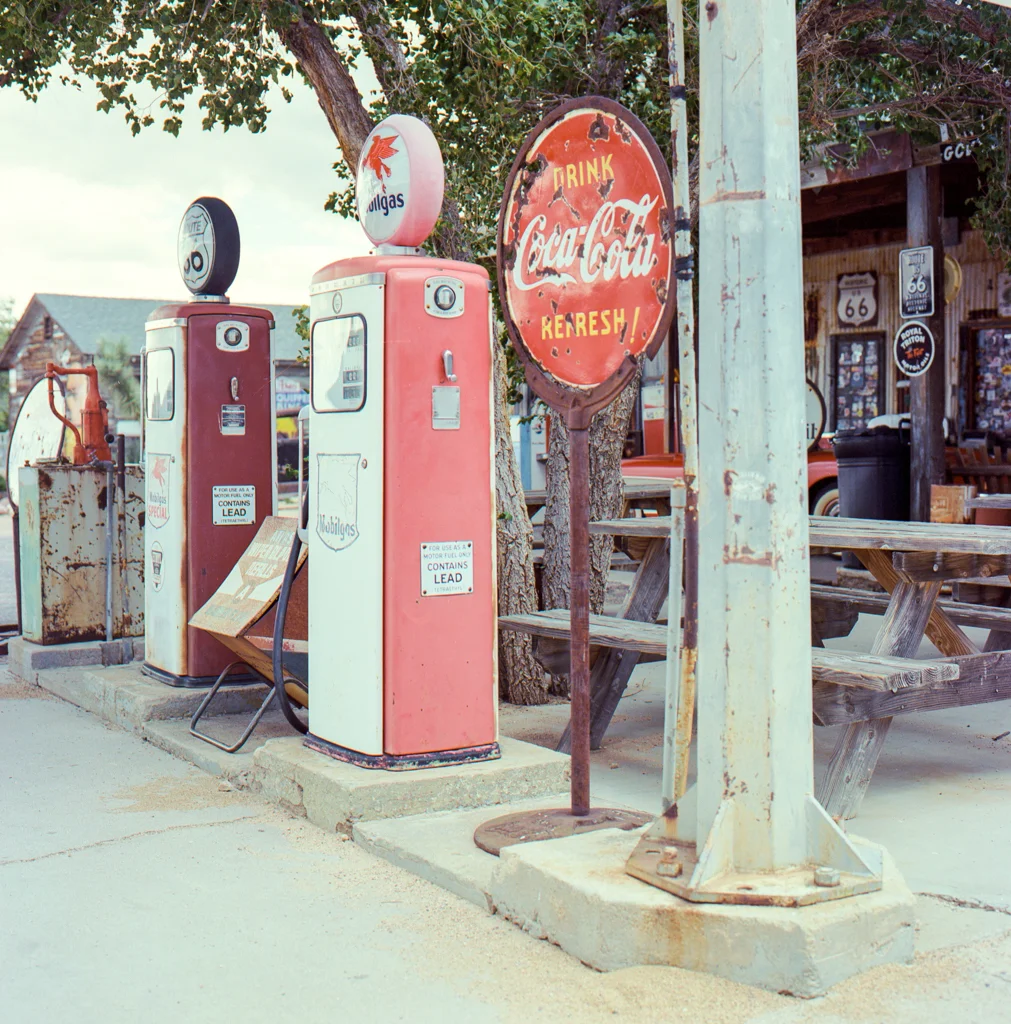
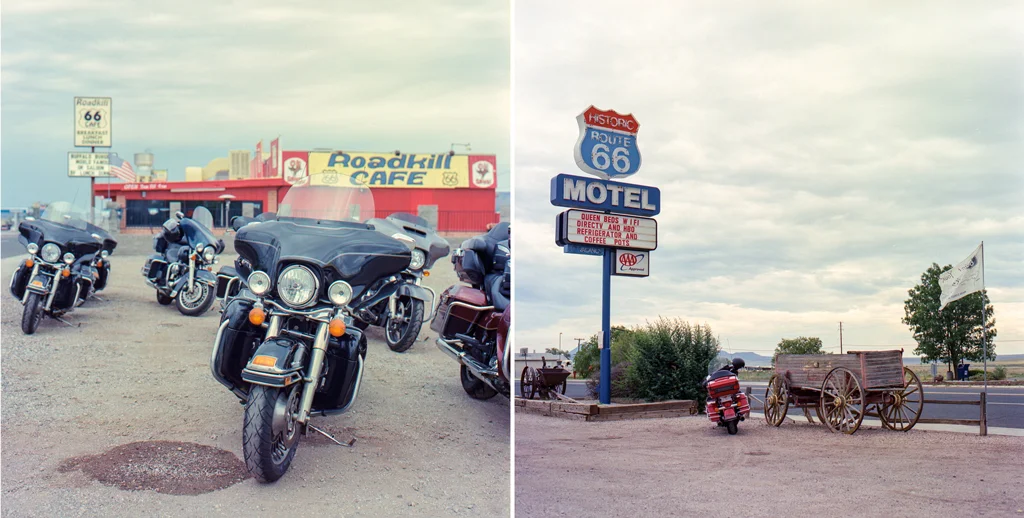
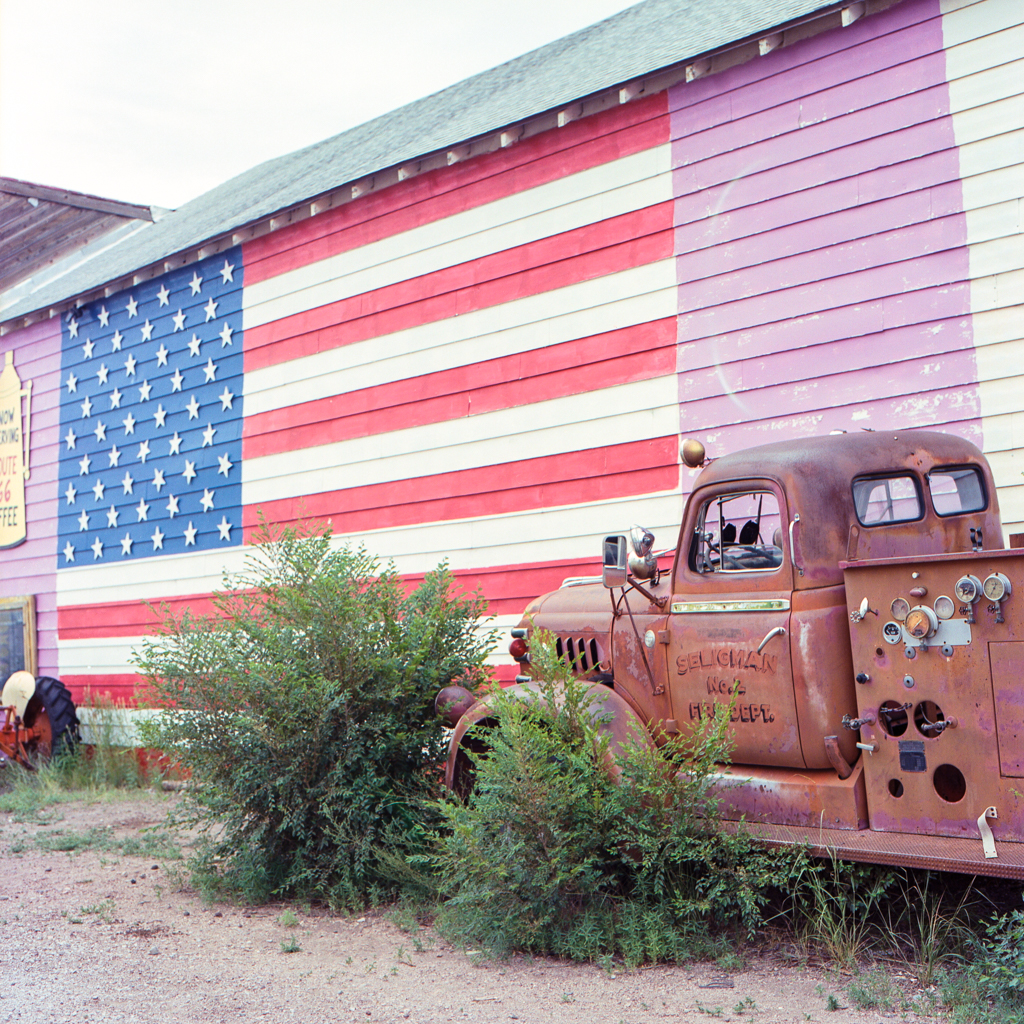
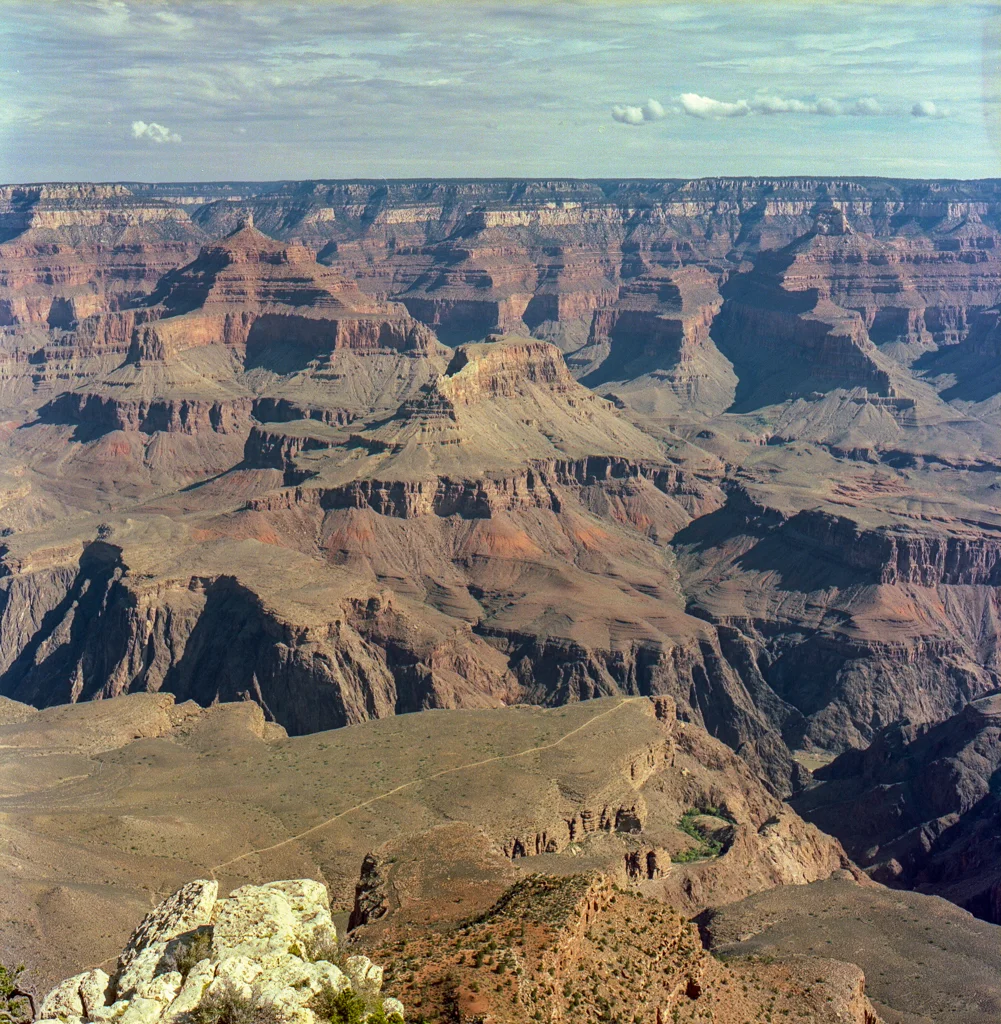
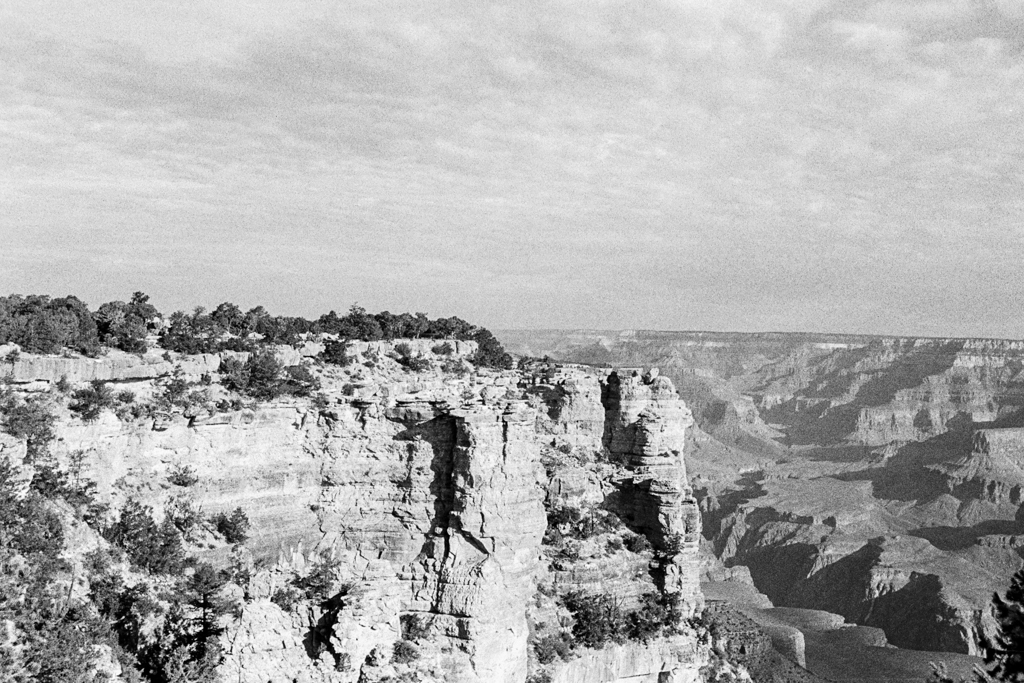
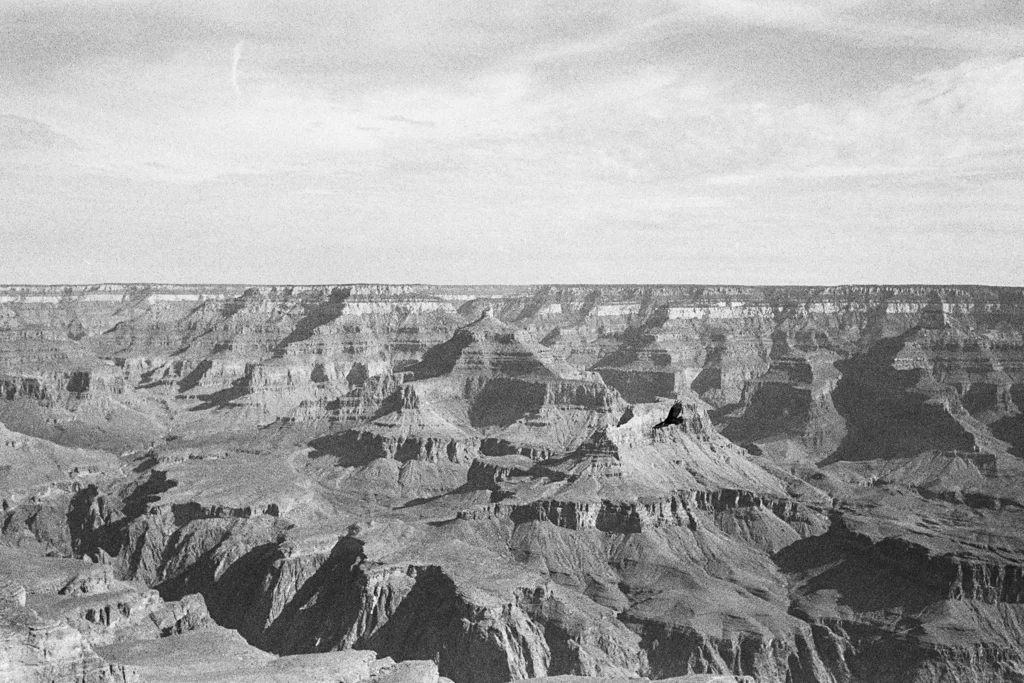
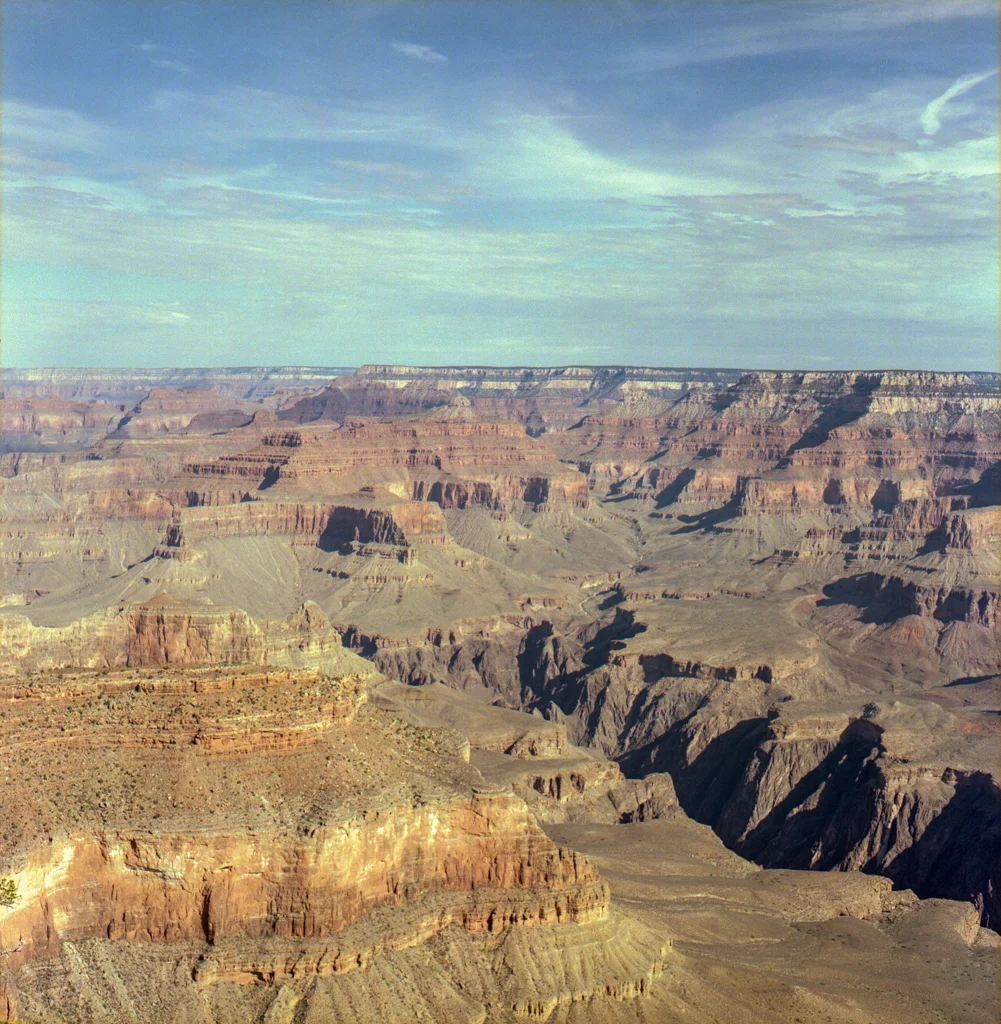
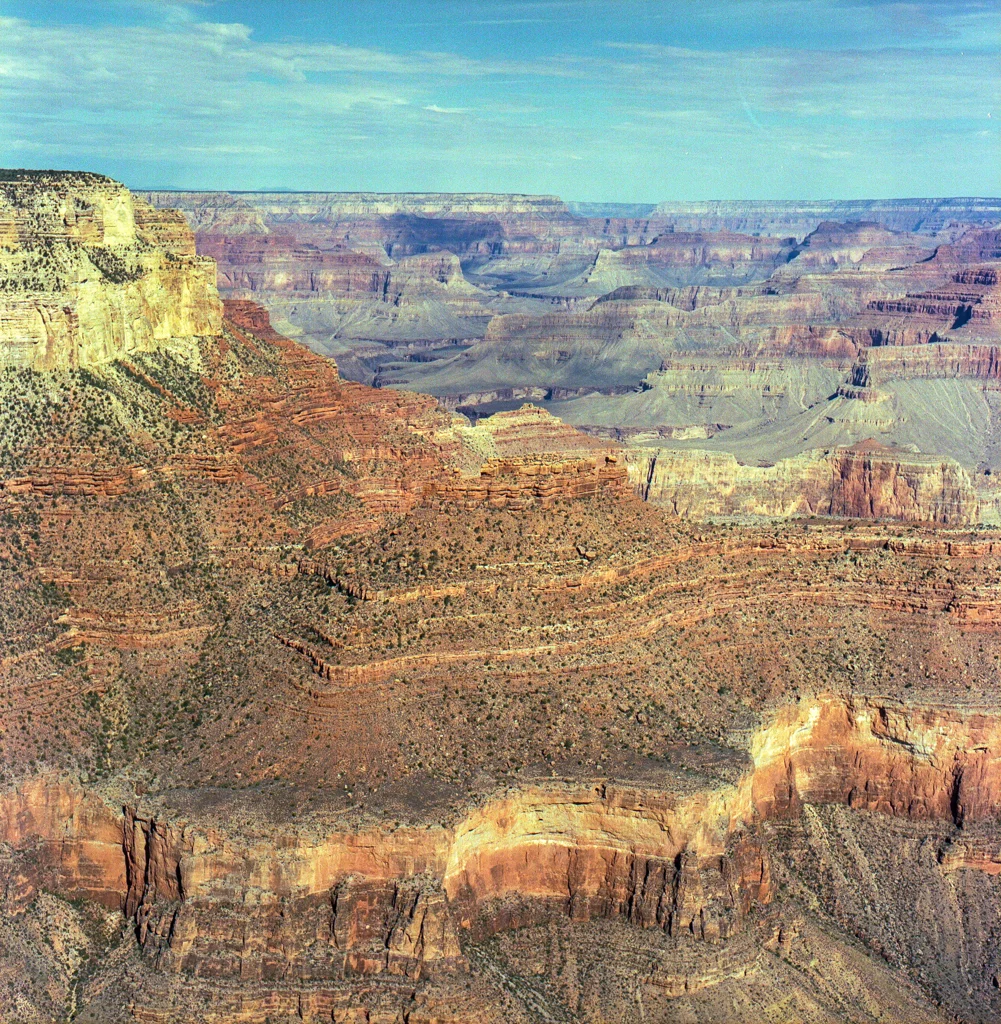
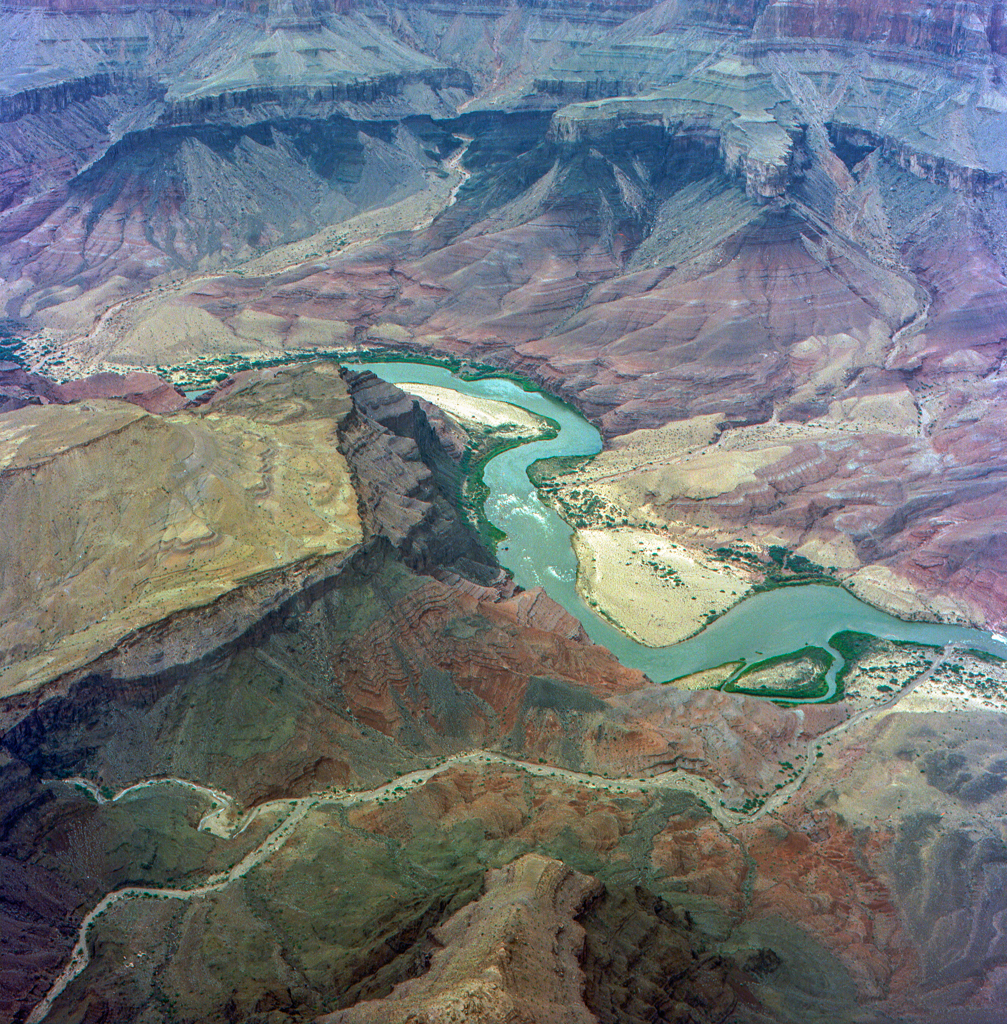
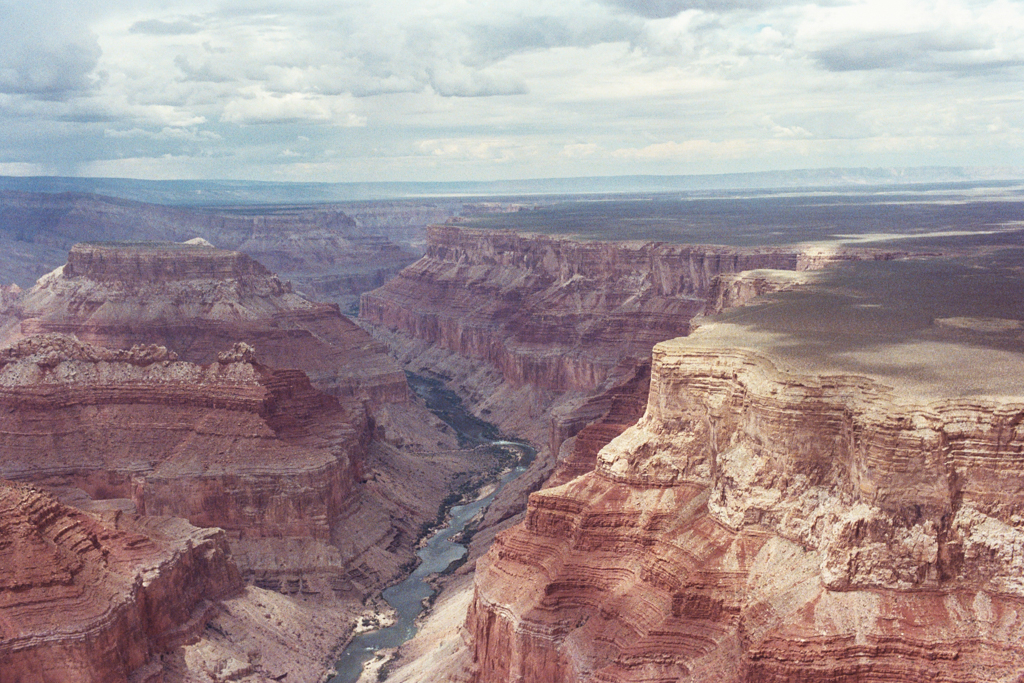
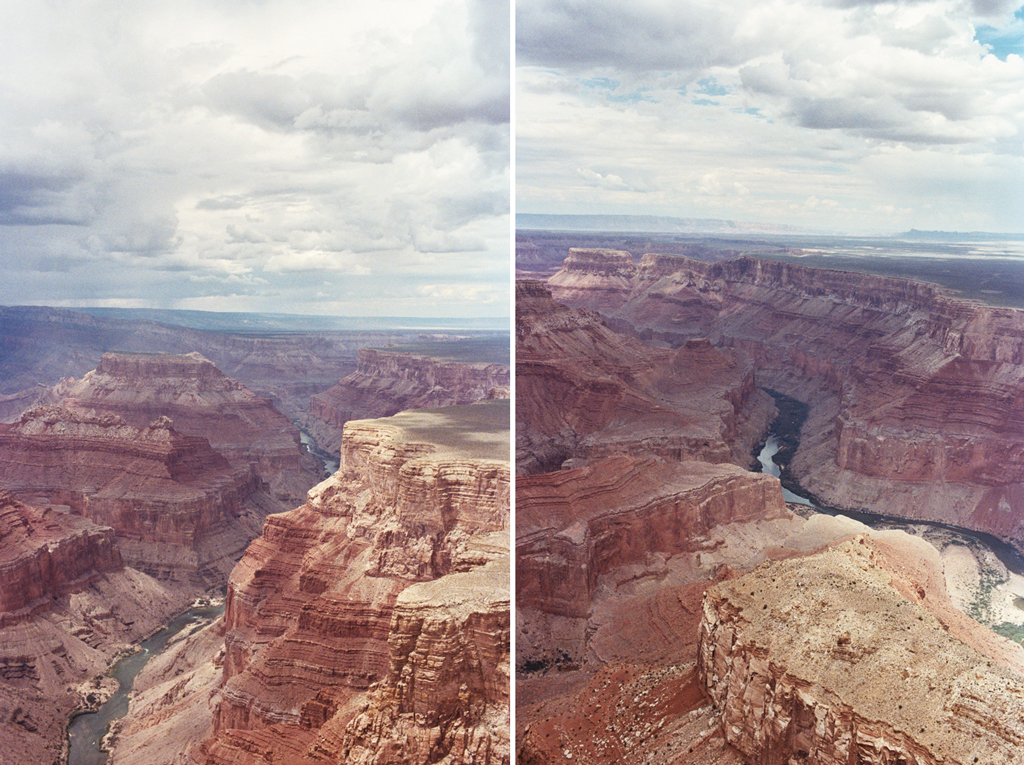
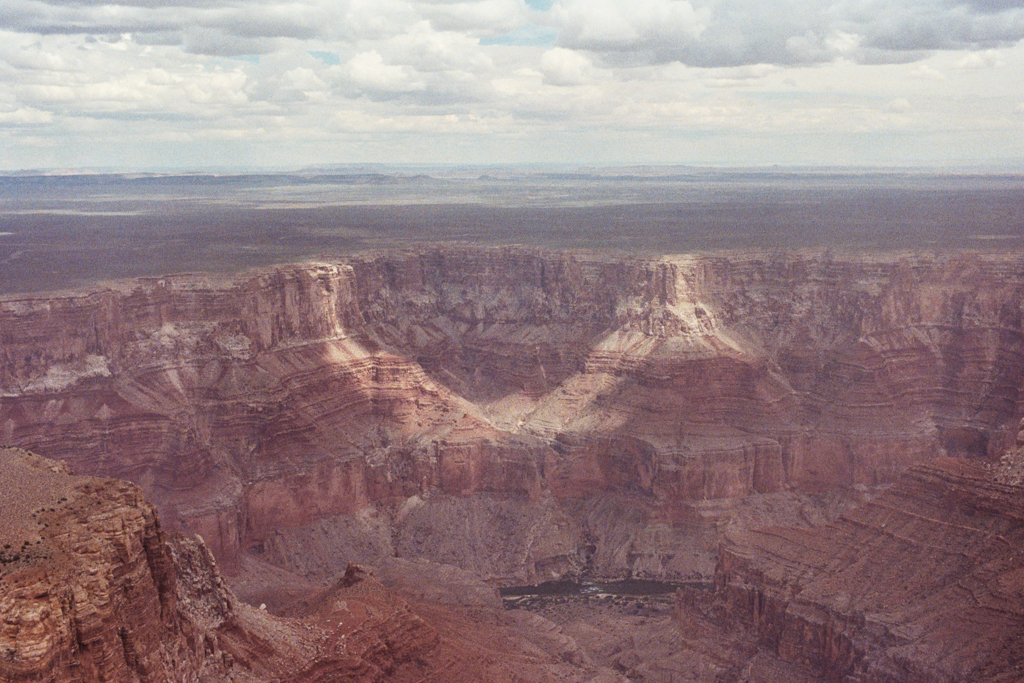
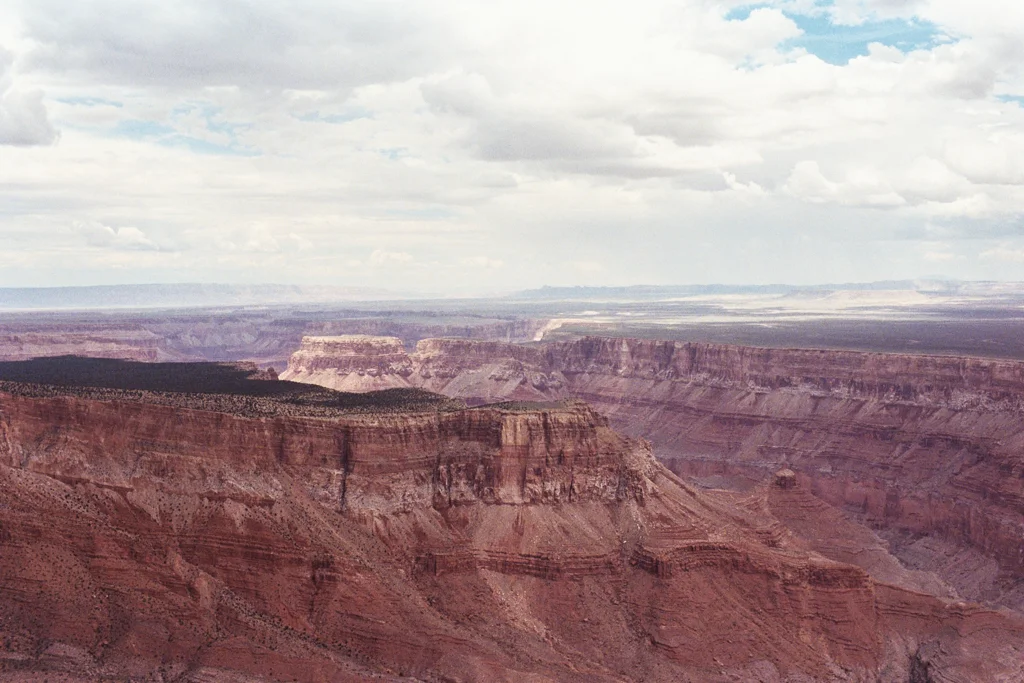
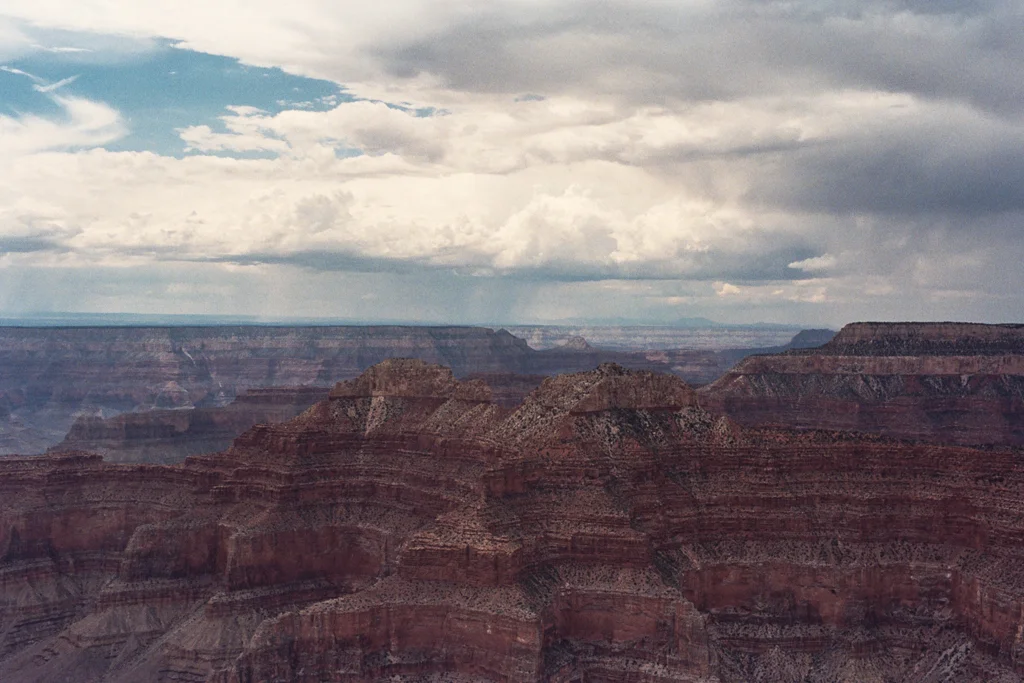
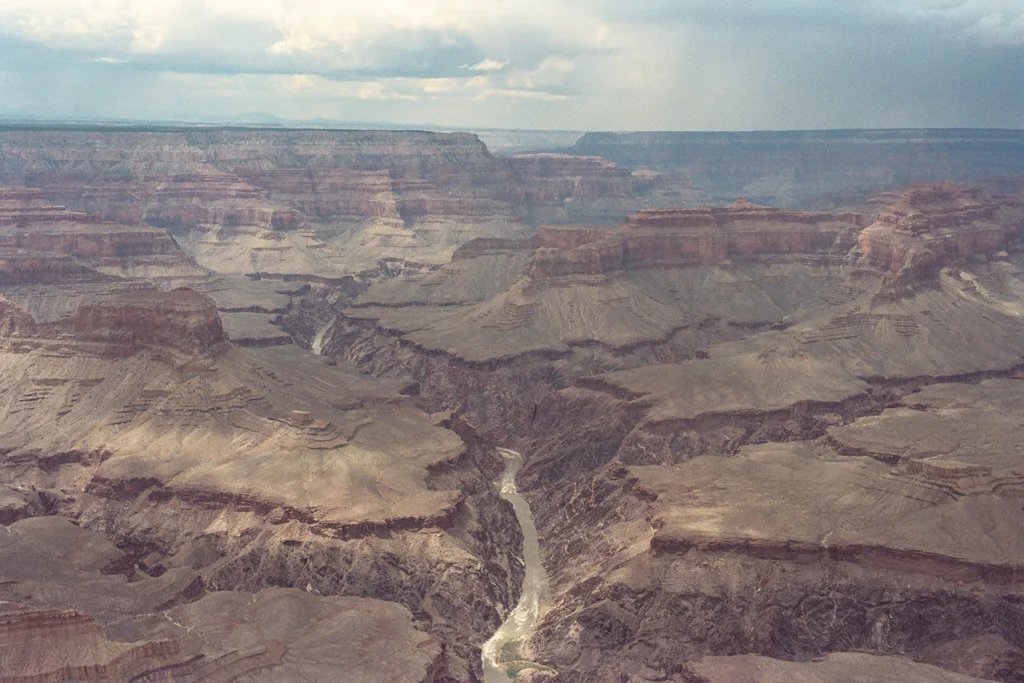
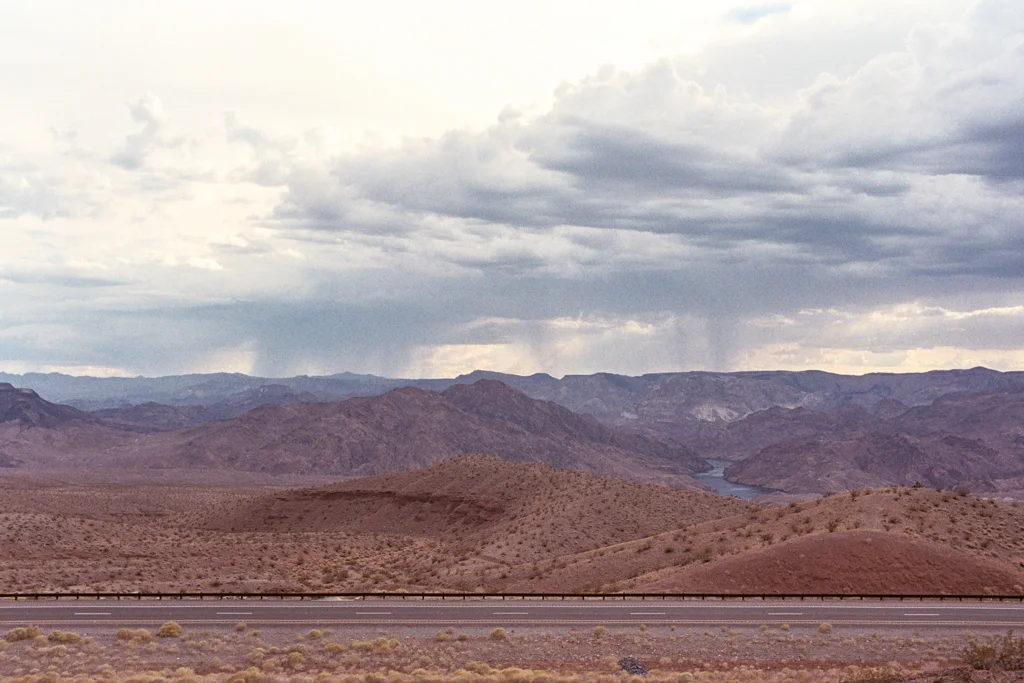
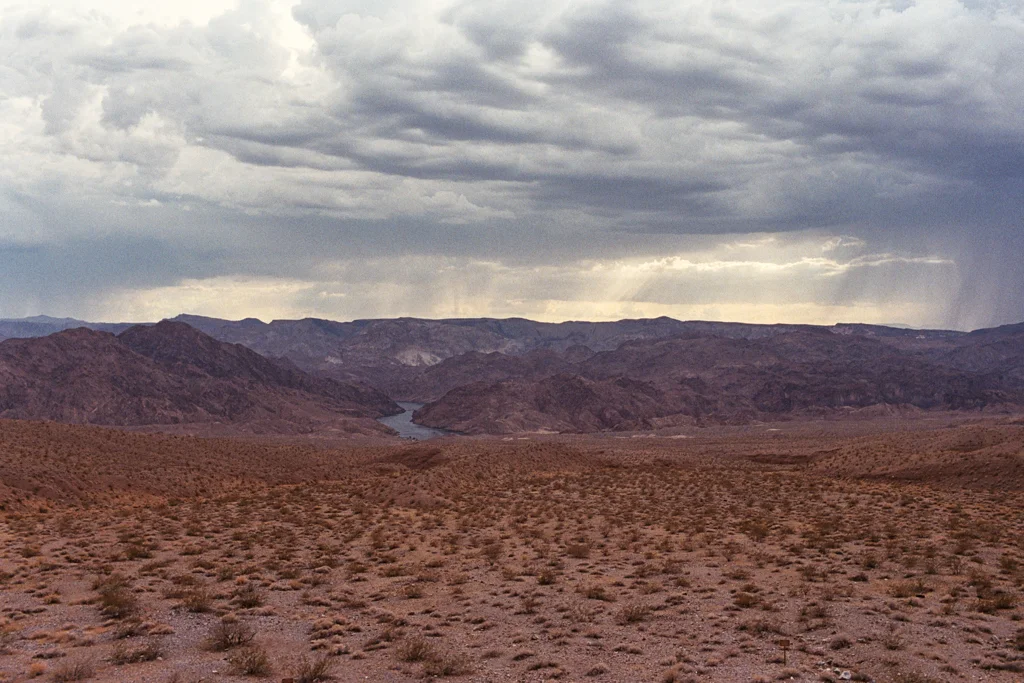
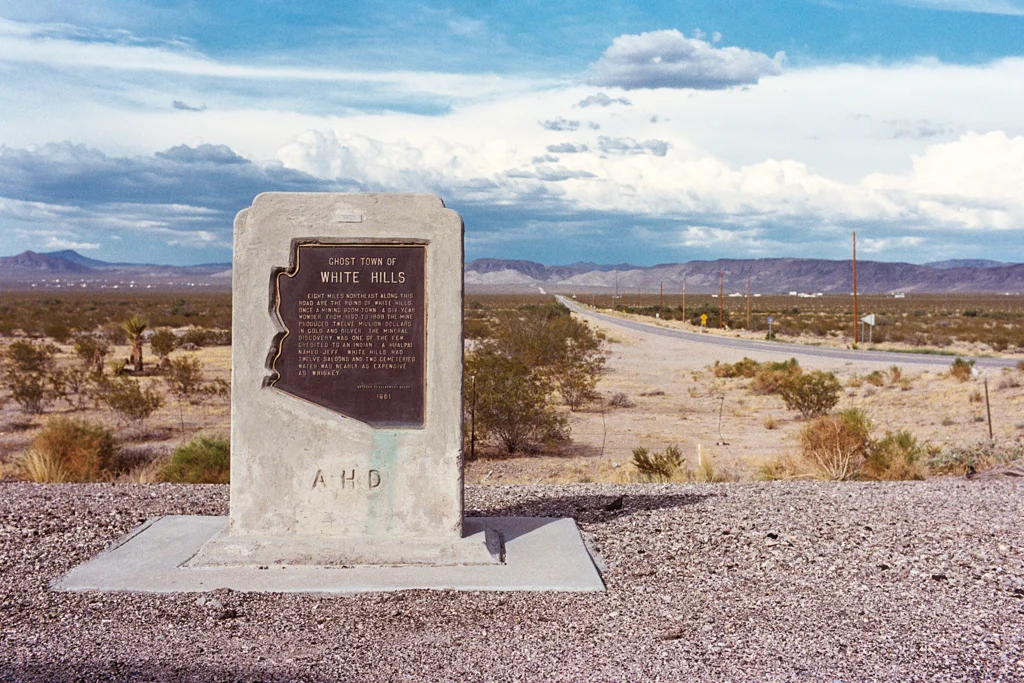
On day 2, Thursday, I started my journey early in the day and first stopped at the Hoover Dam. I spent about an hour there and then continued towards the Grand Canyon South Rim. It's about a 4 1/2 hour straight drive from Las Vegas to the South Rim. Rather than heading straight to the South Rim I also took a detour along Route 66 from Kingman to Seligman. I arrived at the South Rim late in the afternoon and spent the night close by in Tuscyan, Arizona.
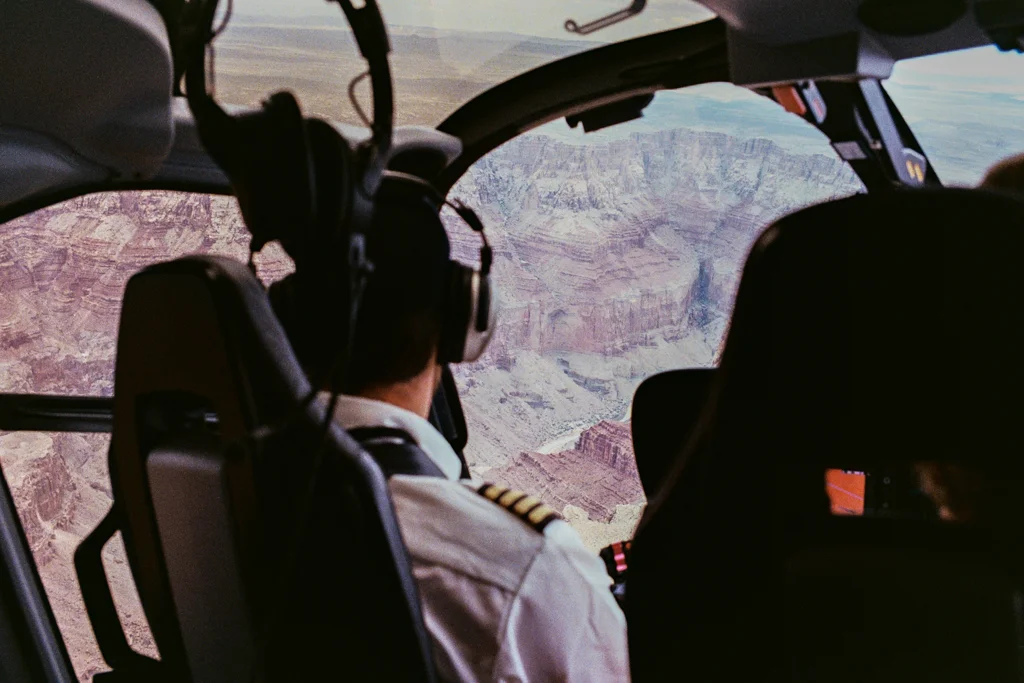
On day 3 I explored the Grand Canyon early in the morning and went on a helicopter ride exploring the East side of the Grand Canyon, before heading back to Las Vegas.
The photos that follow were taken with the Leica M-A / Summicron 35 and Hasselblad 500c / Carl Zeiss 80. All photos were developed (Kodak XTol and Tetenal C-41 press kit developer) and scanned at home (Kodak Pakon and Epson V600). The photos were taken on Kodak Tri-X 400, Kodak Ultramax 400, Kodak Portra 400 and Kodak Portra 800. I am comfortable with developing and scanning black and white photos, however, I still have to get the hang of scanning and developing color.
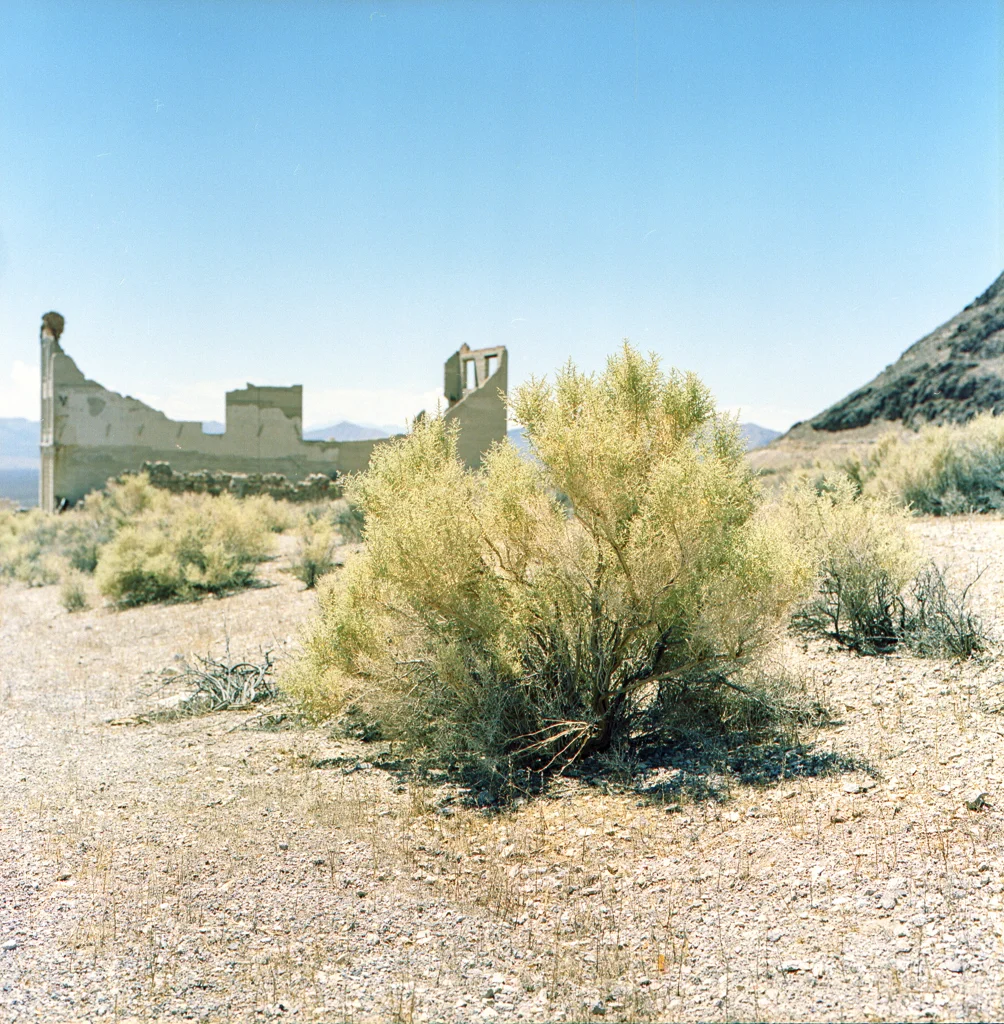
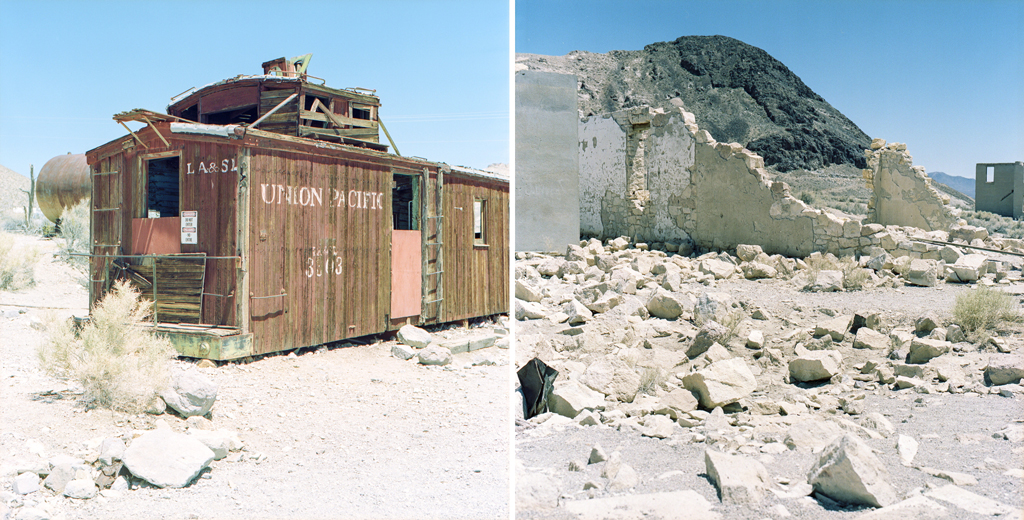
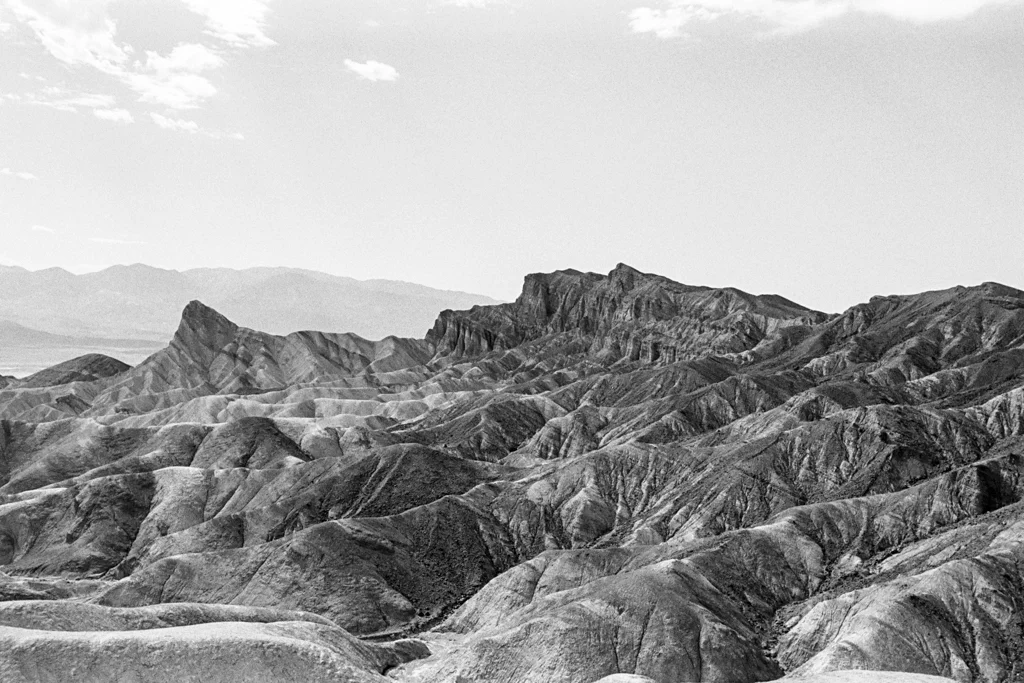
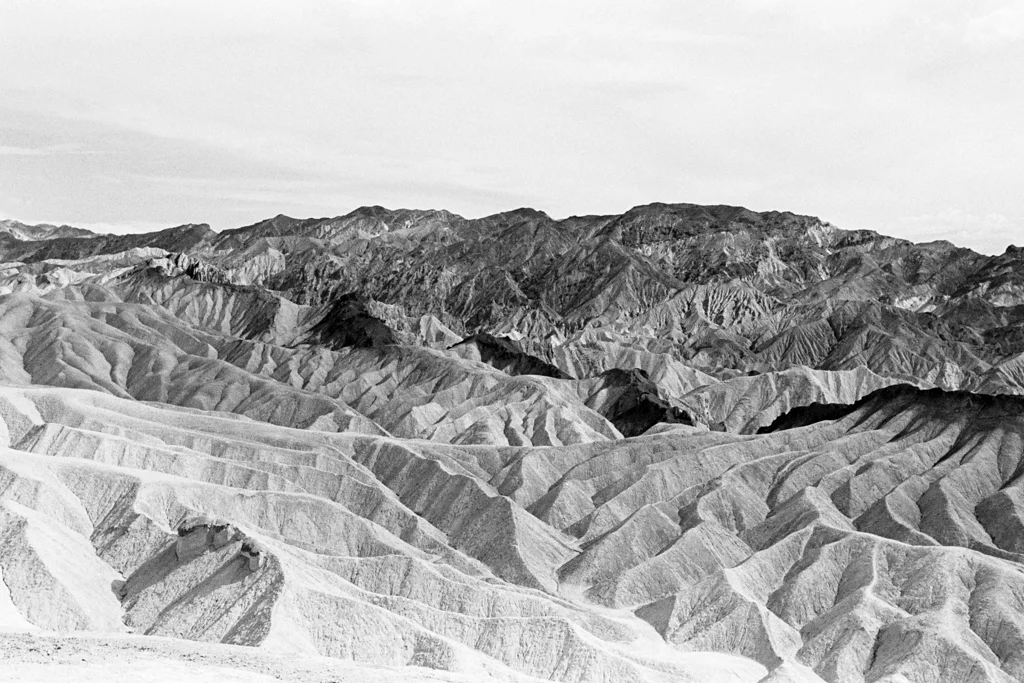
Day 1 // Rhyolite Ghost Town and Death Valley


Days 2 and 3 // Hoover Dam, Route 66 and Grand Canyon


Coney Island
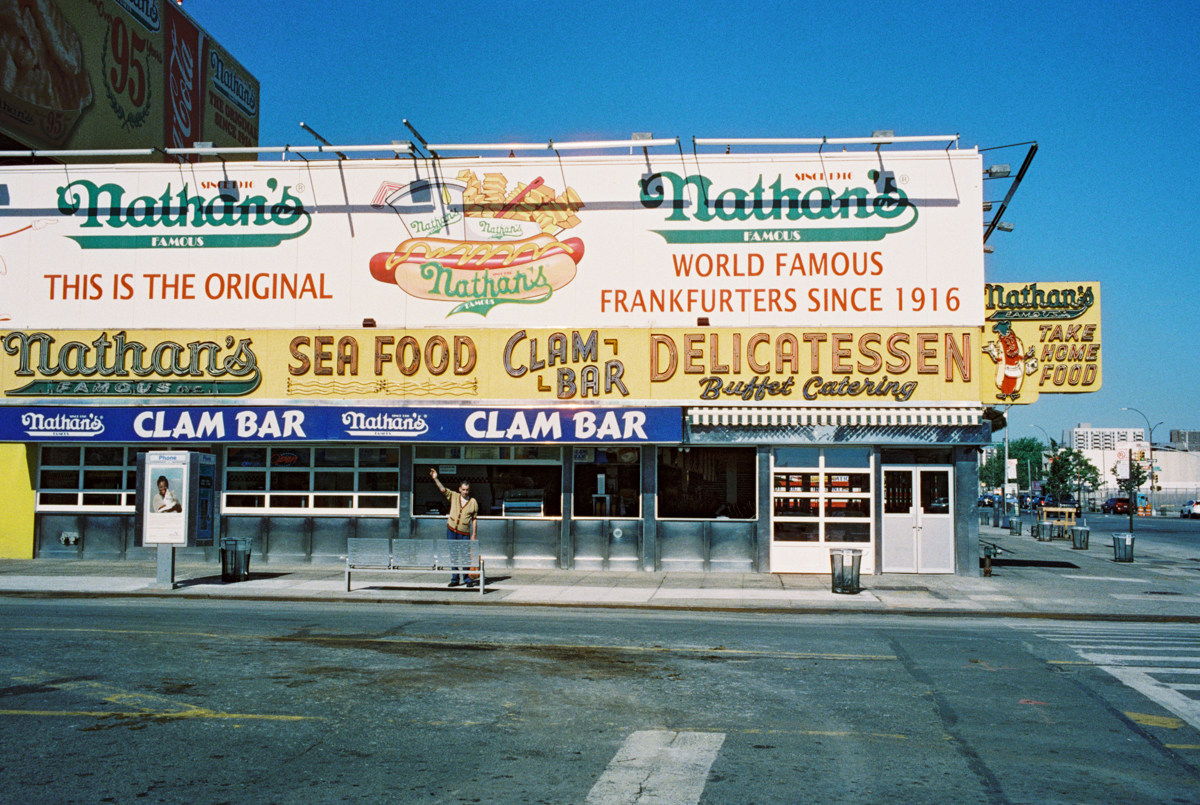
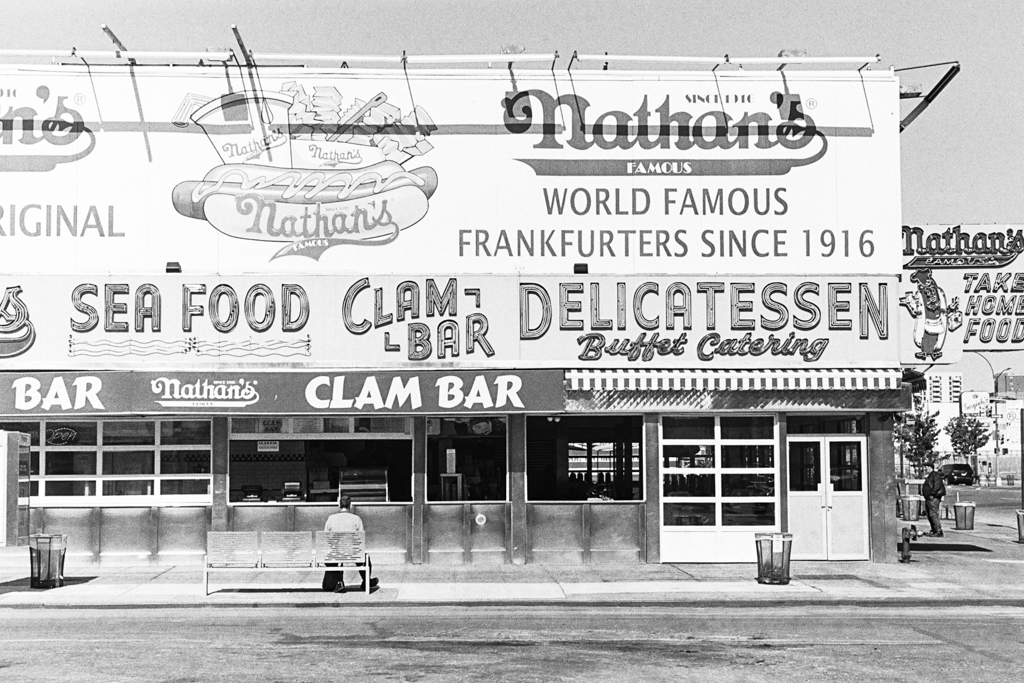
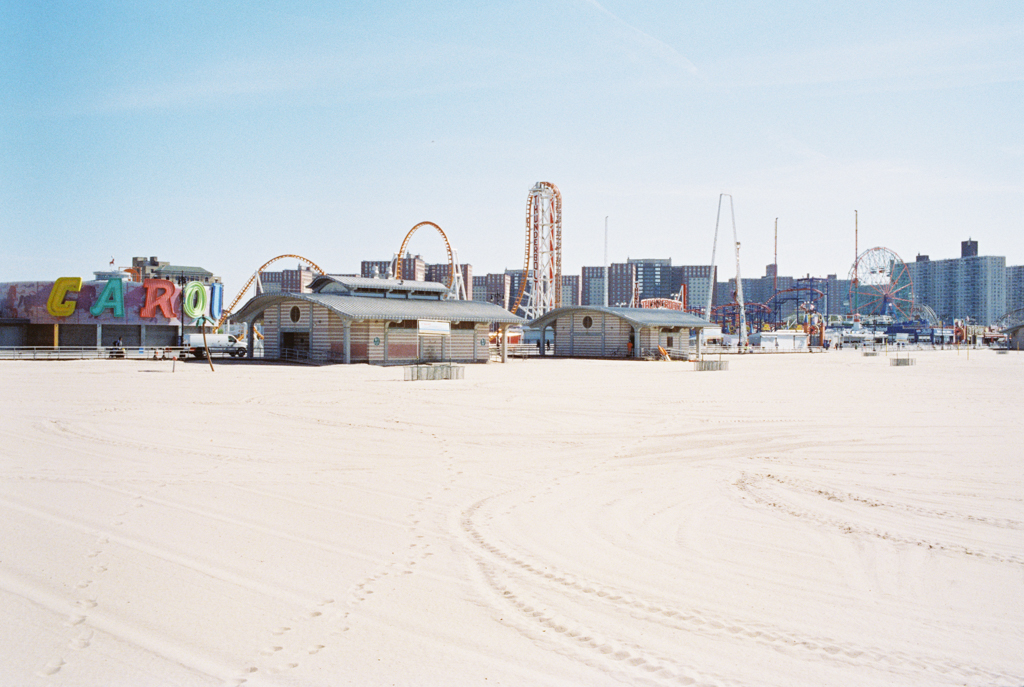
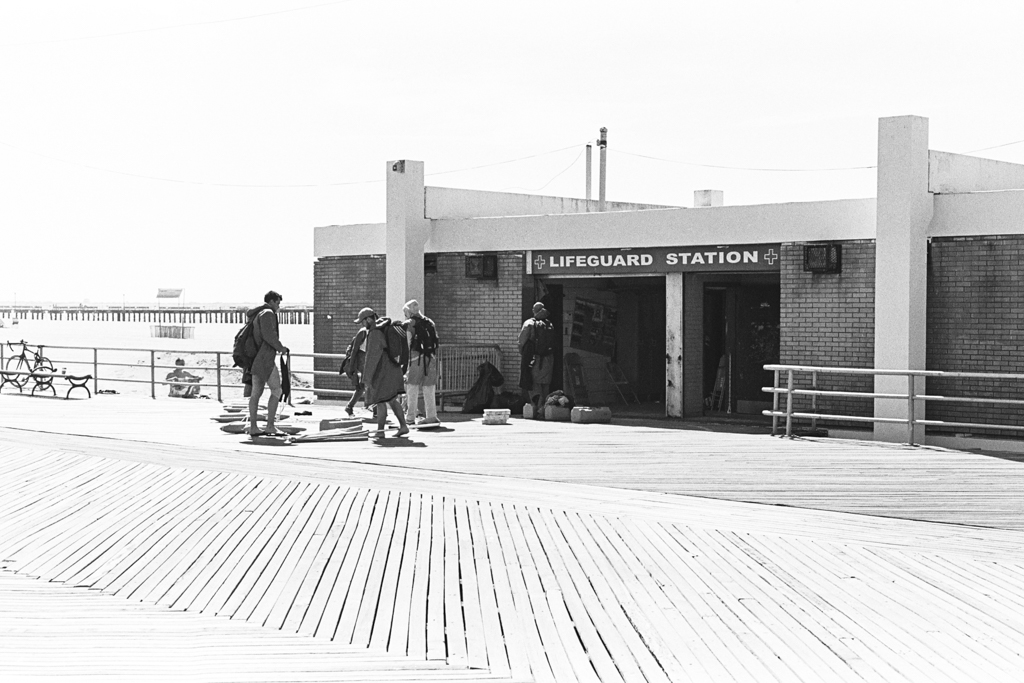
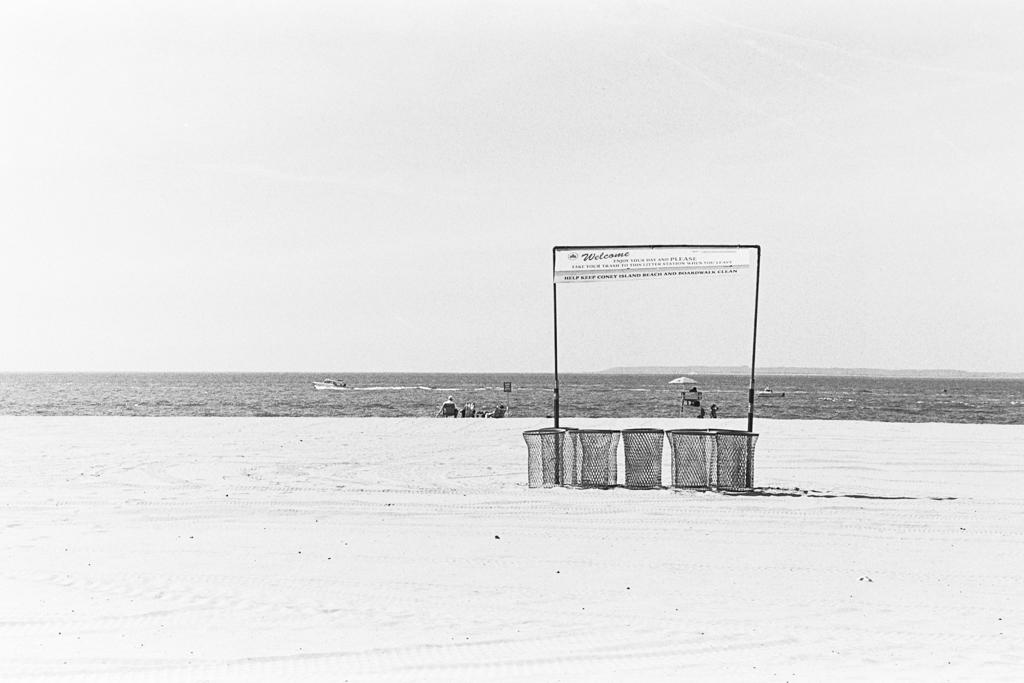
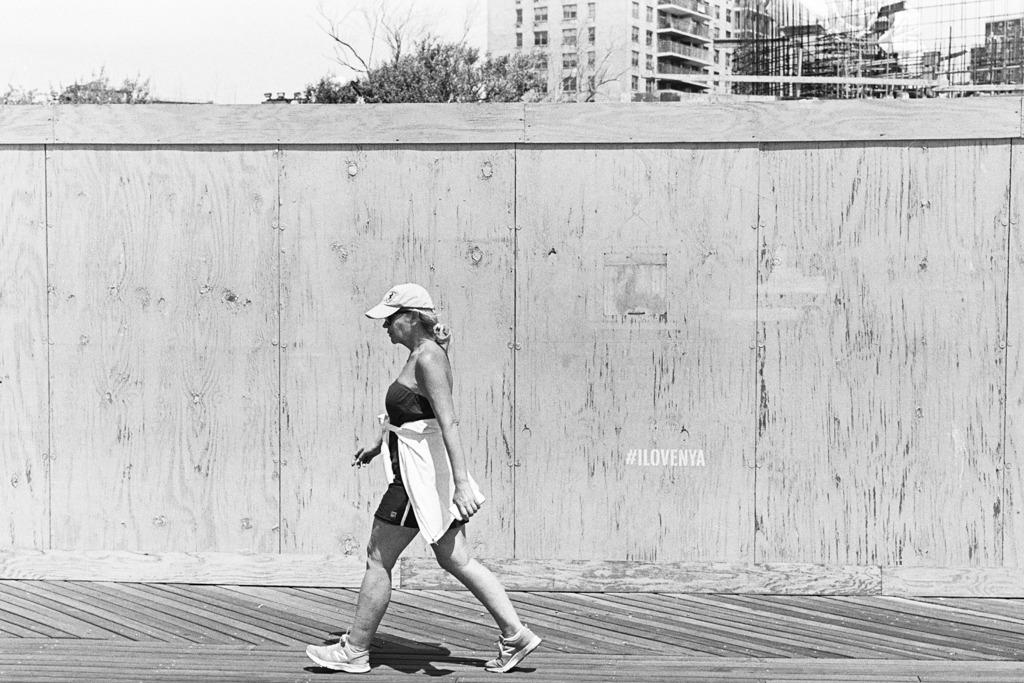
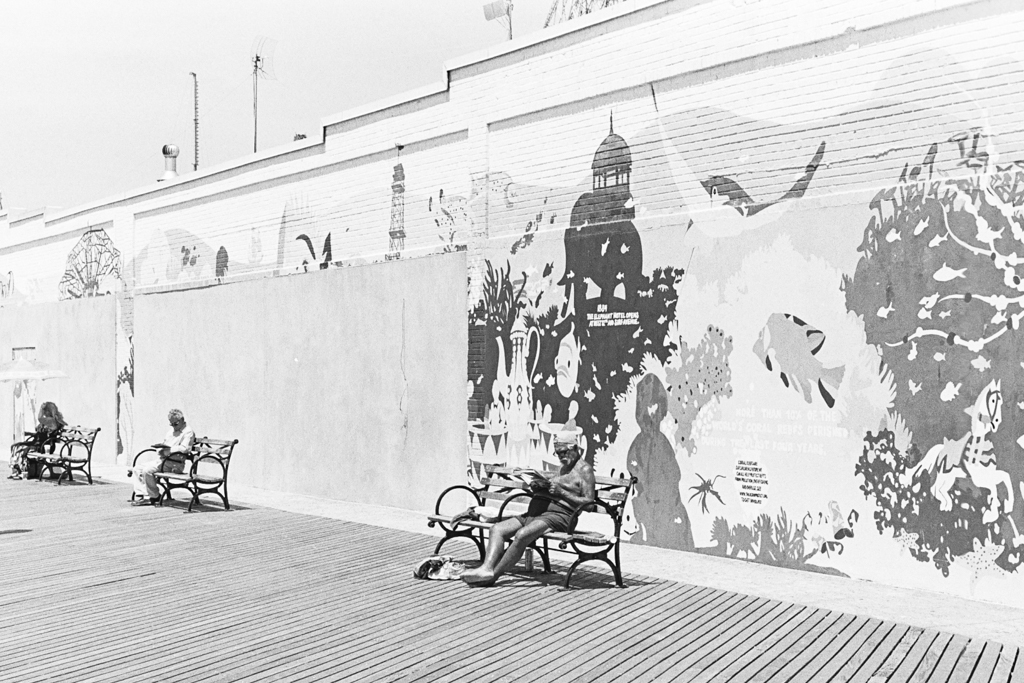
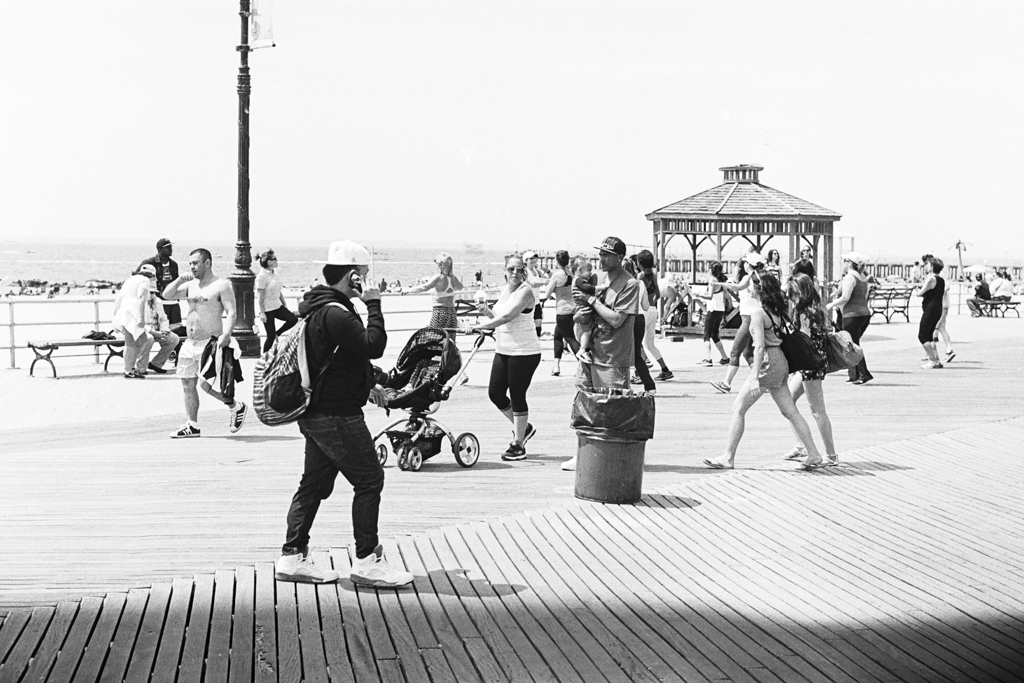
Coney Island, home of the (in)famous Cyclone roller-coaster and annual world famous Nathan’s hot dog eating contest. Difficult to imagine, but this past Memorial Day was the first time that I ventured out there for a visit.

Coney Island, home of the (in)famous Cyclone roller-coaster and annual world famous Nathan’s hot dog eating contest. Difficult to imagine, but this past Memorial Day was the first time that I ventured out there for a visit. I had seen and heard about it many times on TV, in photos, and read about it in the newspaper, but never had the urge to visit. When my mum came for a visit we decided to head out there. She has seen the majority of NYC and I wanted to show her something new. It was well worth it.
It was quite an interesting visit. Walking along the boardwalk from one end to the other, we sometimes felt like we were back in Eastern Europe. You could hear the random people passing us speak their native tongue (Russian, Czech and Polish). Slowly, minute by minute, the beach and boardwalk woke up and filled with more and more people. It was fascinating to see how Coney Island “woke up”.

Following are a couple of photos I captured. To avoid the crowds and traffic jams we ventured out to Coney Island (from Connecticut) early in the morning, arriving at the boardwalk around 8am. Surf Ave was still empty so we were able to park close to the boardwalk. After a quick lunch at 1pm we drove back home to Connecticut. I highly recommend heading there early in the morning to enjoy the relatively empty boardwalk, because in the afternoon it gets really crowded and parking is really difficult to find. If you are heading there from Connecticut you also have to be mindful of the JFK and Whitestone bridge traffic. Coney Island can also be reached by subway from Manhattan, however, it is quite a long journey and I believe it is the same line that people take to JFK.
All black and white photos were taken with the Leica M3, Summicron 50 (Rigid) and Kodak Tri-X 400, developed (XTOL) and scanned (Pakon) at home. All color photos were taken with the Leica M-A, Summicron 35 and Cinestill 800, and developed/scanned by Richard Photo Lab. The sun was blasting full power all day, so most photos were shot at f8 or f5.6 and 1/1000 shutter speed. I am quite happy how well the Cinestill 800 performed.


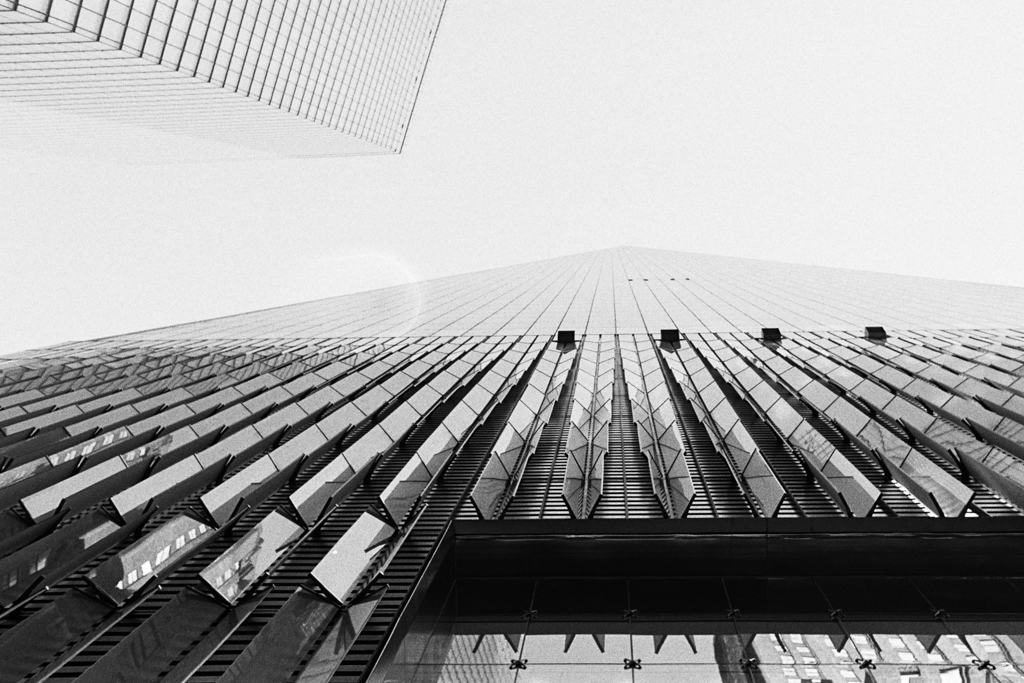
One World Trade Center
We remember
We rebuild
We come back stronger
– President Obama (Message left on One World Trade Center steel beam)

We remember
We rebuild
We come back stronger
– President Obama (Message left on One World Trade Center steel beam)
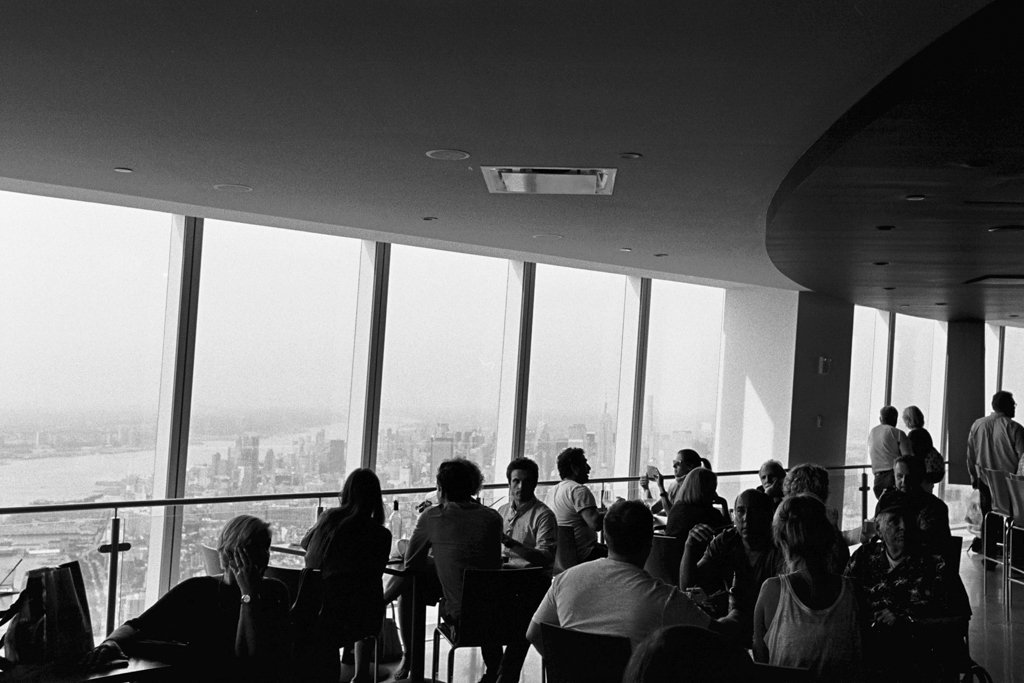
That last sentence by President Obama is spot on. New York City came back stronger, One World Trade Center and the One World Observatory is quite impressive. Almost 14 years later after that fateful day on September 11th, 2001 One World Trade Center opened its doors to the public for the first time. What an impressive accomplishment by the men and women who build the tower. I was fortunate enough to go up there on opening day. It was a long wait, but it was well worth it. If you are visiting New York, definitely take the time to visit One WTC and the Observatory. You’ll have three floors (102nd, 101st and 100th) to explore magnificent 360 degrees view of the city.

Below are the photos that I took with the Leica M-A, Summicron 35/2 and Kodak Tri-X 400. The photos were developed (XTOL) and scanned (Pakon) at home. It’s somewhat ironic, because I bet that prior to 2001 most photos that were taken on the old observation deck were with film cameras. It’s tough to take a film camera with you nowadays, because it has to go through an x-ray machine for security reasons. Luckily none of my photos was impacted. Some of them show a bit of window glare/reflection.


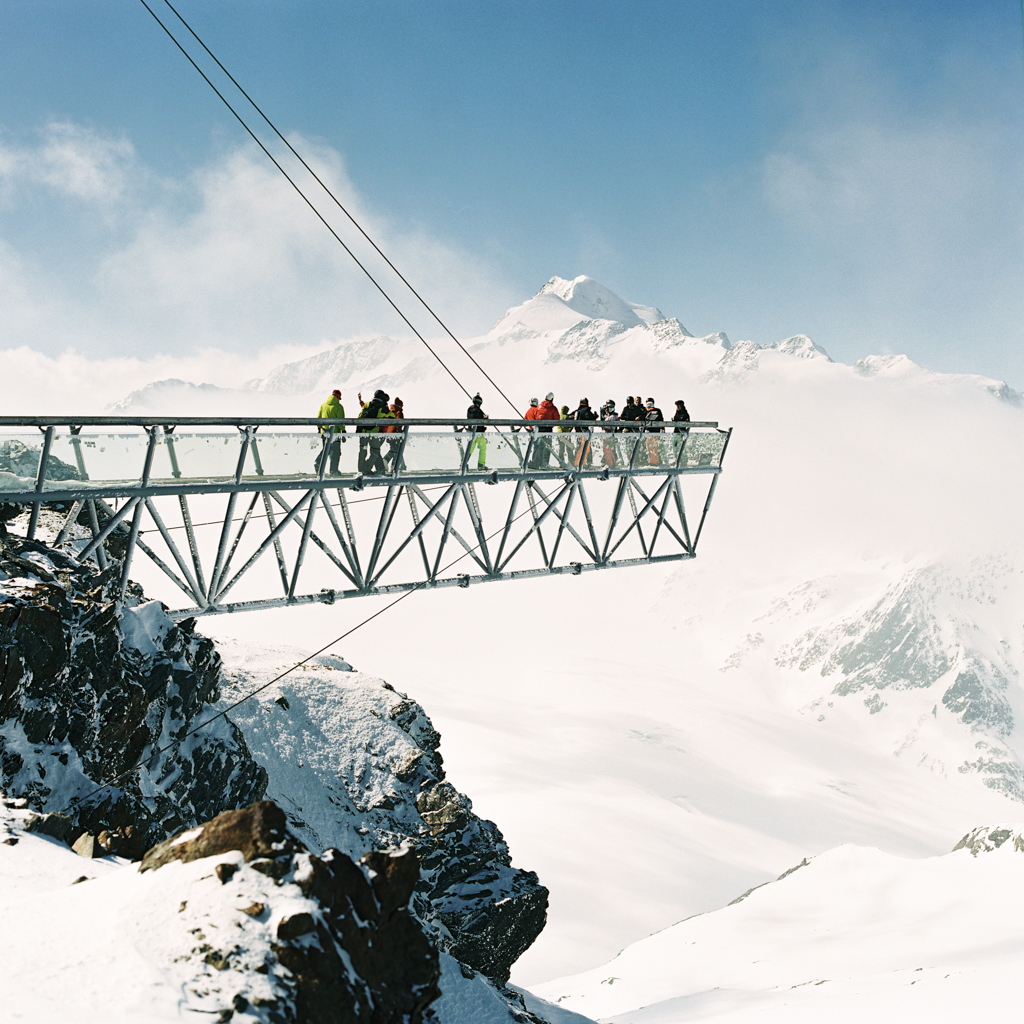
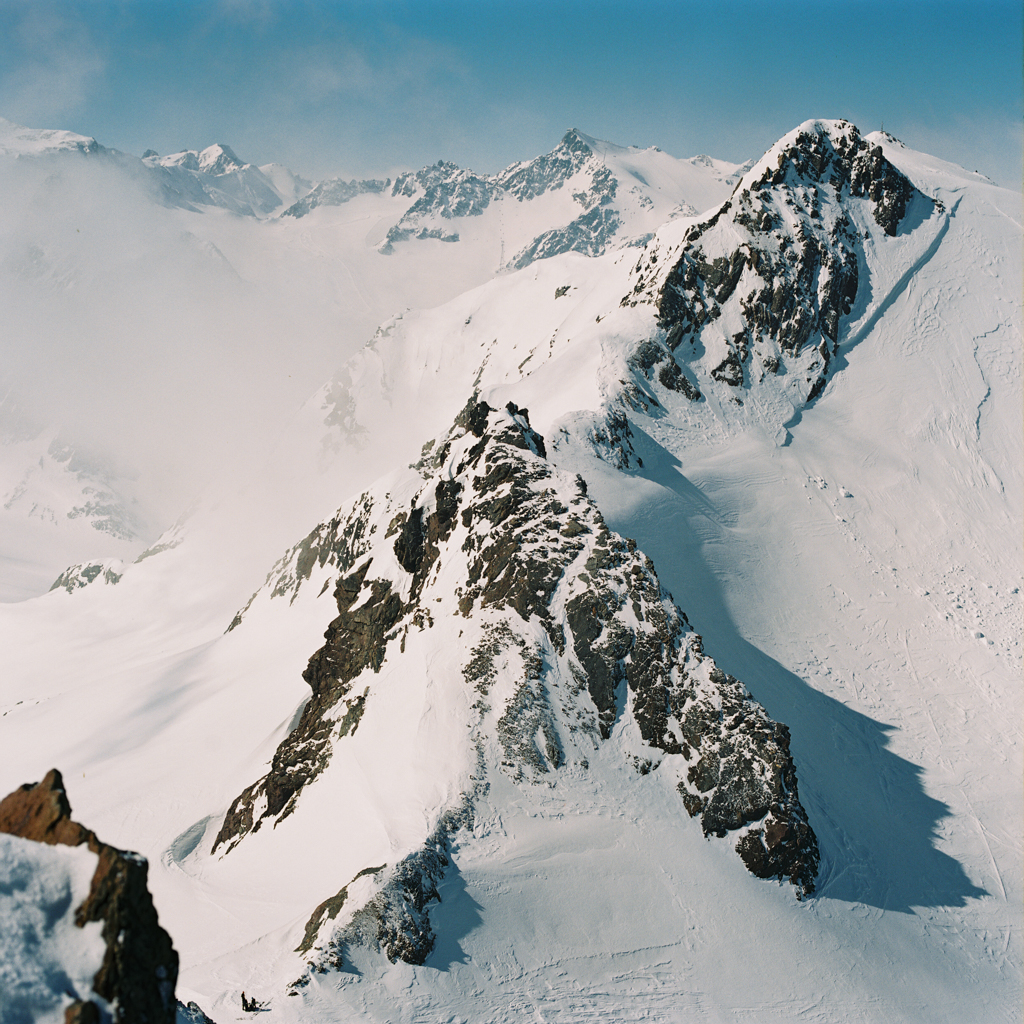
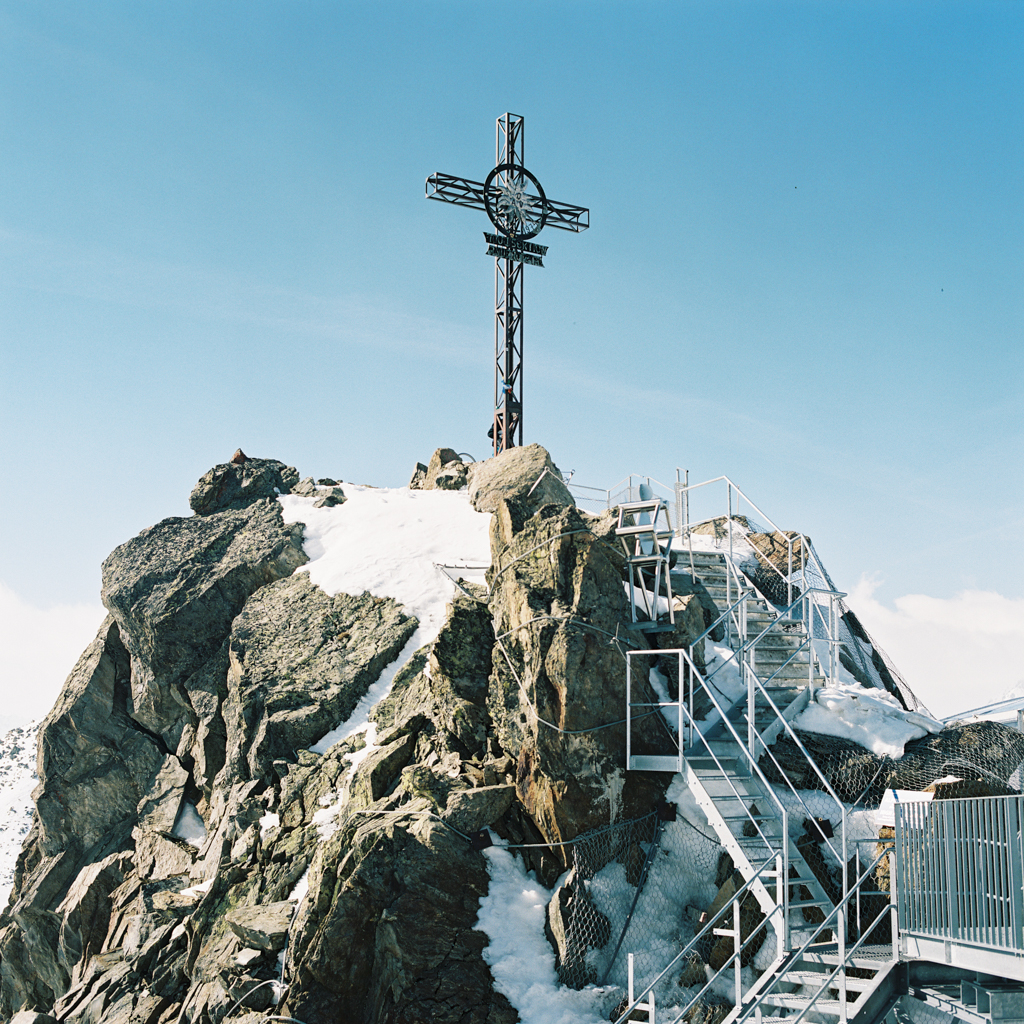
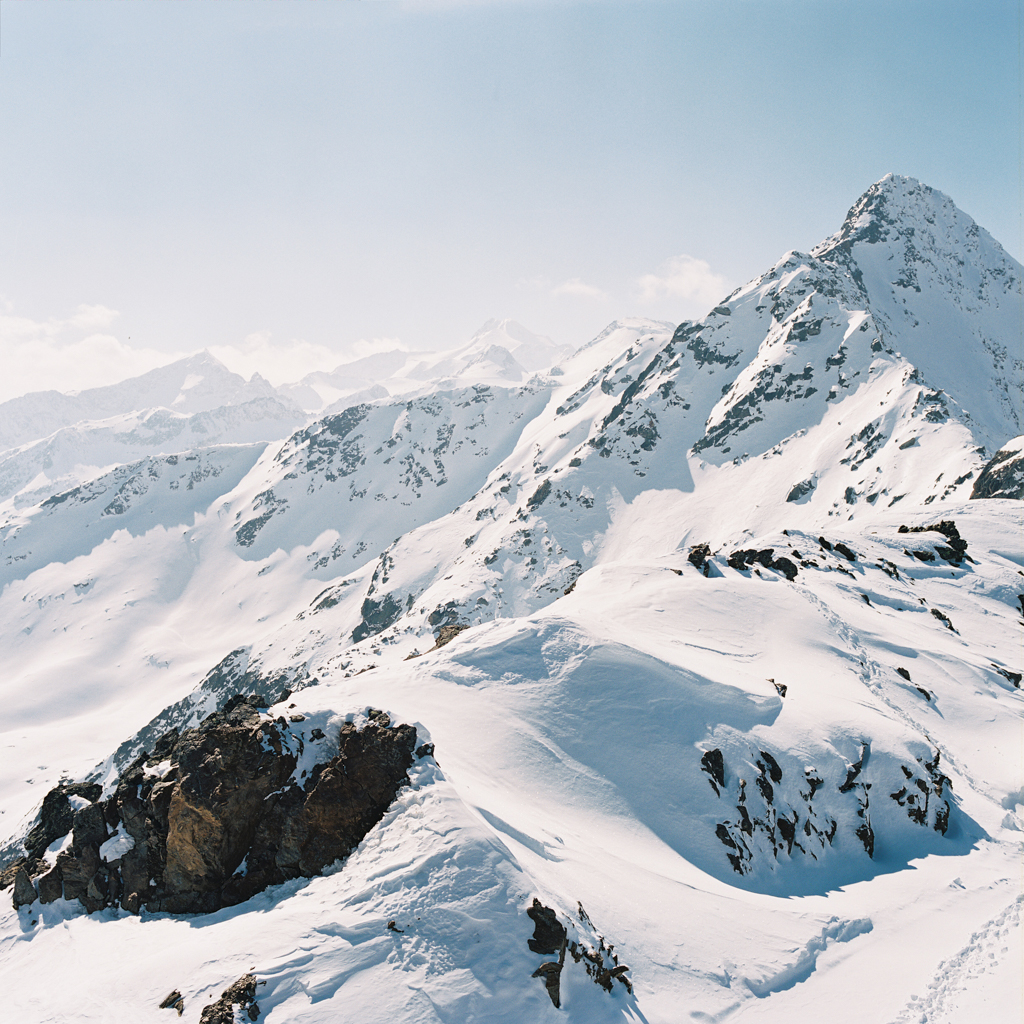
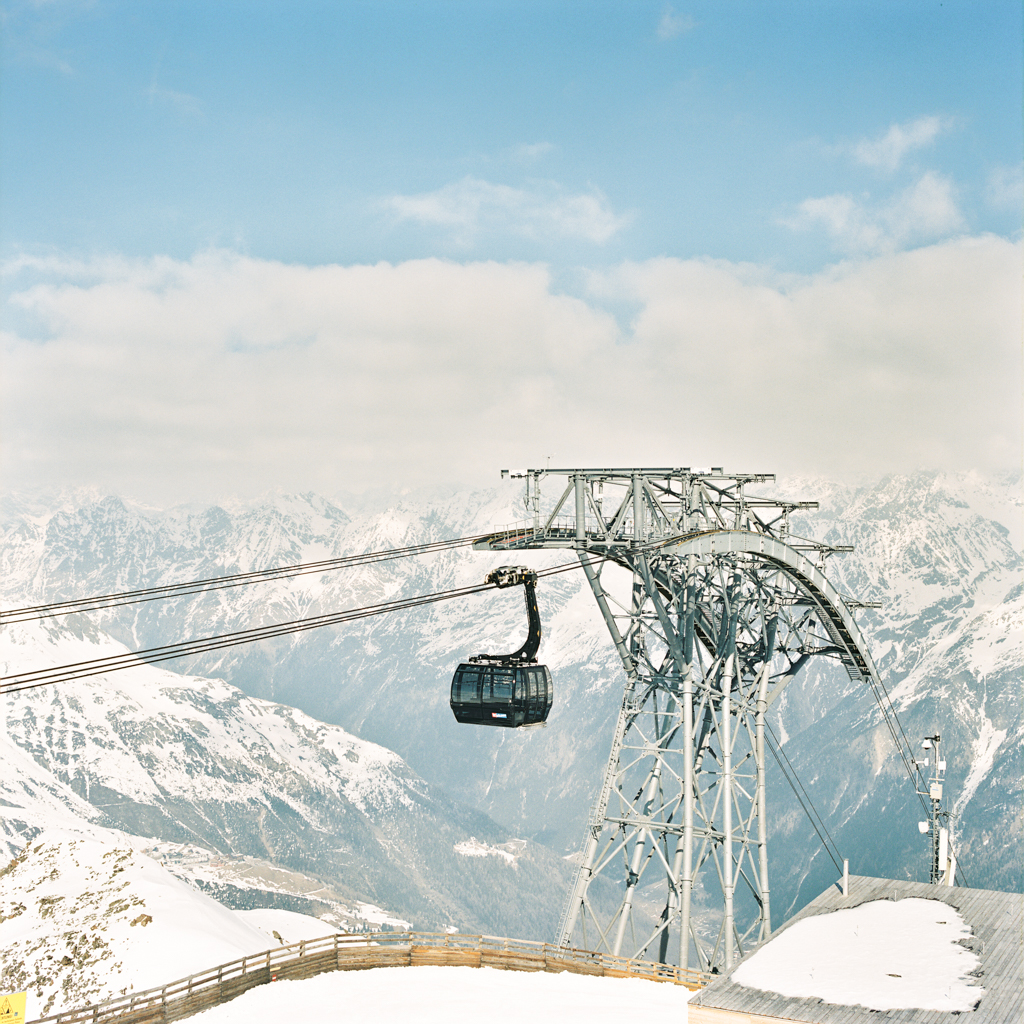
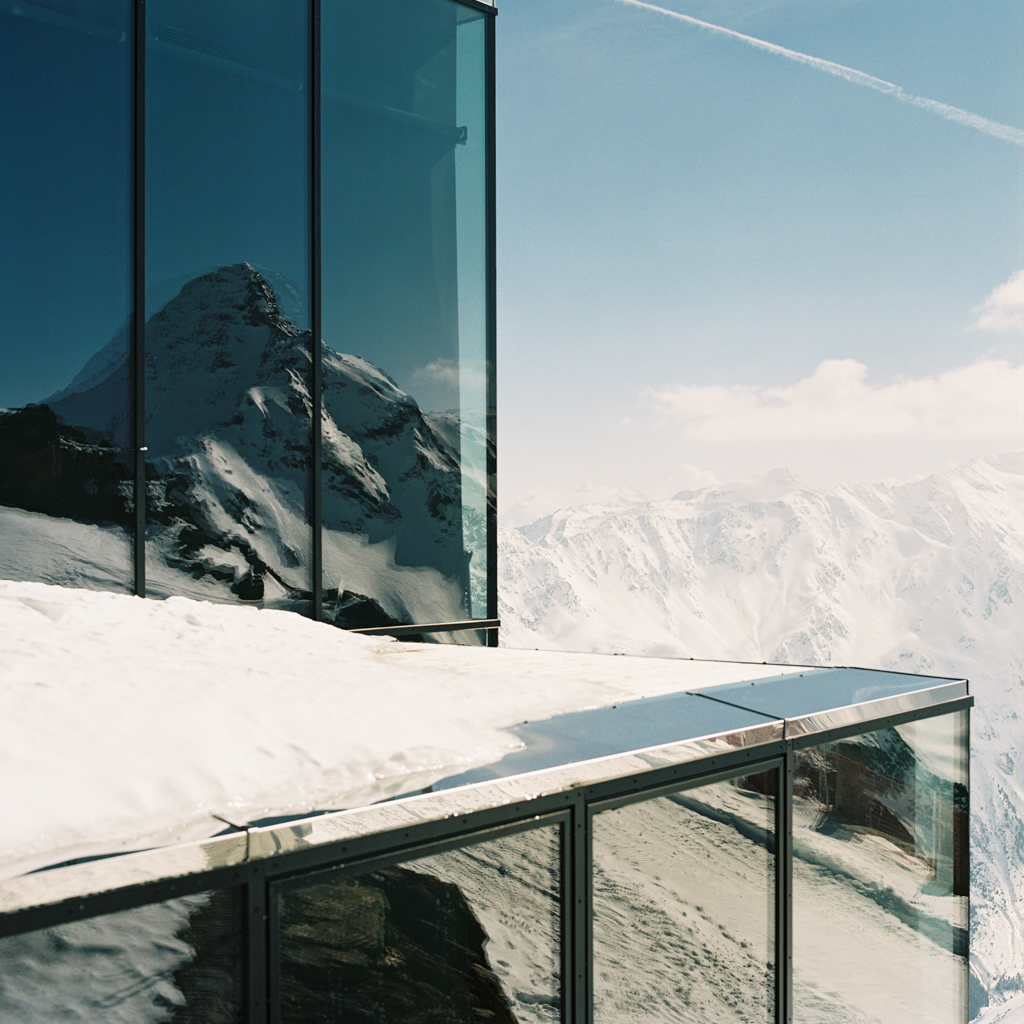
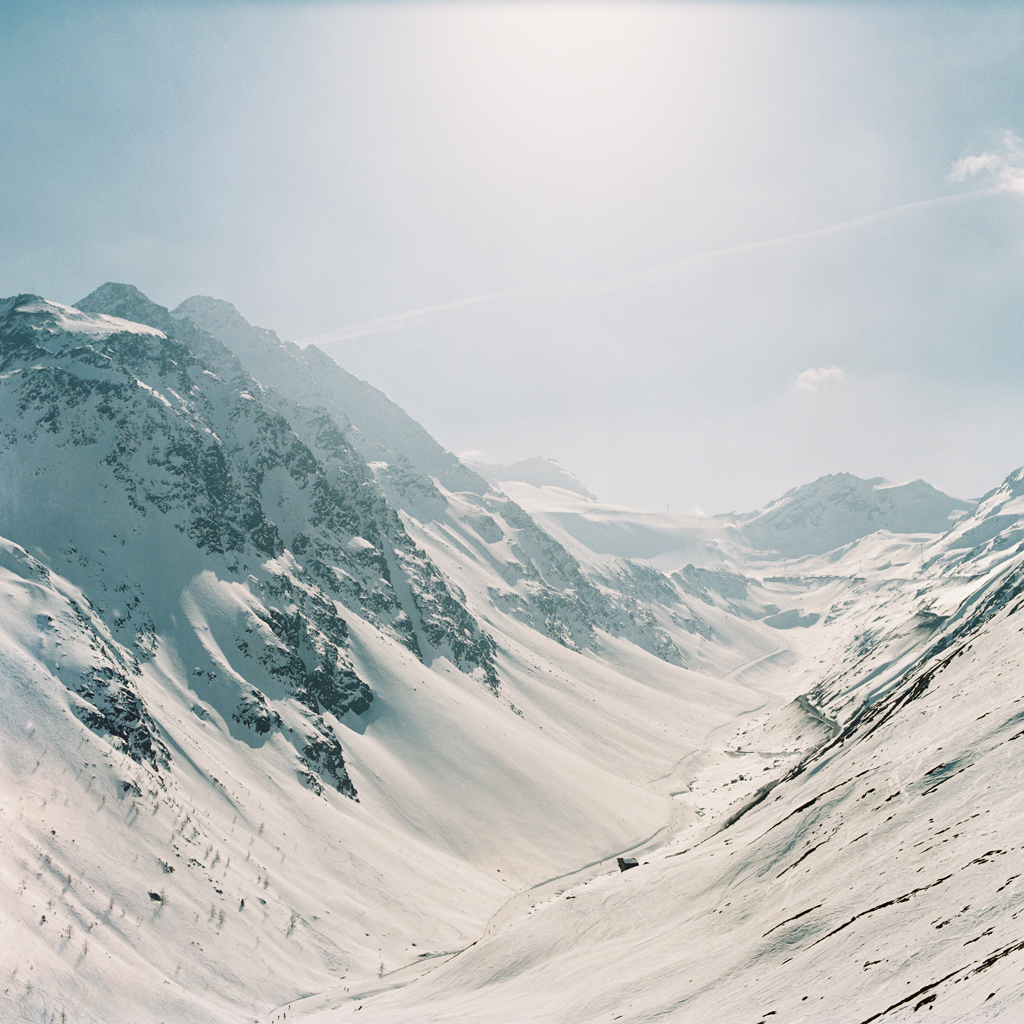
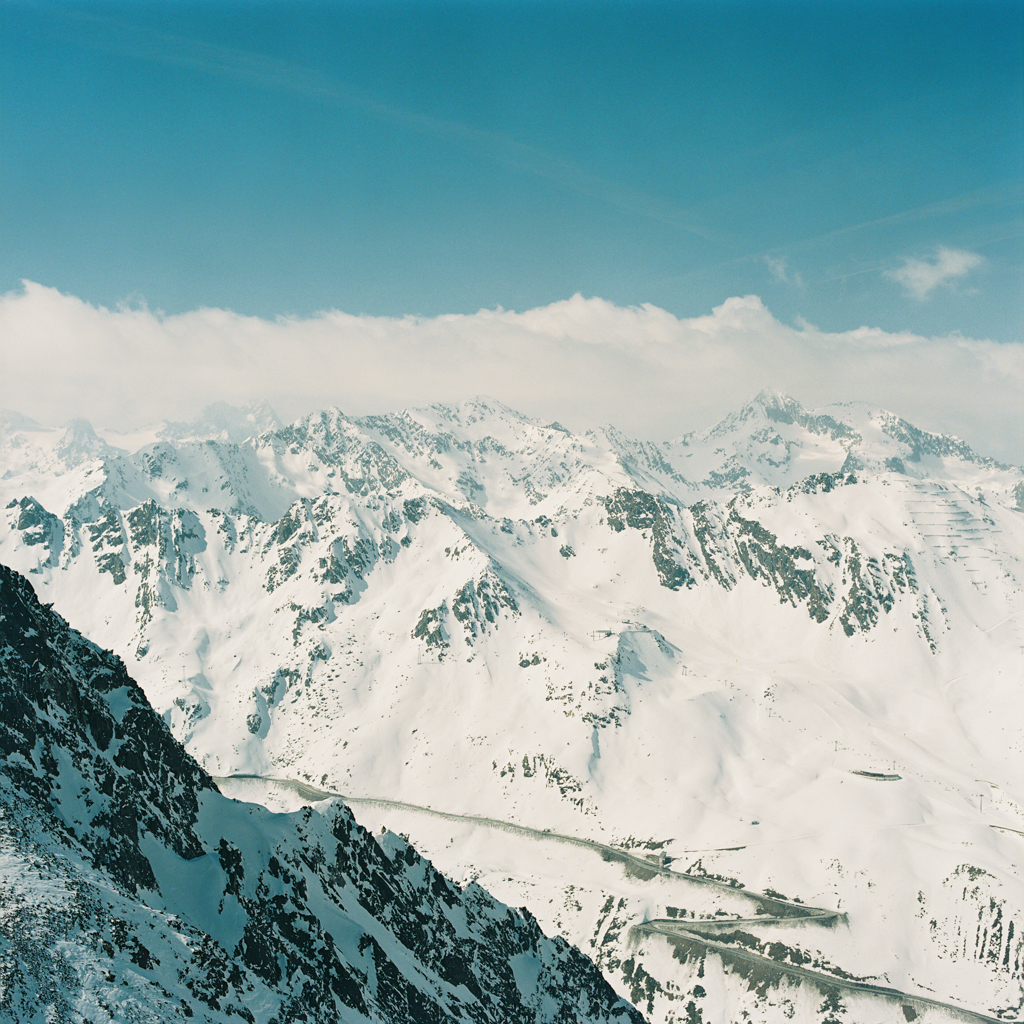
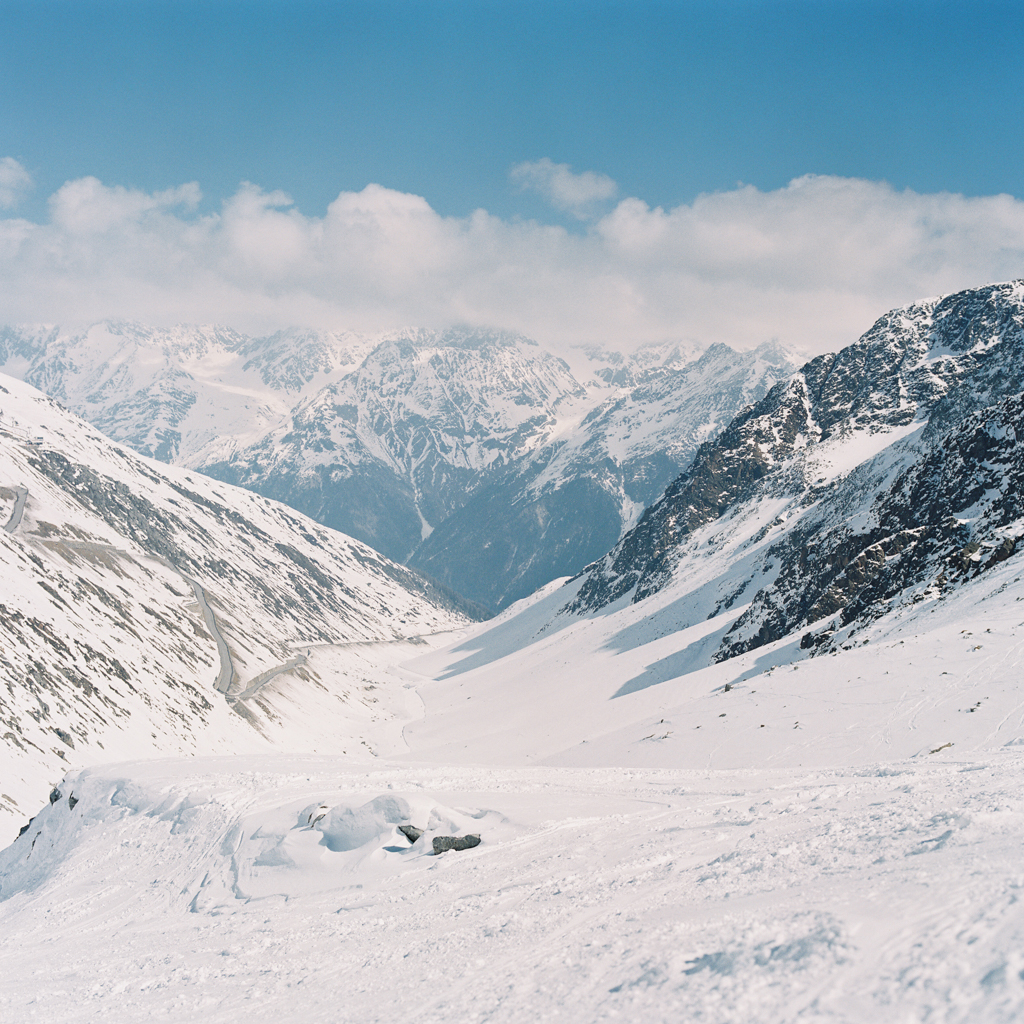
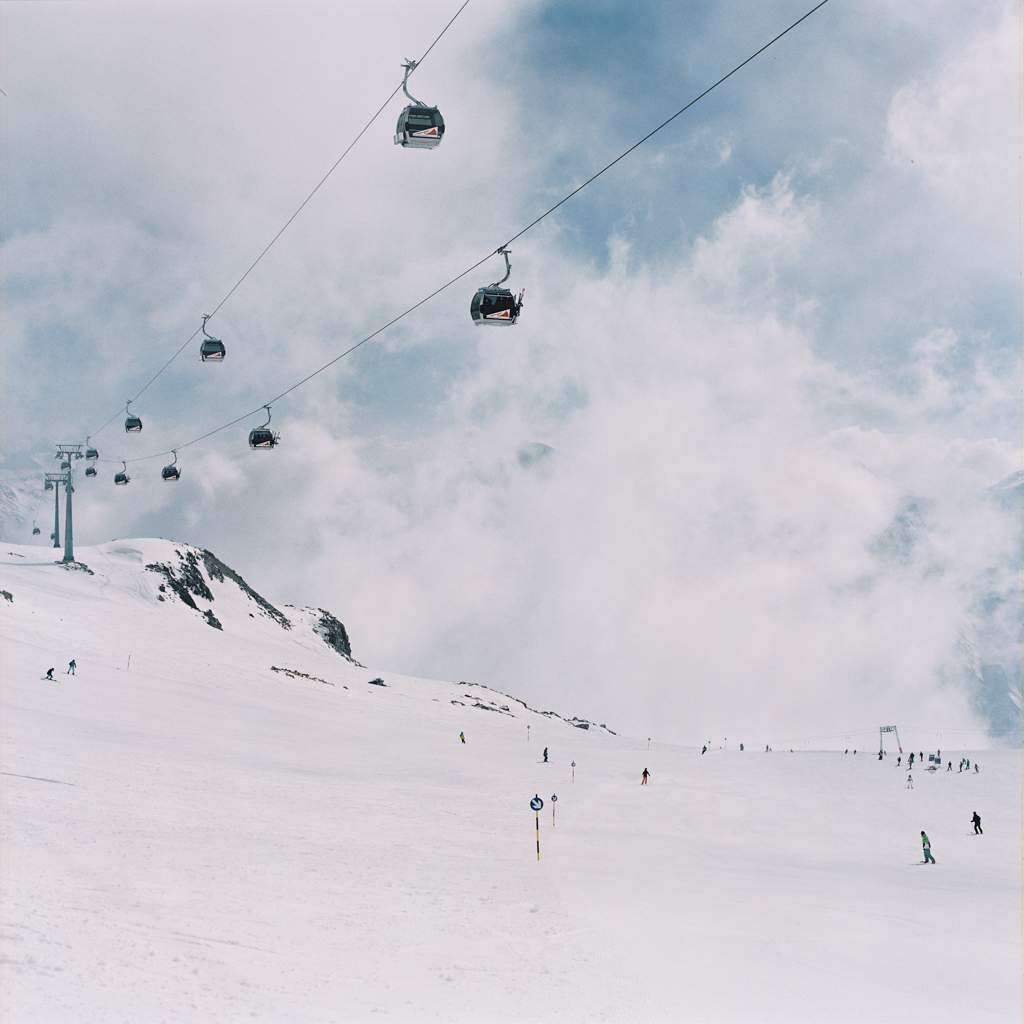
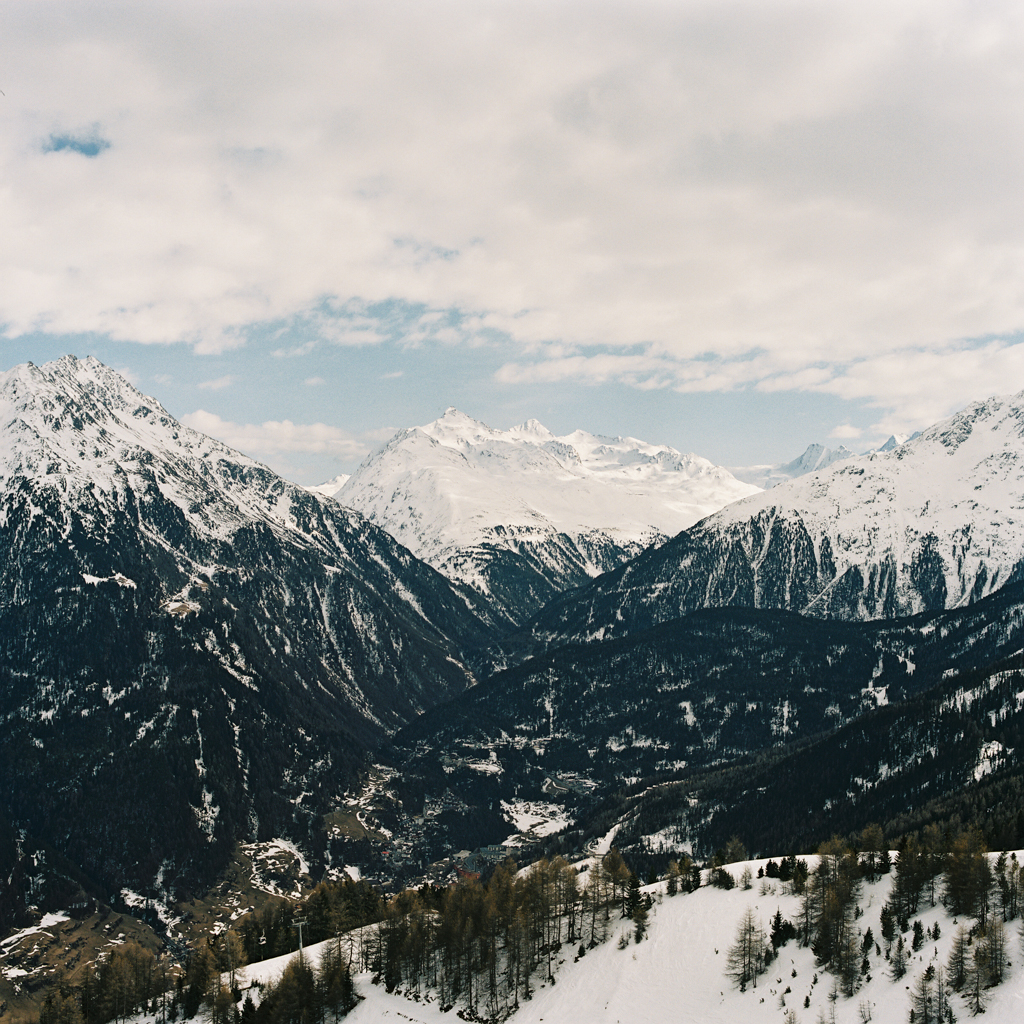
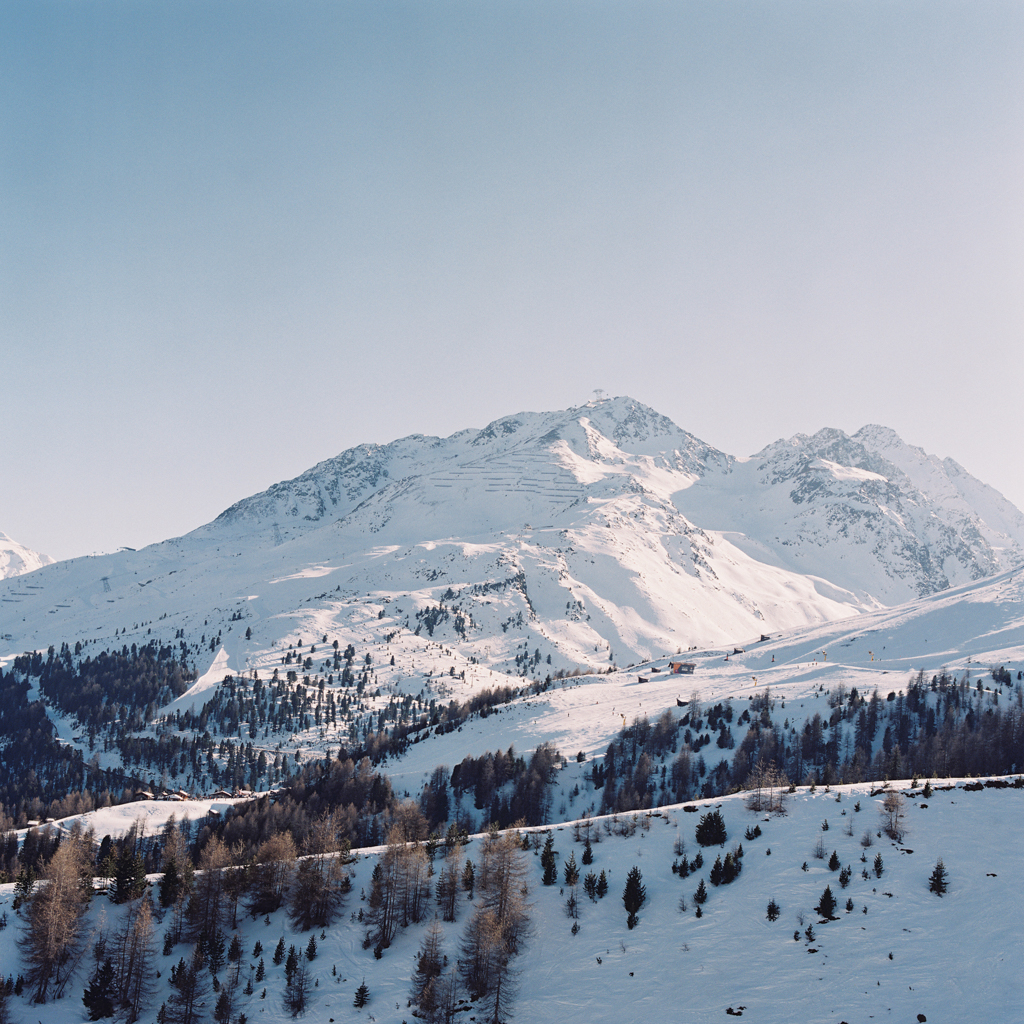
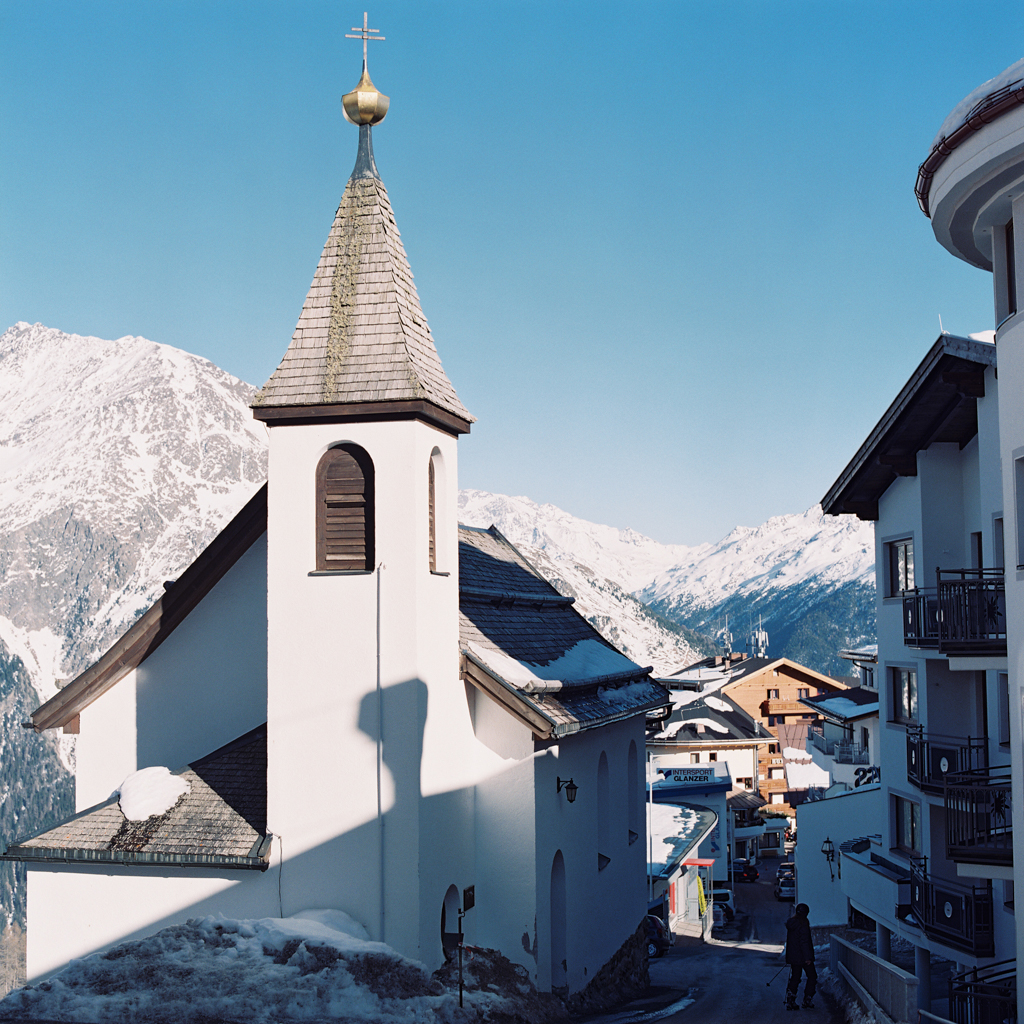
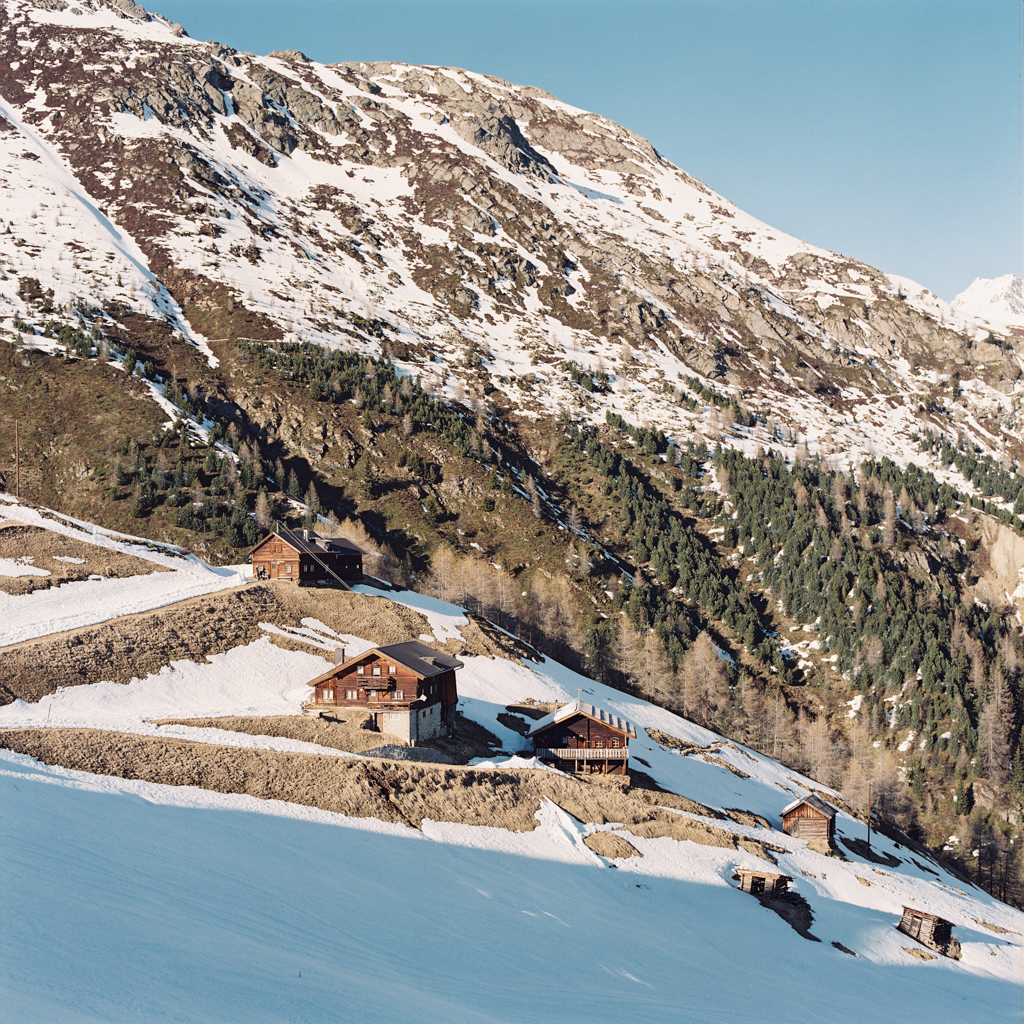
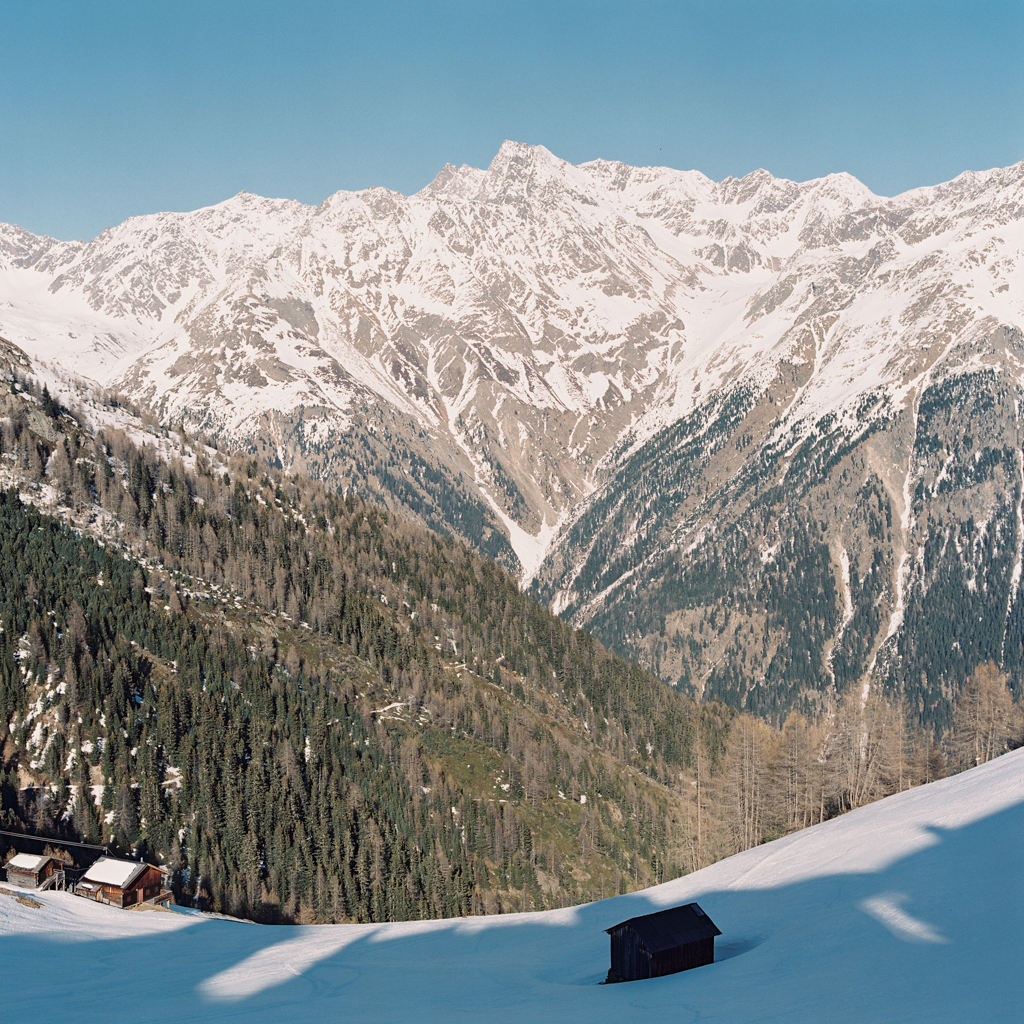
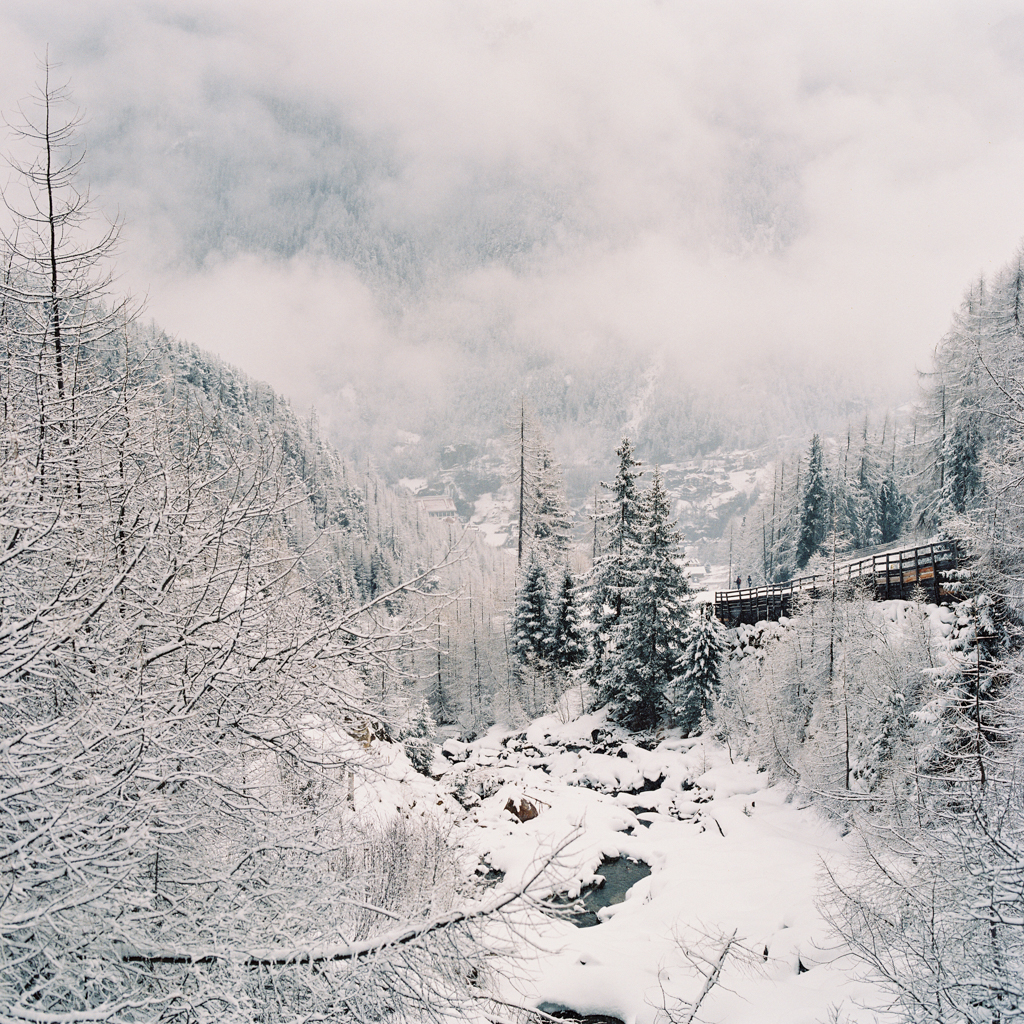
Oetztal Alps
Eight long years, that’s how long it has been since my last snowboarding trip. Eight years ago I lived in Amsterdam and flew down to Switzerland for a long weekend for some snowboarding fun. I lived in Zurich the year before, so knew the area quite well. On one of the morning runs down the hill I had a pretty bad fall and injured my left leg.

Eight long years, that’s how long it has been since my last snowboarding trip. Eight years ago I lived in Amsterdam and flew down to Switzerland for a long weekend for some snowboarding fun. I lived in Zurich the year before, so knew the area quite well. On one of the morning runs down the hill I had a pretty bad fall and injured my left leg. I kept going for the rest of the day which turned out not to be smart and ended in the emergency room. Fast forward a couple more years, to about 2008, and I slipped in front of the house on ice and broke the same leg/ankle in three different places. Needless to say, it took quite some time to heal and some more time before I could put real pressure on my ankle again and do things such as cycling or running.
Fast forward to the beginning of 2015 and I was itching to go snowboarding again. There’s only a limited amount of snowboarding movies and videos one can watch laying on the couch before you feel the urge to book a plane ticket and head to the mountains. I picked up skateboarding/longboarding two summers ago, but even that wasn’t enough.

I’ve been to ski resorts in Switzerland, Austria, Czech Republic, Slovakia and France in the past, but never in the USA or Canada. I called a couple of friends of mine begging to go on a snowboarding trip to Colorado, Canada or some other ski resort here in the USA/Canada, but all of them either had a no plans to go or had already gone in December. Going by yourself quite honestly sucks, so I was disappointed that I may not go again this season. Luckily my mom called me and told me that she had a trip planned to Hochsoelden in Austria. It didn’t take a lot to convince her and after a couple of calls we found a place for me to stay, and a couple of clicks and I had a plane ticket booked.
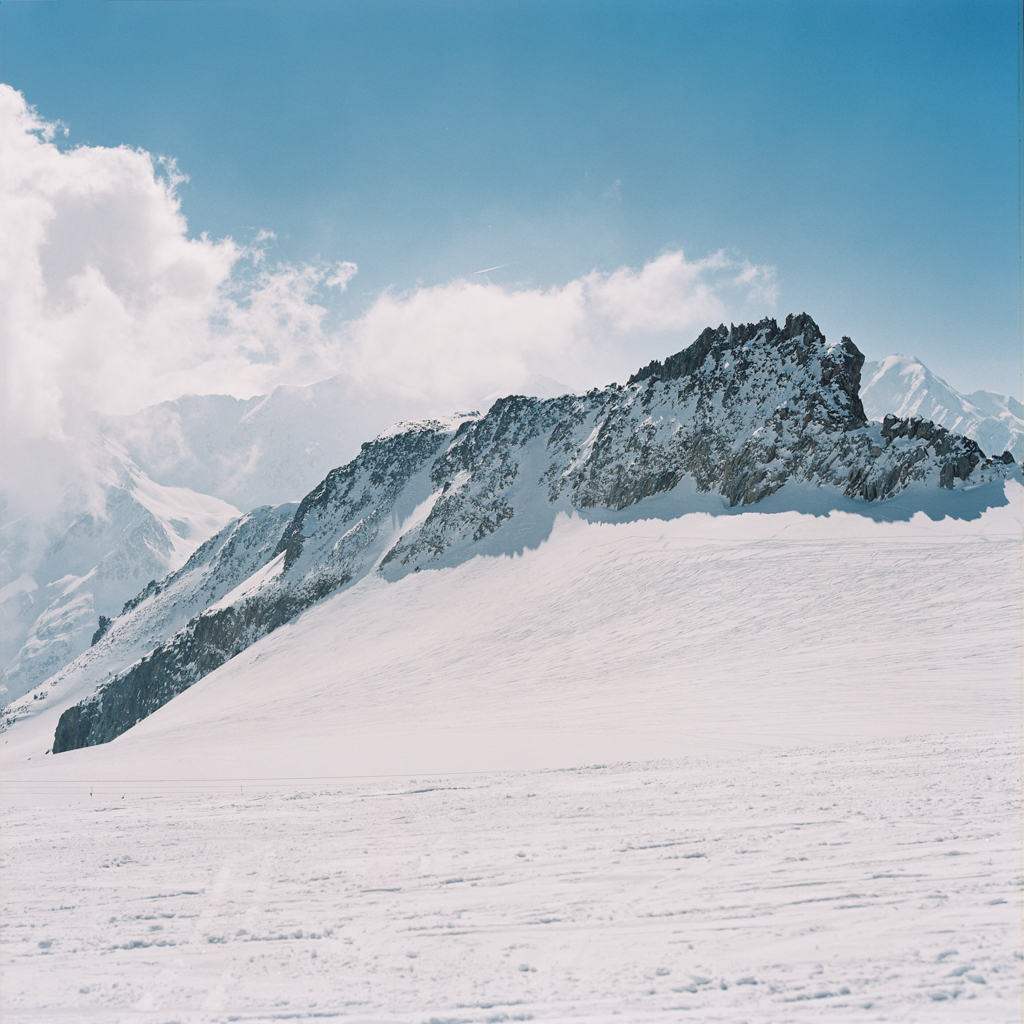
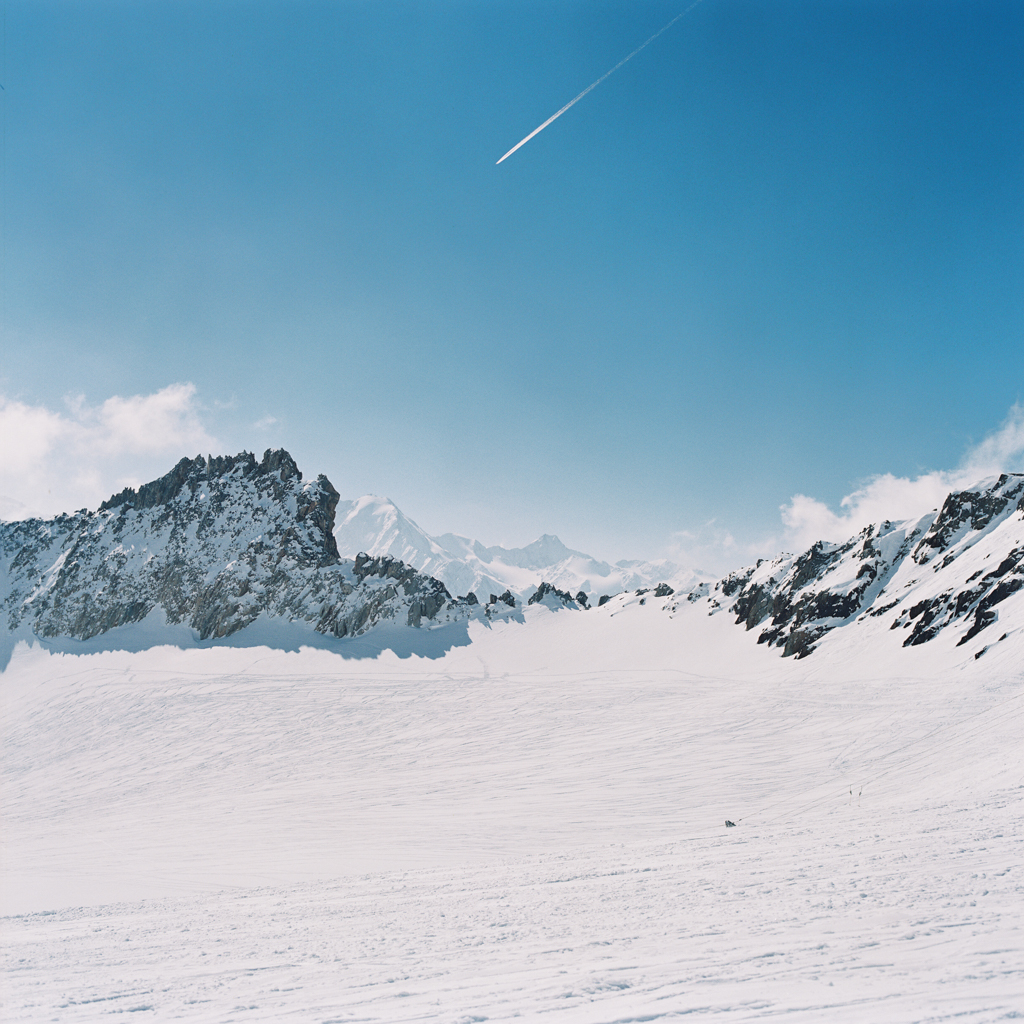
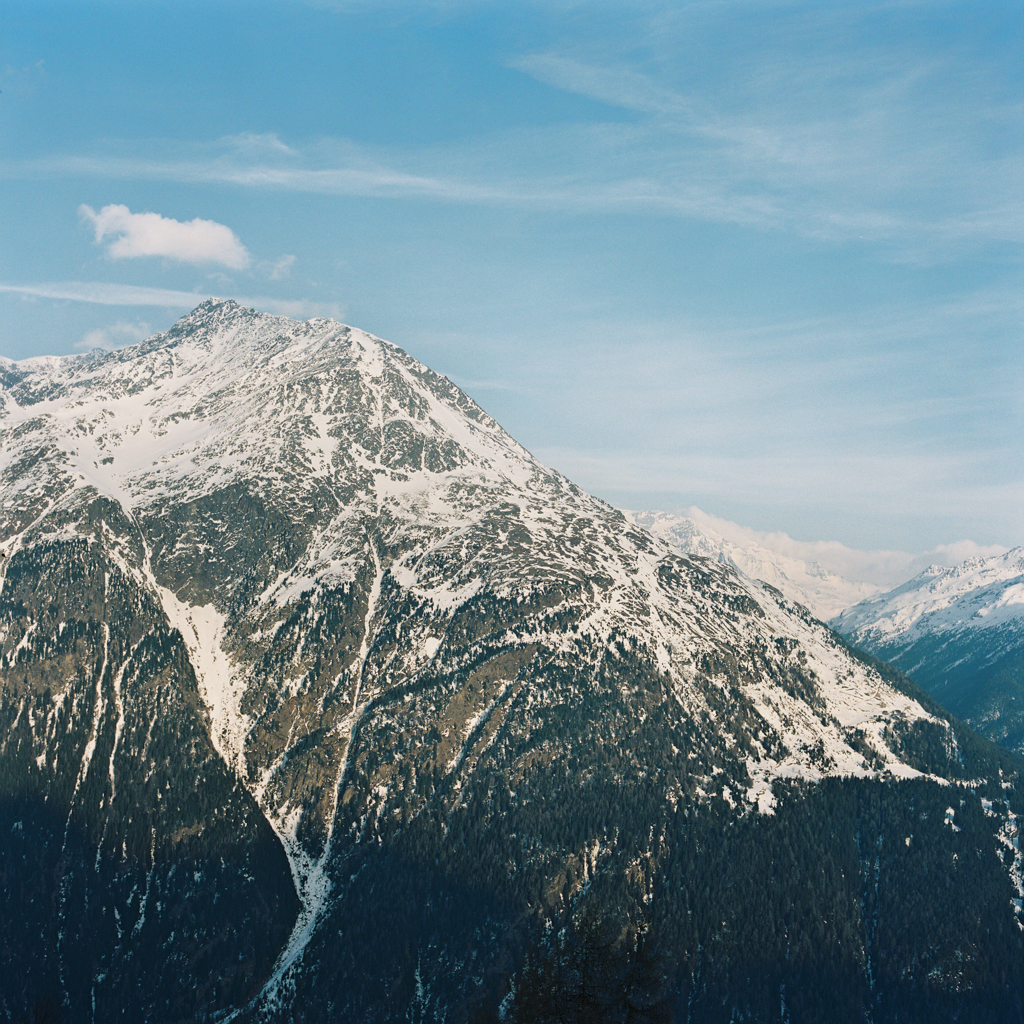
Hochsoelden is located in the Oetztal Alps, roughly 2090 meters above sea level. It’s about 3 hours by car from Munich airport, which I flew into directly from New York. The best part, Hochsoelden is located right in the ski resort and you have access to about 33 lifts/gondolas, 150km of ski slopes, a glacier, and peaks as high as 3,340 meters. Luckily the weather was gorgeous as well throughout the week and the snow conditions were awesome. There was enough snow to do one of the longest runs, 15km, from the peak all the way down to the valley (Soelden).

Even before my trip started I was excited about taking photos in Austria of the Alps. I decided to take my Hasselblad with me and a couple rolls of Kodak Portra 400 and Fuji Pro 400H. The majority of the photos below are Kodak Portra 400. But enough of the talk, below are the photos I took on the trip. All were scanned/developed by Richard PhotoLab in California. Enjoy!
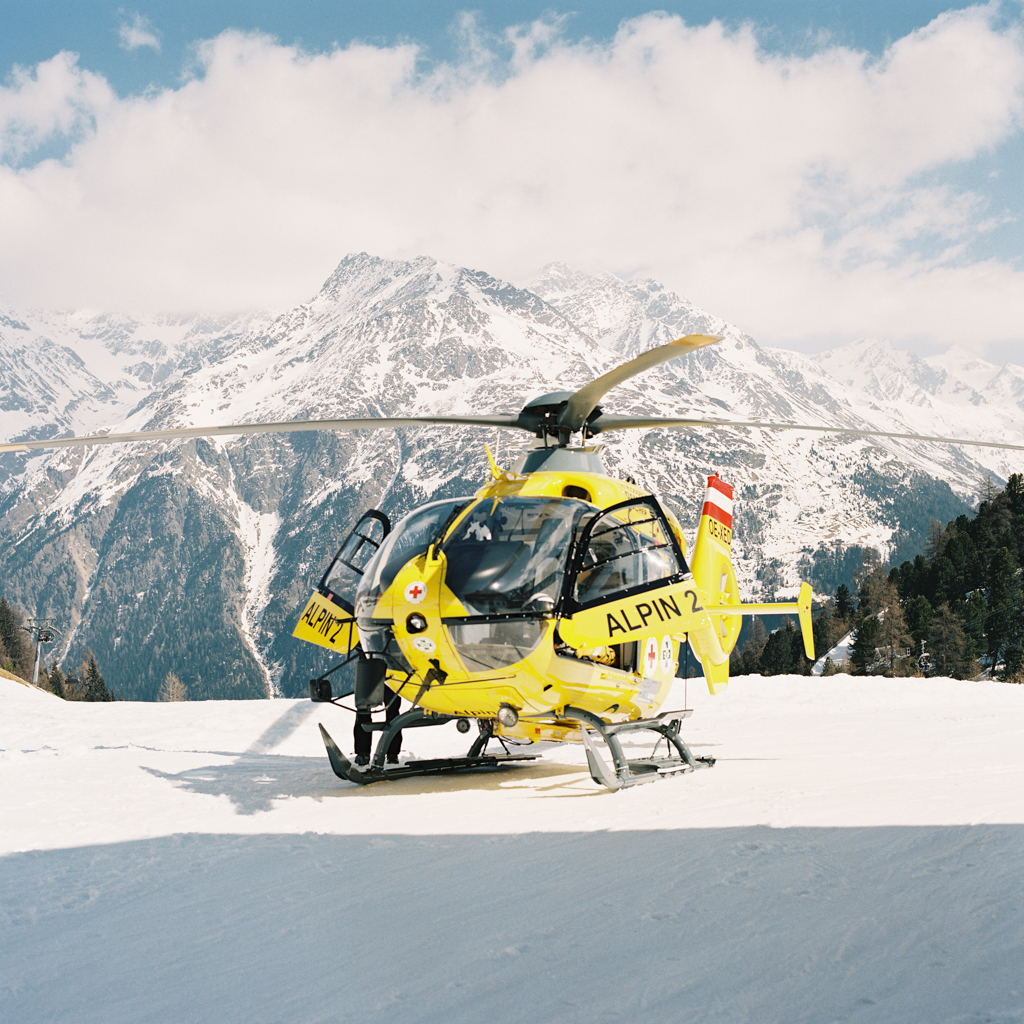
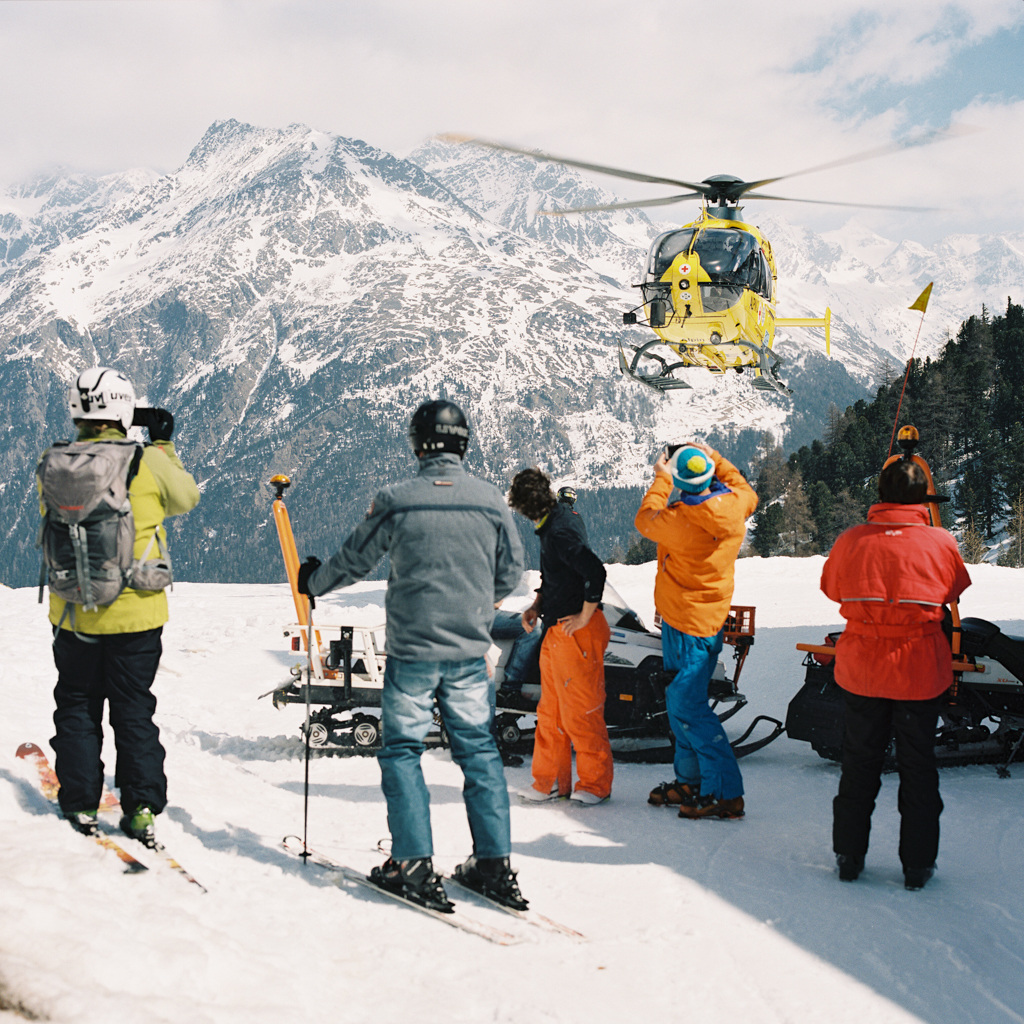
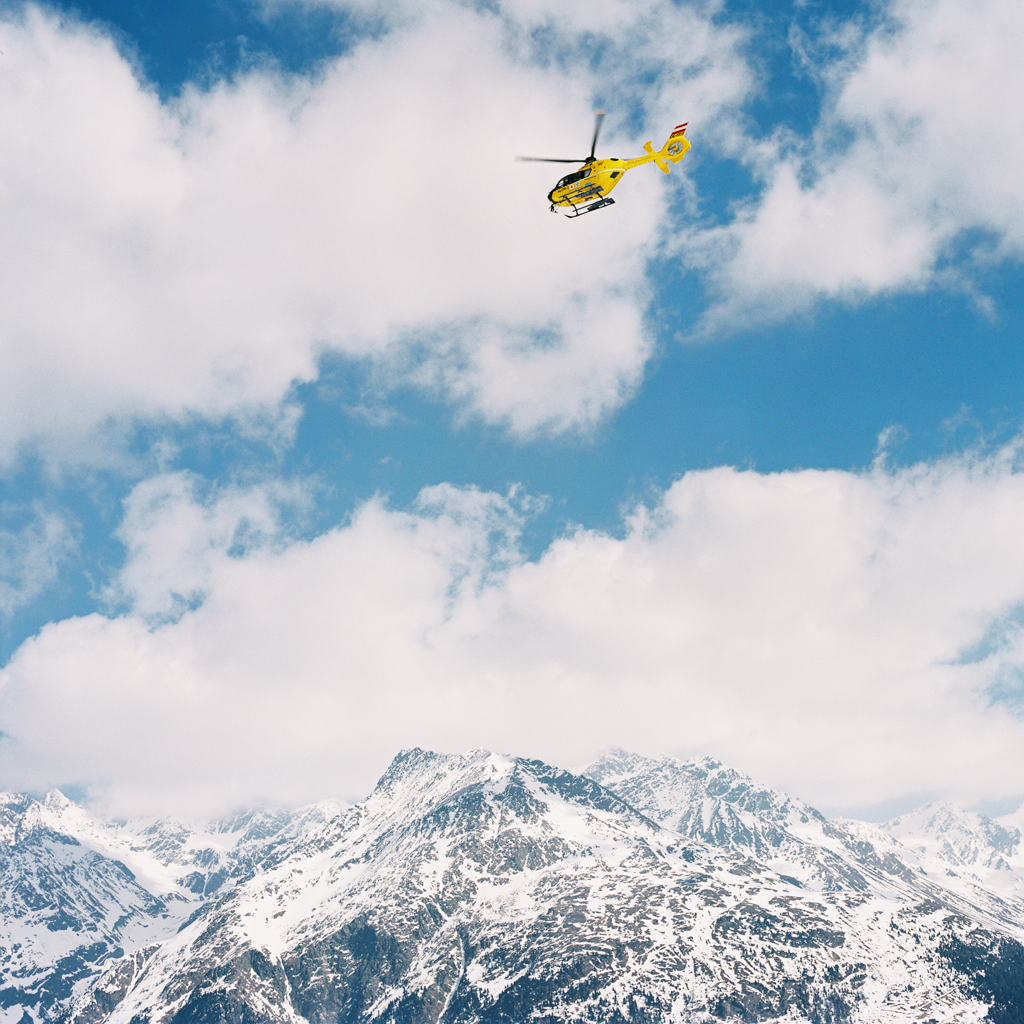
Technology has a evolved quite a bit, even on the ski slopes. You can actually go online after your ski trip, type in your ski-pass number and get a recap of your entire trip.