The American West on Kodak Ektachrome: Sedona to Zion
You read Kerouac enough times and eventually you stop making excuses about not having time for the road.
I had spent years looking at William Eggleston's Chromes — those saturated, hyper-real portraits of the American South rendered on slide film — and wondering what that same palette would do to the desert. Ektachrome in humid Memphis is one thing. Ektachrome in the dry, harsh light of Arizona and Utah is something else entirely.
In March 2026, I loaded a Leica MP with Ektachrome 100, flew from Miami to Phoenix, packed the family into a rental van, and drove to Sedona, through the Grand Canyon, up past Horseshoe Bend, and into southern Utah. Nine days. 1,600 miles. One camera. One lens. One film stock.
This is what the American West looks like on slide film — and what happens when the mythology actually delivers.
Quick Trip Reference
Dates: March 21–29, 2026
Flight: MIA to PHX on American Airlines
Route: Phoenix → Sedona (4 nights) → Grand Canyon National Park (day trip) → Horseshoe Bend → Orderville/Zion National Park (3 nights) → Scottsdale (Phoenix)
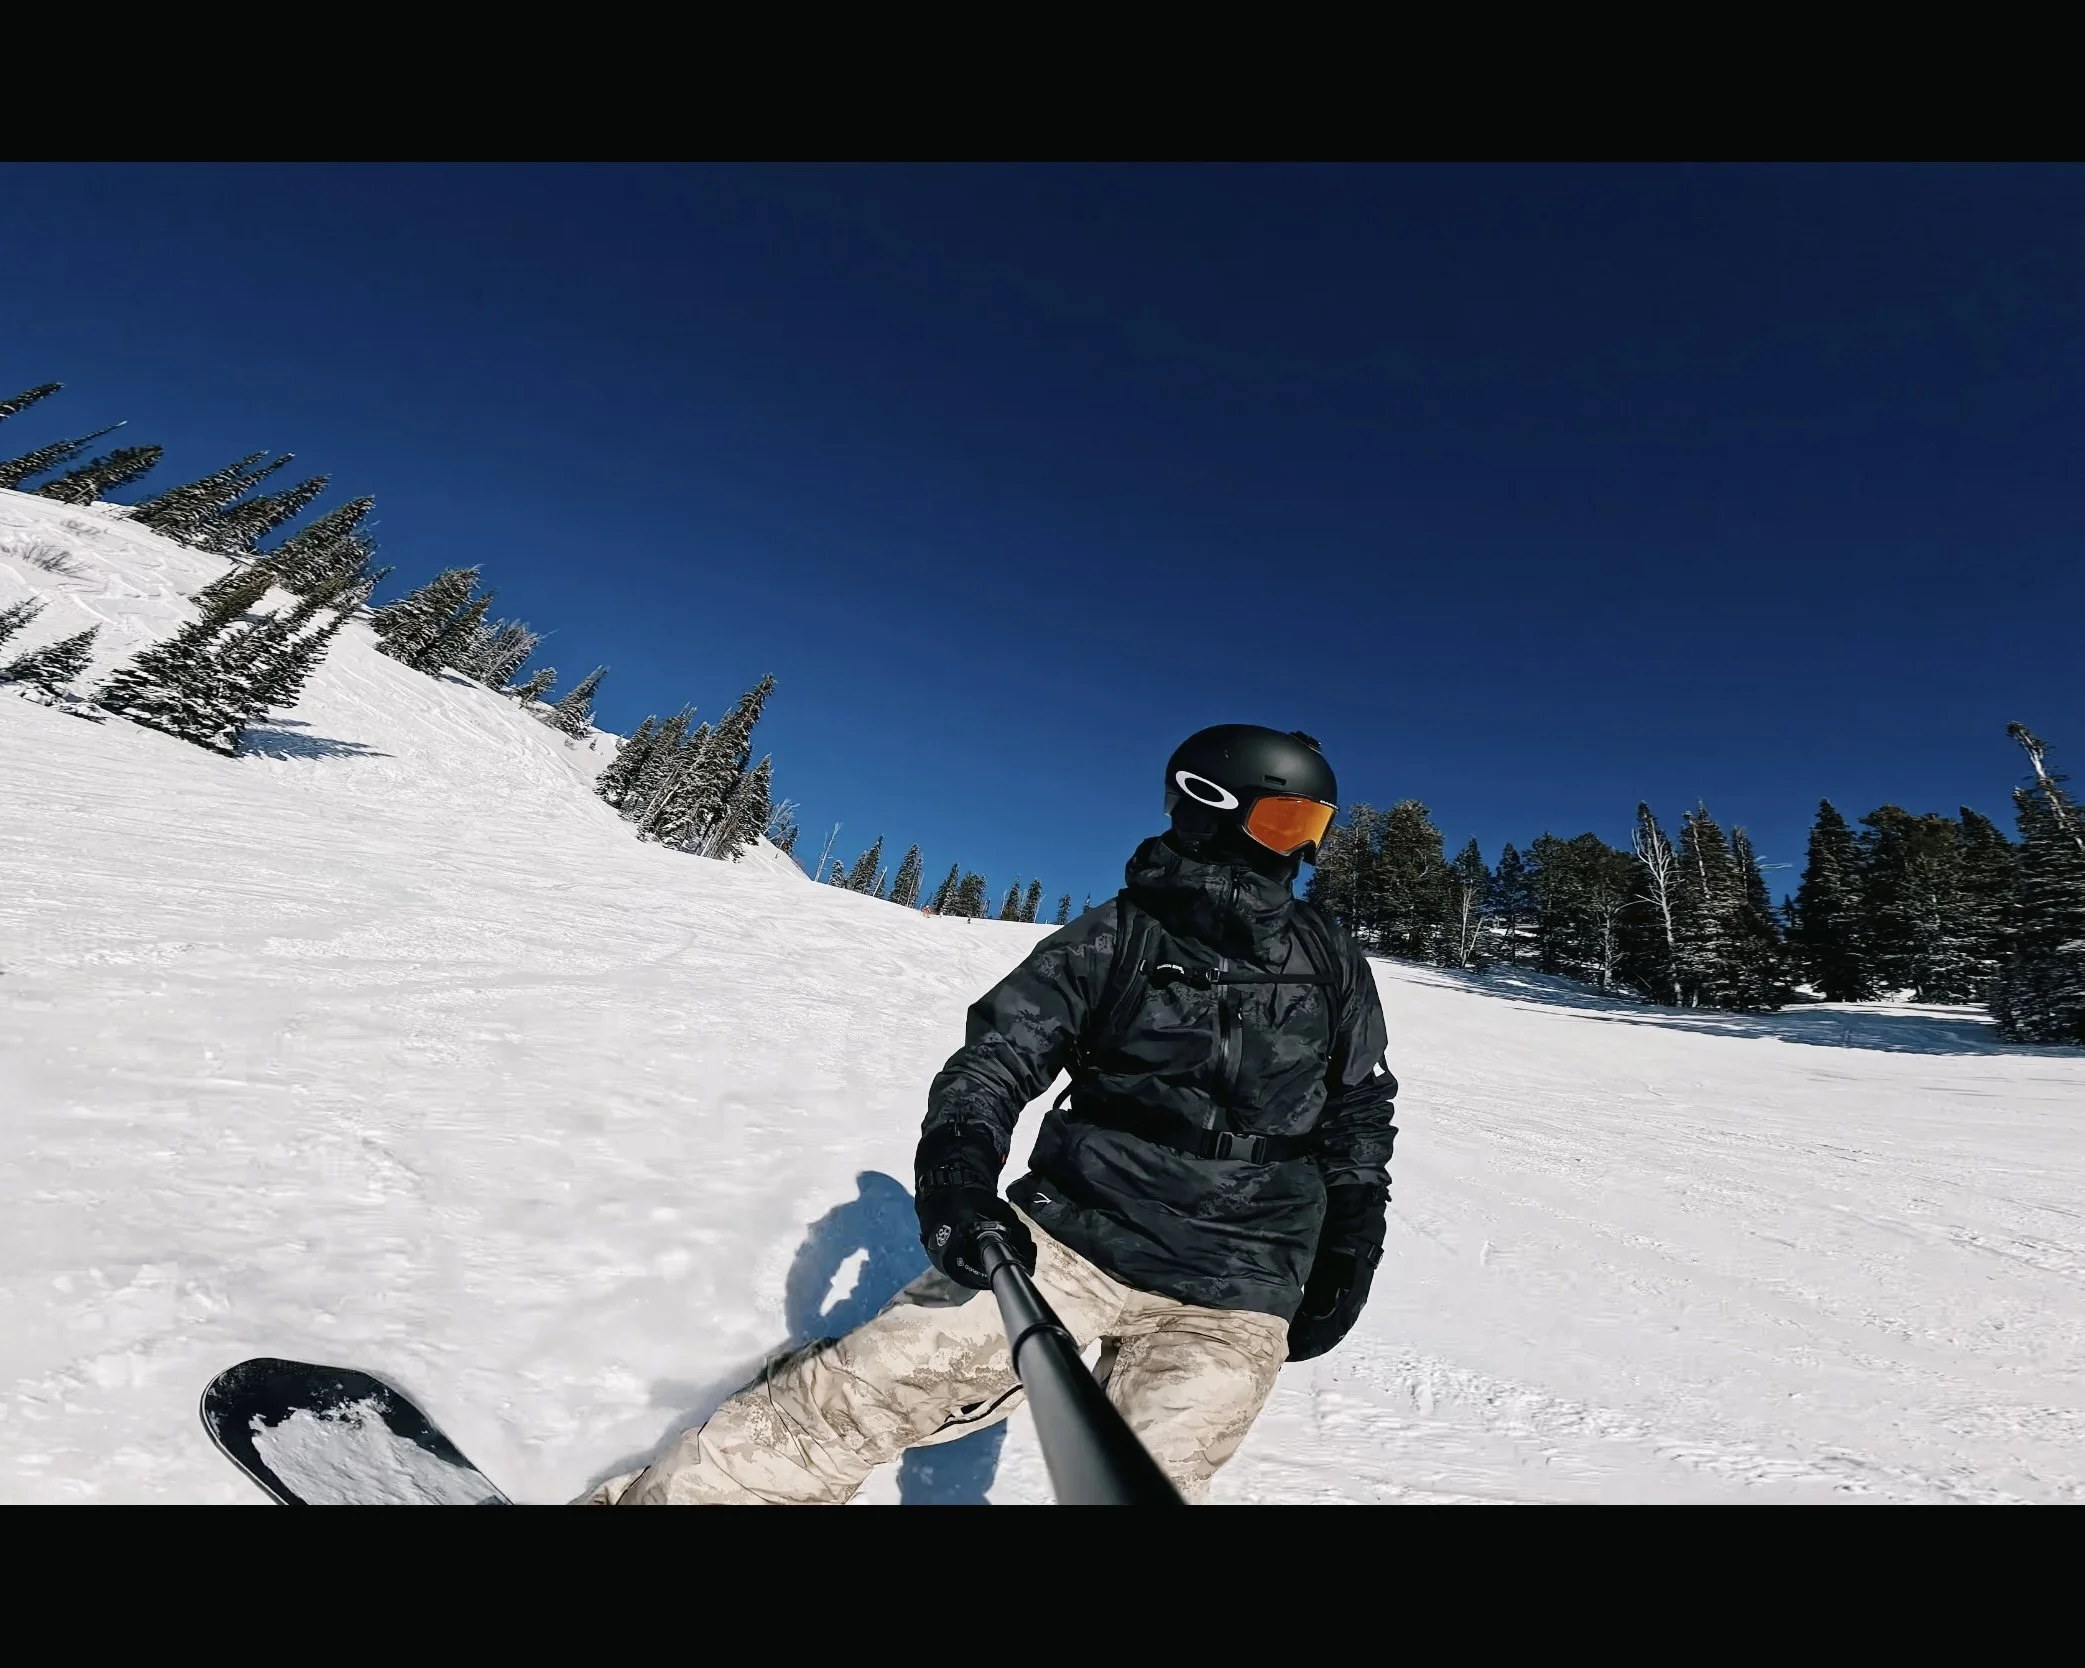
Camera: Leica MP (film)
Lens: Summilux 35mm f/1.4 ASPH steel rim reissue
Film: Kodak Ektachrome 100 (E-6 slide film)
Lab: Richard Photo Lab, California (standard E-6 process)
Total frames shot: 290 (8 rolls)
Why Ektachrome for the Desert

Ektachrome is a slide film. It renders color differently than negative film — more saturated, more contrasty, less forgiving. Eggleston shot Kodachrome and later Ektachrome because the saturation matched his vision of the American South. That humid, green, decaying palette.
The American West is the opposite. Dry. Red. Blue sky so intense it almost vibrates.
I wanted to see what Ektachrome would do to that.
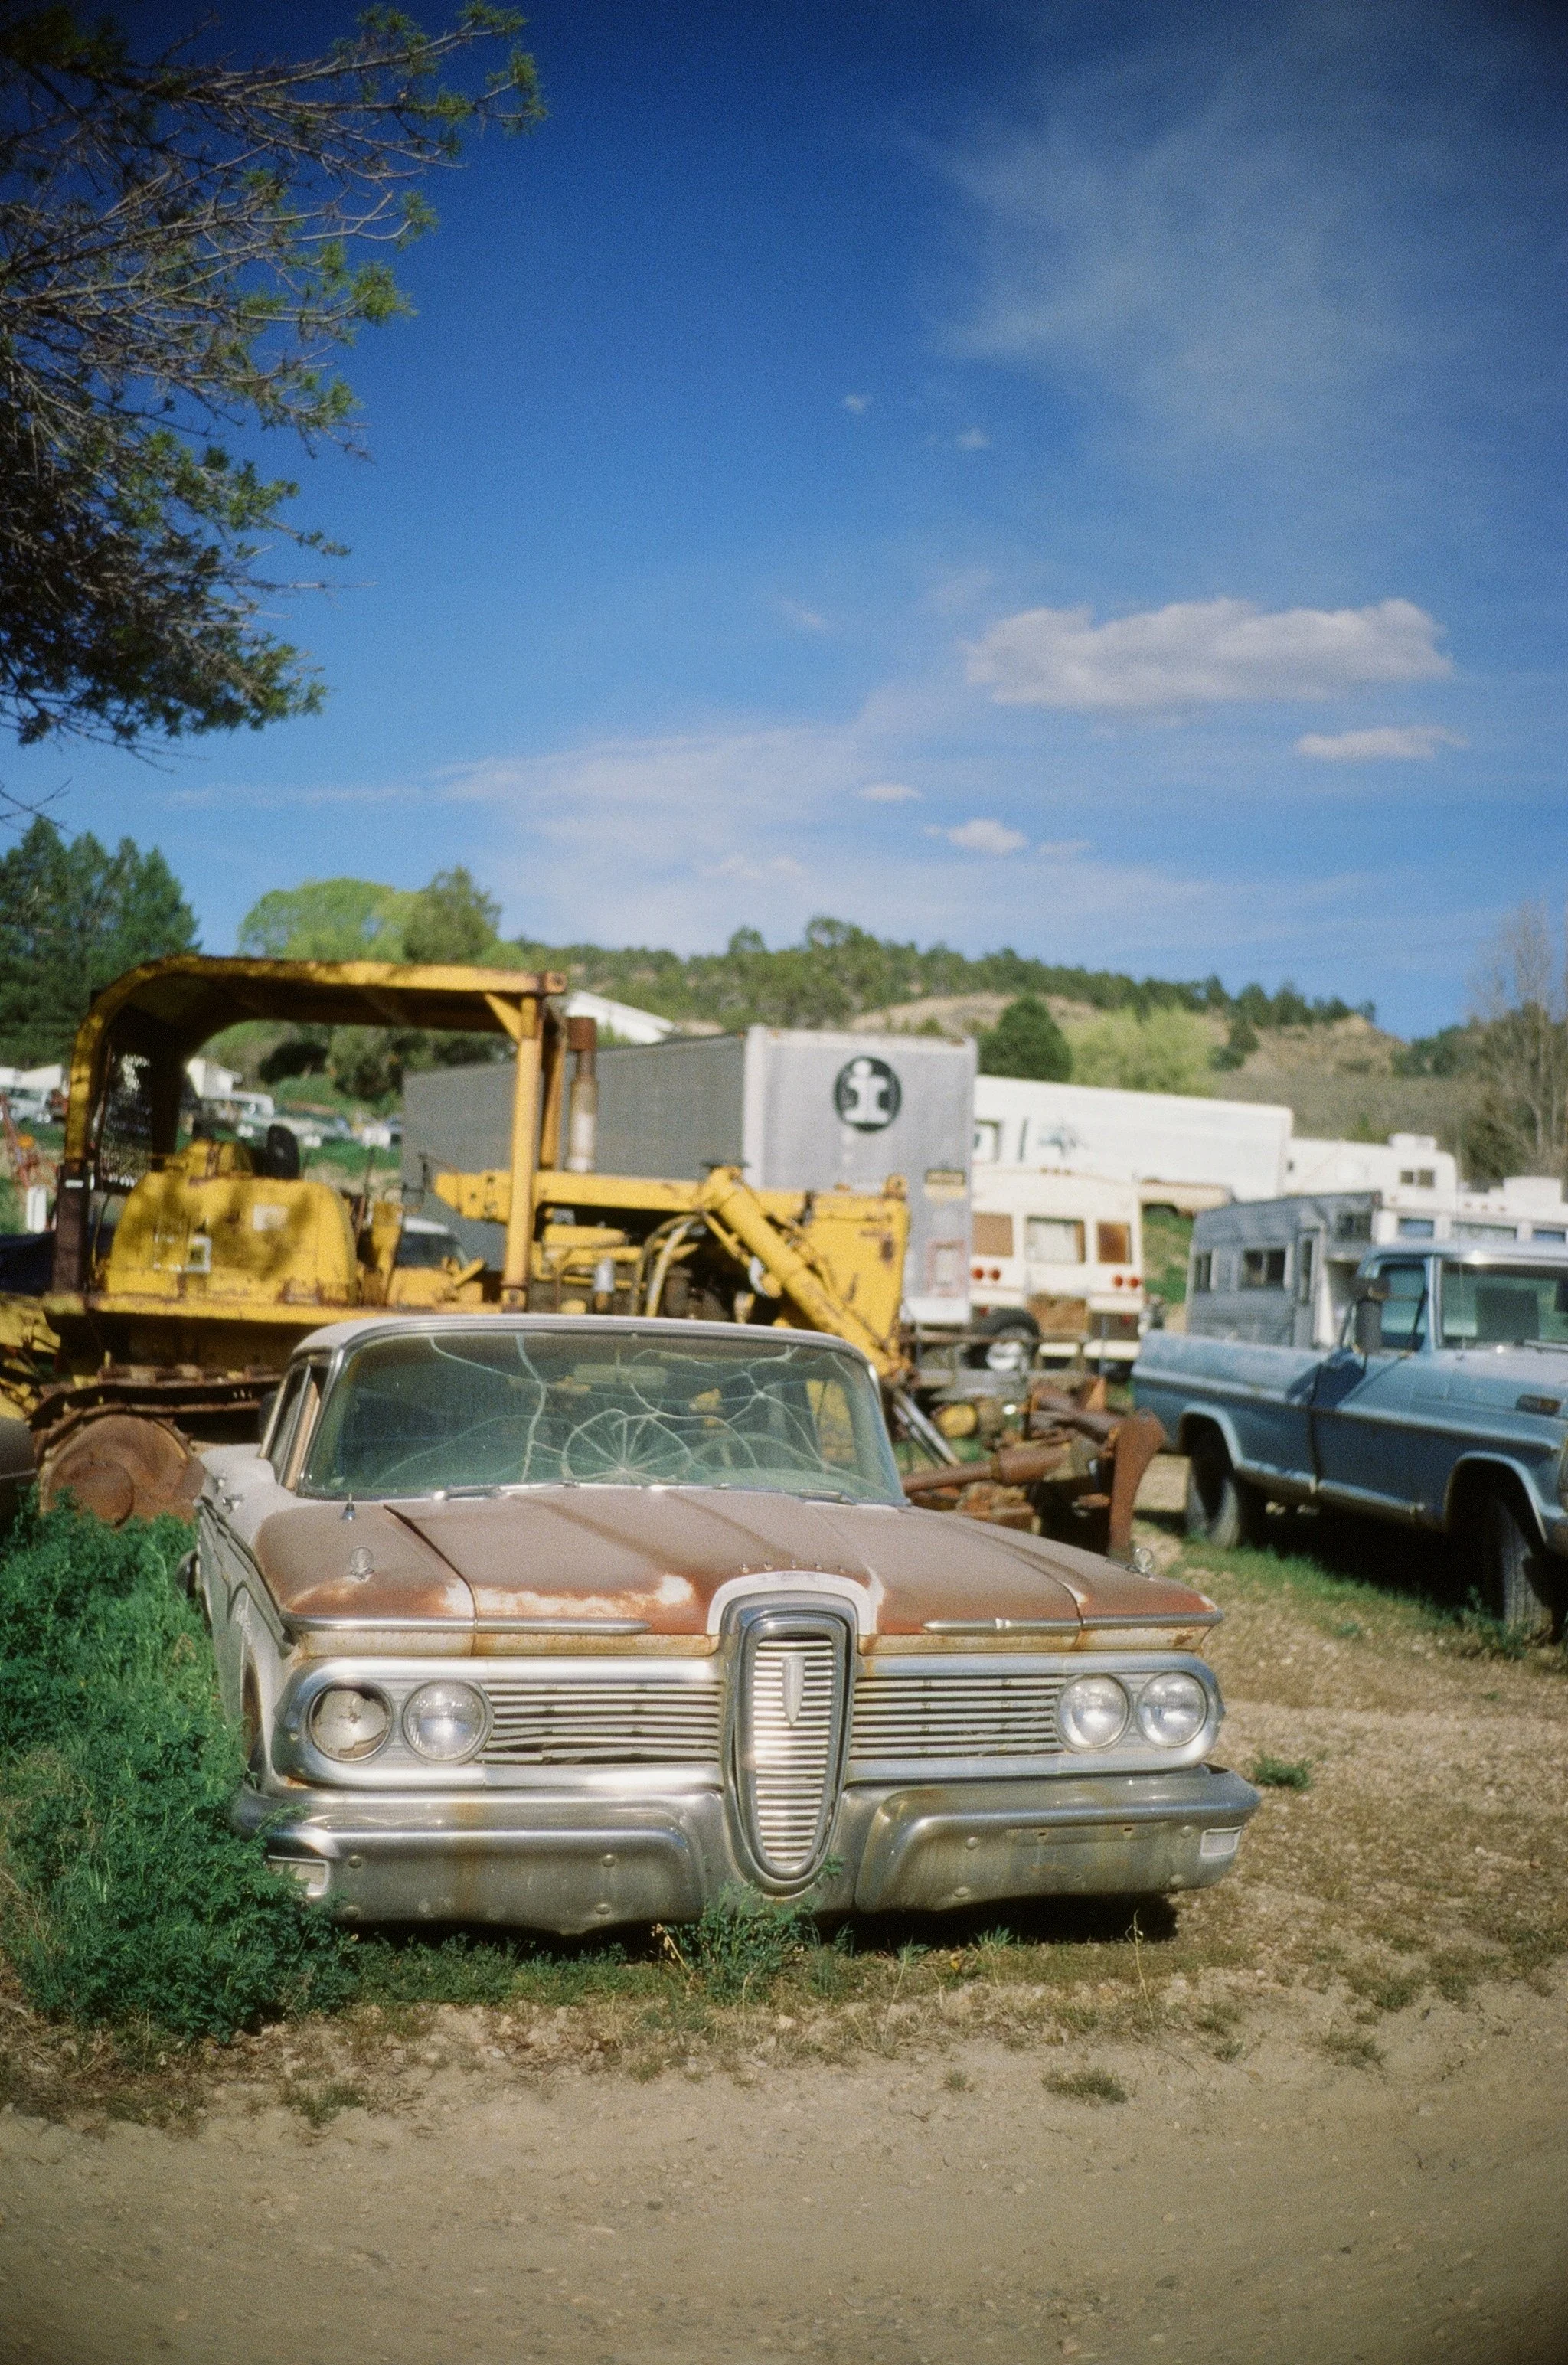
The answer: it rendered the desert exactly as it looked. Not undersaturated. Not blown out. The reds in Sedona stayed red. The sky stayed impossibly blue. The rust on abandoned gas stations and vintage car junkyards stayed rust.
Slide film does not lie. It does not forgive bad exposure. It does not give you latitude to pull shadows or recover highlights in post. You meter carefully, you expose correctly, or you lose the shot.
I metered every frame. No sunny 16. No guessing. The Leica MP's built-in meter handled the desert light without issue. Ektachrome 100 at box speed, standard E-6 processing at Richard Photo Lab.
The scans came back exactly as expected. Clean. Sharp. Saturated. Film still delivers.
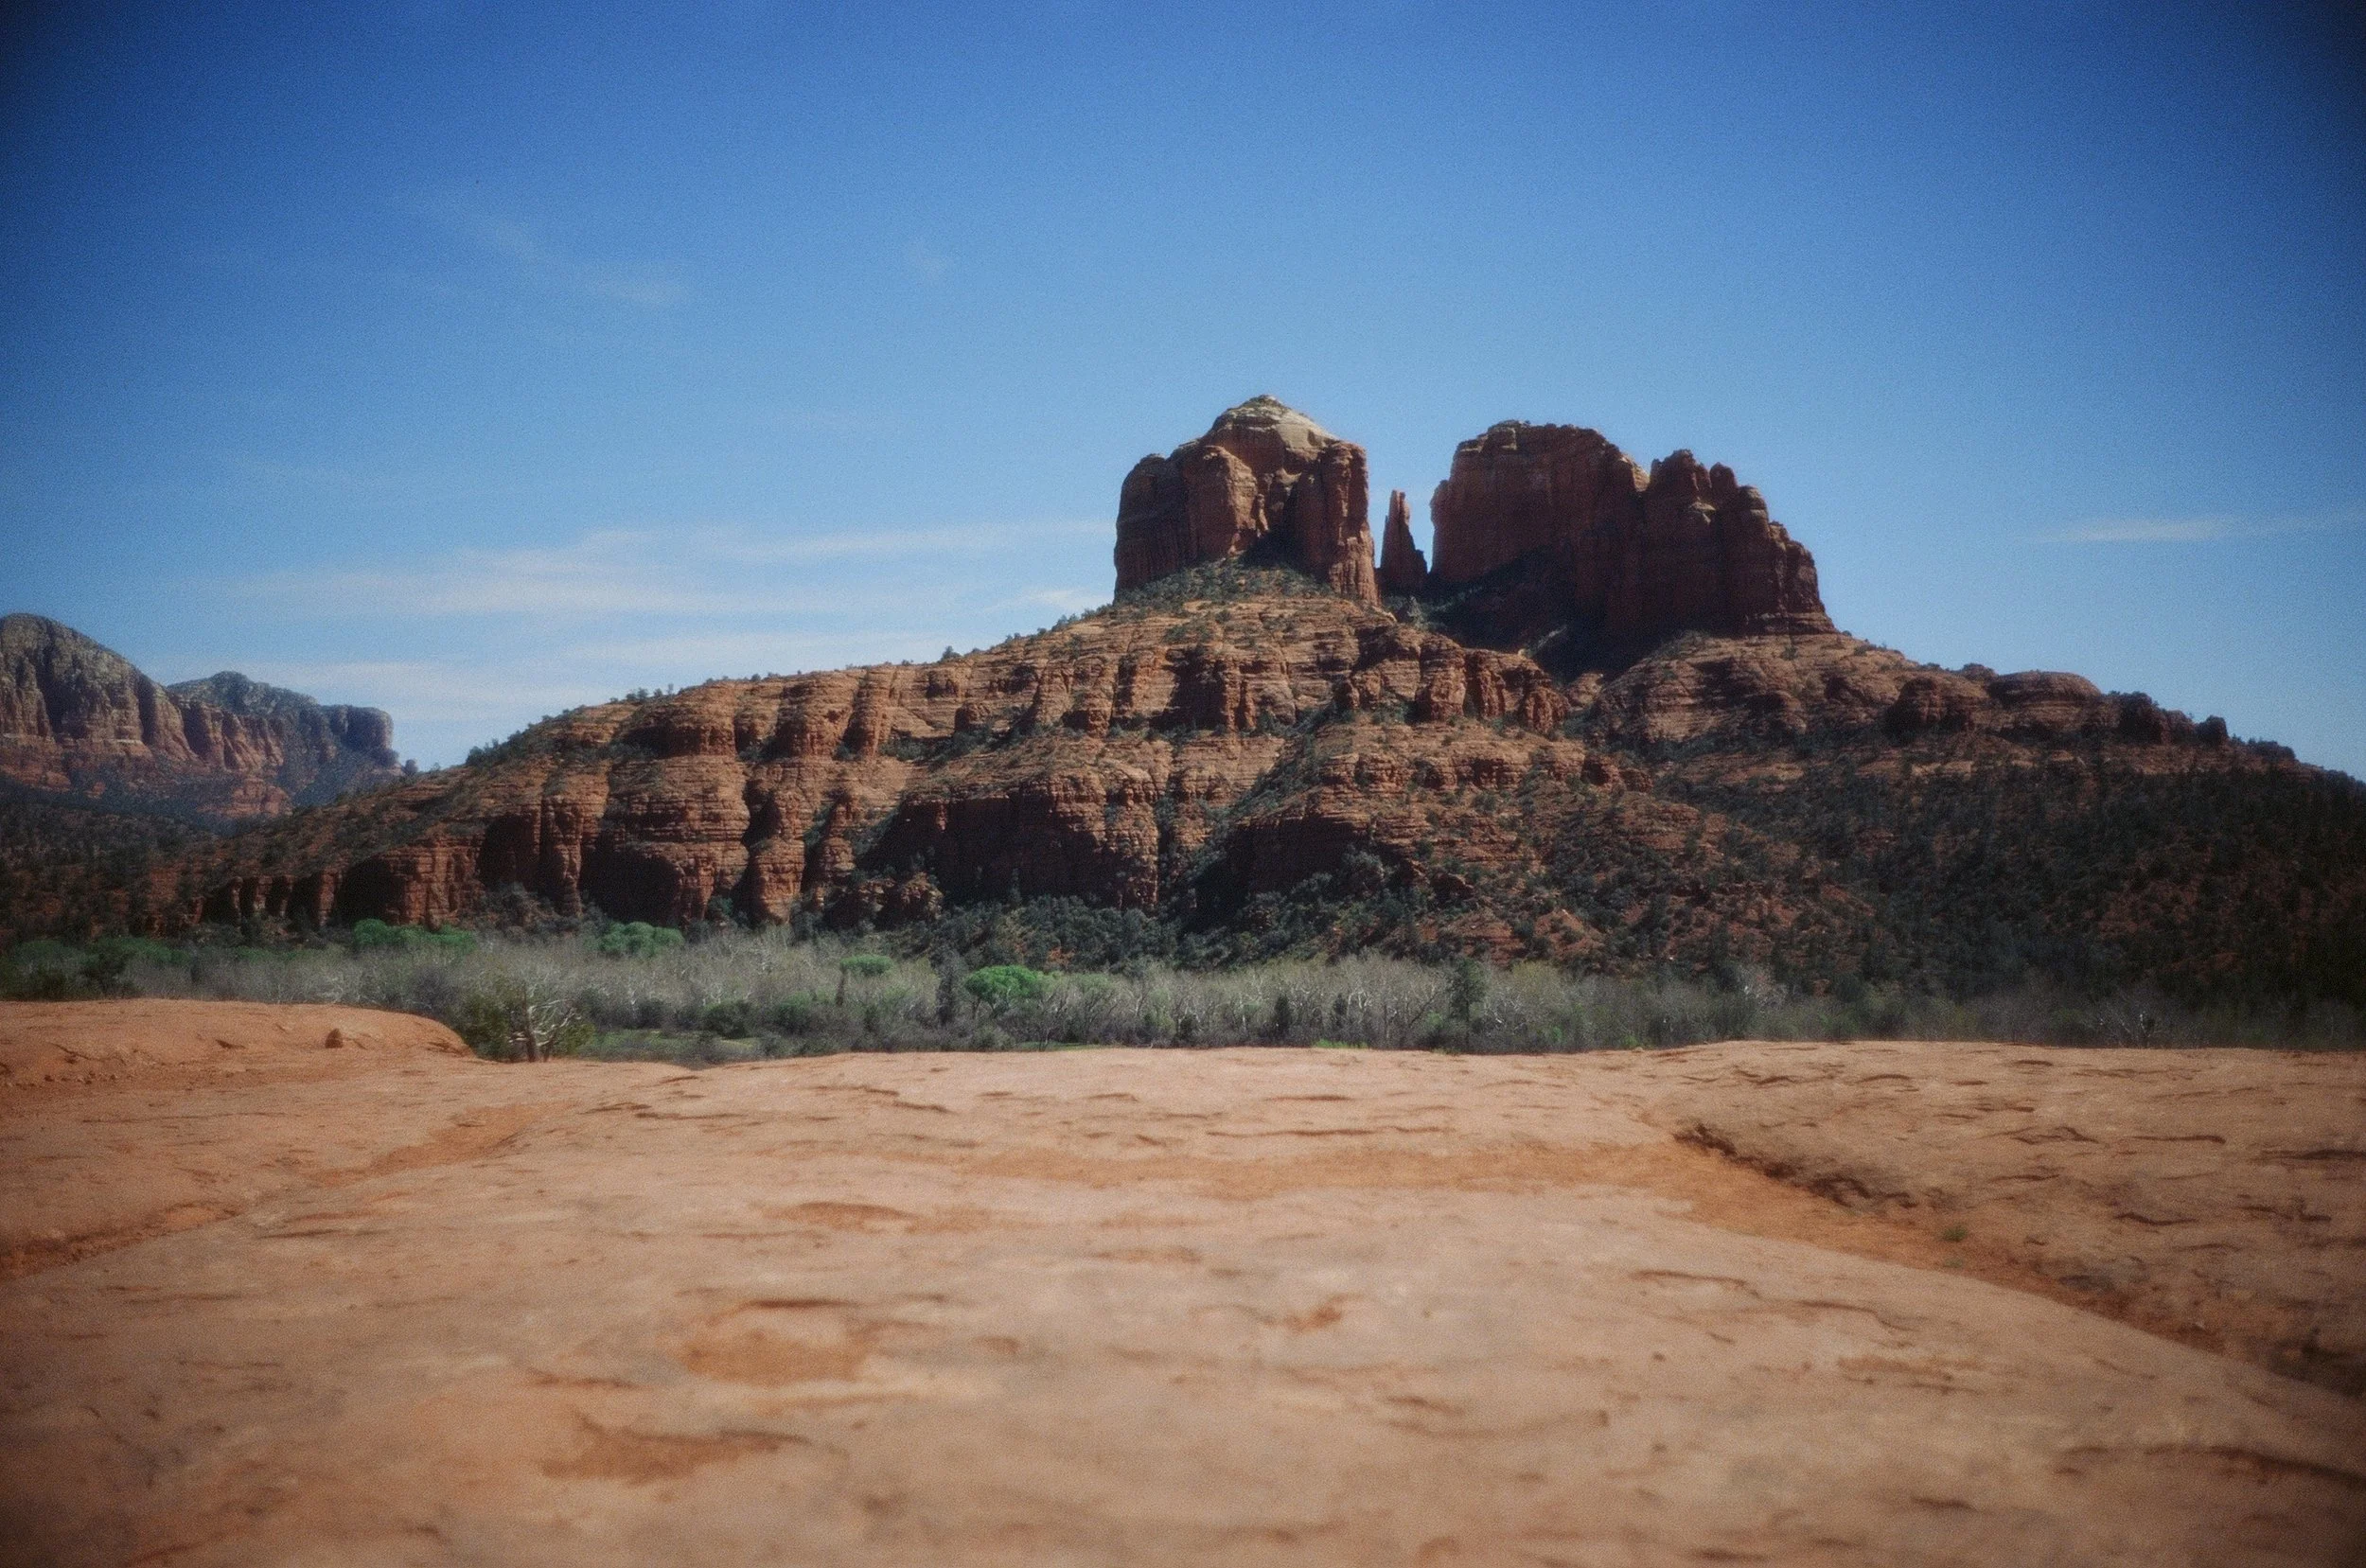
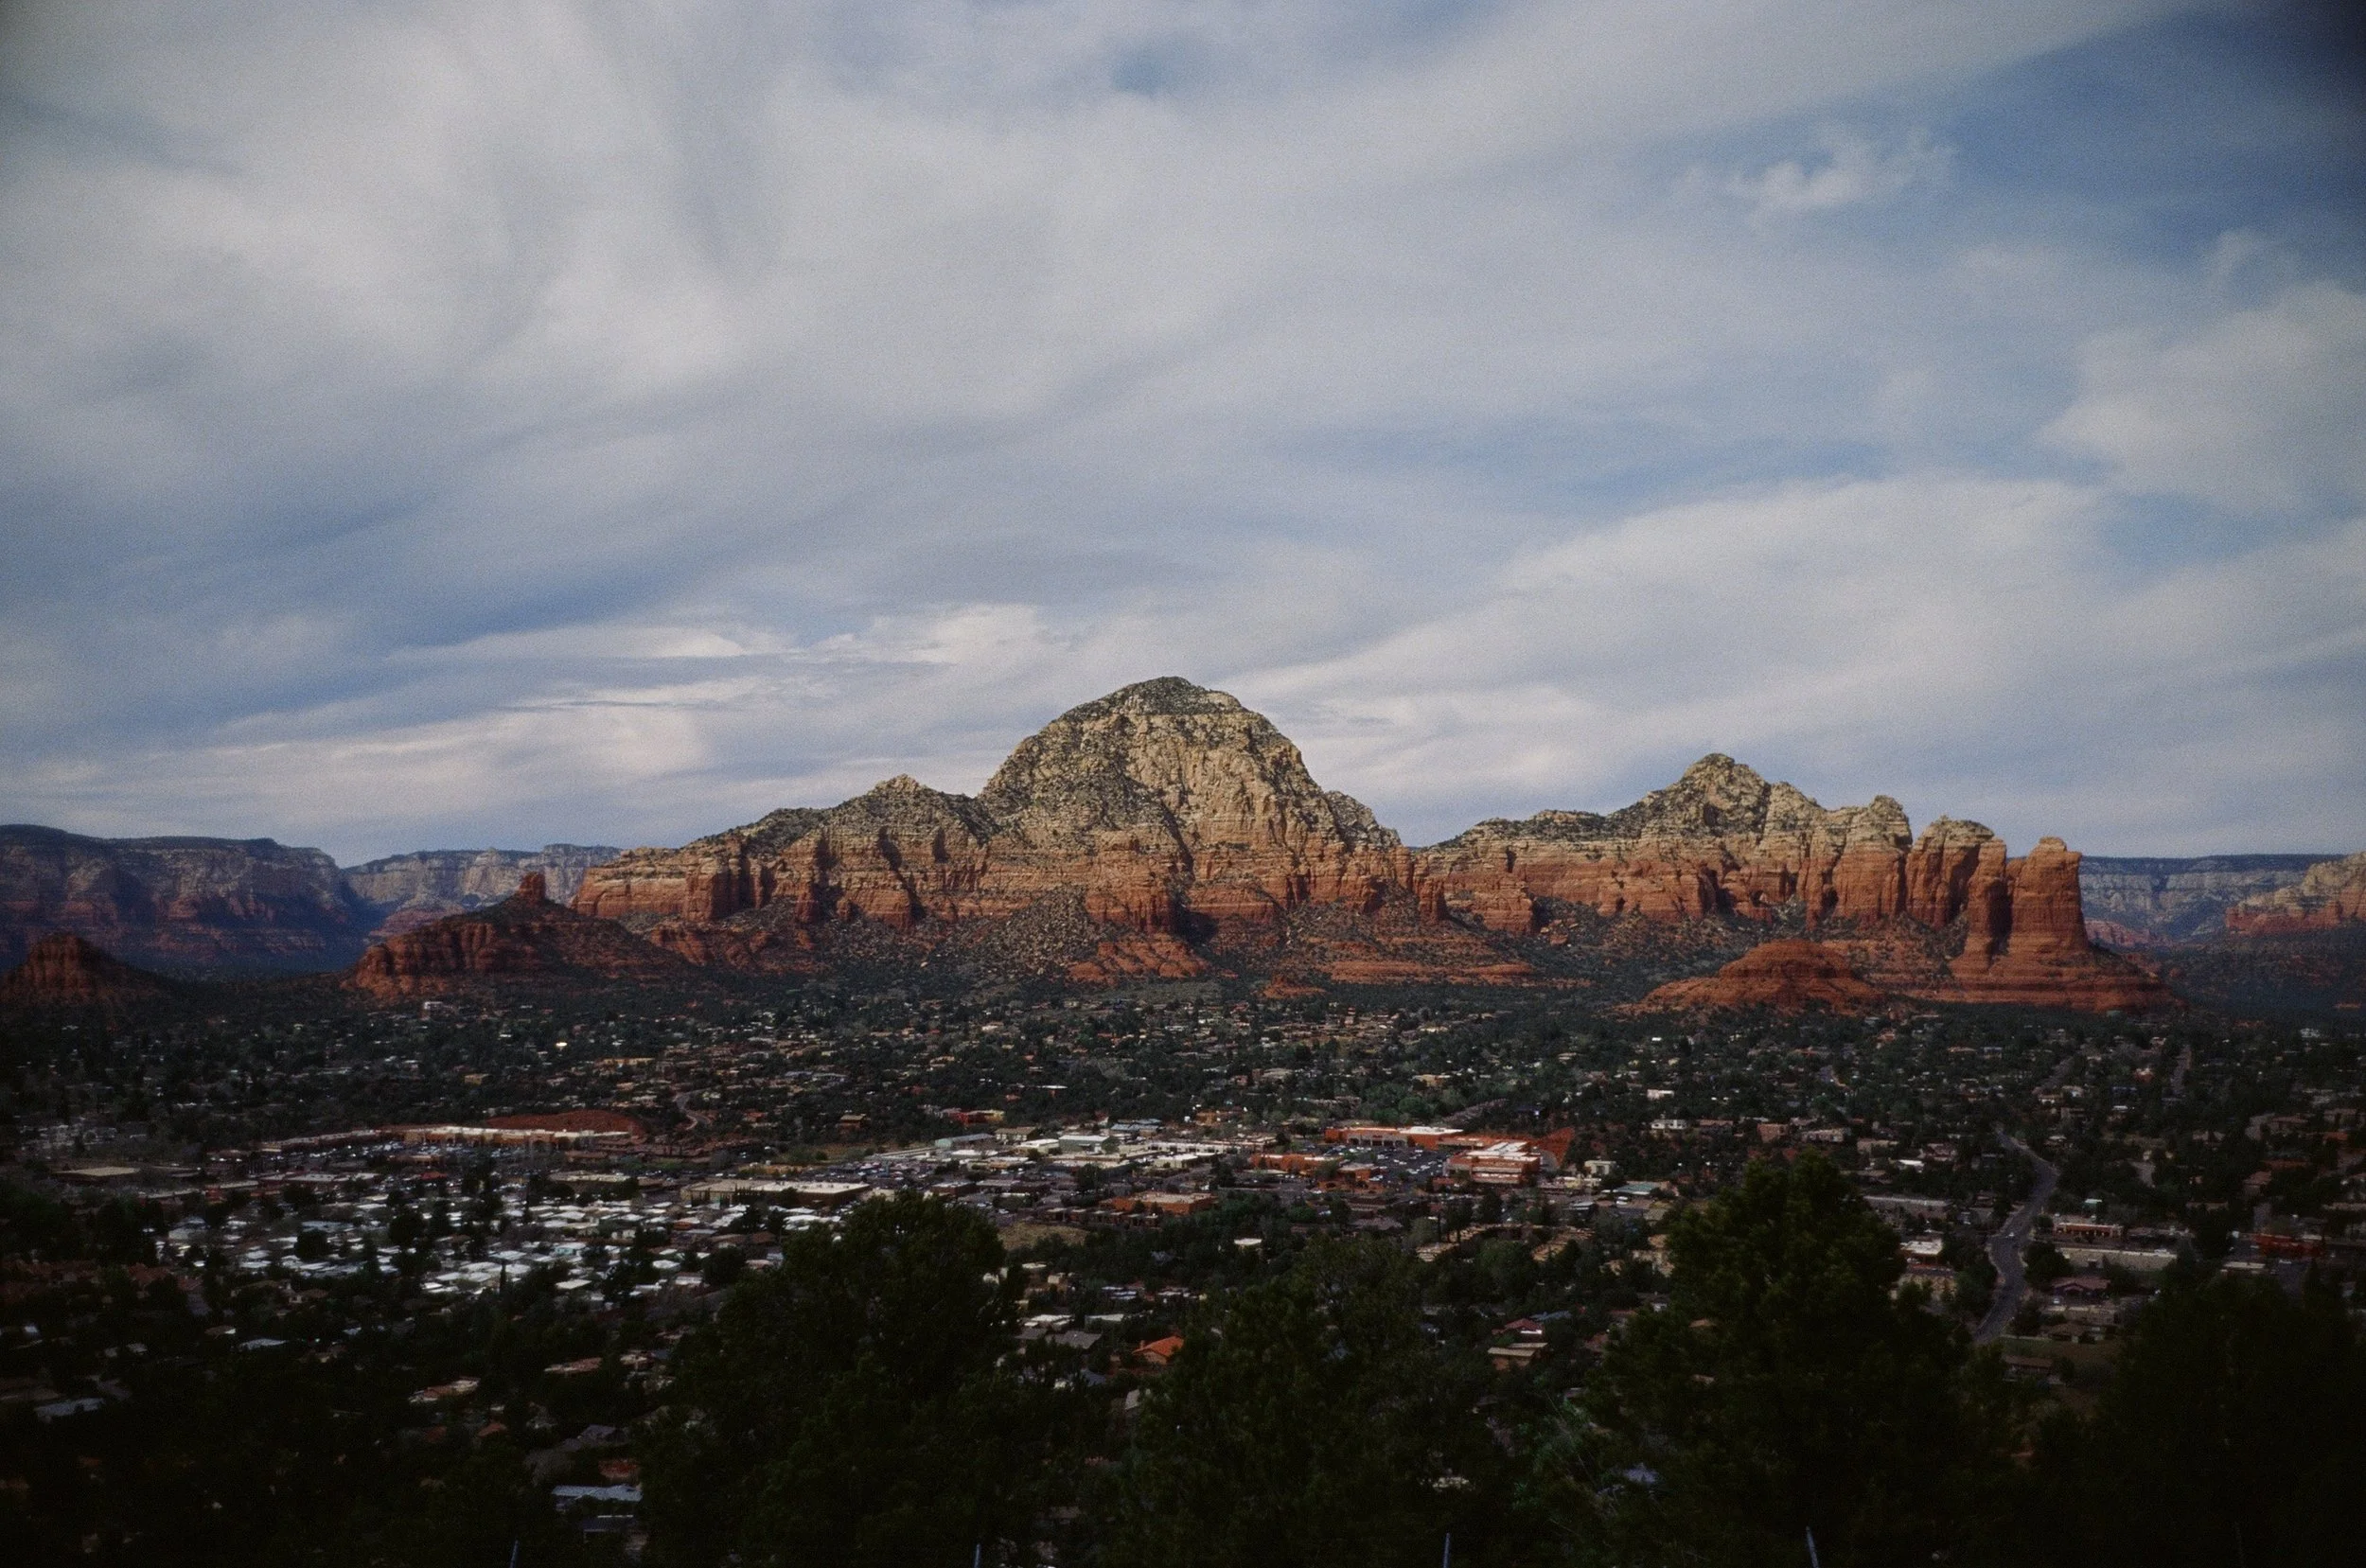
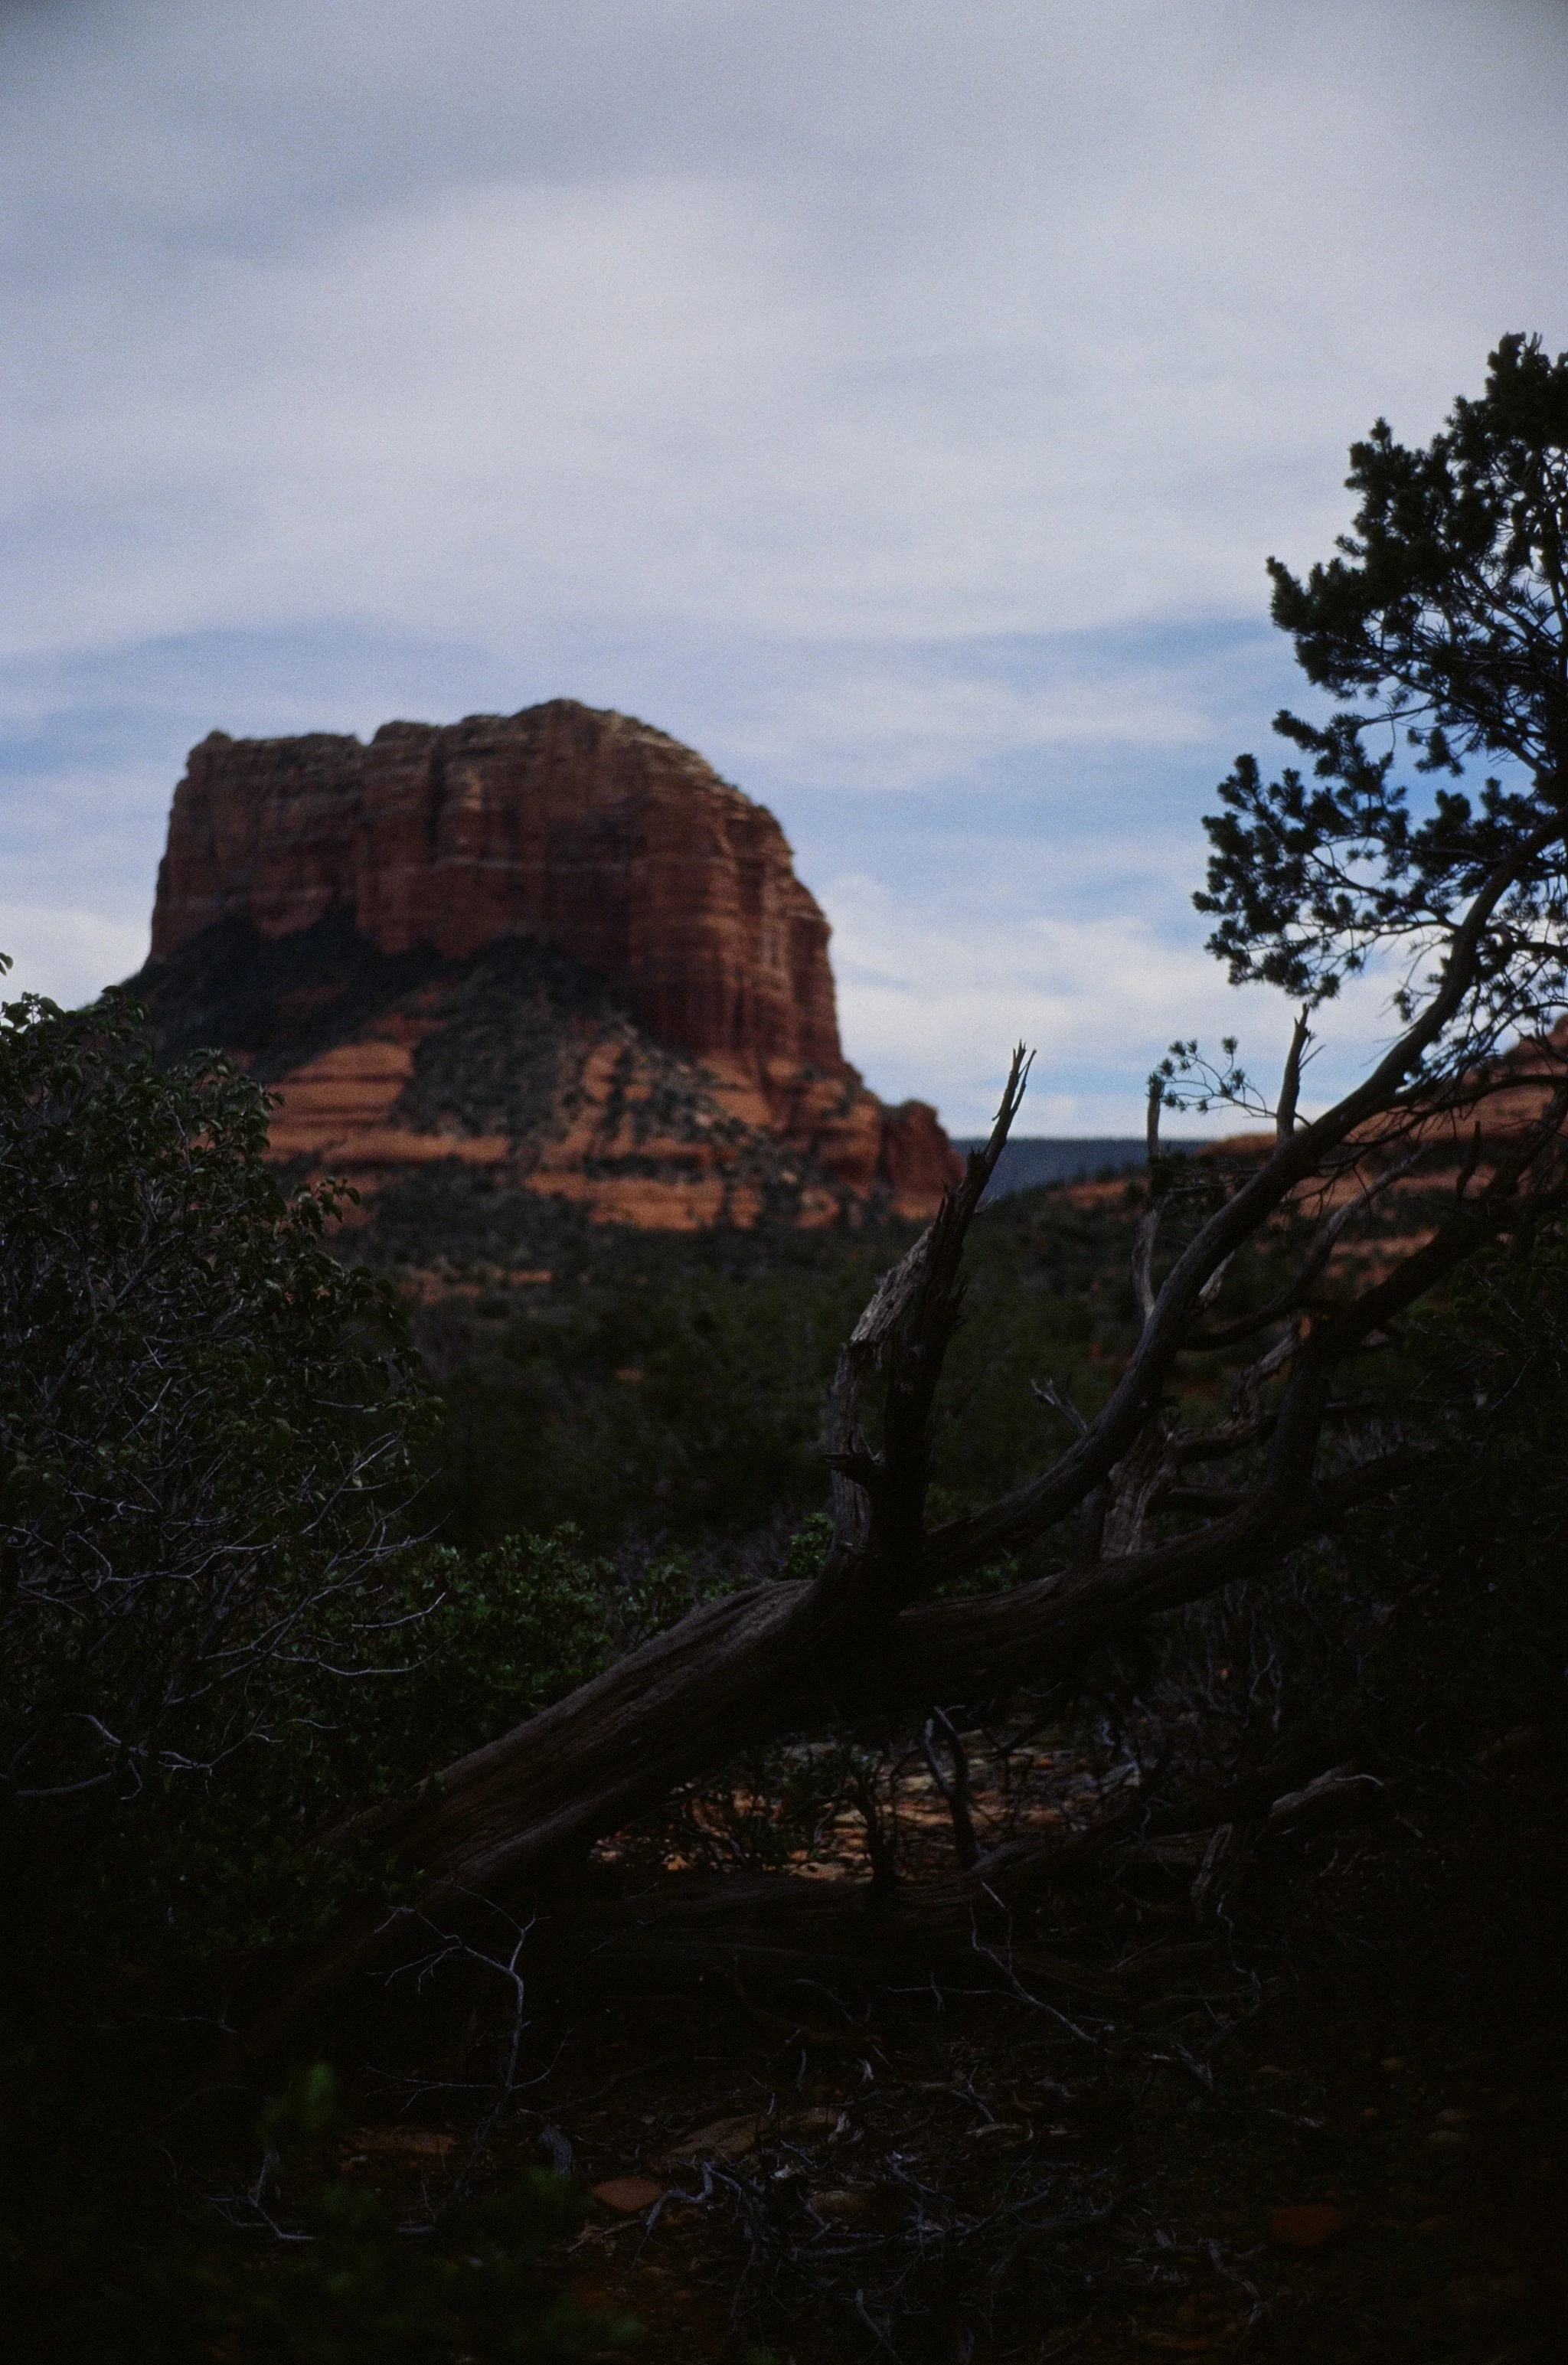
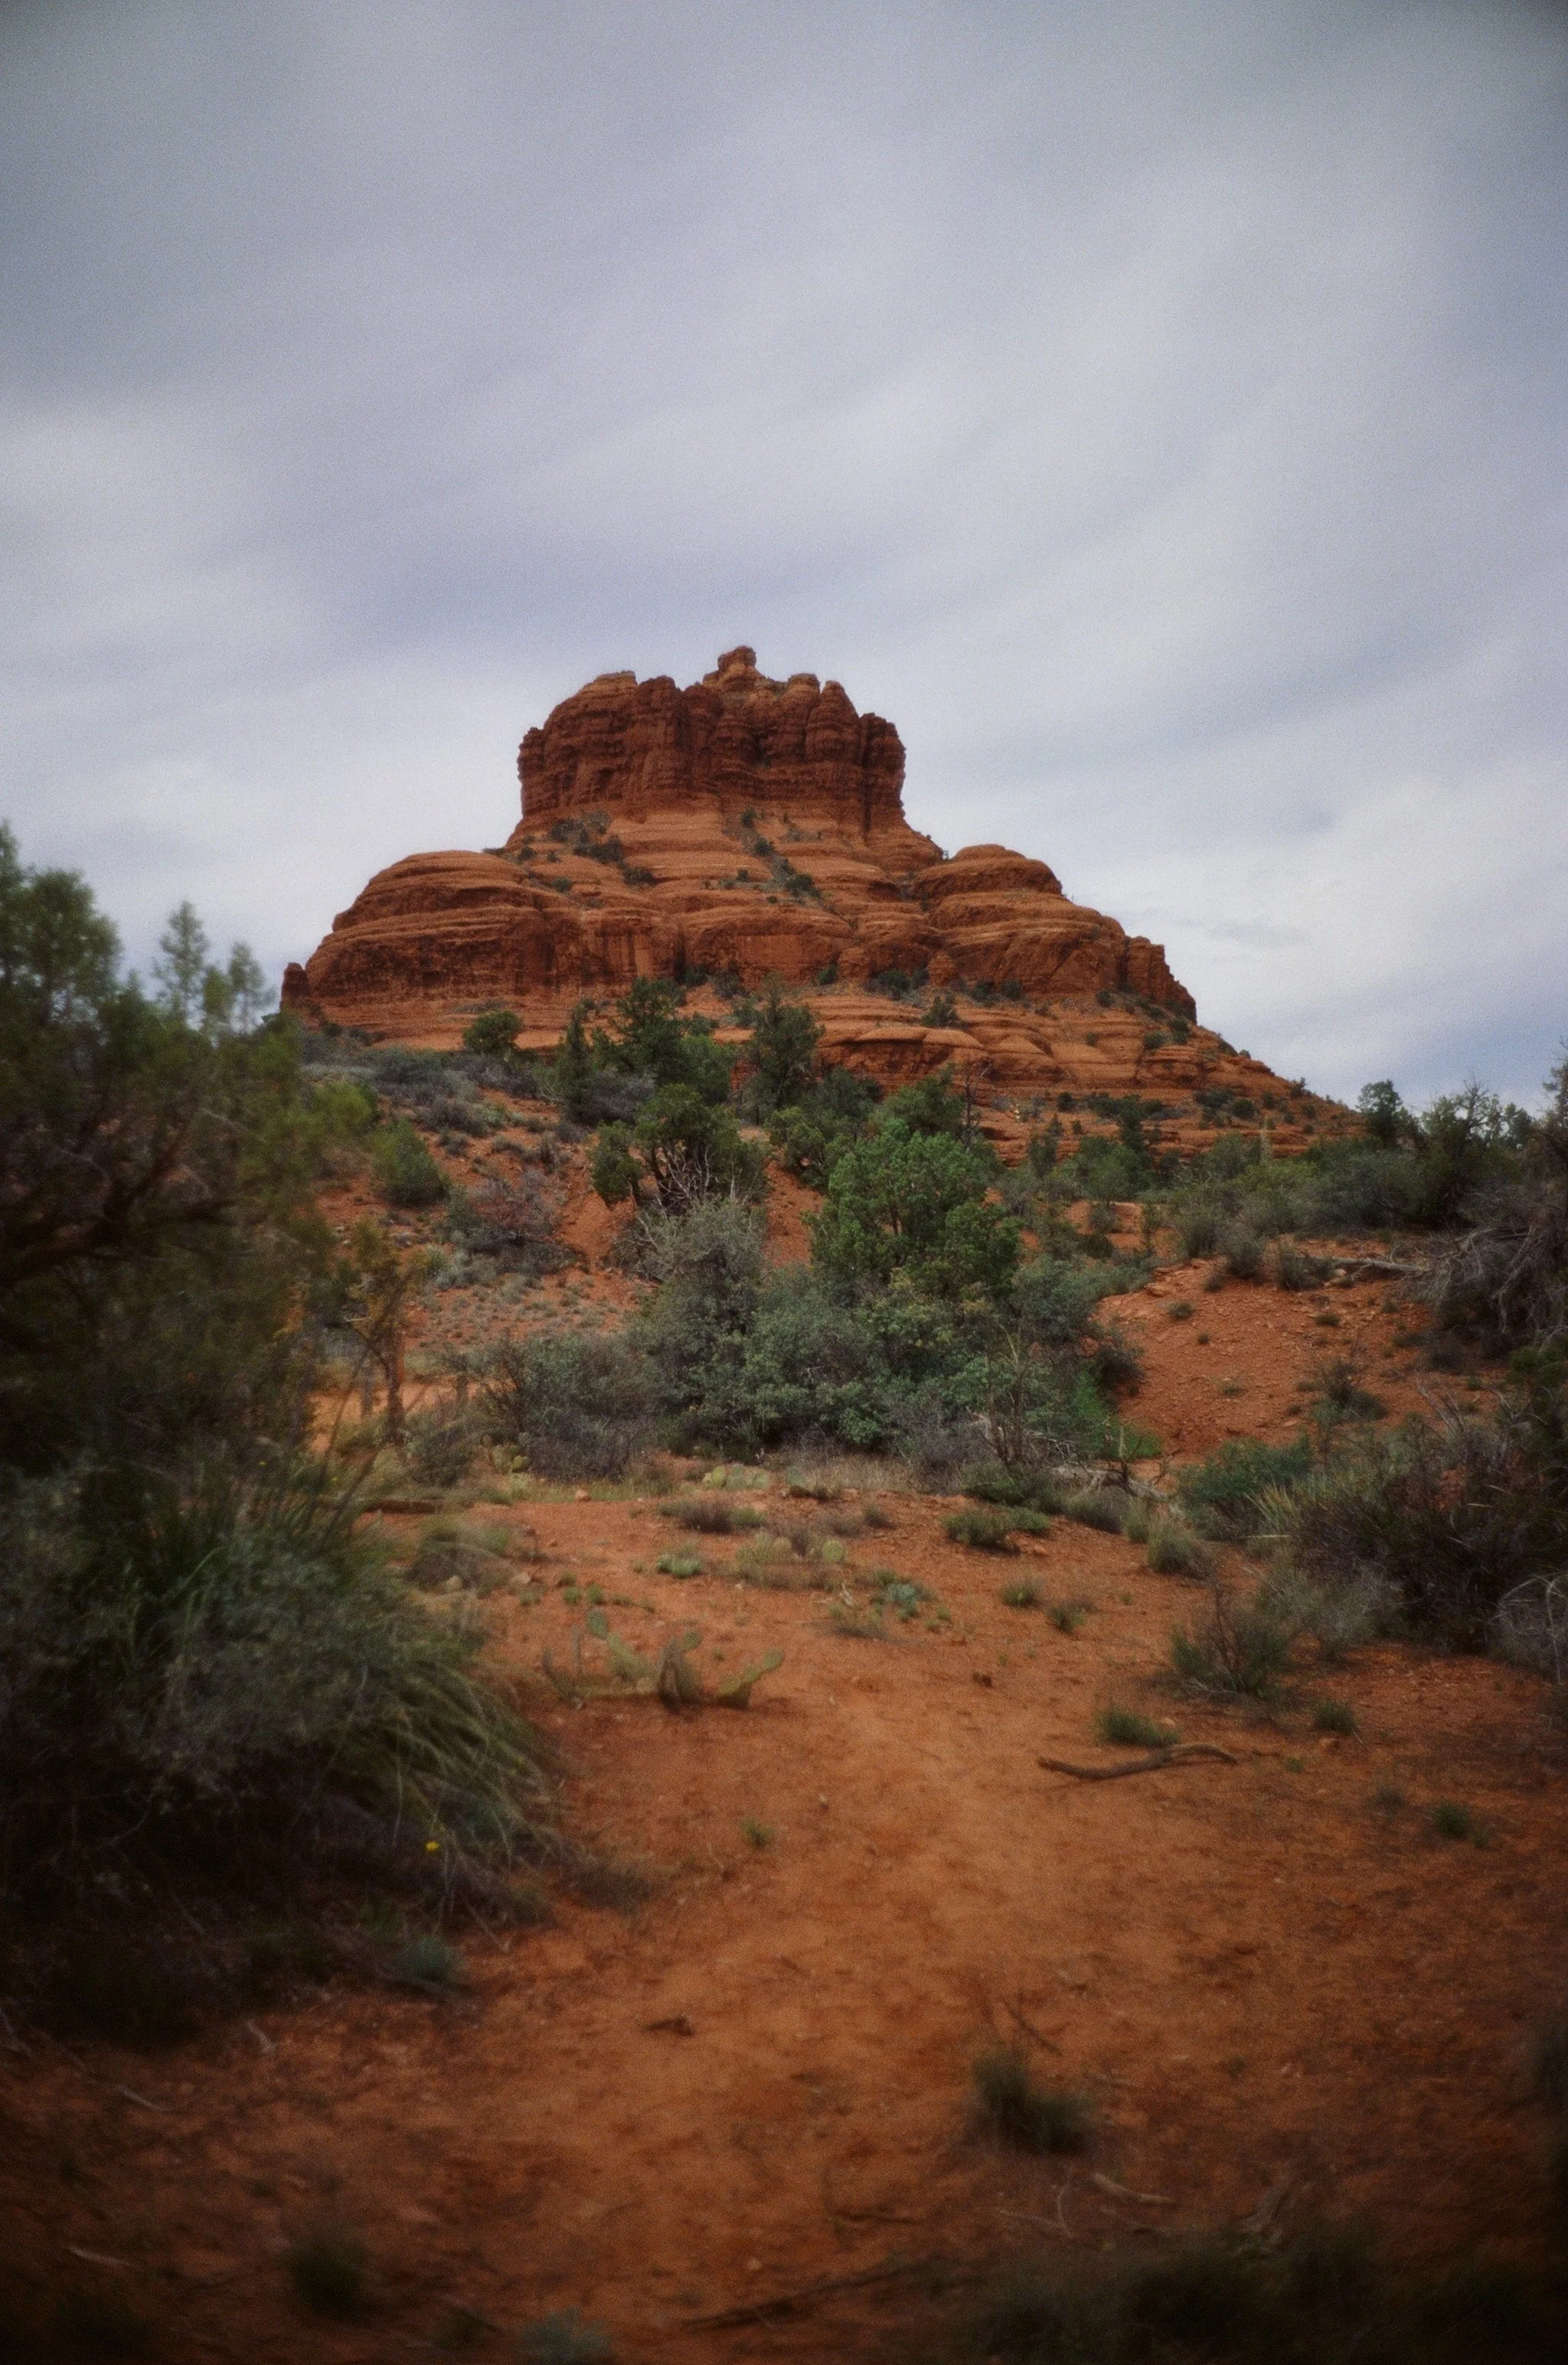
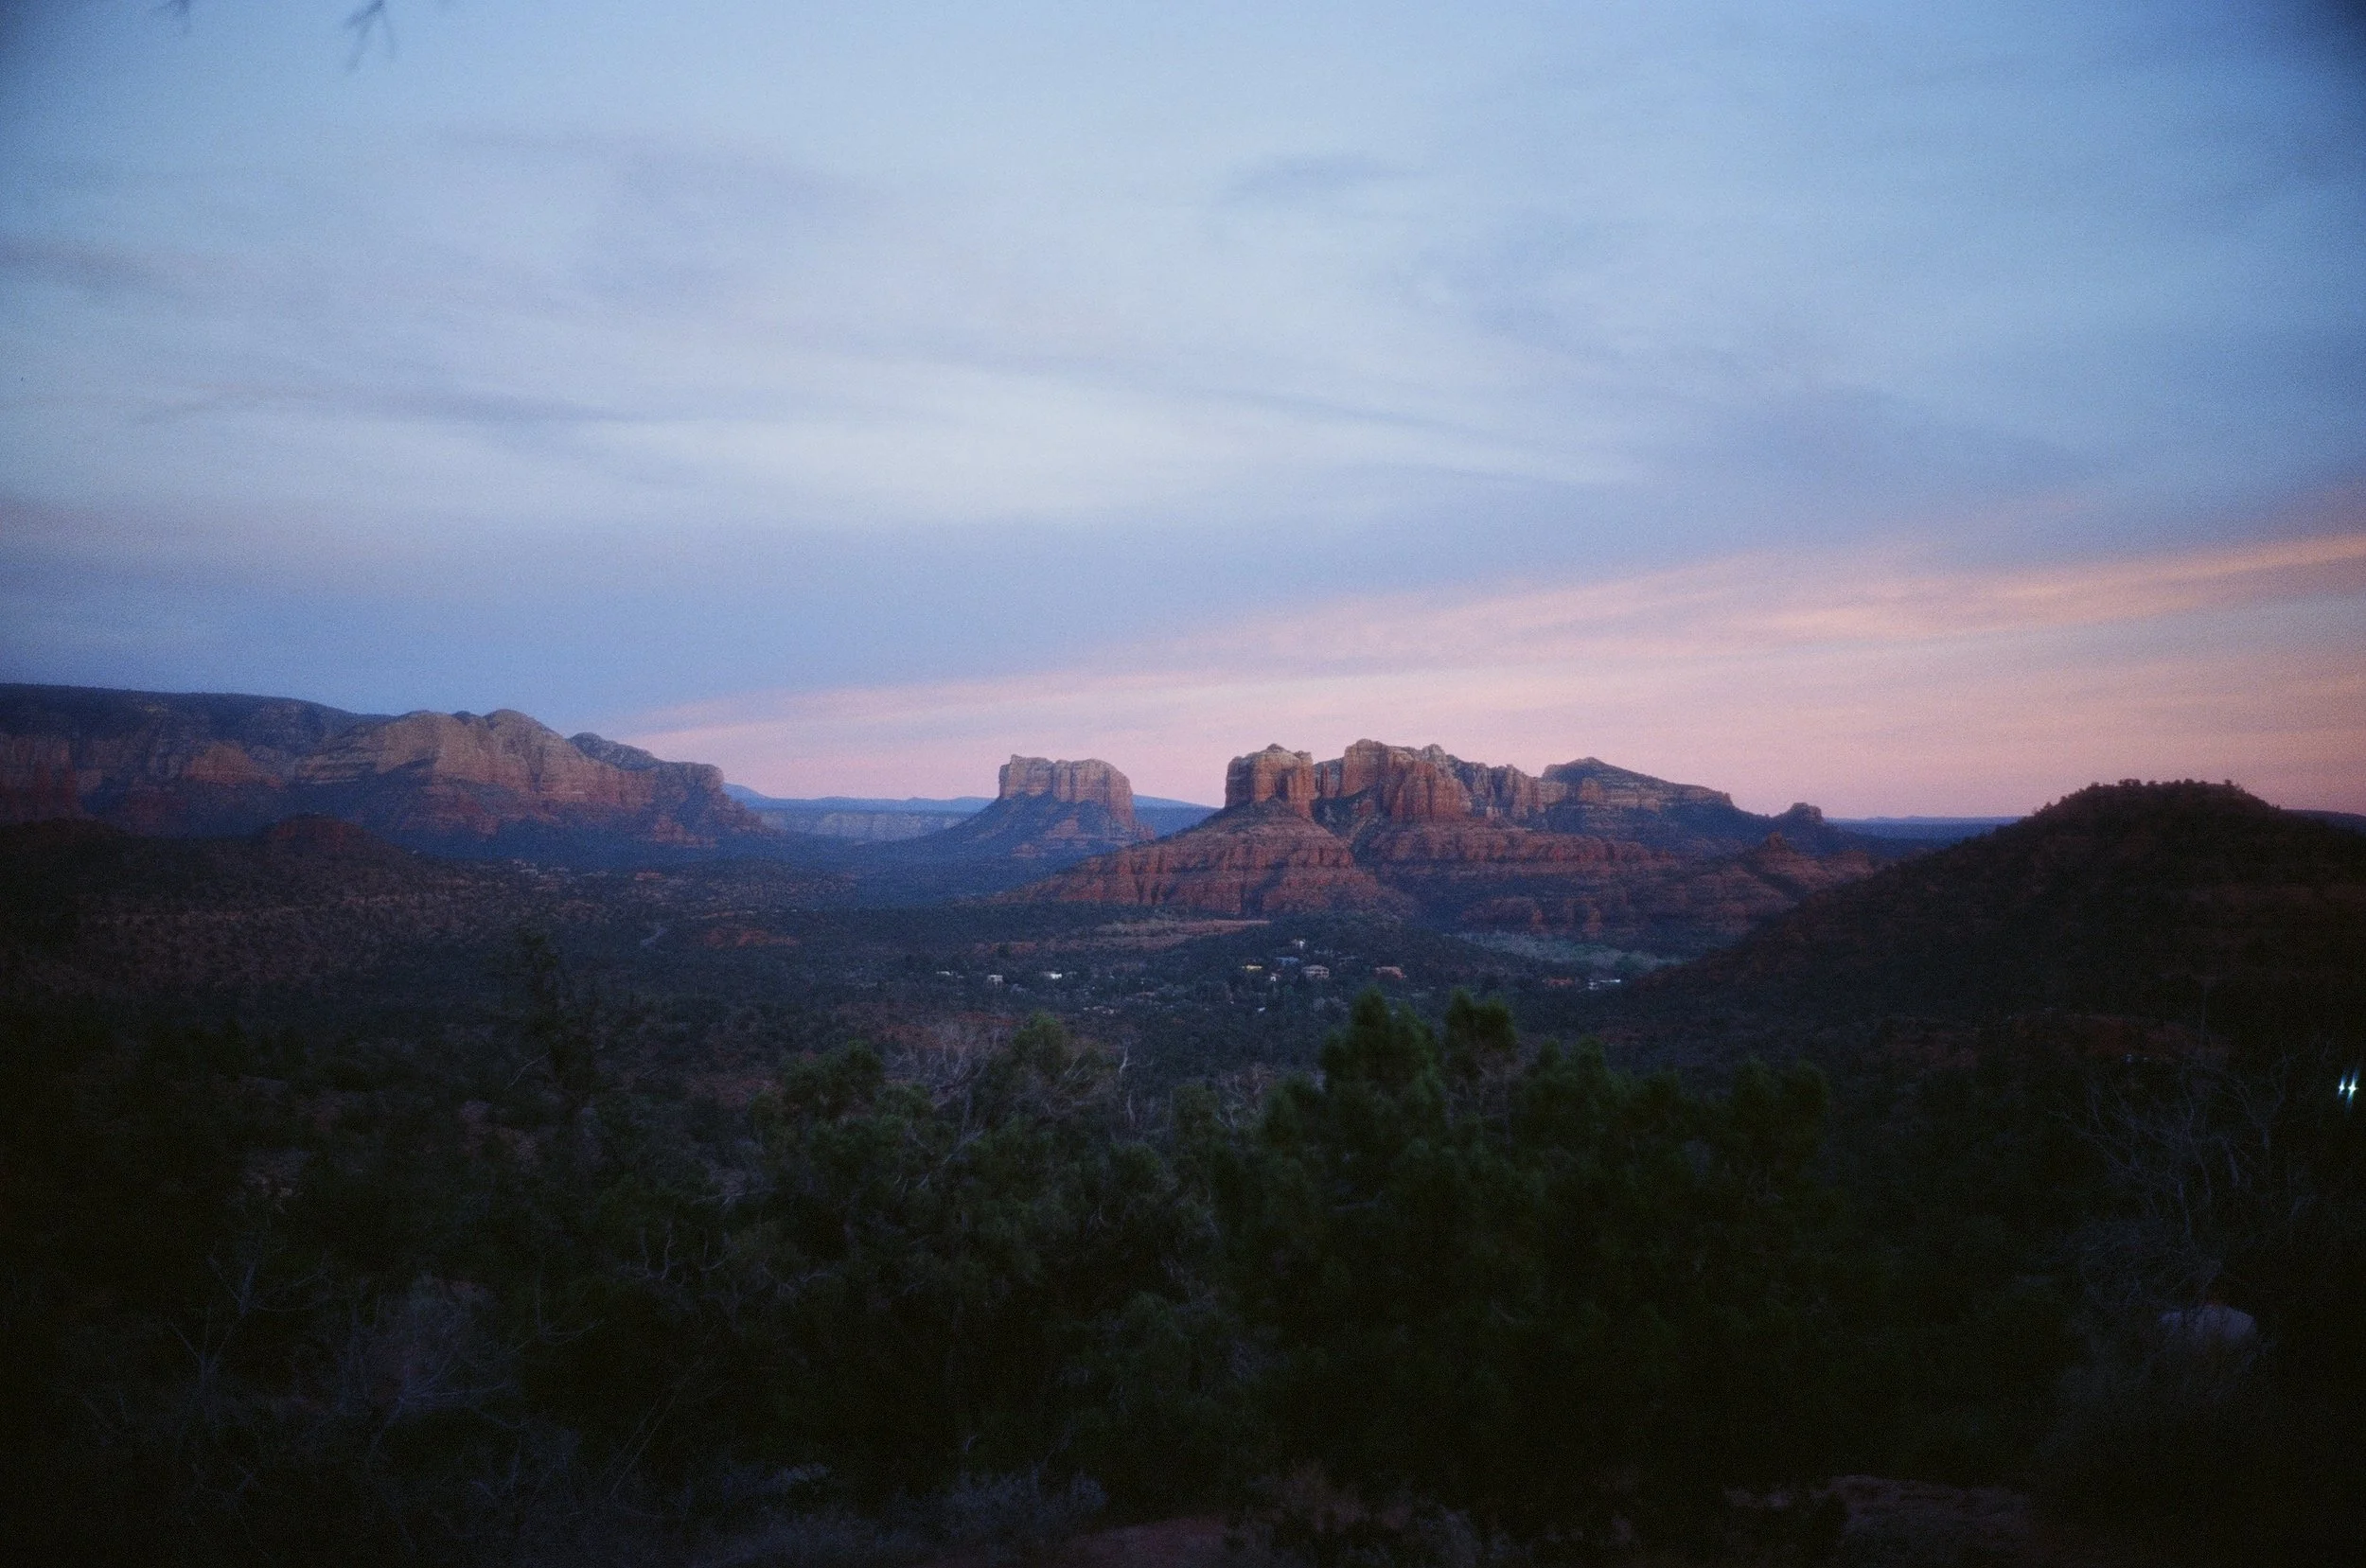
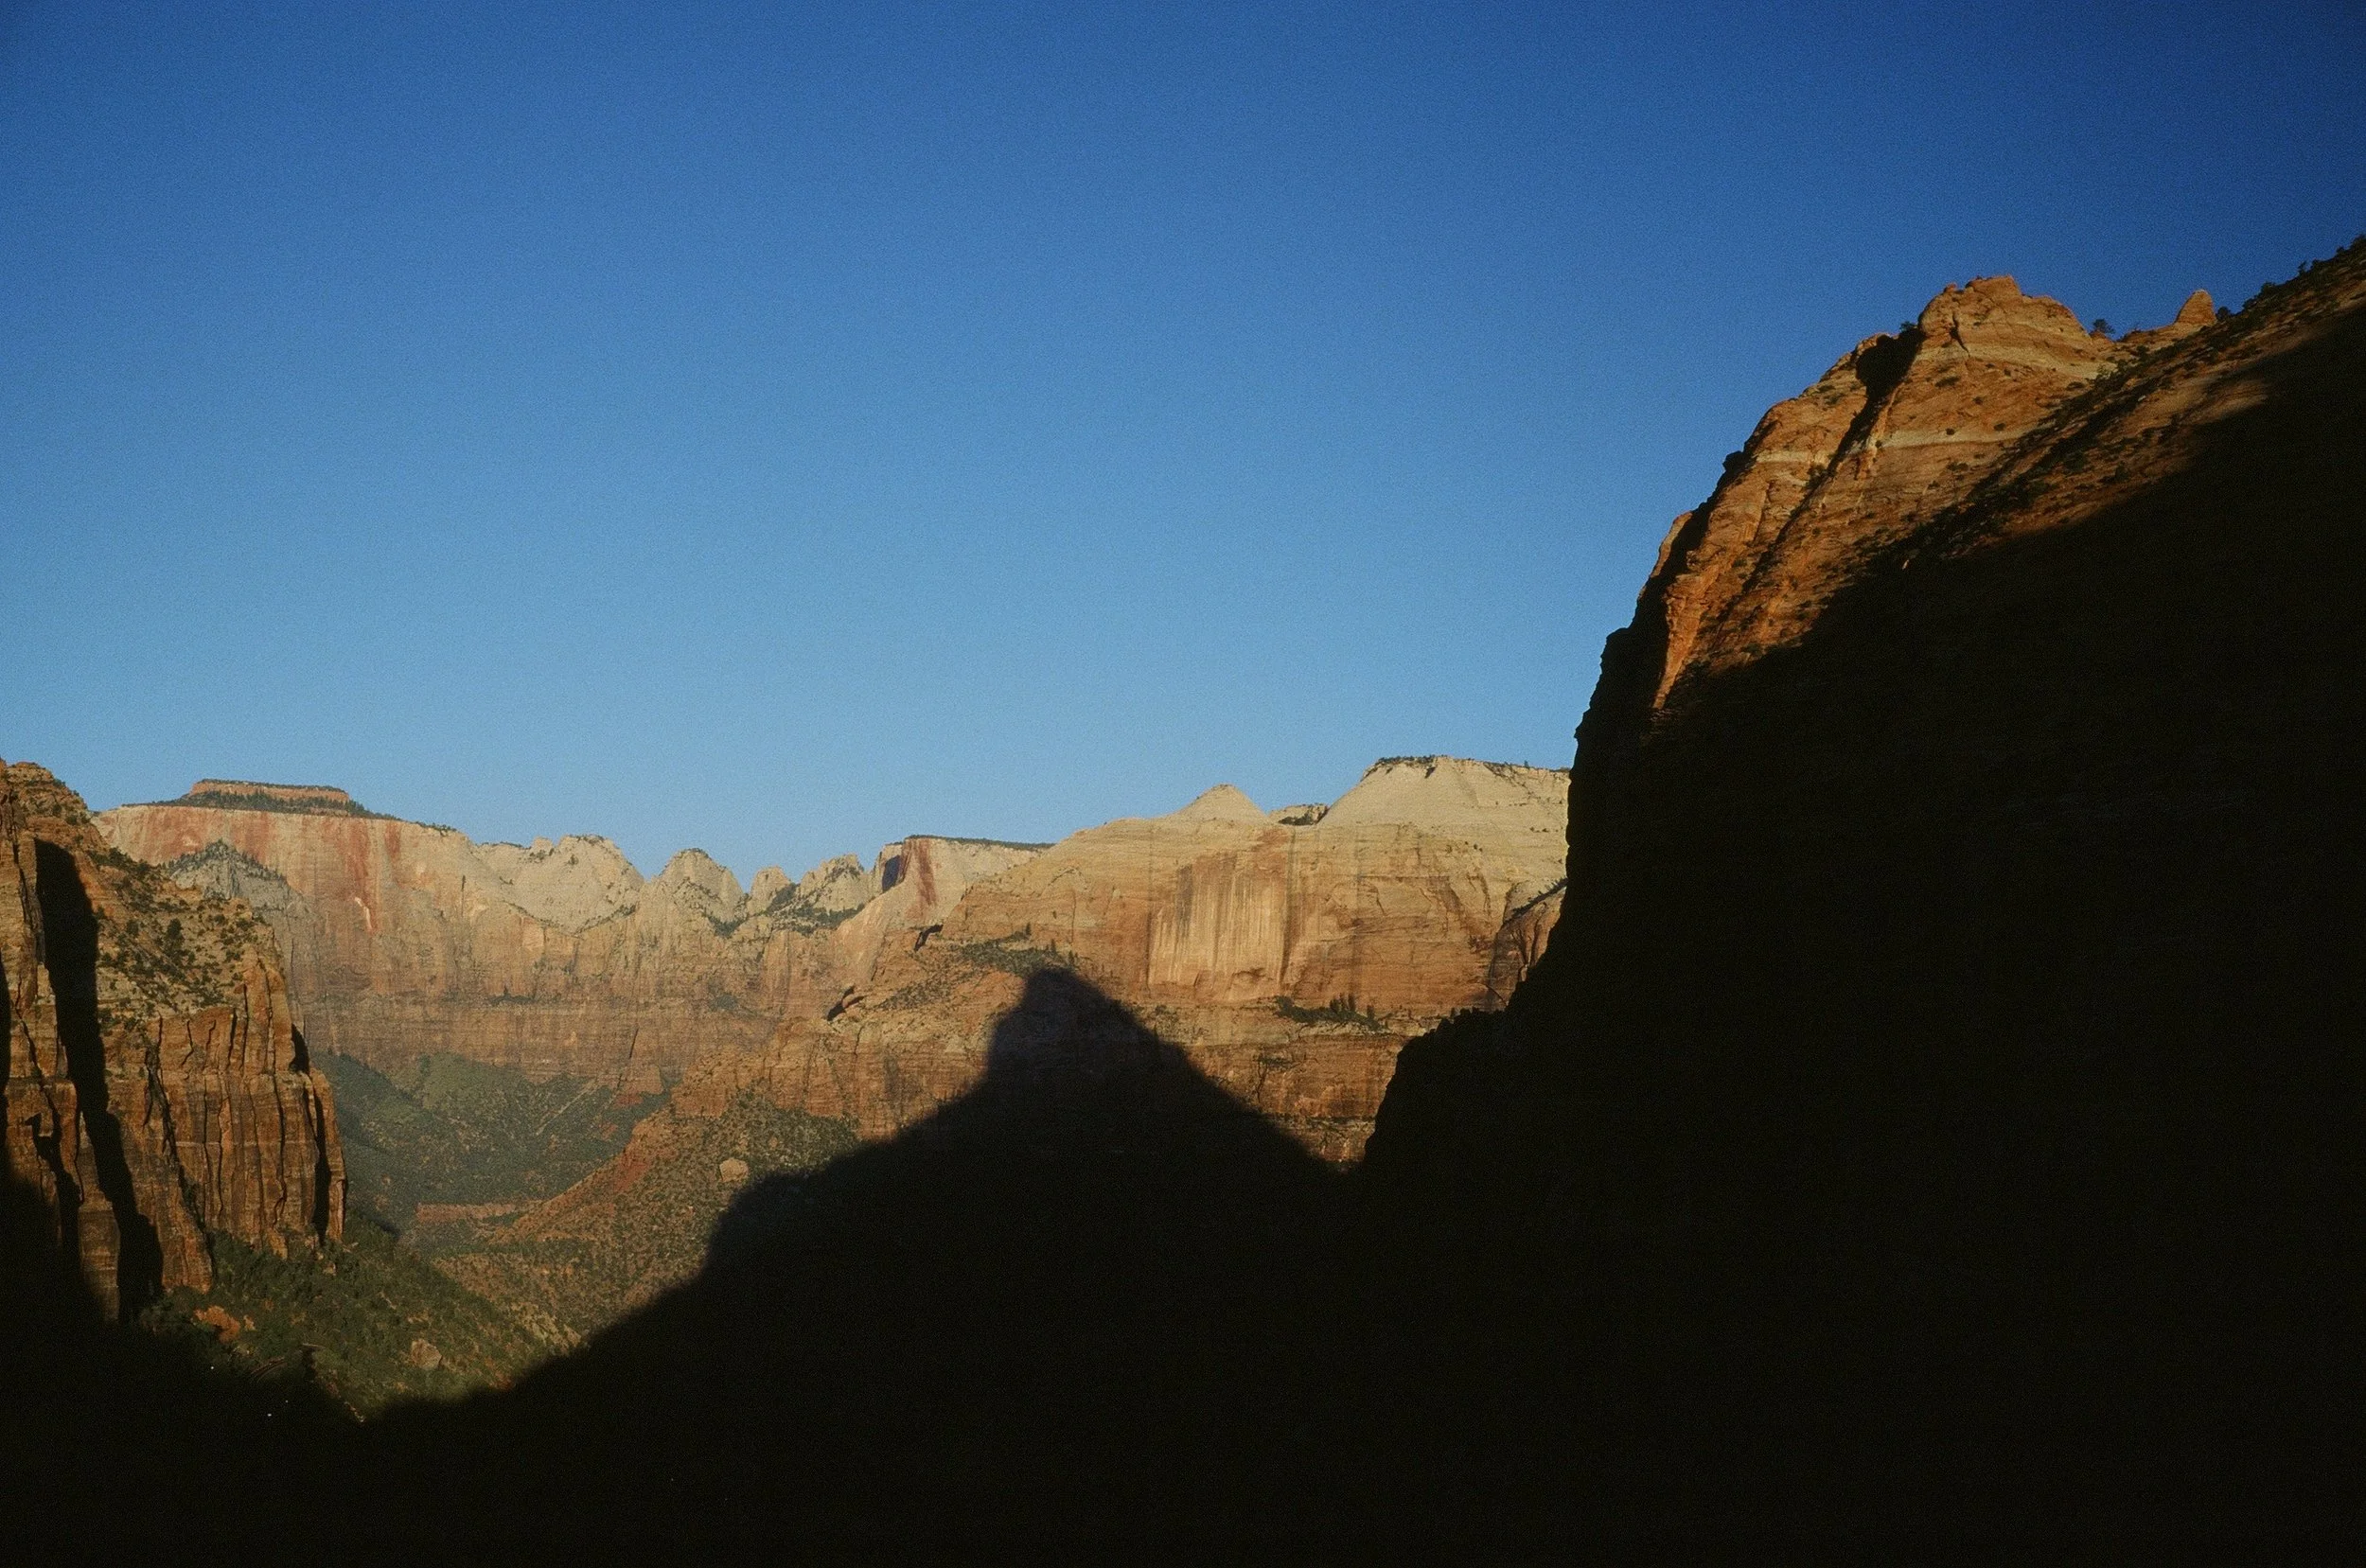
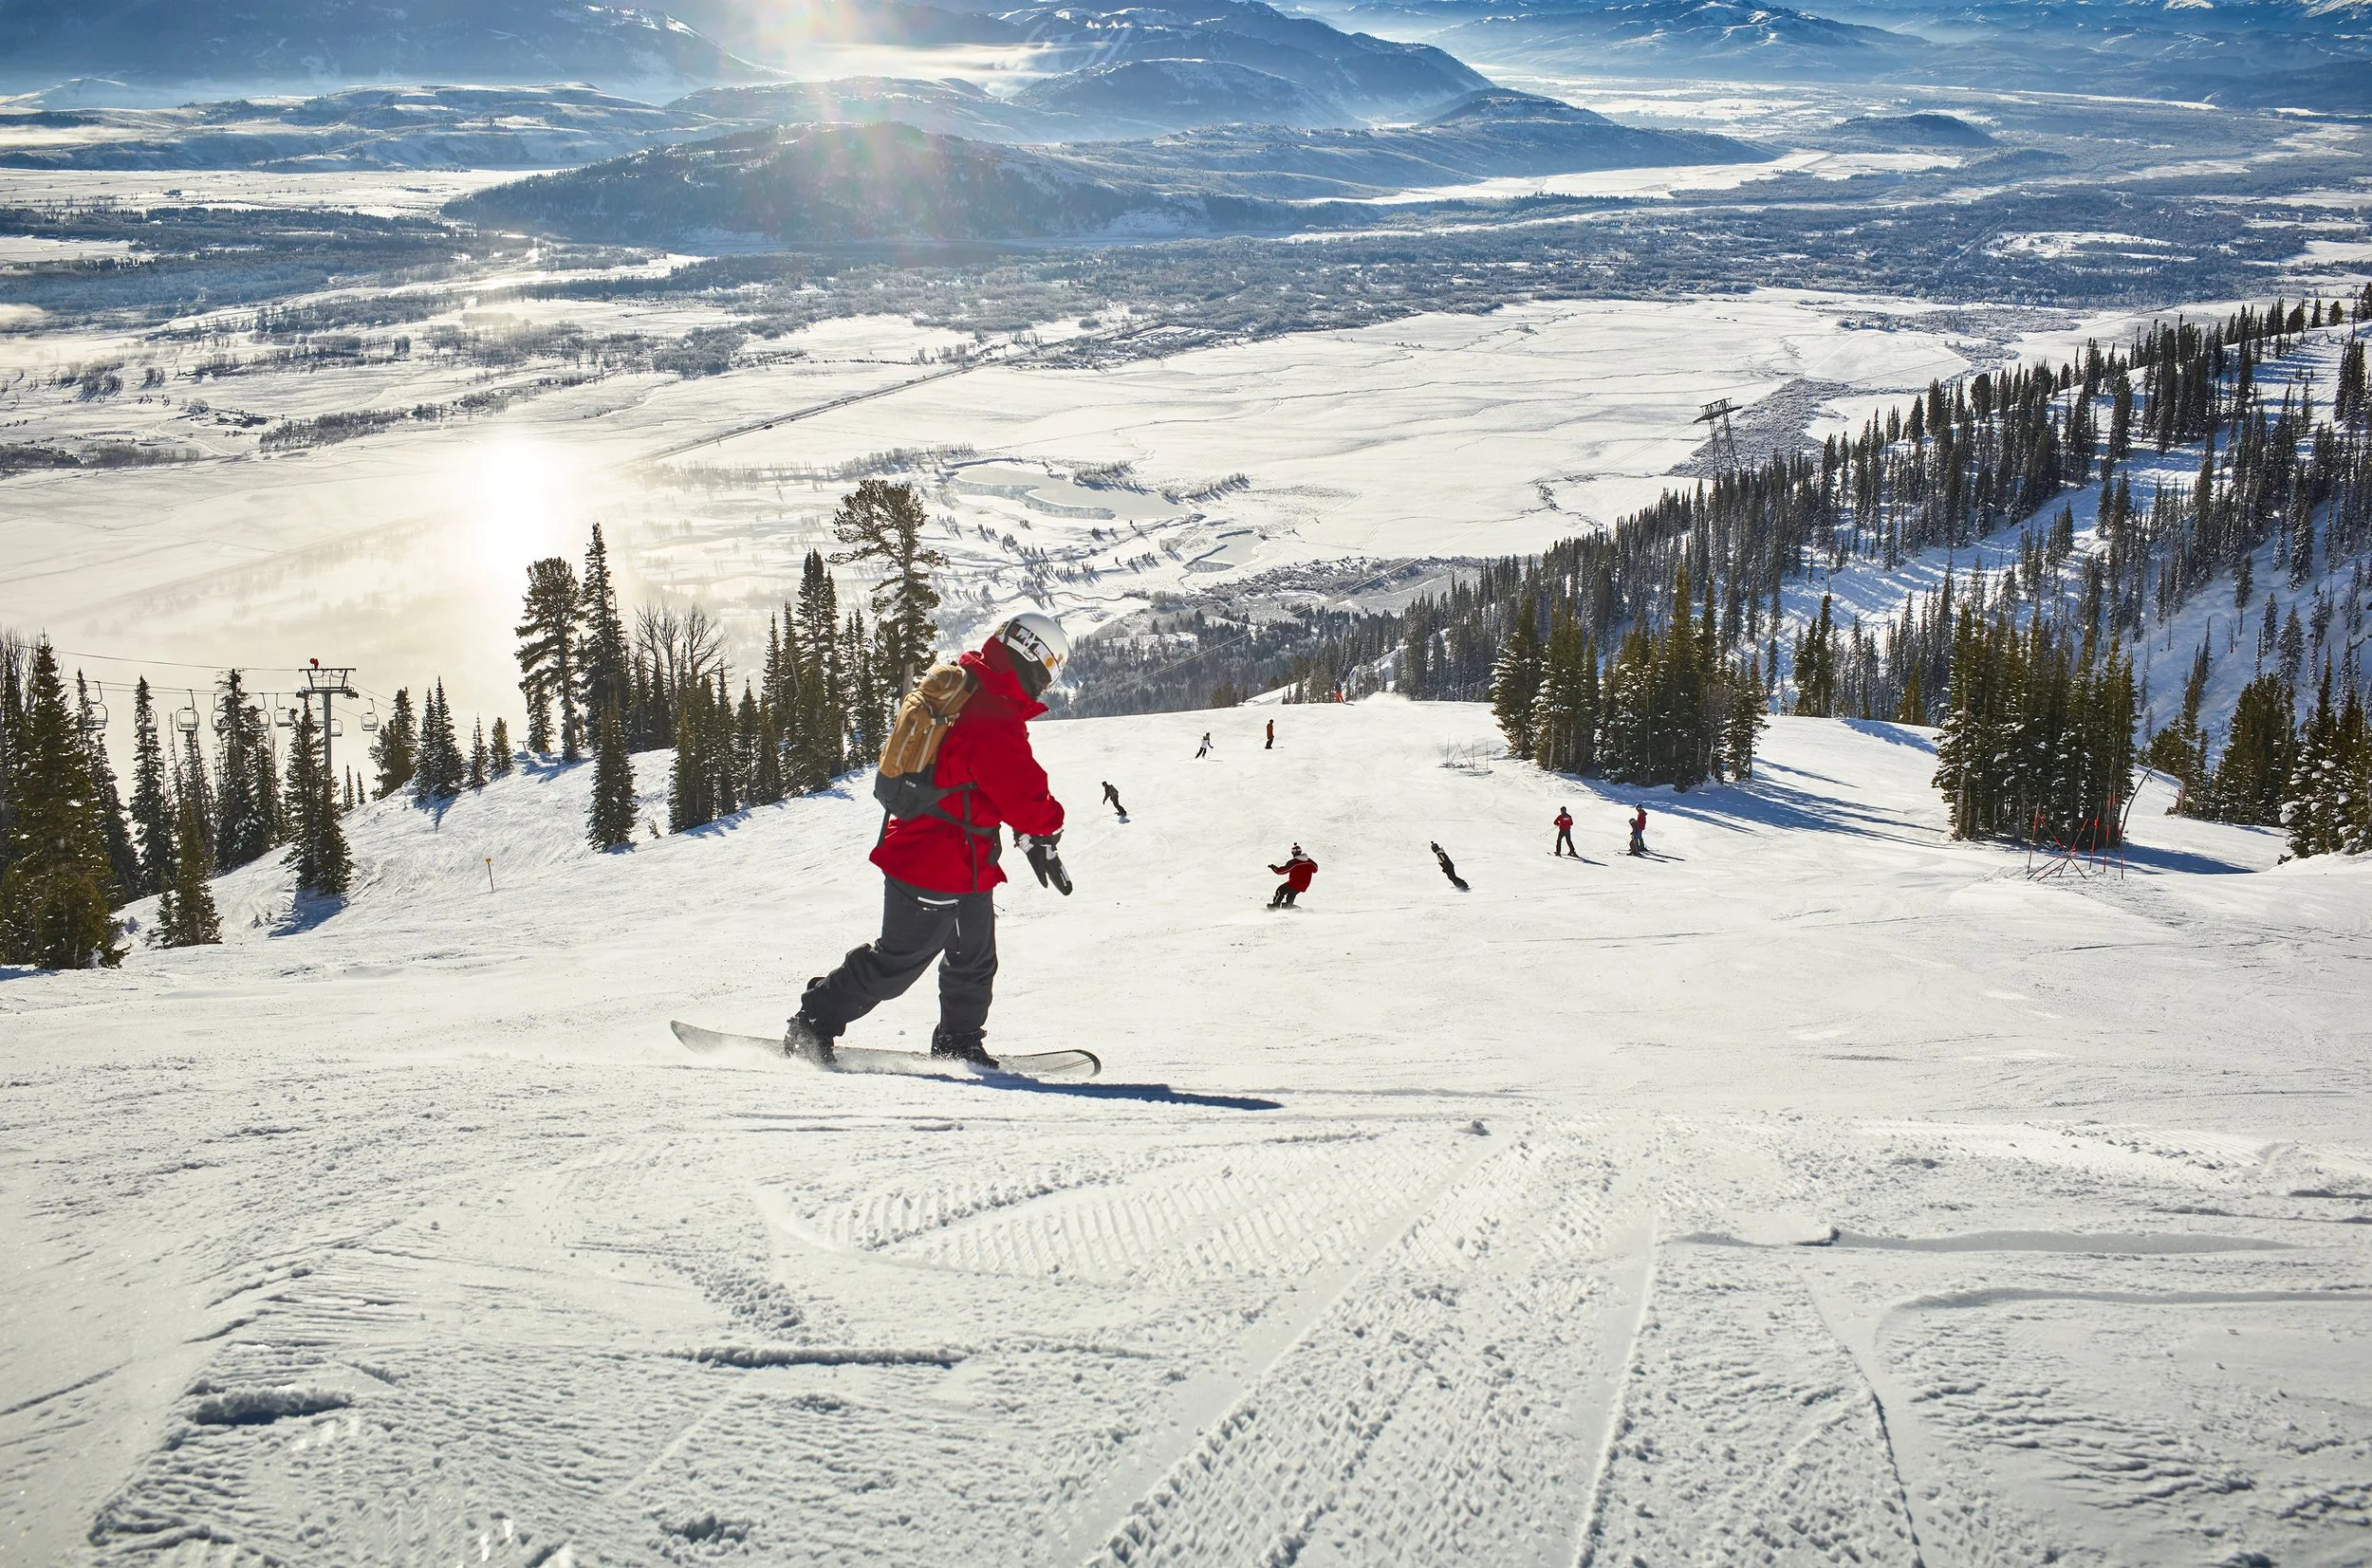
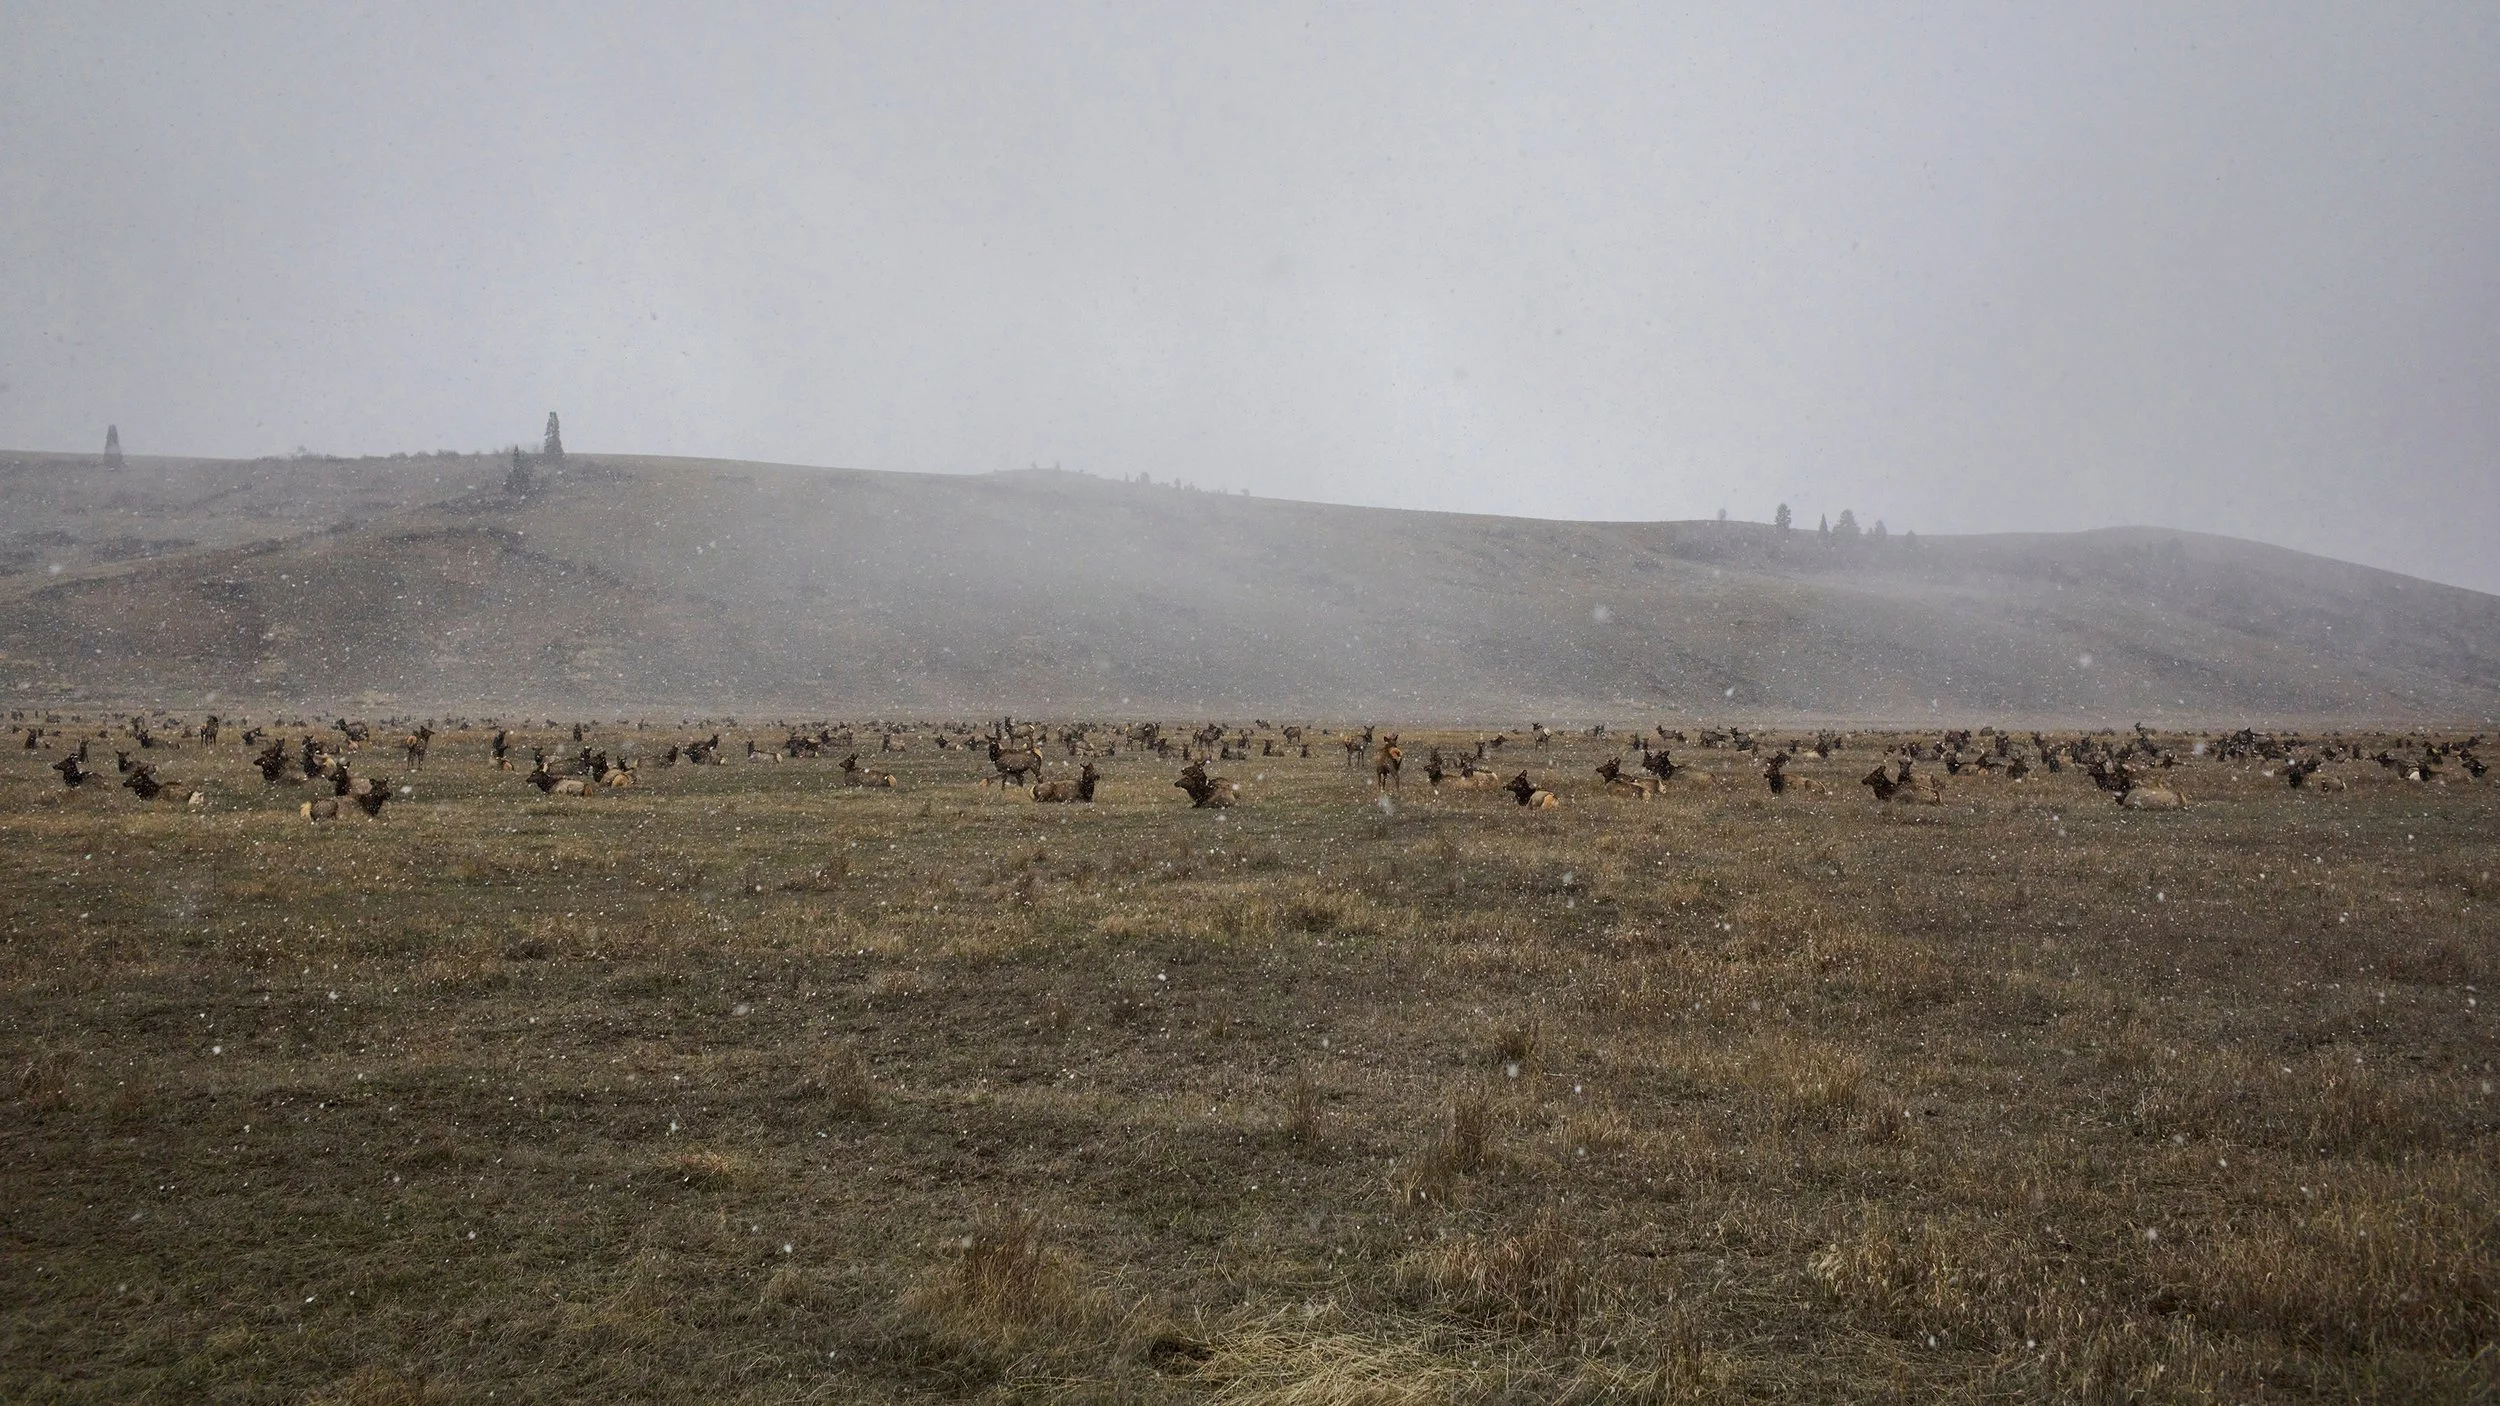
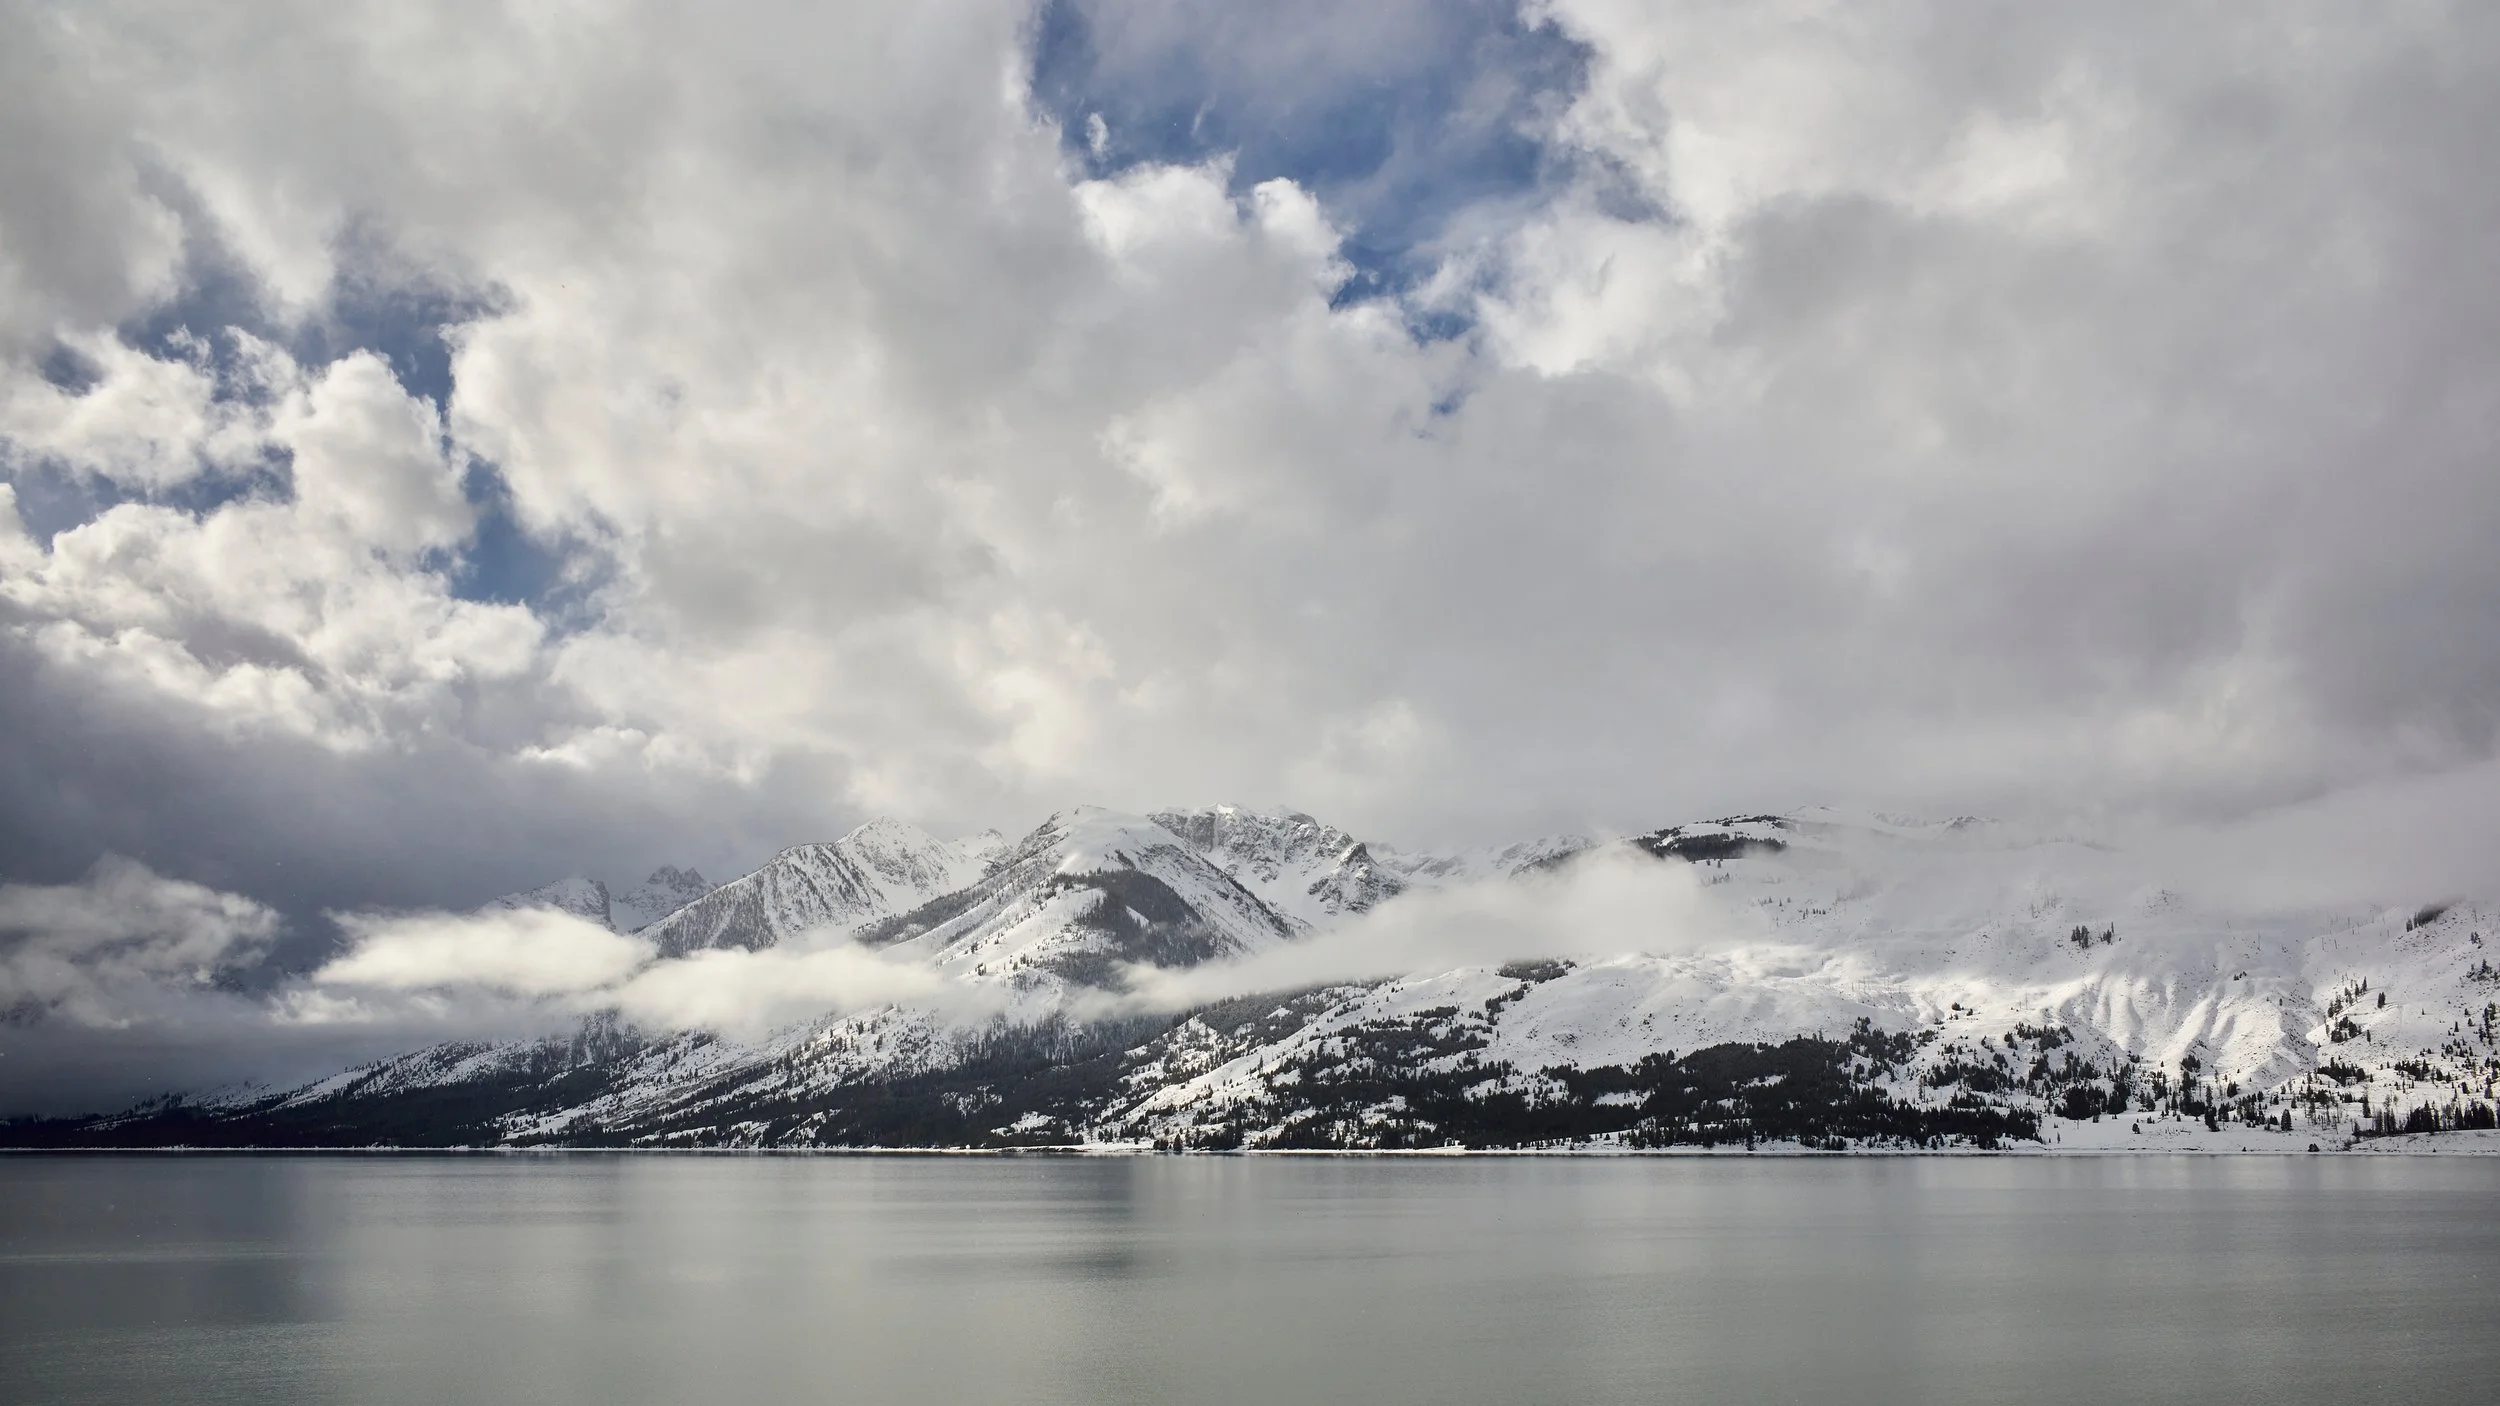
Sedona: The First Encounter
Sedona is tourist-heavy, Instagram-famous, and impossible to avoid if you are driving through northern Arizona. It is also legitimately stunning in a way that survives the hype.
The red rocks are not subtle. They are massive, iron-rich formations that glow at sunrise and sunset. The light changes constantly. Shadows shift. The color temperature moves from cool blue to warm orange depending on the time of day.
Ektachrome handled it without hesitation.
I shot wide landscapes with the 35mm Summilux. The focal length was perfect — wide enough to capture scale, tight enough to isolate specific formations. The Leica's rendering gave the images a sharpness and three-dimensionality that matched the clarity of the desert air.
We stayed four nights in Sedona. I shot every morning and every evening. The kids hiked. My wife read and worked. My dad, the kids, and I drove backroads looking for vantage points and old signs.
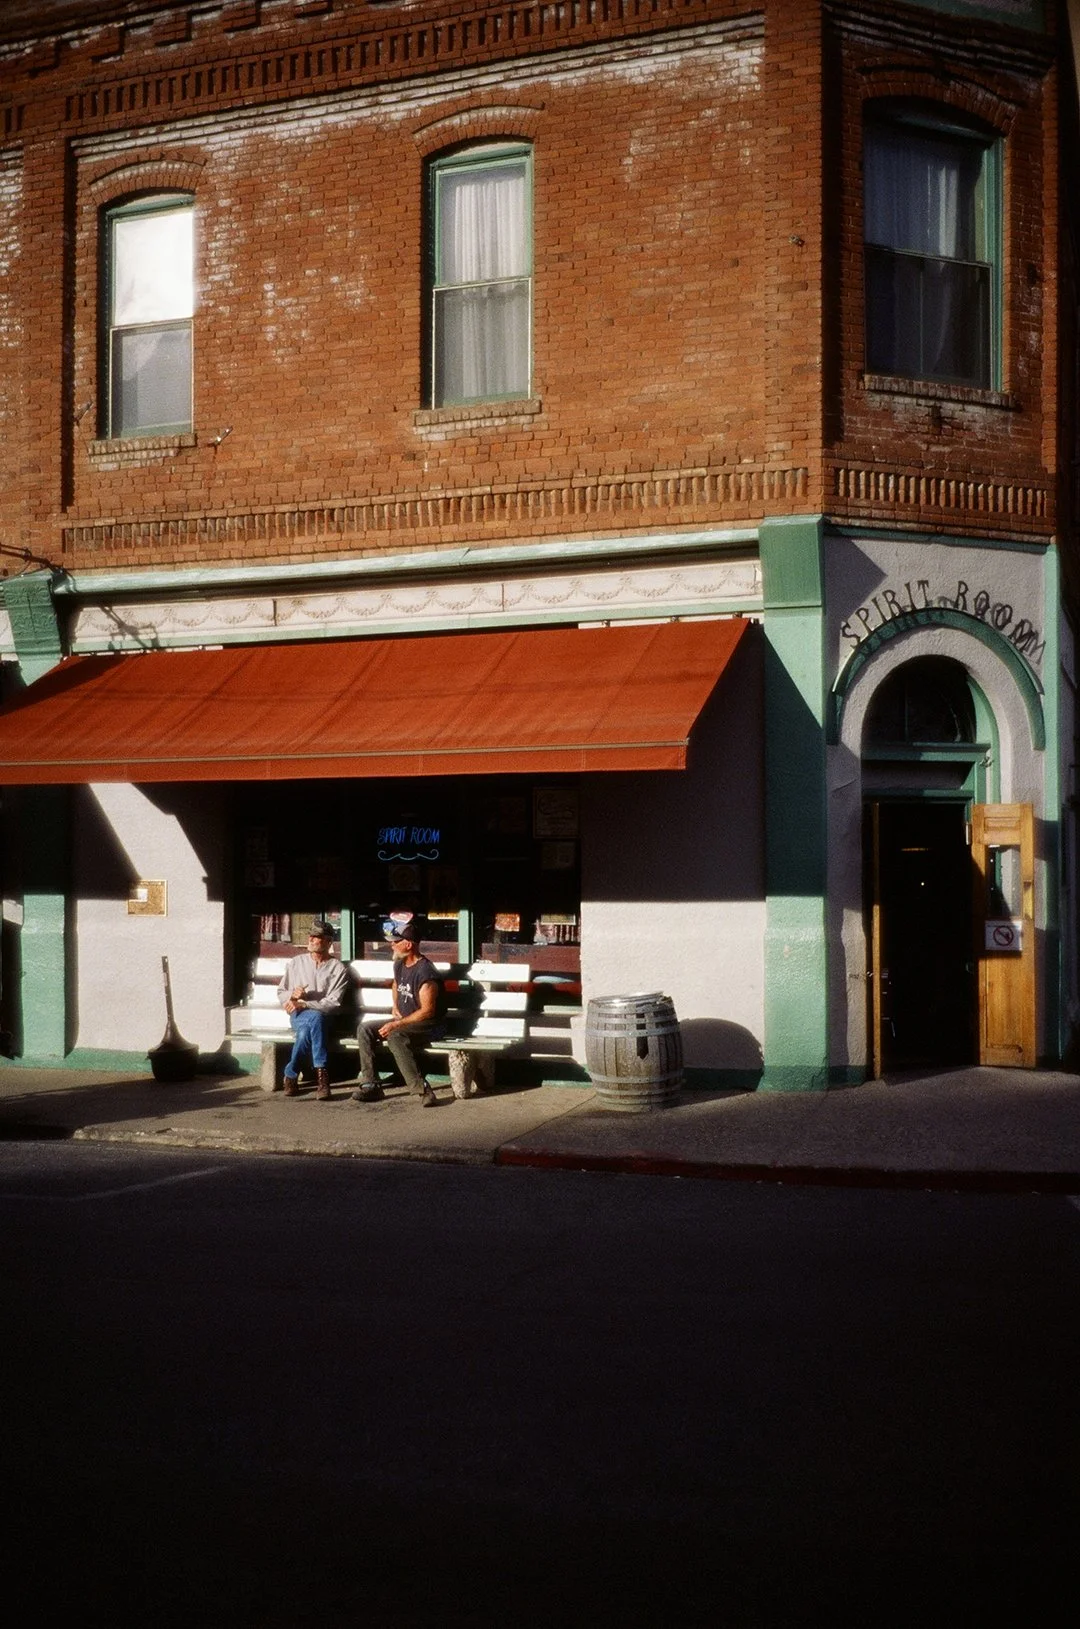
Jerome: Ghost Town Vertical
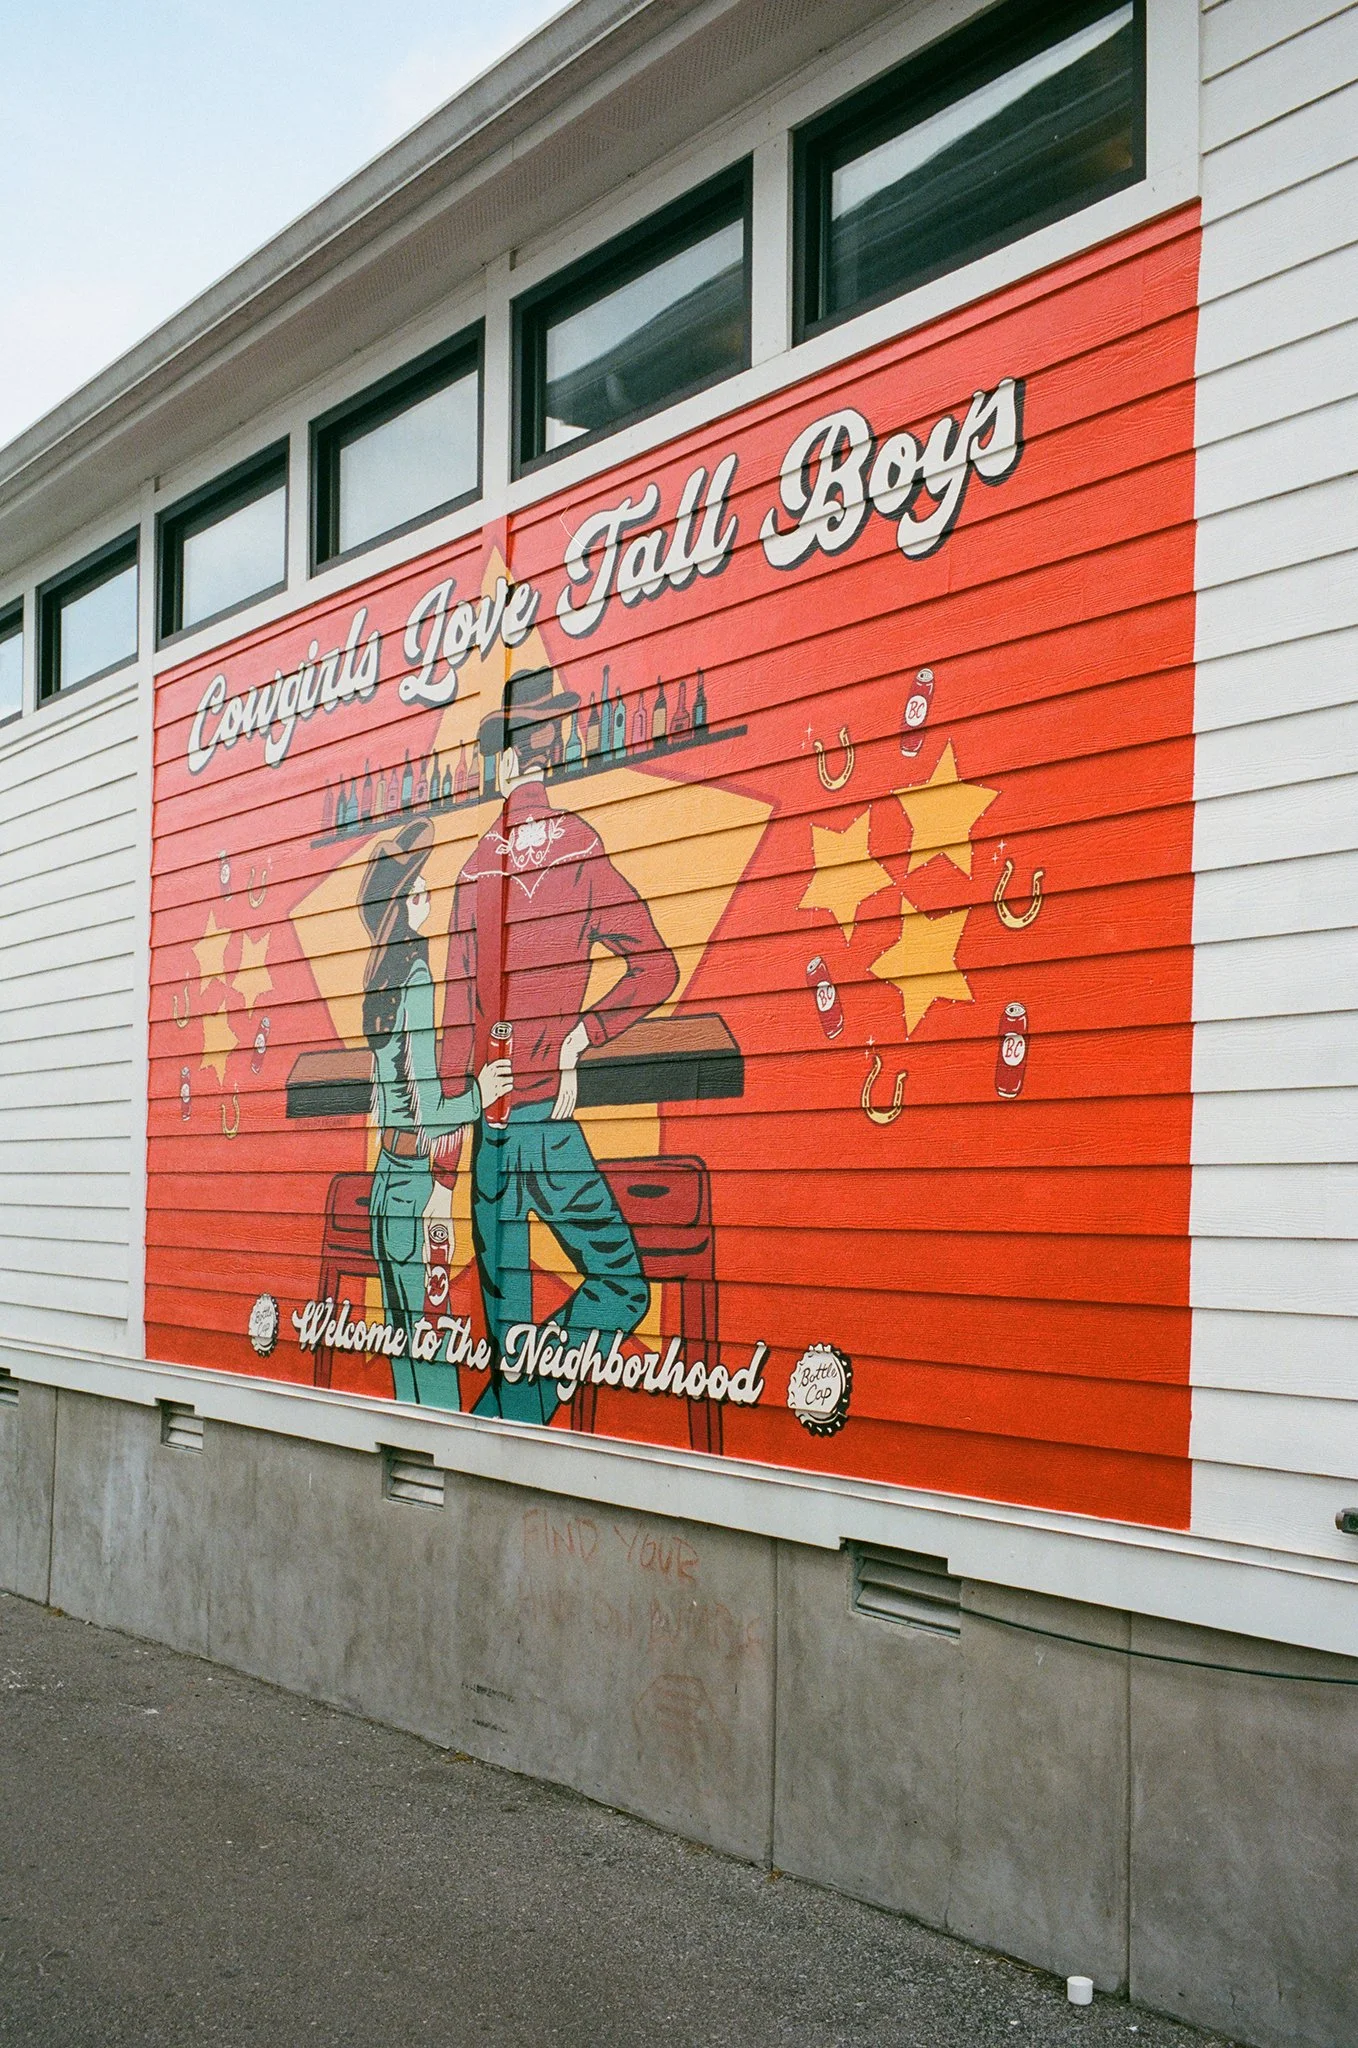
Jerome sits at 5,000 feet on the side of Cleopatra Hill. Former copper mining town. Population dropped from 15,000 to 50 after the mines closed in 1953. Now it's artists, galleries, and buildings that refuse to collapse.
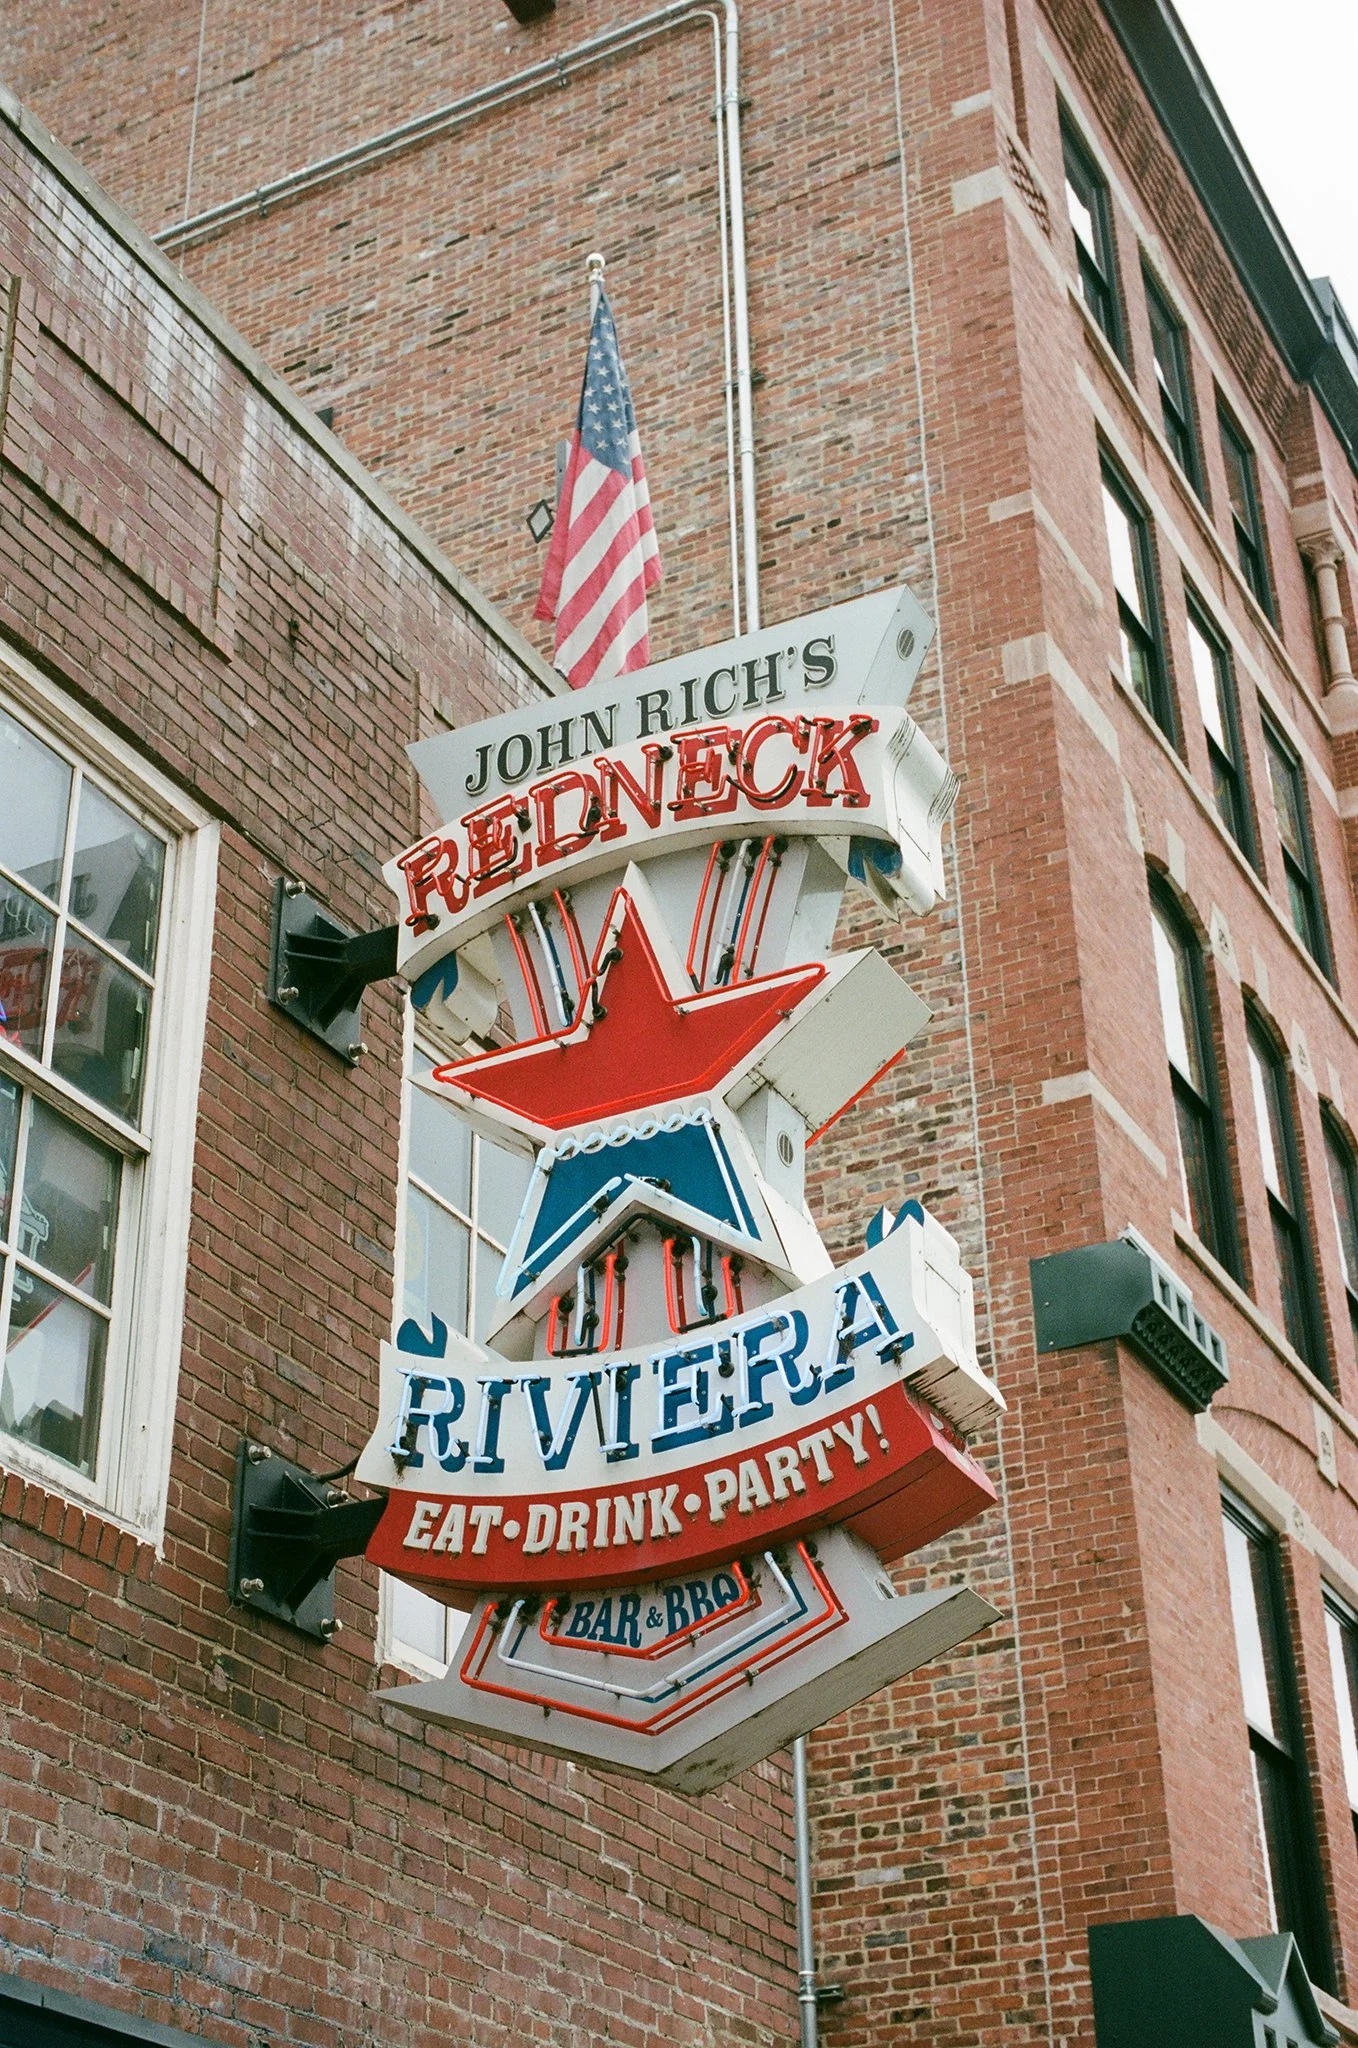
The main street climbs steep. Old brick storefronts. Mint green trim. Orange awnings. The kind of saturated, everyday Americana that I am in love with.
I walked the street when the afternoon light hit hard. Shadows cutting across facades. Two people on a bench outside the Spirit Room. The colors looked exactly like what Ektachrome was made to render.
One frame. Metered for the highlights. Let the shadows go black. Committed.
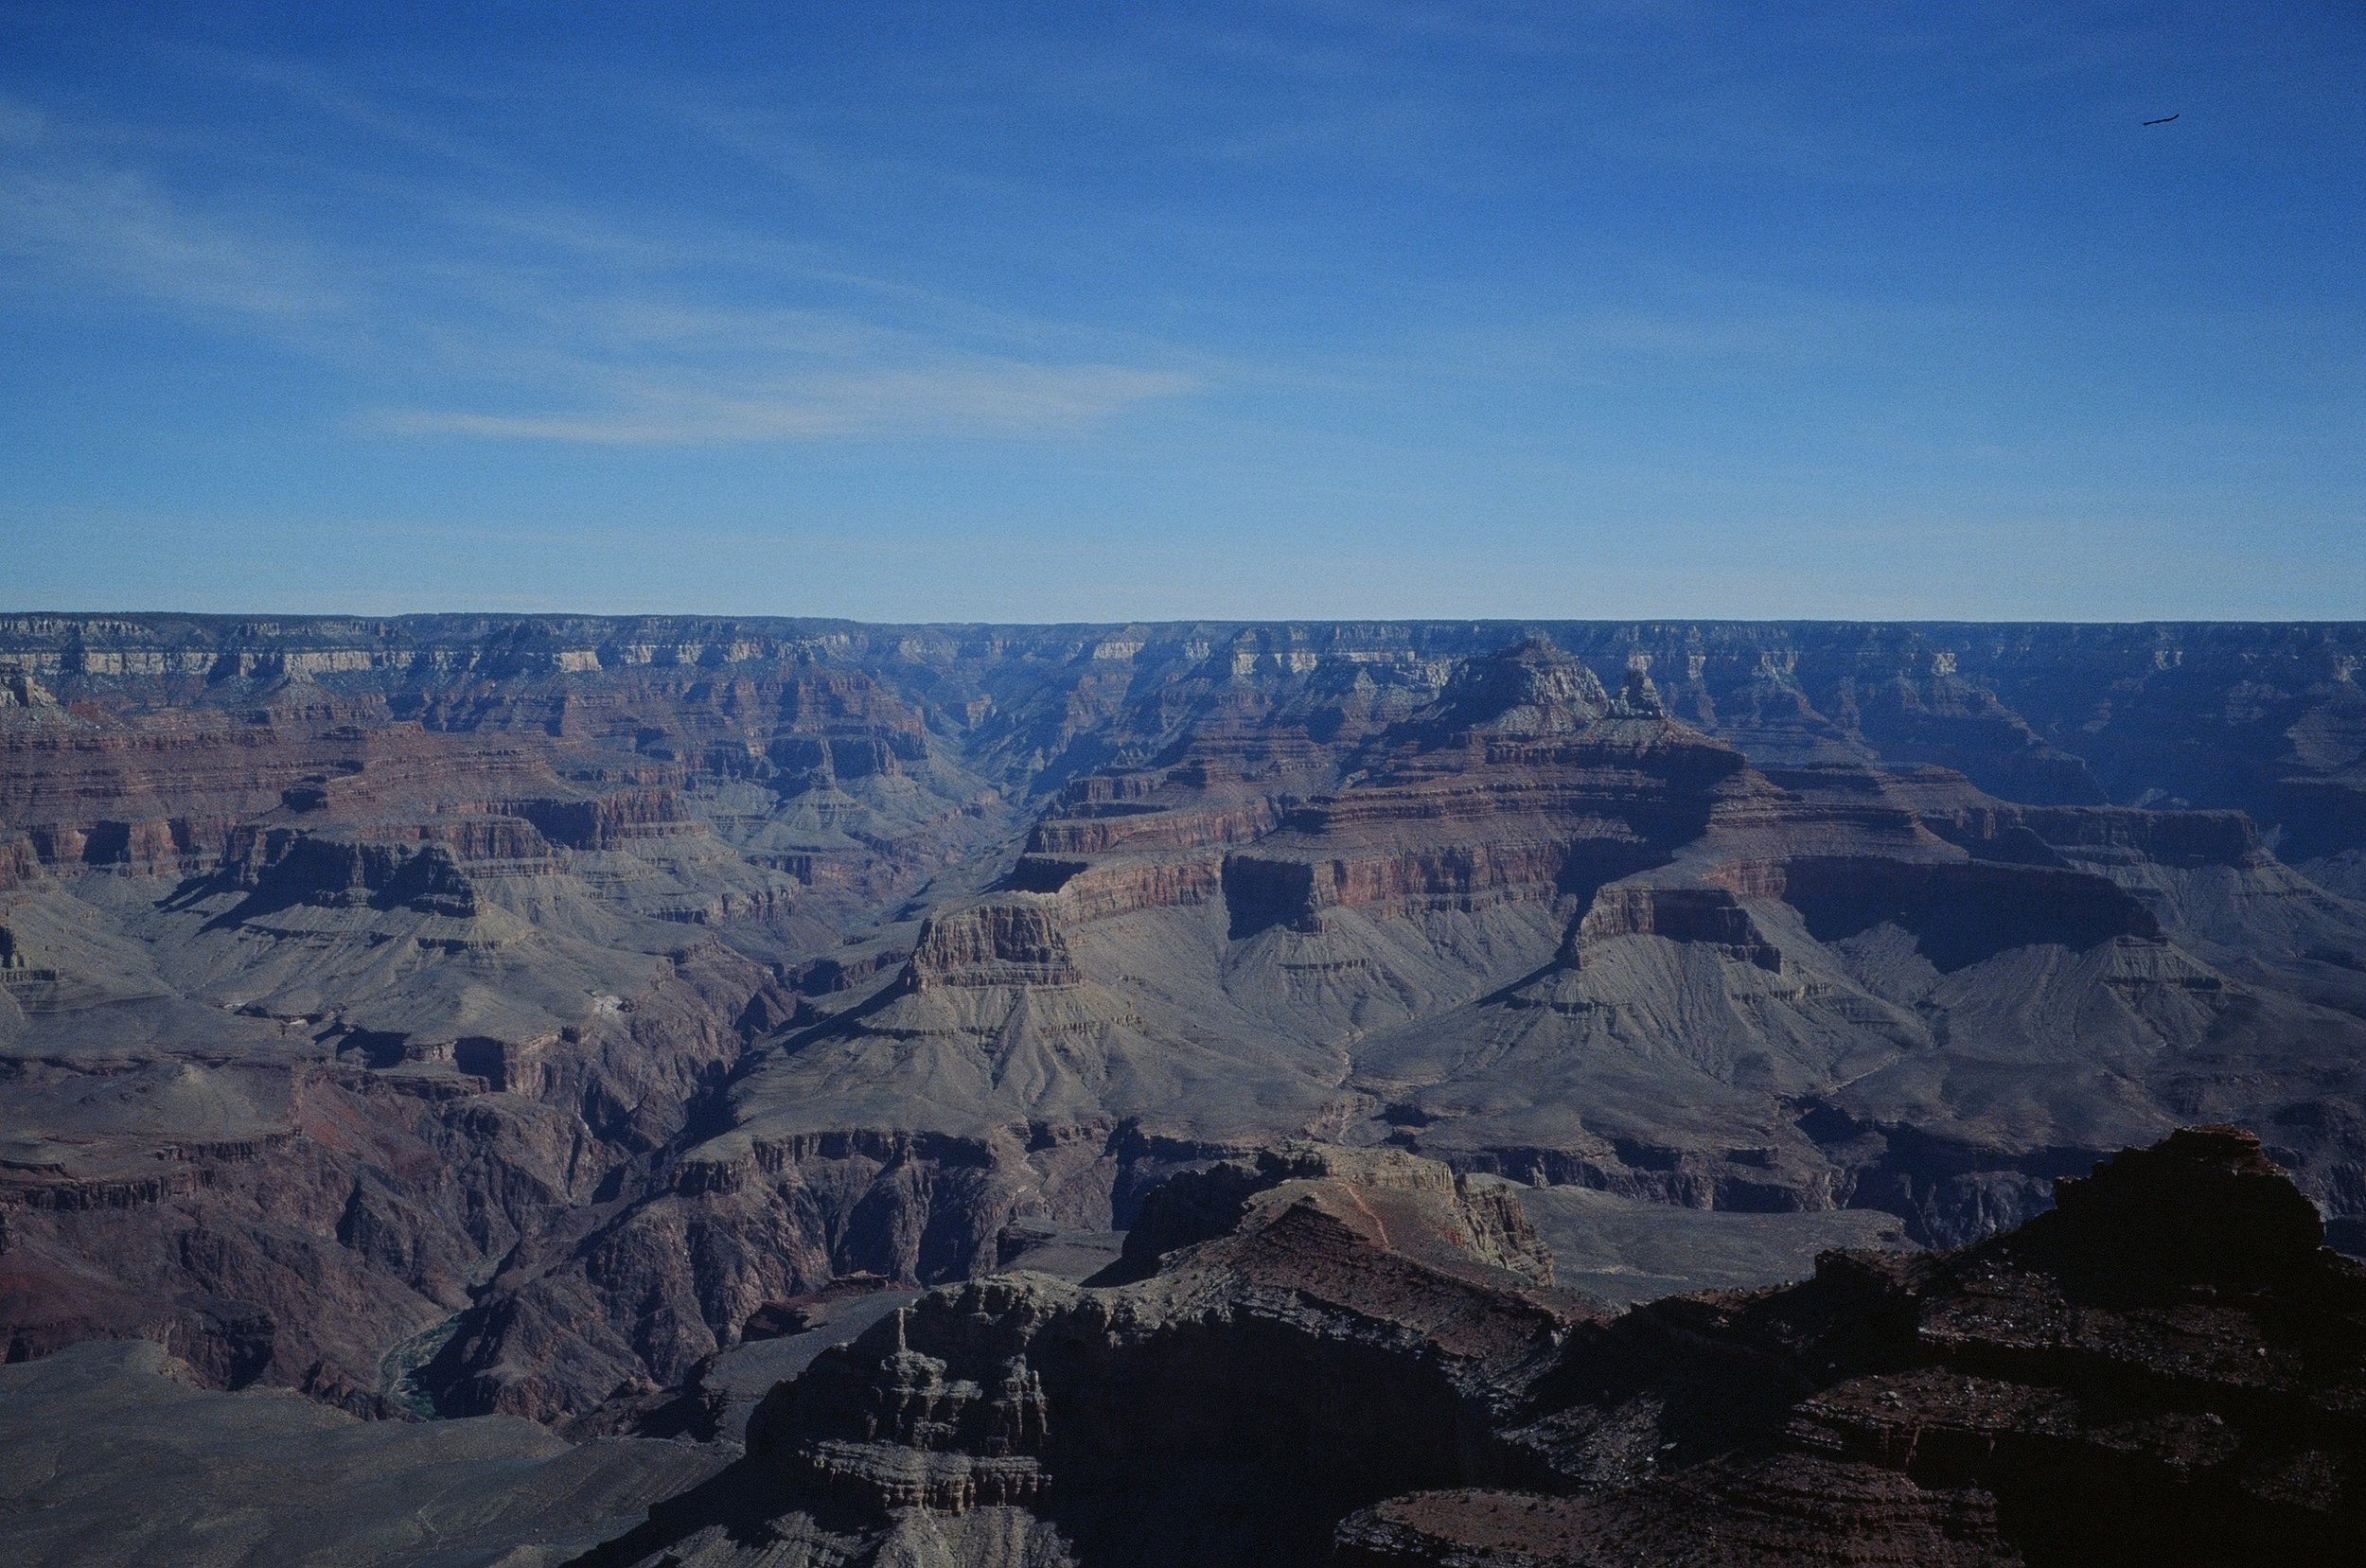
Grand Canyon: The Cliché That Delivers
The Grand Canyon is the most photographed natural landmark in the United States. It has been shot on every format, every film stock, every digital sensor ever made. It is a visual cliché.
It is also undeniable.
The Grand Canyon South Rim was full. Spring break crowds. Families everywhere, primarily West Coast families. Overlook platforms designed for maximum throughput.
None of that mattered once I looked over the edge.
The scale is incomprehensible. The canyon does not fit in a viewfinder. It does not translate to a photograph. You stand there and realize that no image will ever capture what you are seeing, and you shoot anyway because what else are you going to do.
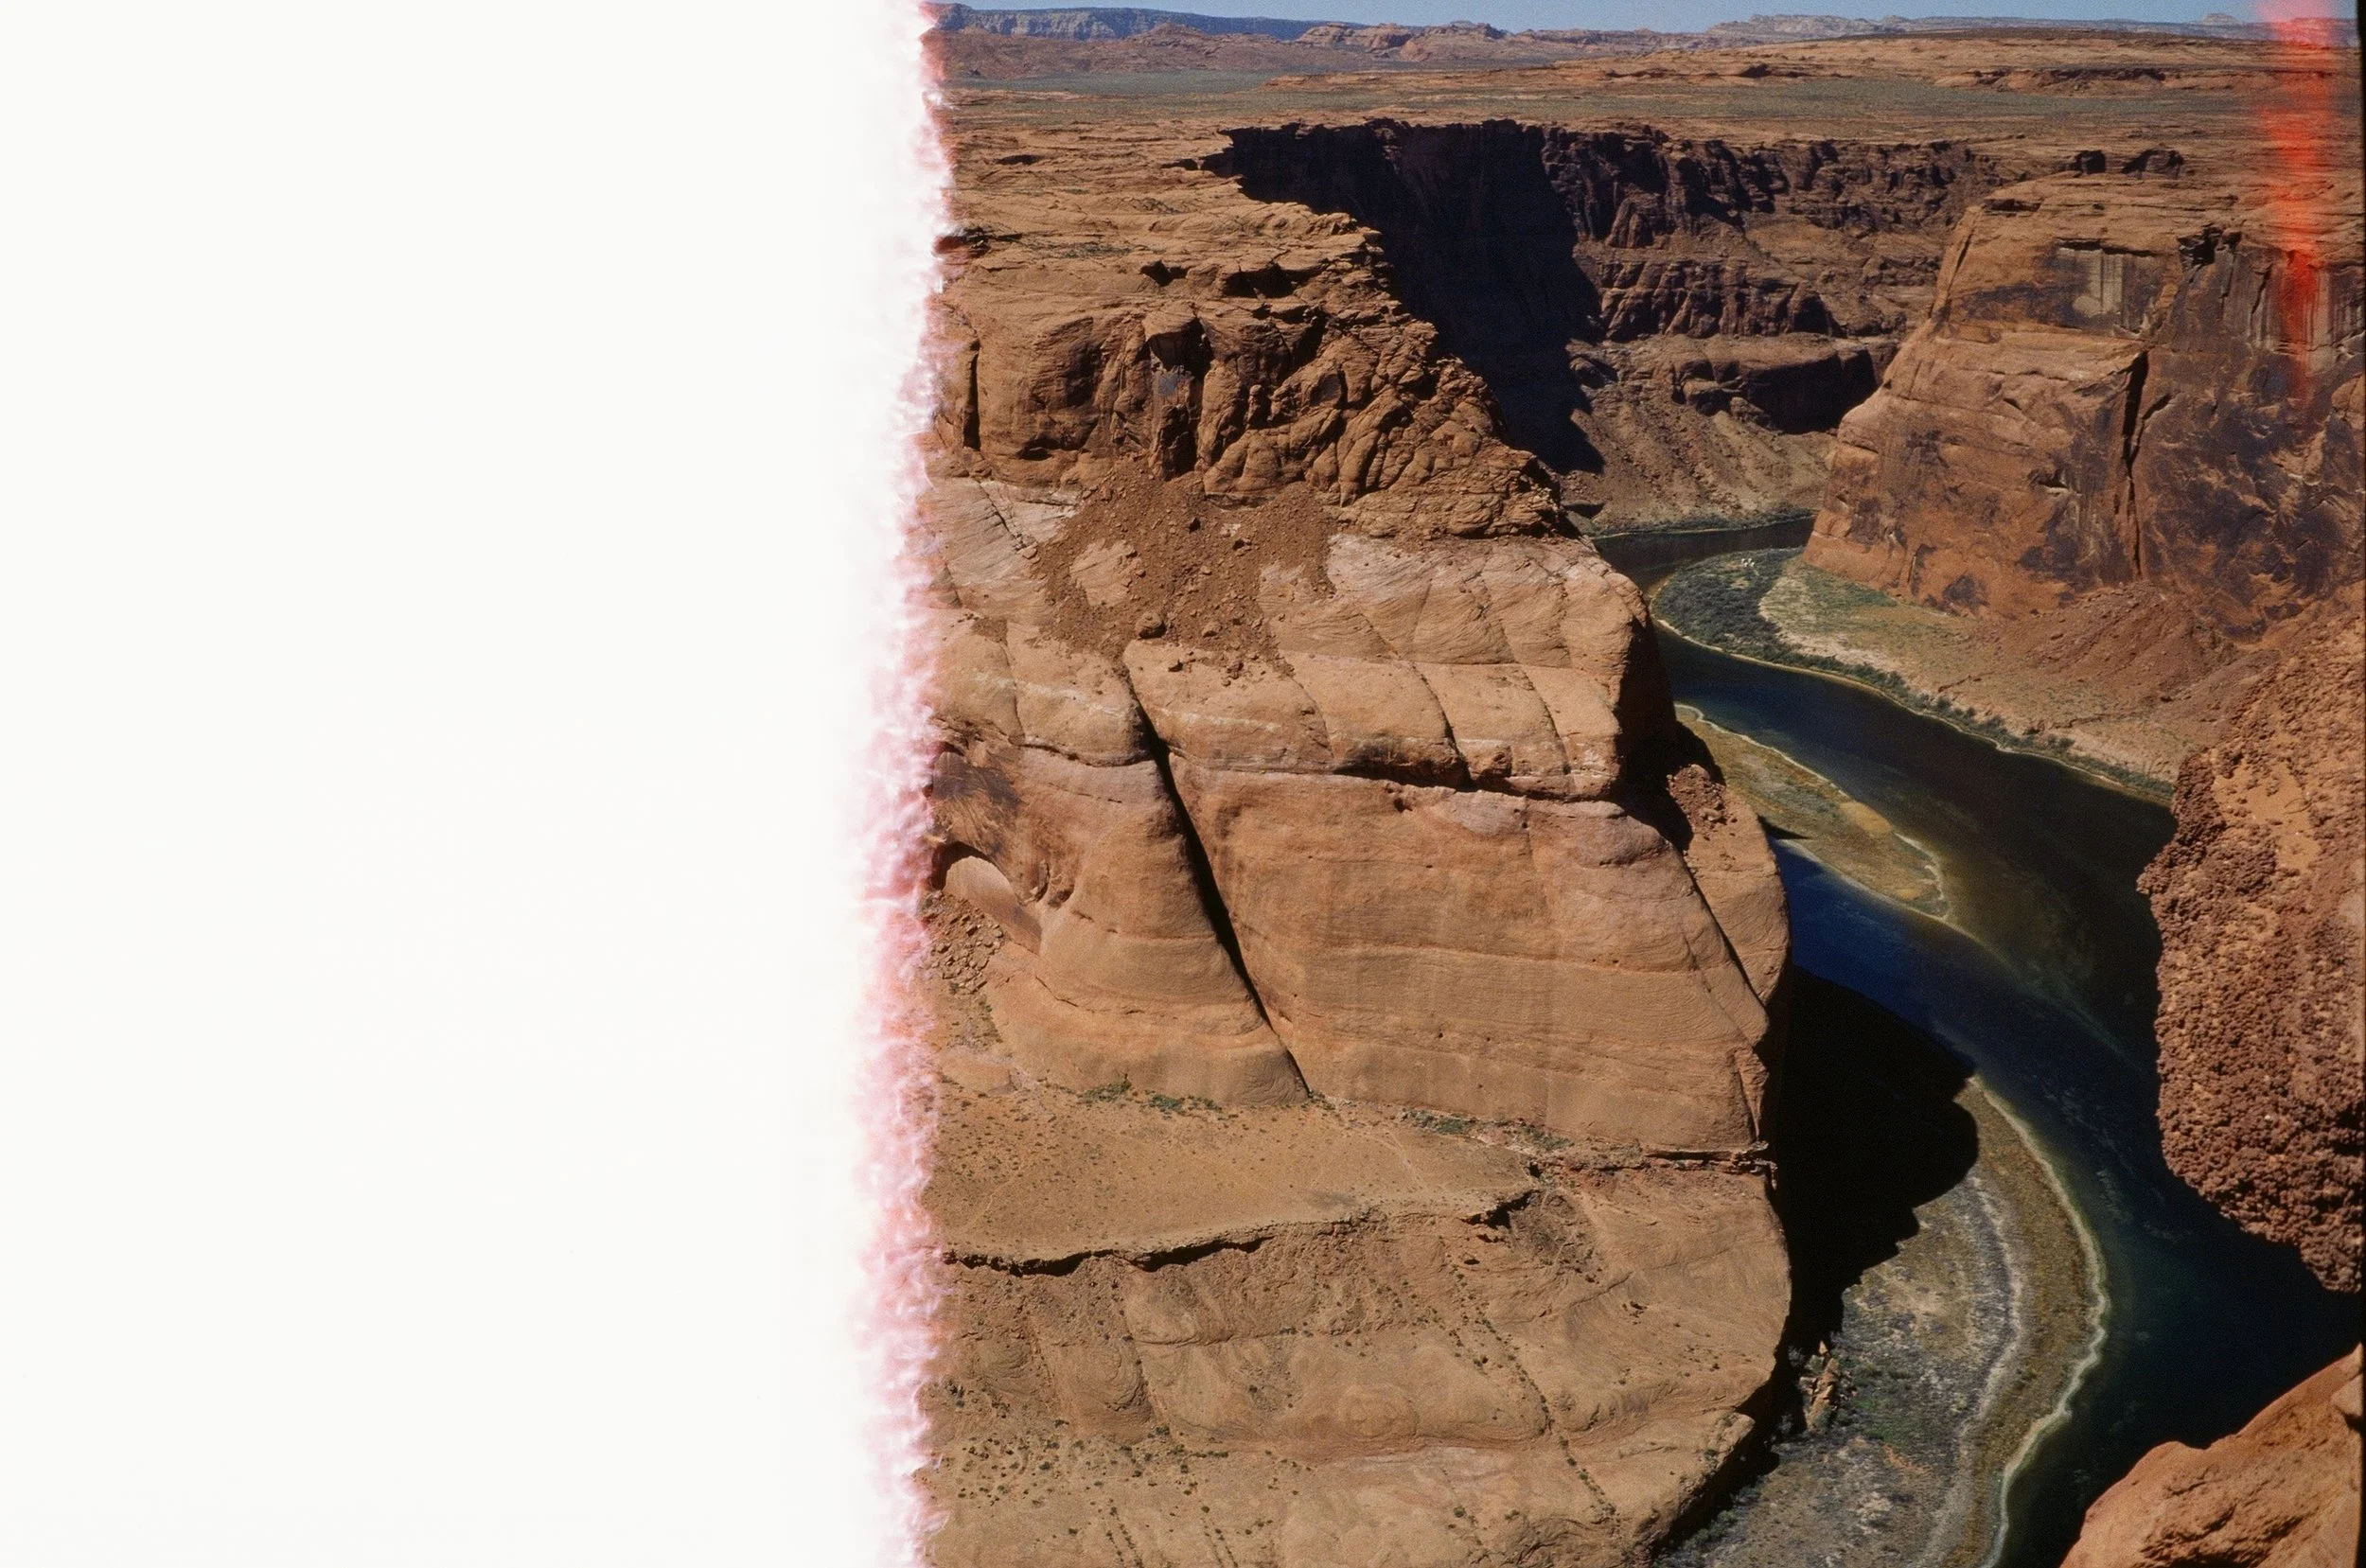
Ektachrome compressed the depth into layers of color — red, orange, purple, blue. The shadows went dark. The highlights stayed controlled. The film did what it was supposed to do: render the scene as accurately as possible within the limitations of a two-dimensional medium.
Route 66
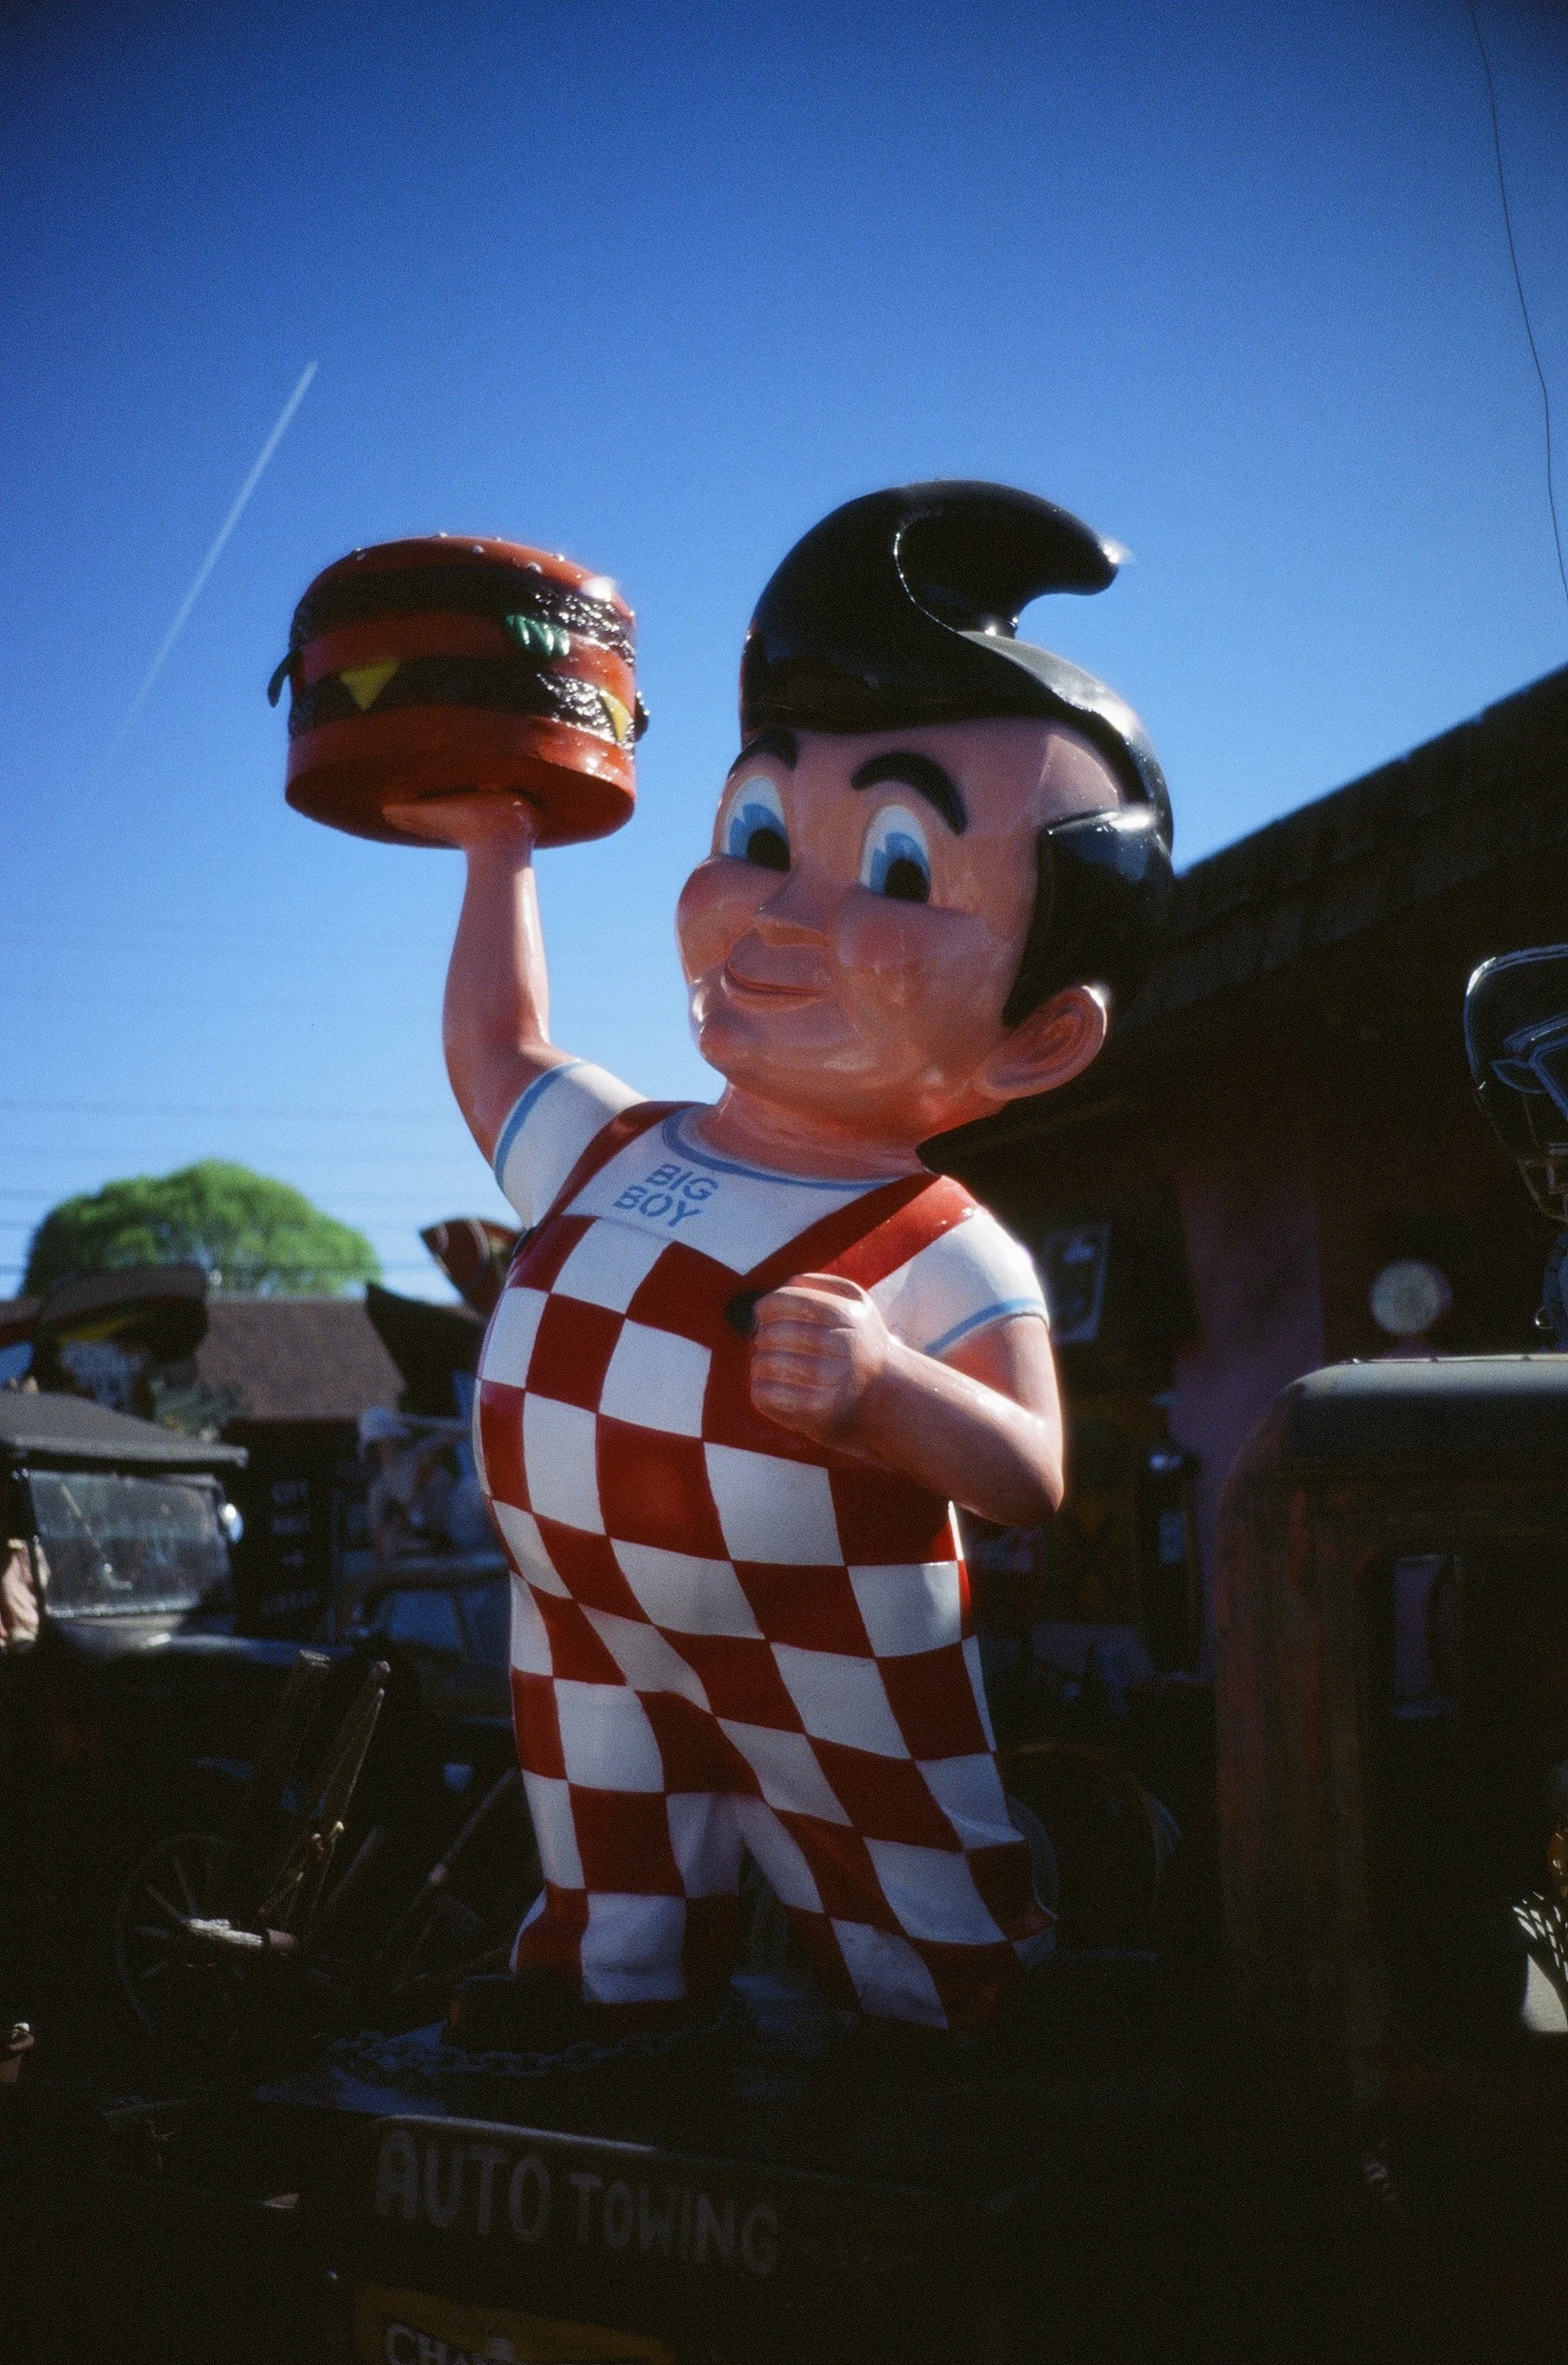
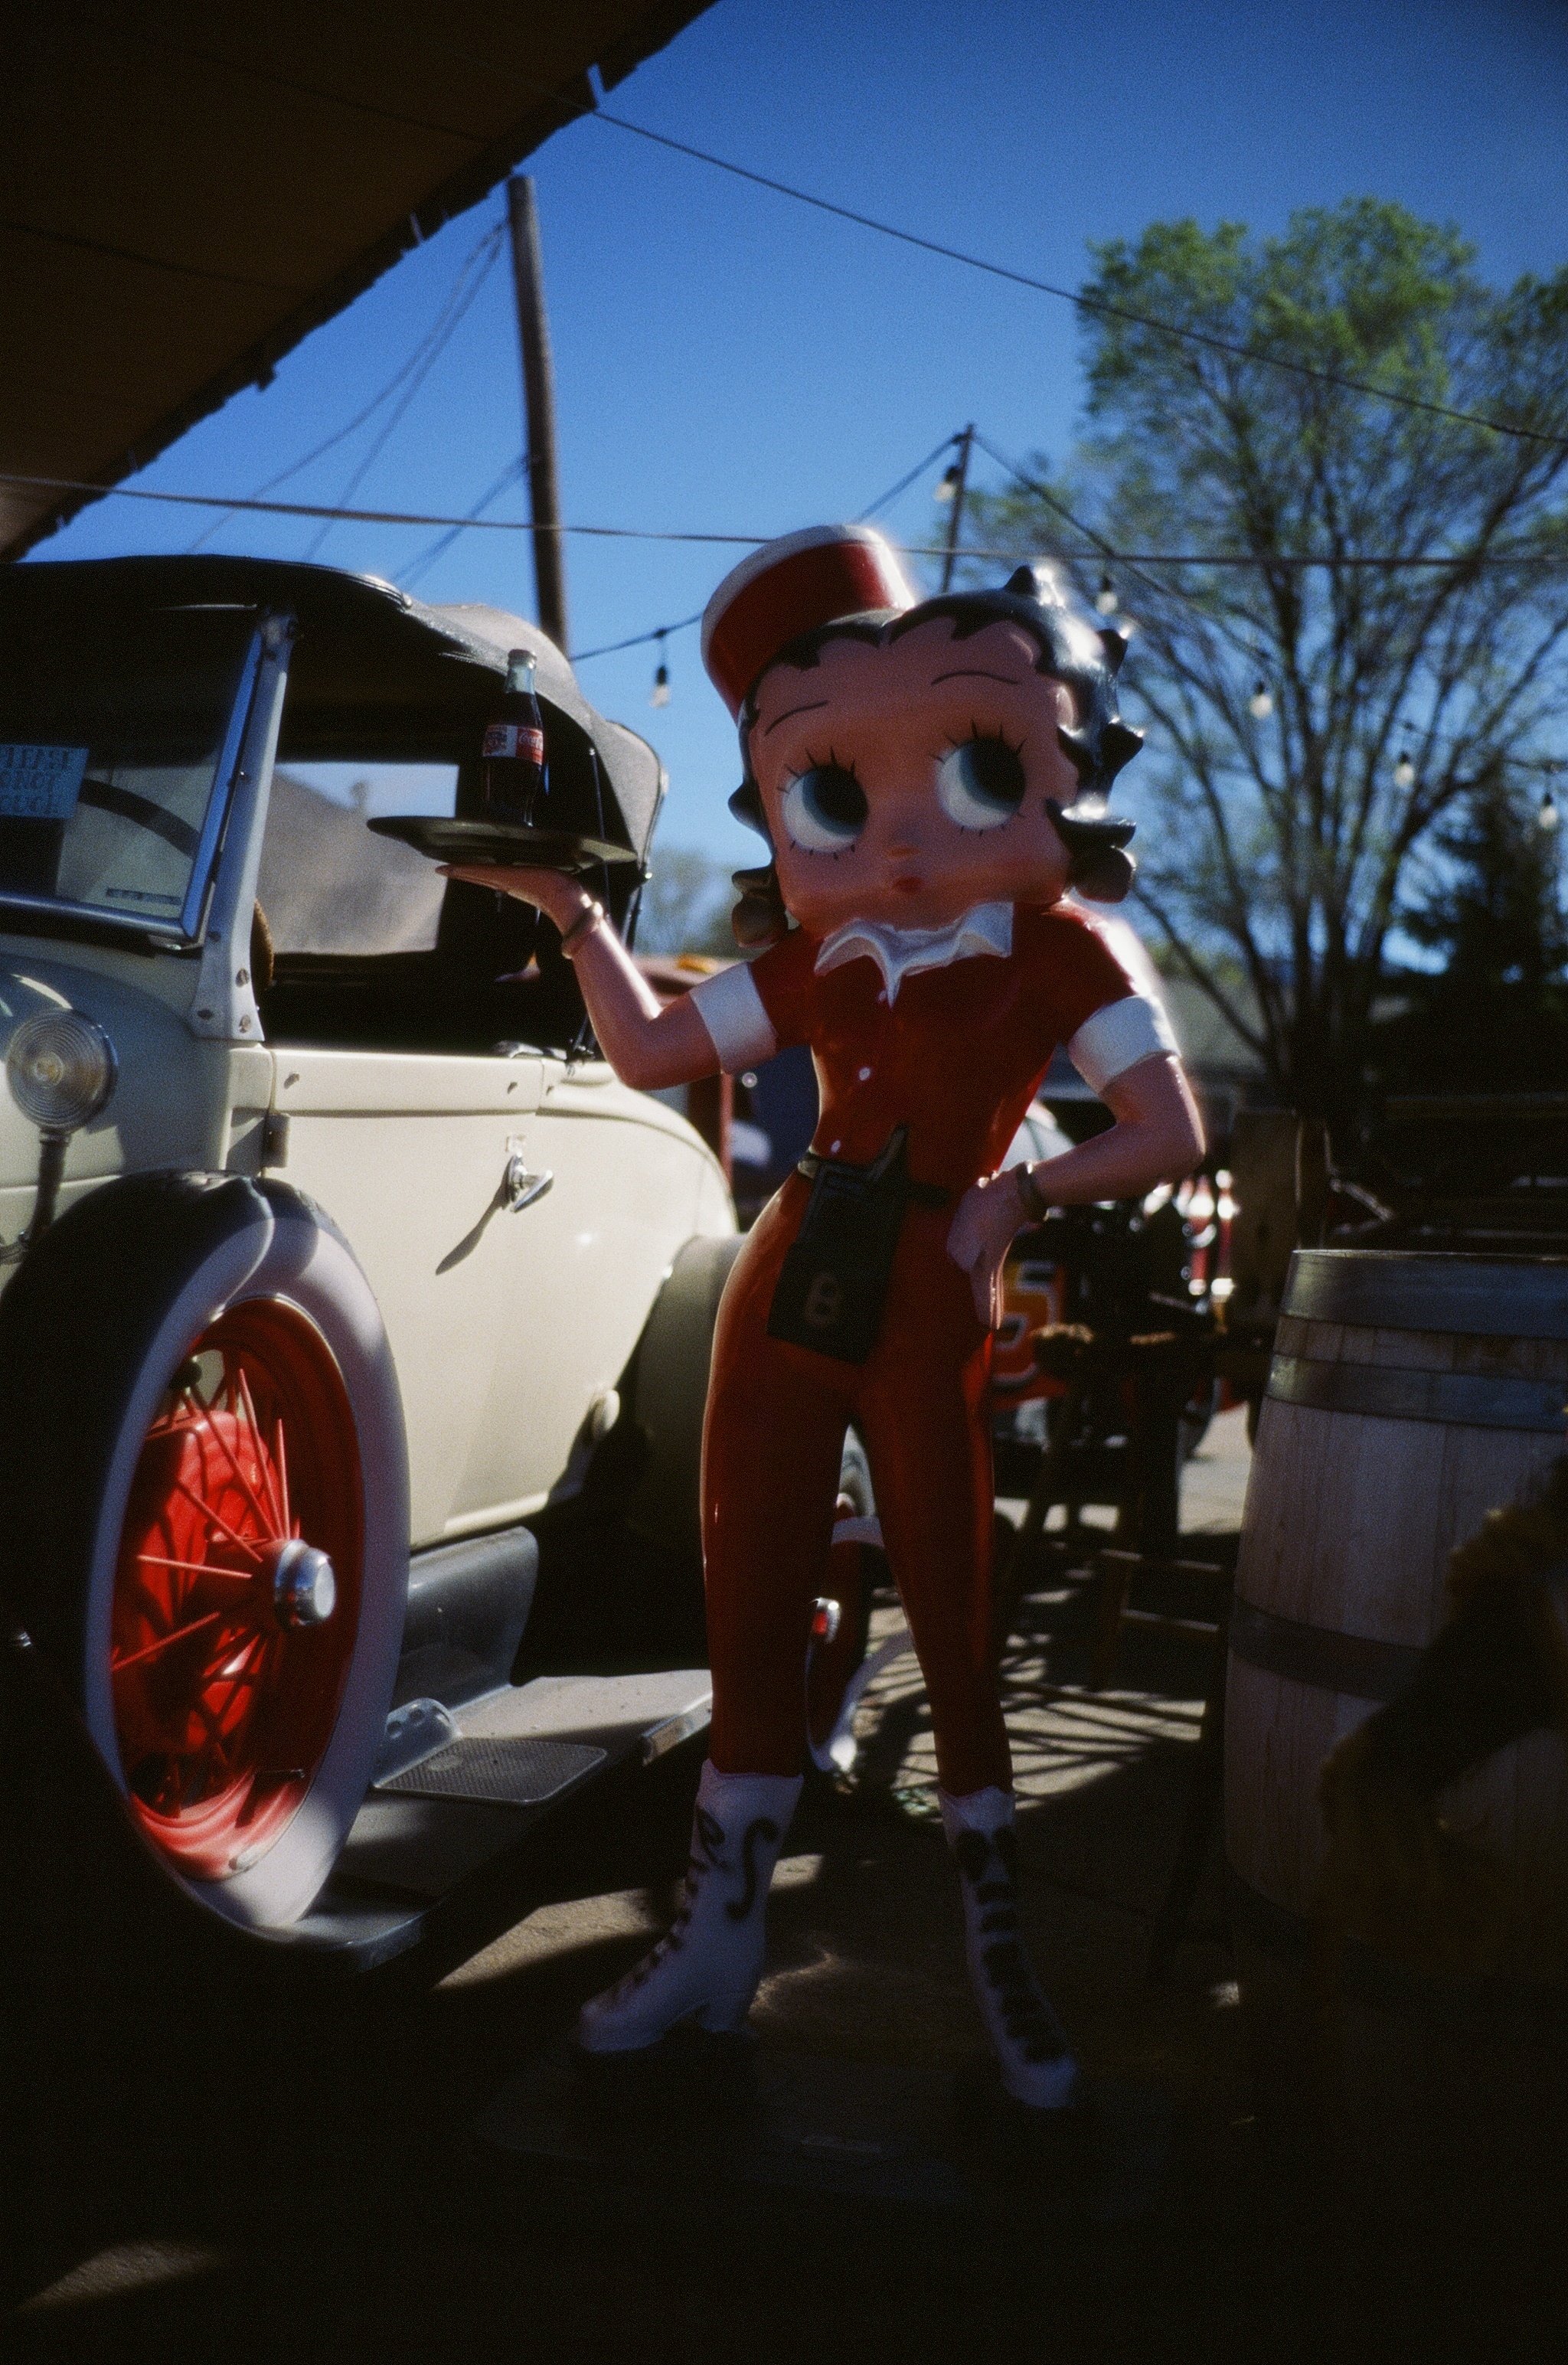
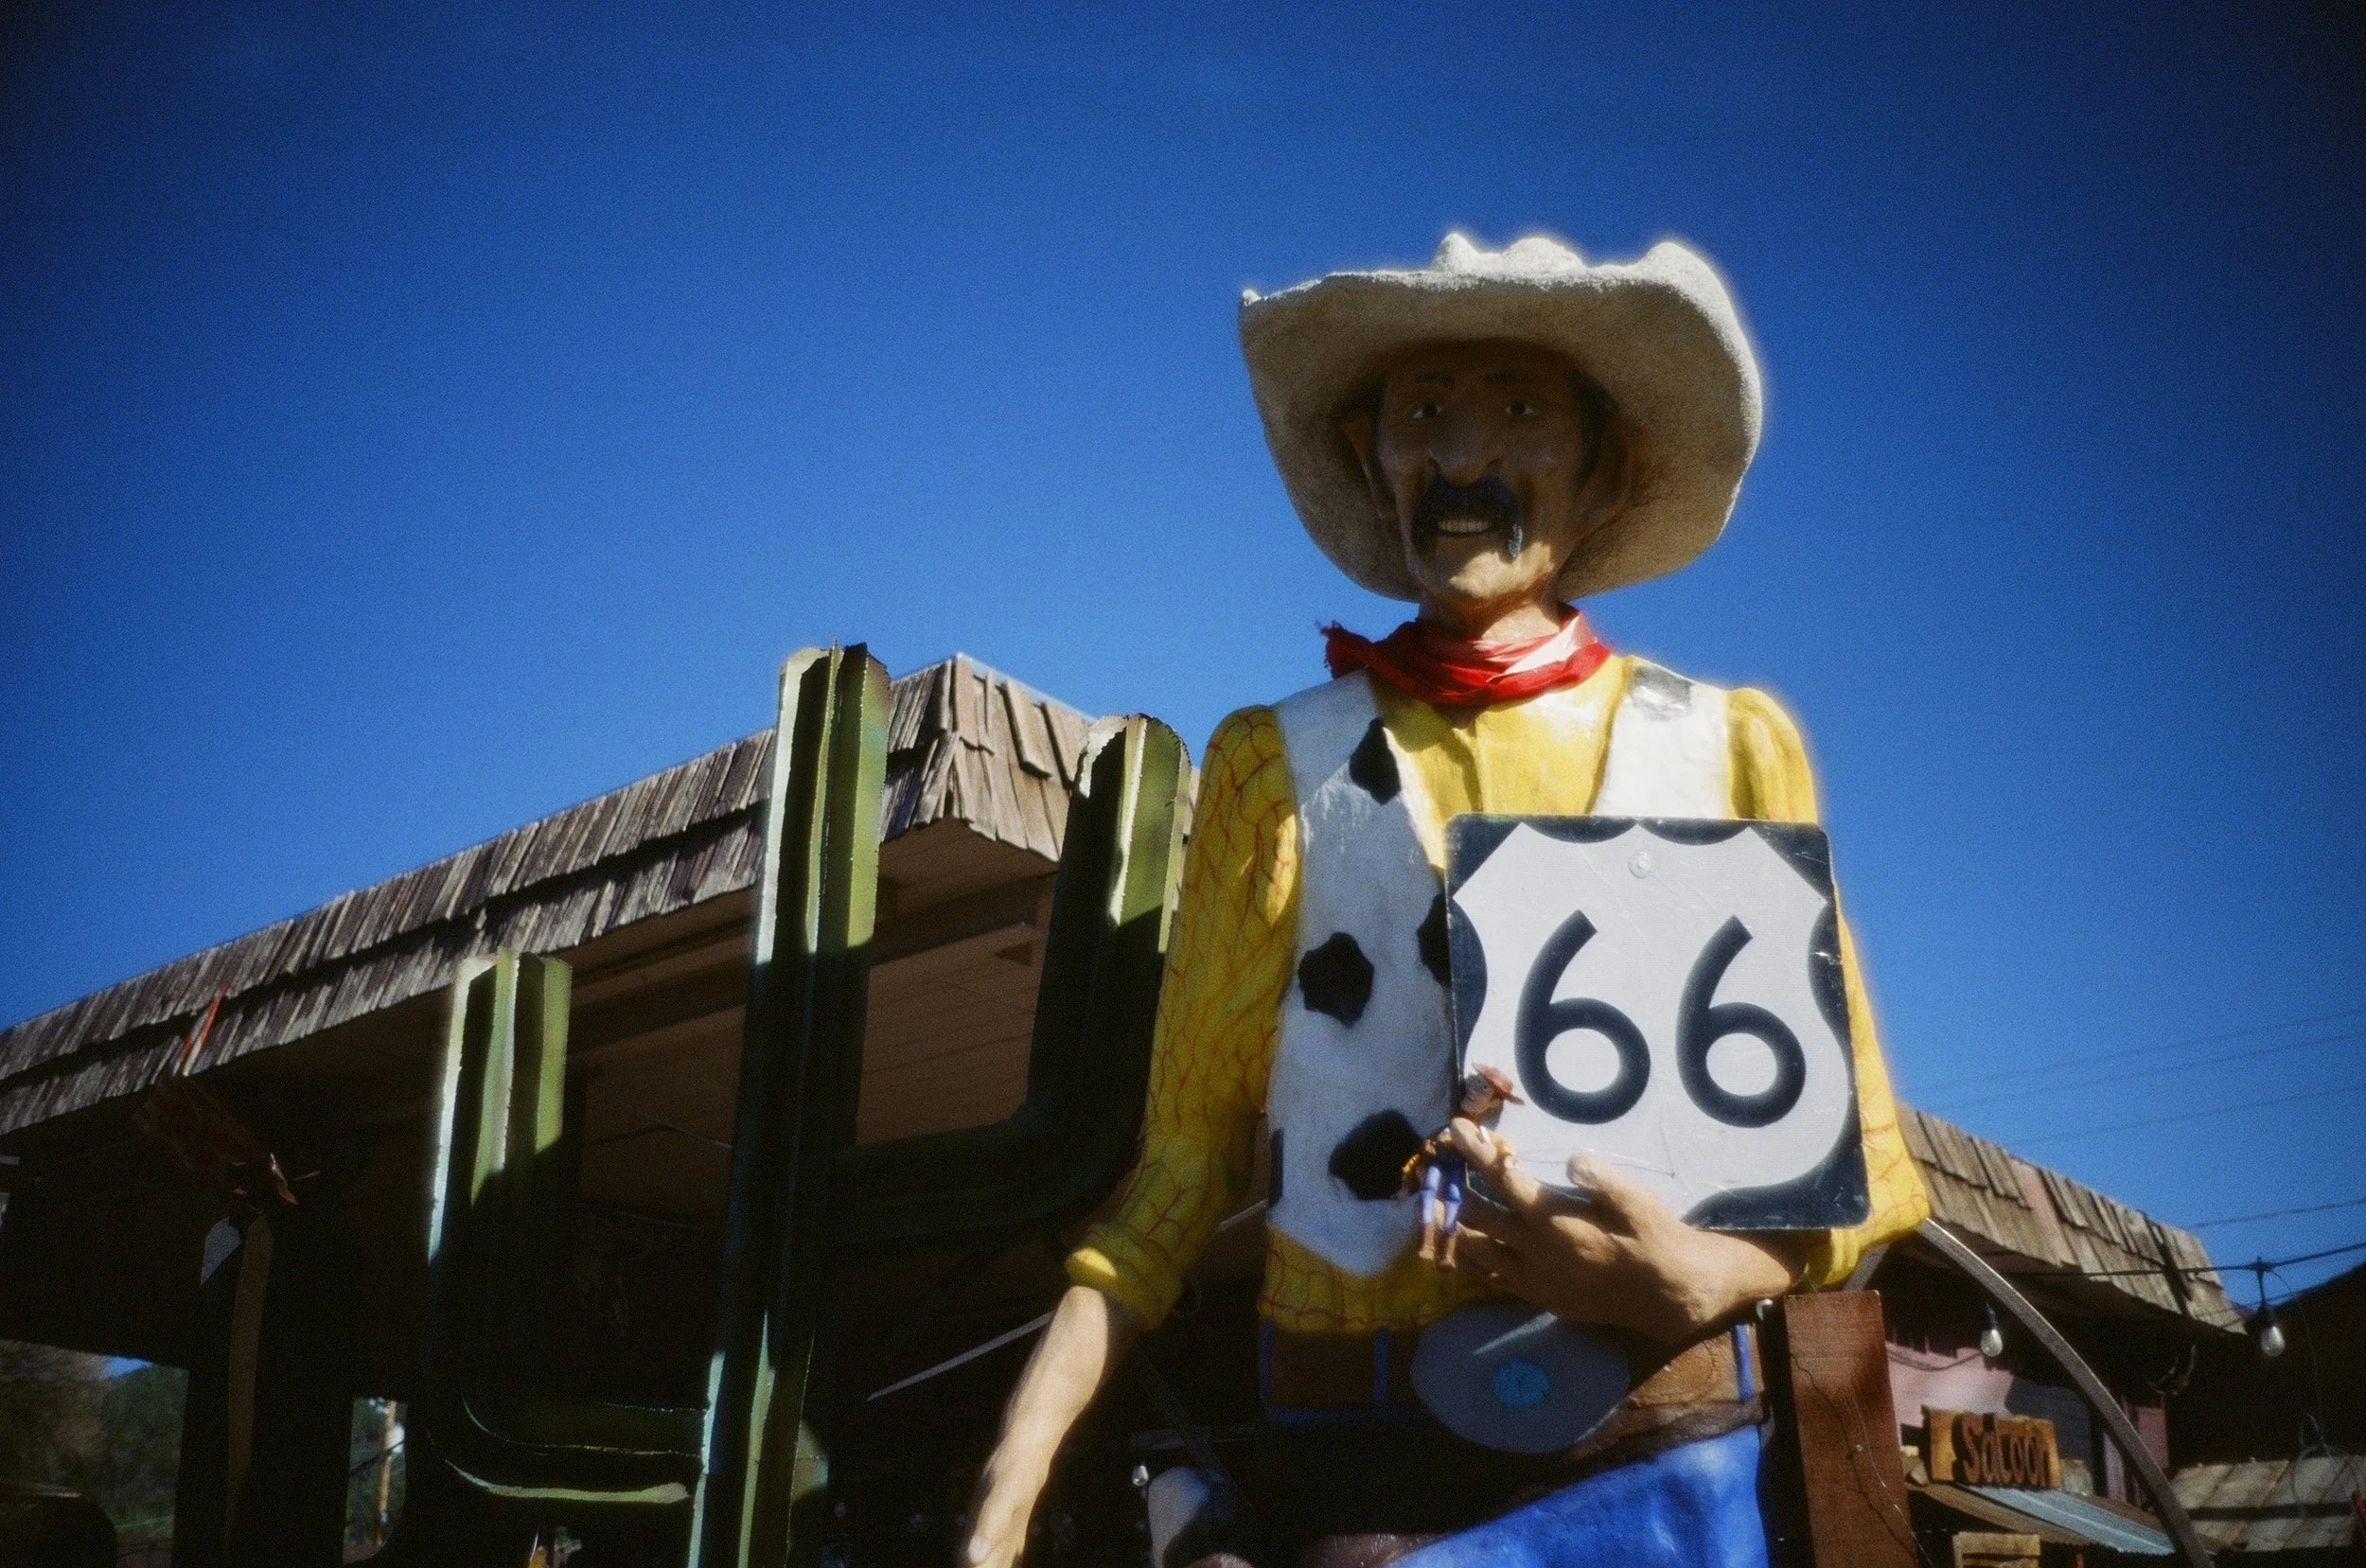
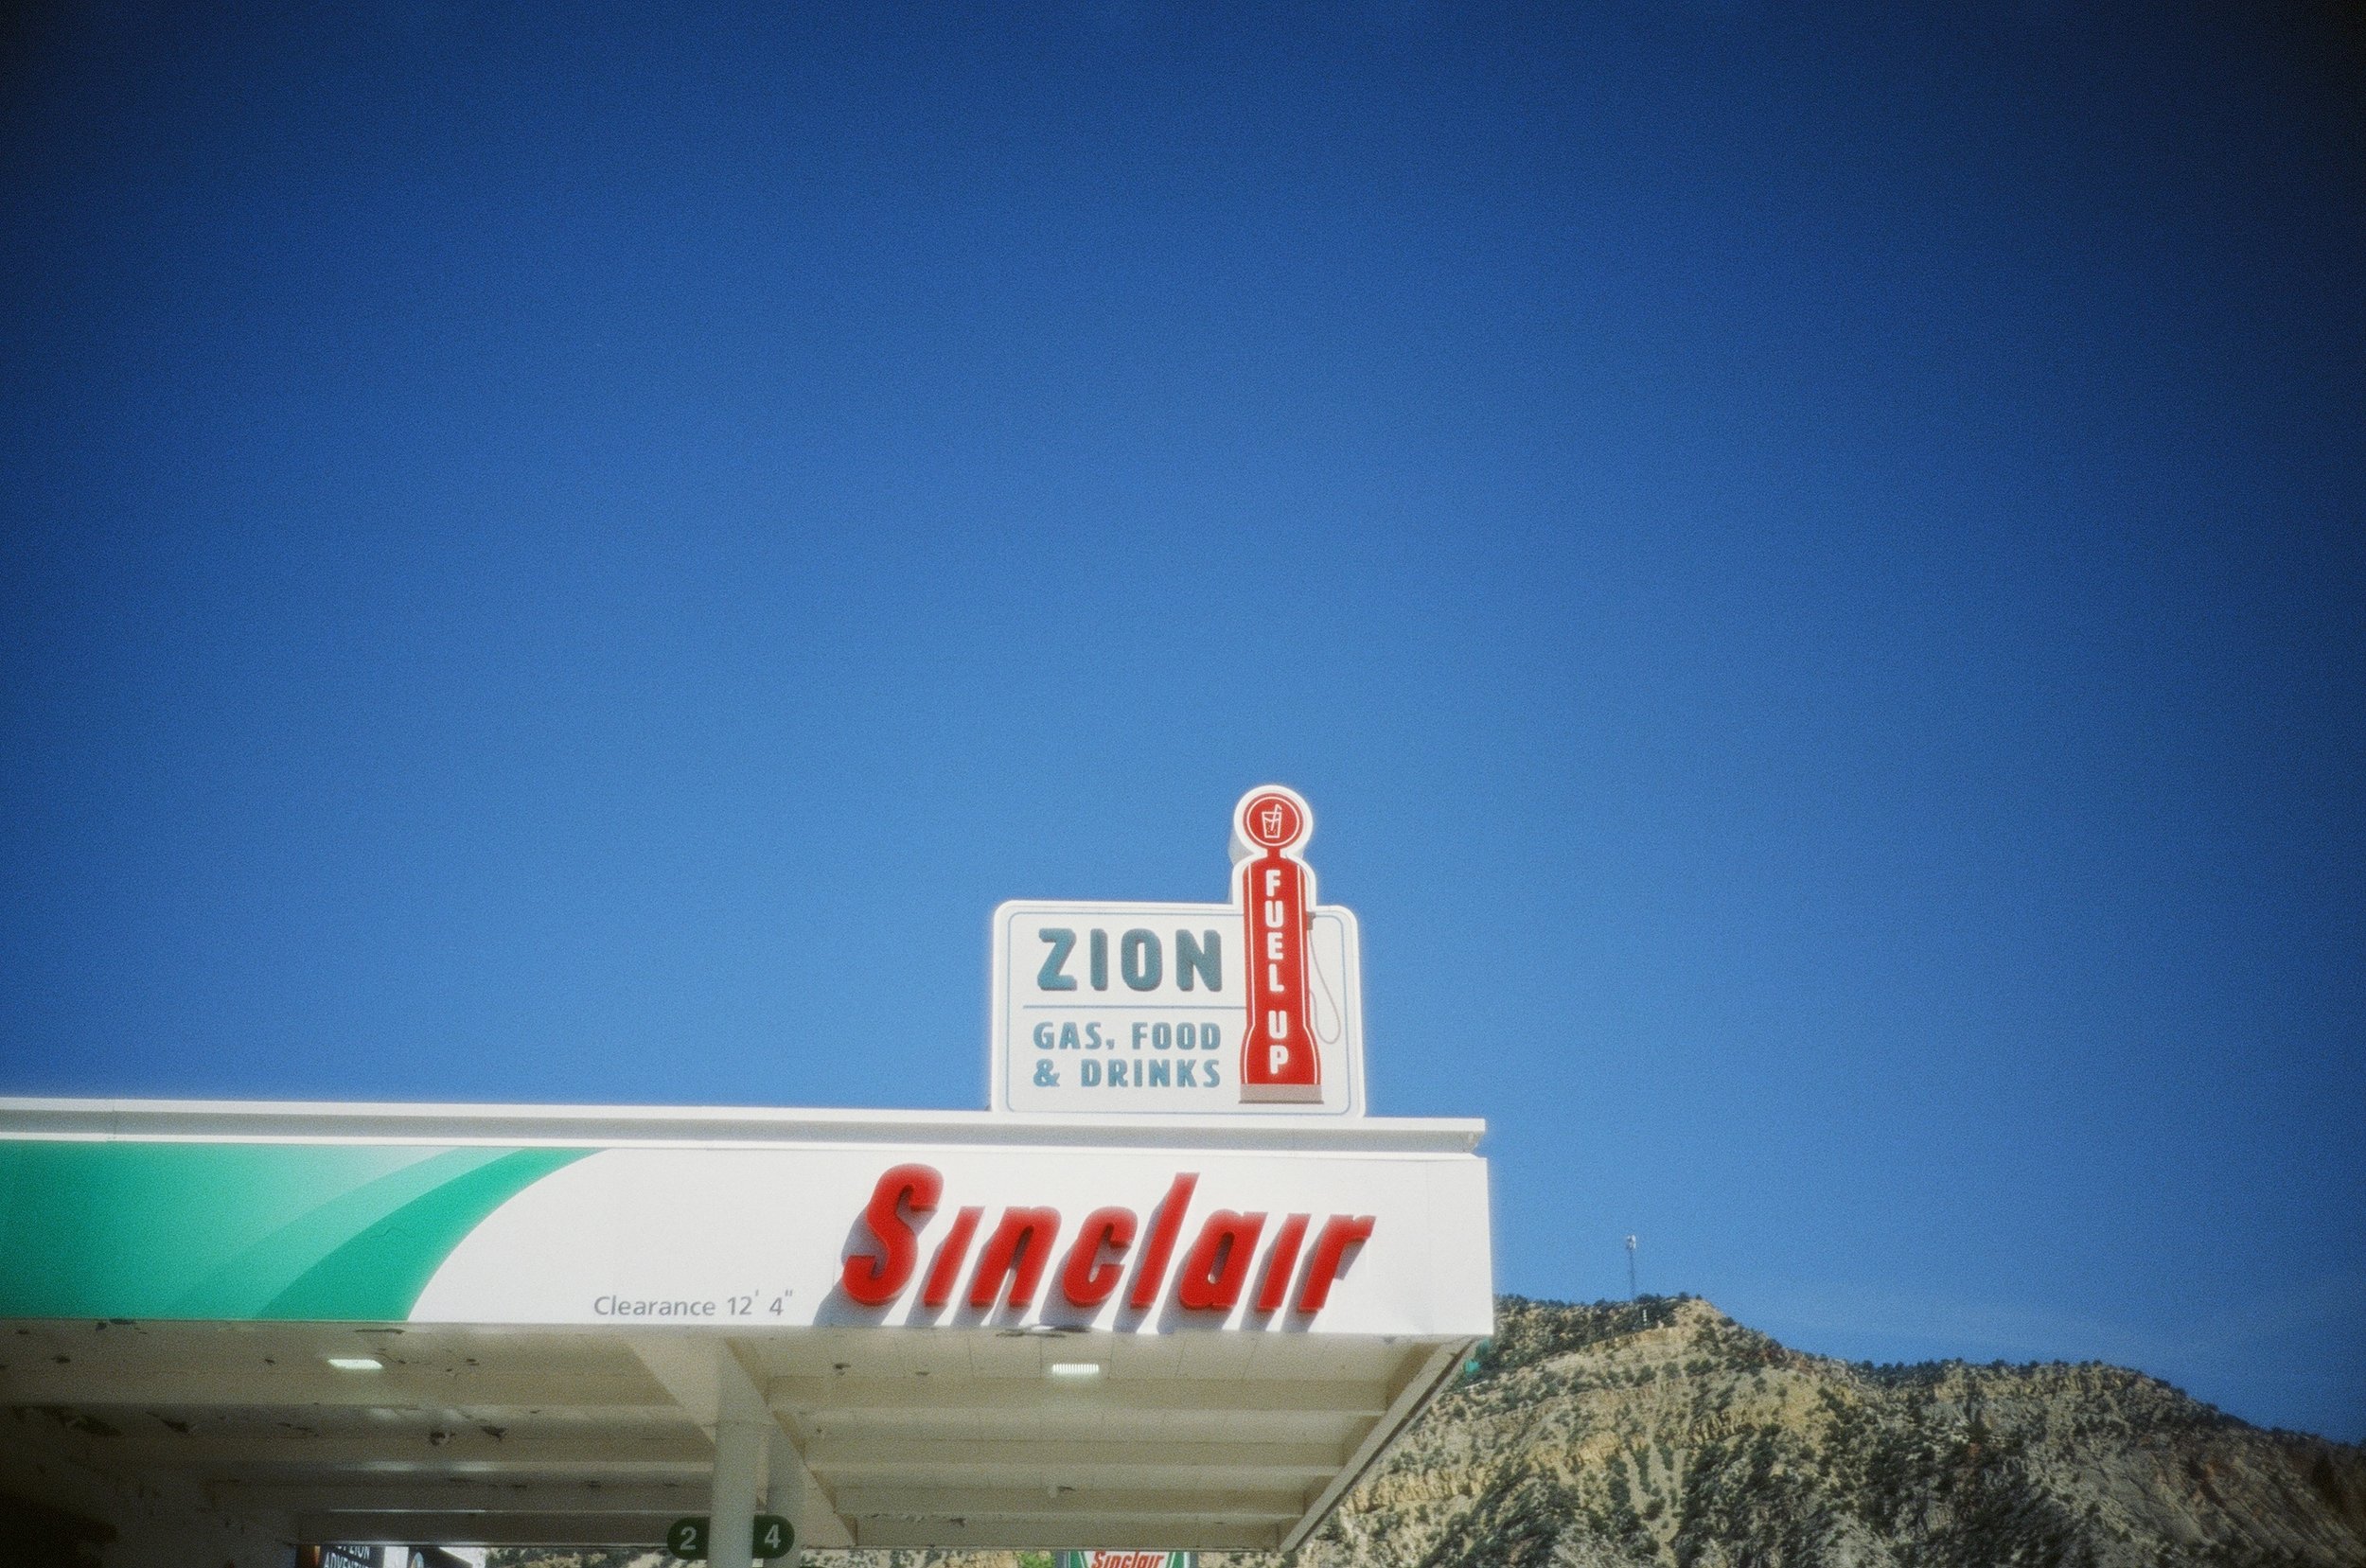
On the drive back to Sedona, we passed through Williams, Arizona — a Route 66 town that still trades on nostalgia and roadside kitsch. Old motels. Diners with neon signs. Gas stations frozen in the 1950s. The kind of Americana that Eggleston would have stopped for.


The Drive North: Meditative Highway and Roadside Finds
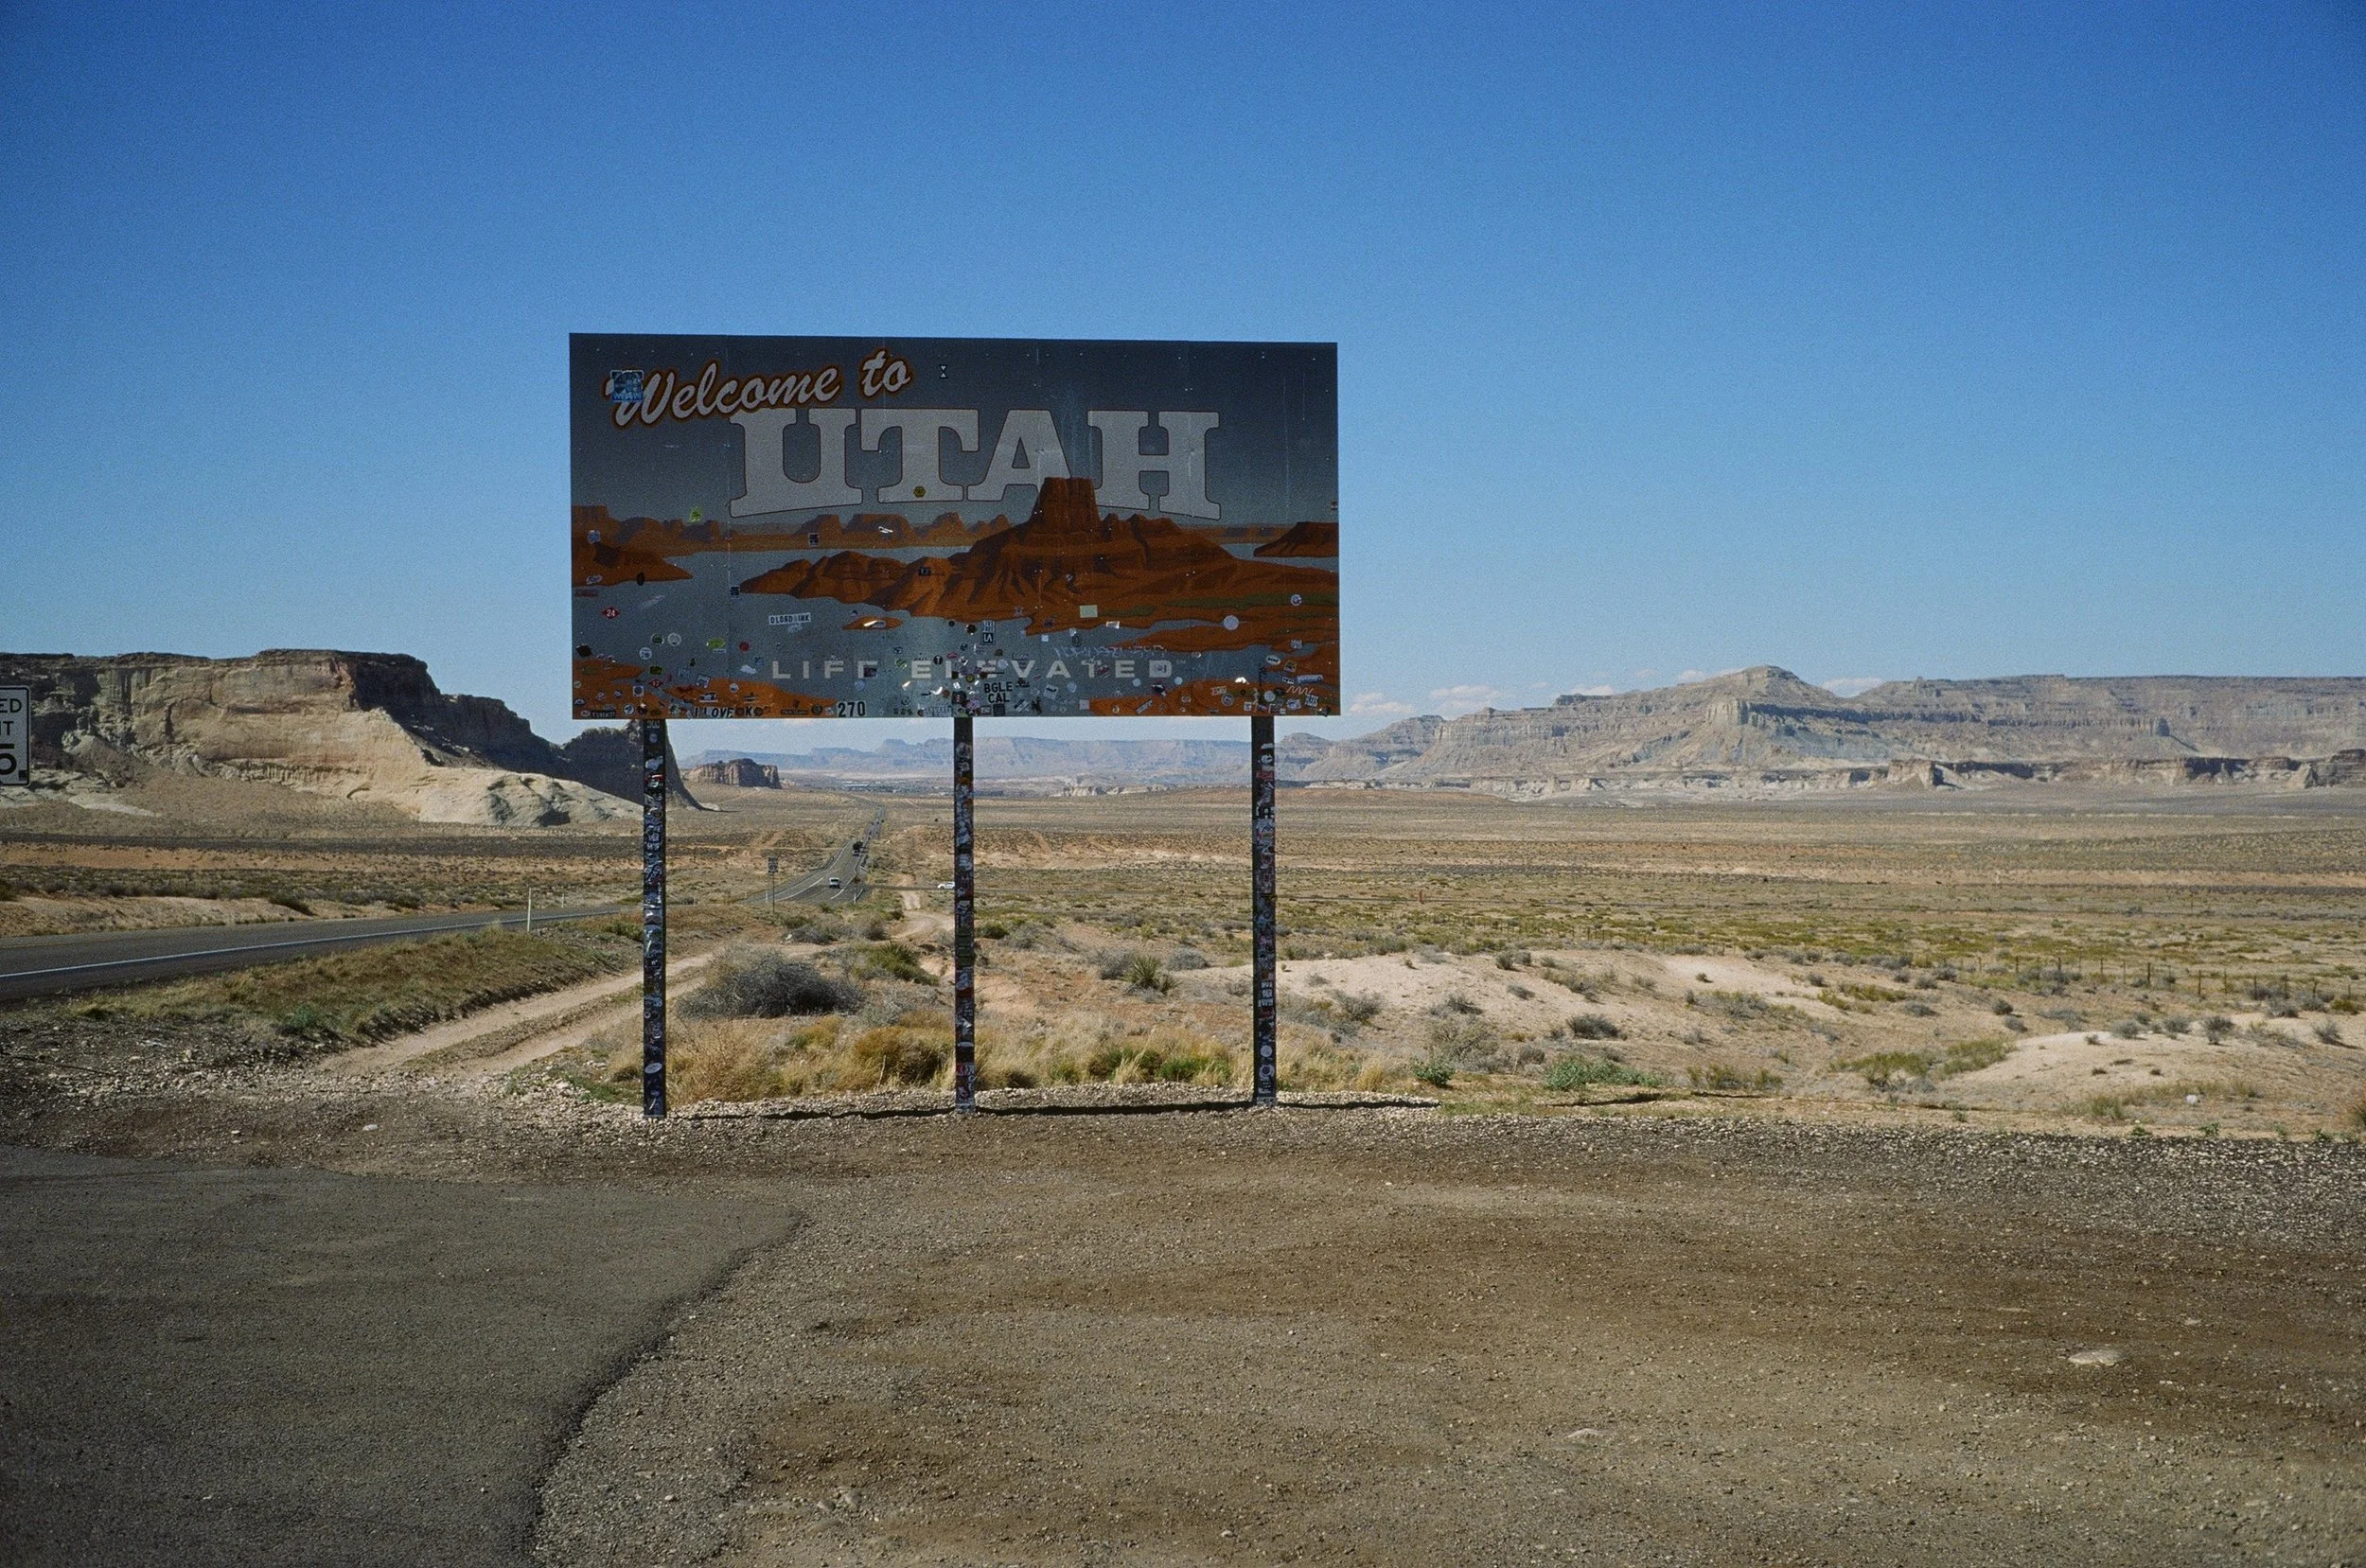
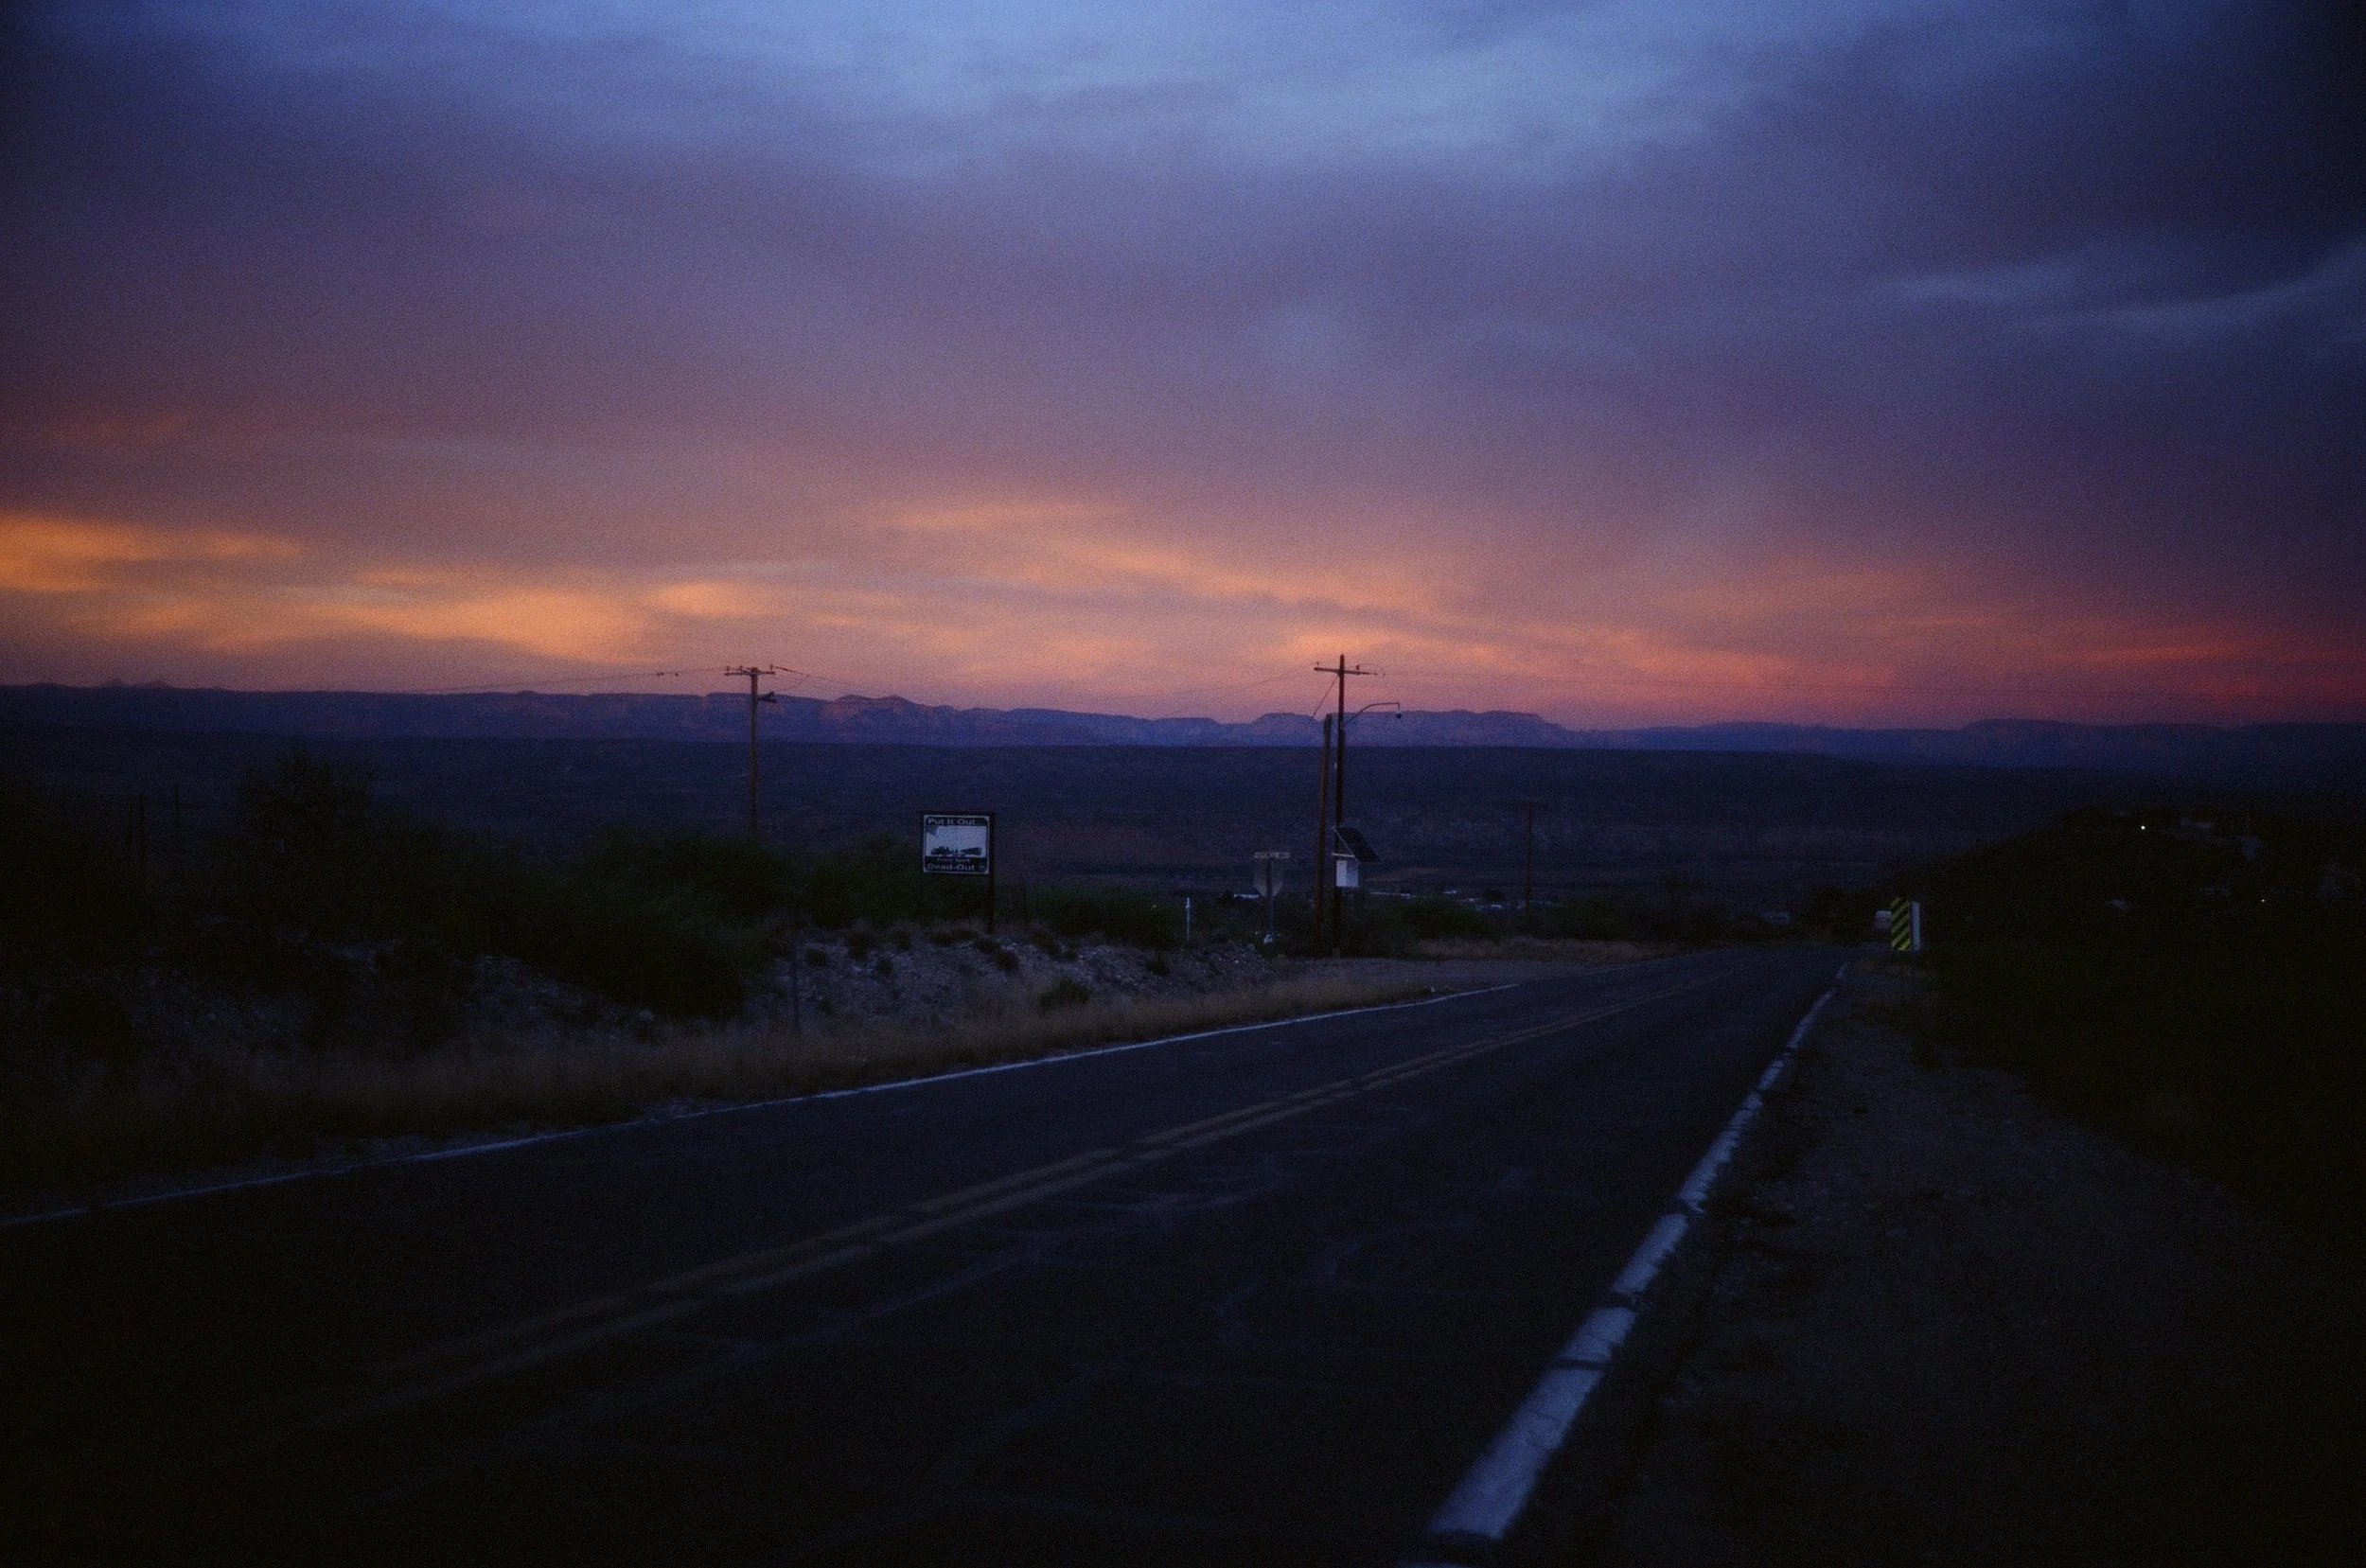
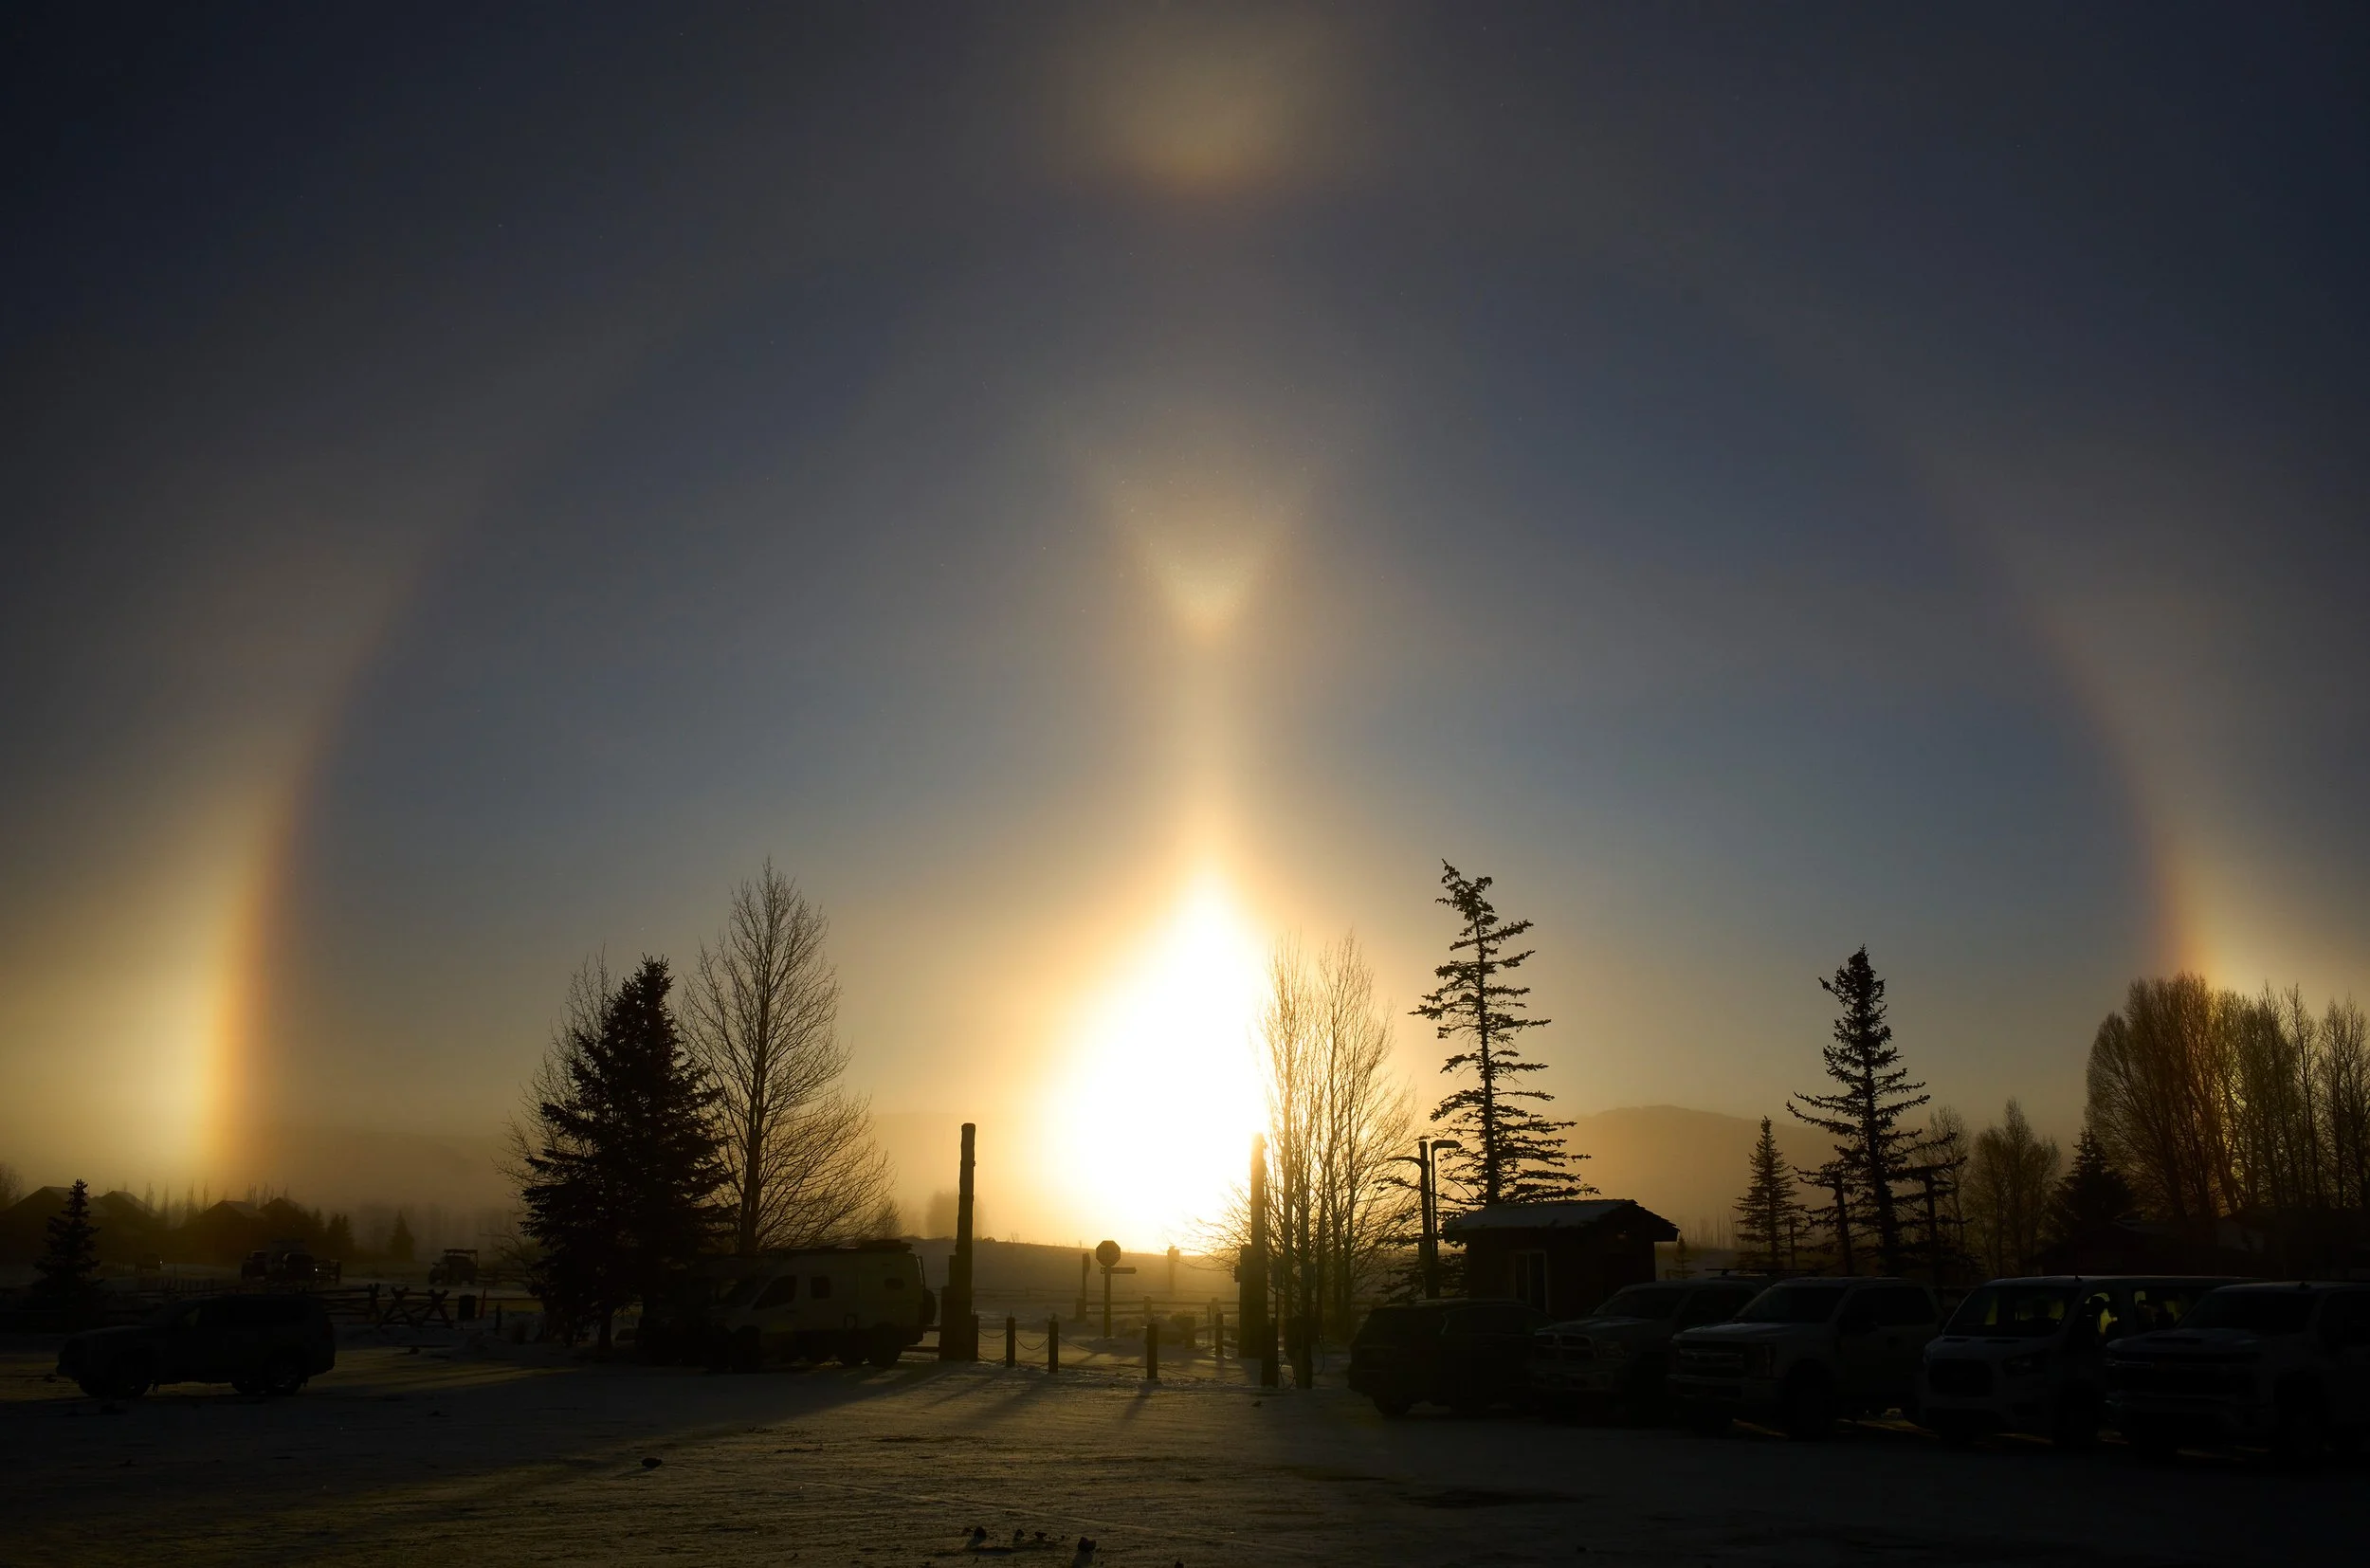
The drive from Sedona to southern Utah is long. Highway 89A to Flagstaff, then Highway 89 north through high desert, past Horseshoe Bend, through Kanab, and into Orderville. It is not interstate. It is two-lane blacktop with long stretches of nothing.
This is where the trip became what I came for.
The highway itself is the subject. Empty roads. Distant mesas. Sky so blue it feels artificial. Abandoned structures. Old signs still standing decades after the businesses closed.
We stopped at Horseshoe Bend. Tourist circus. Crowds. Fenced overlook. Still worth it. The Colorado River bends 270 degrees around a sandstone escarpment, and the view delivers exactly what the photos promise.
The driving was meditative. Not tedious. Not boring. Just long stretches of focus and movement. My wife navigated. I drove. The family slept in the back. The road kept going.
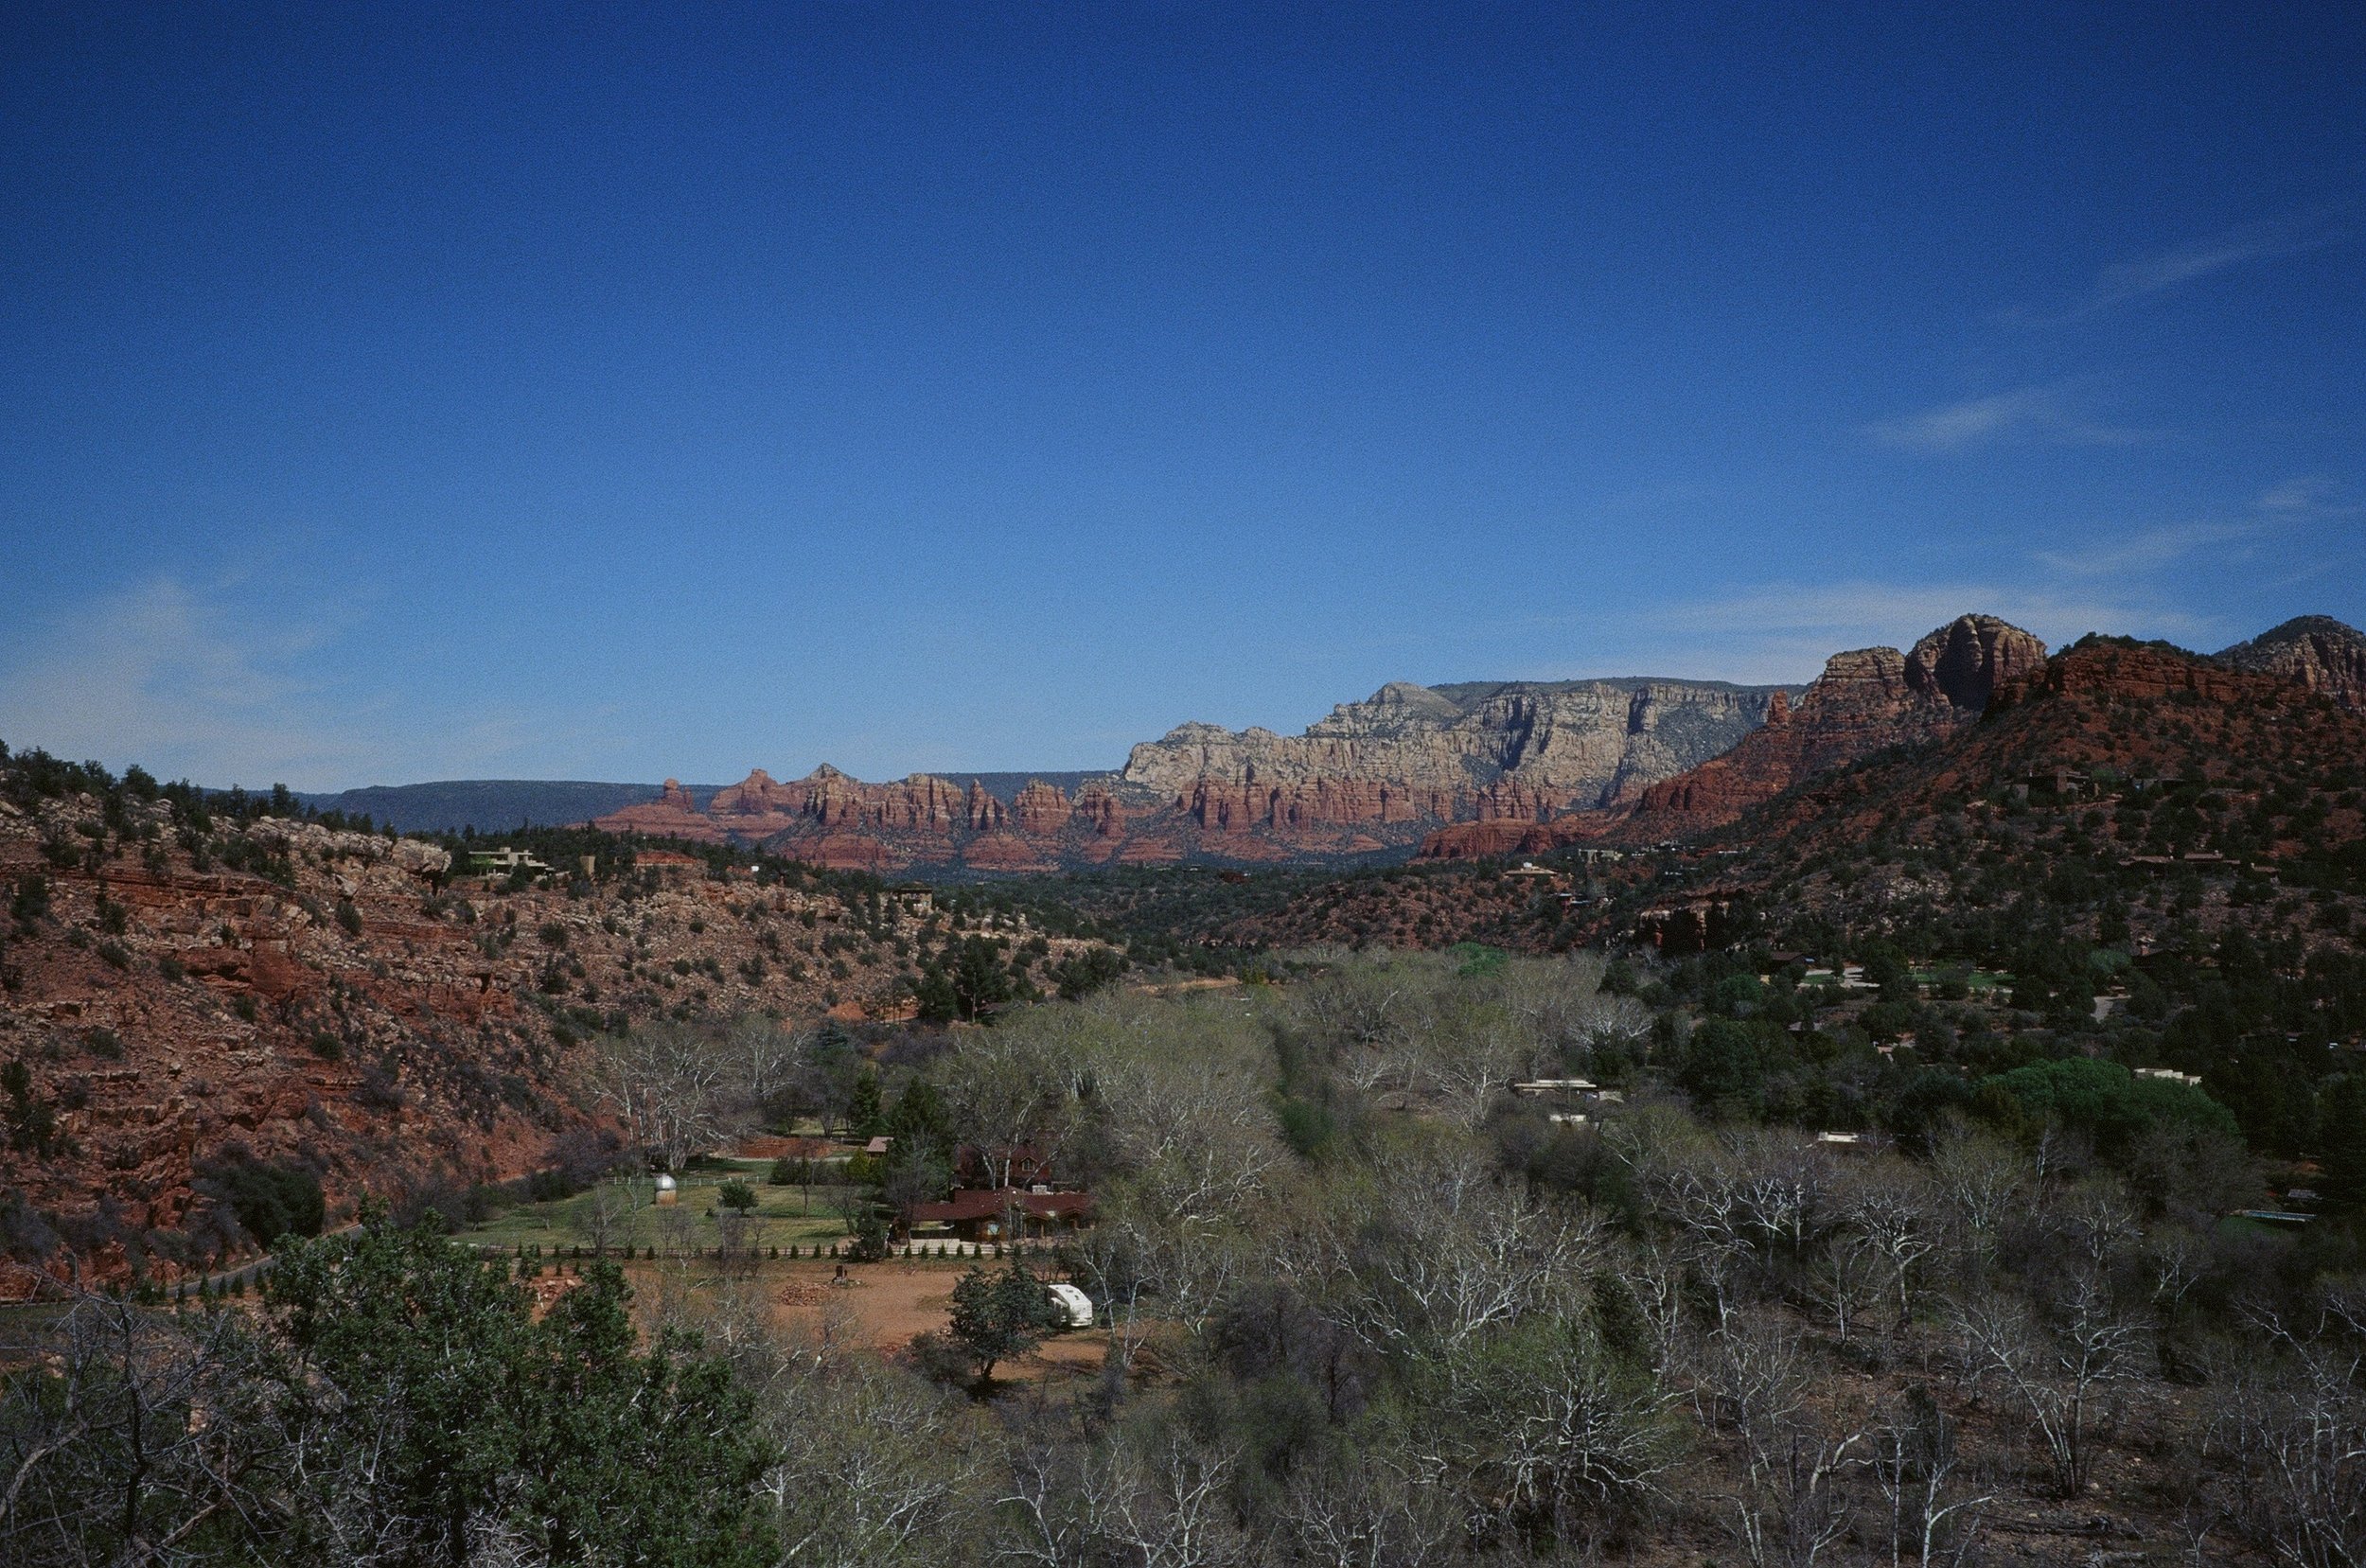
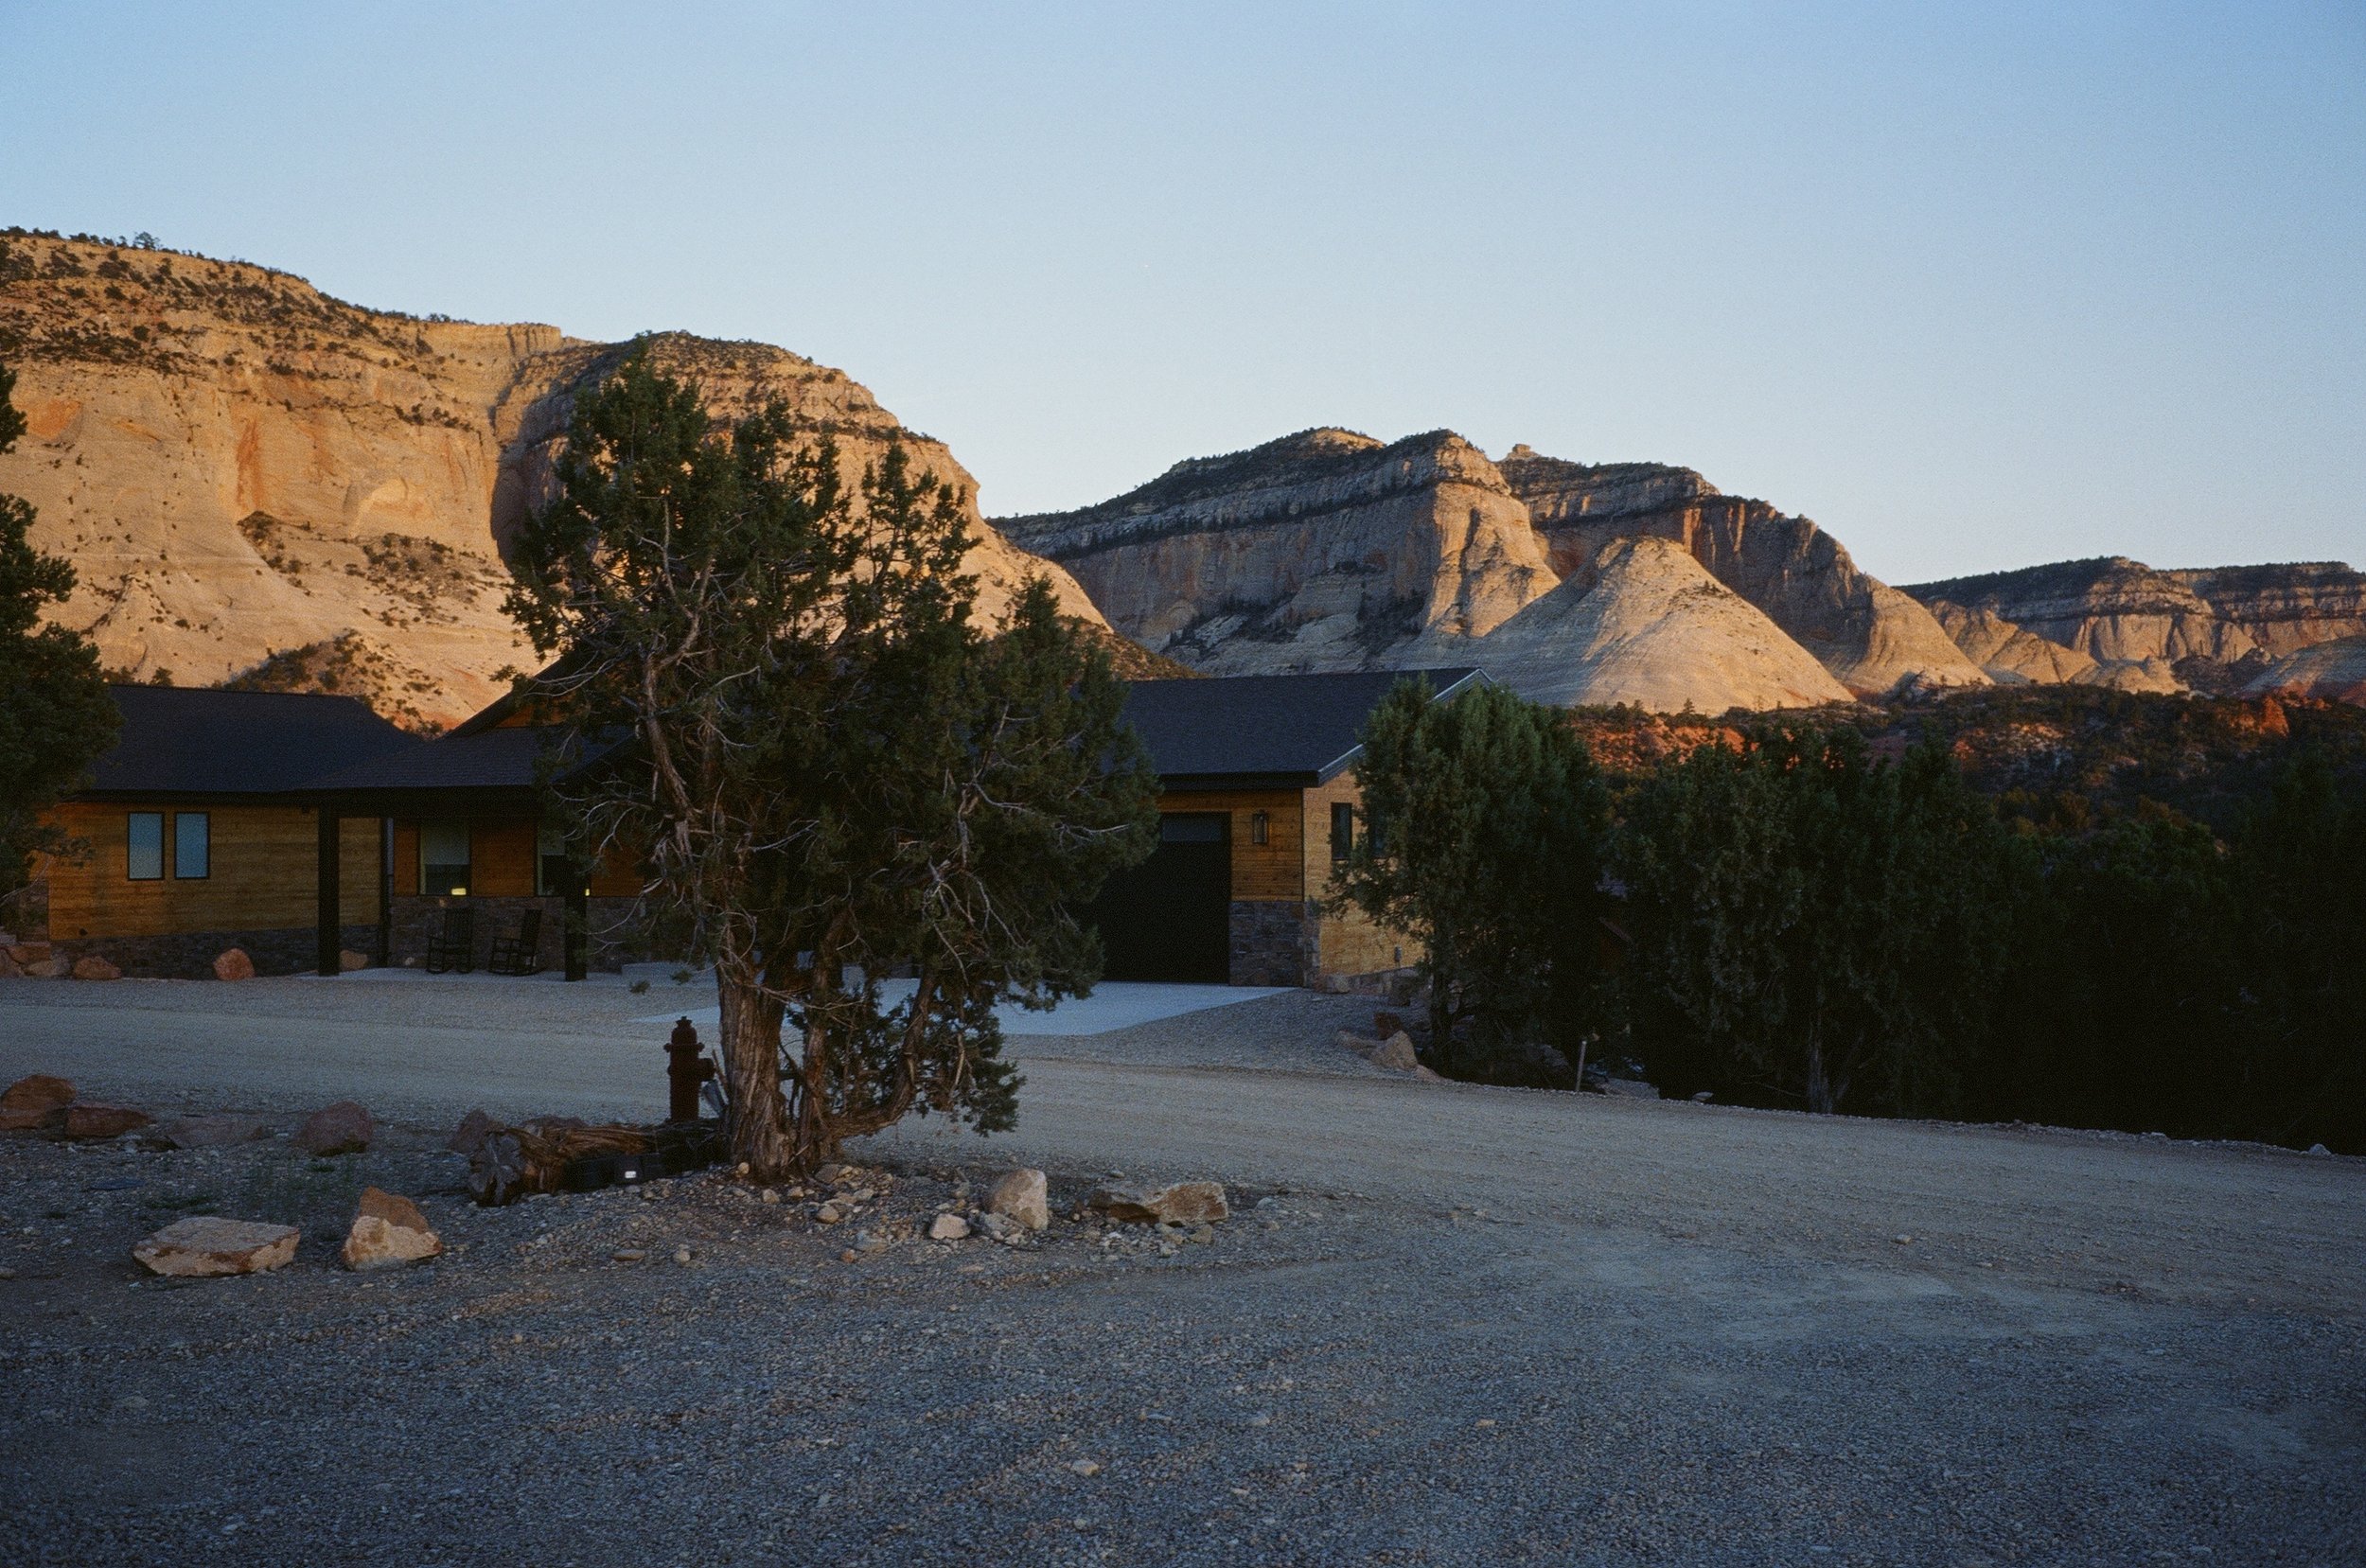
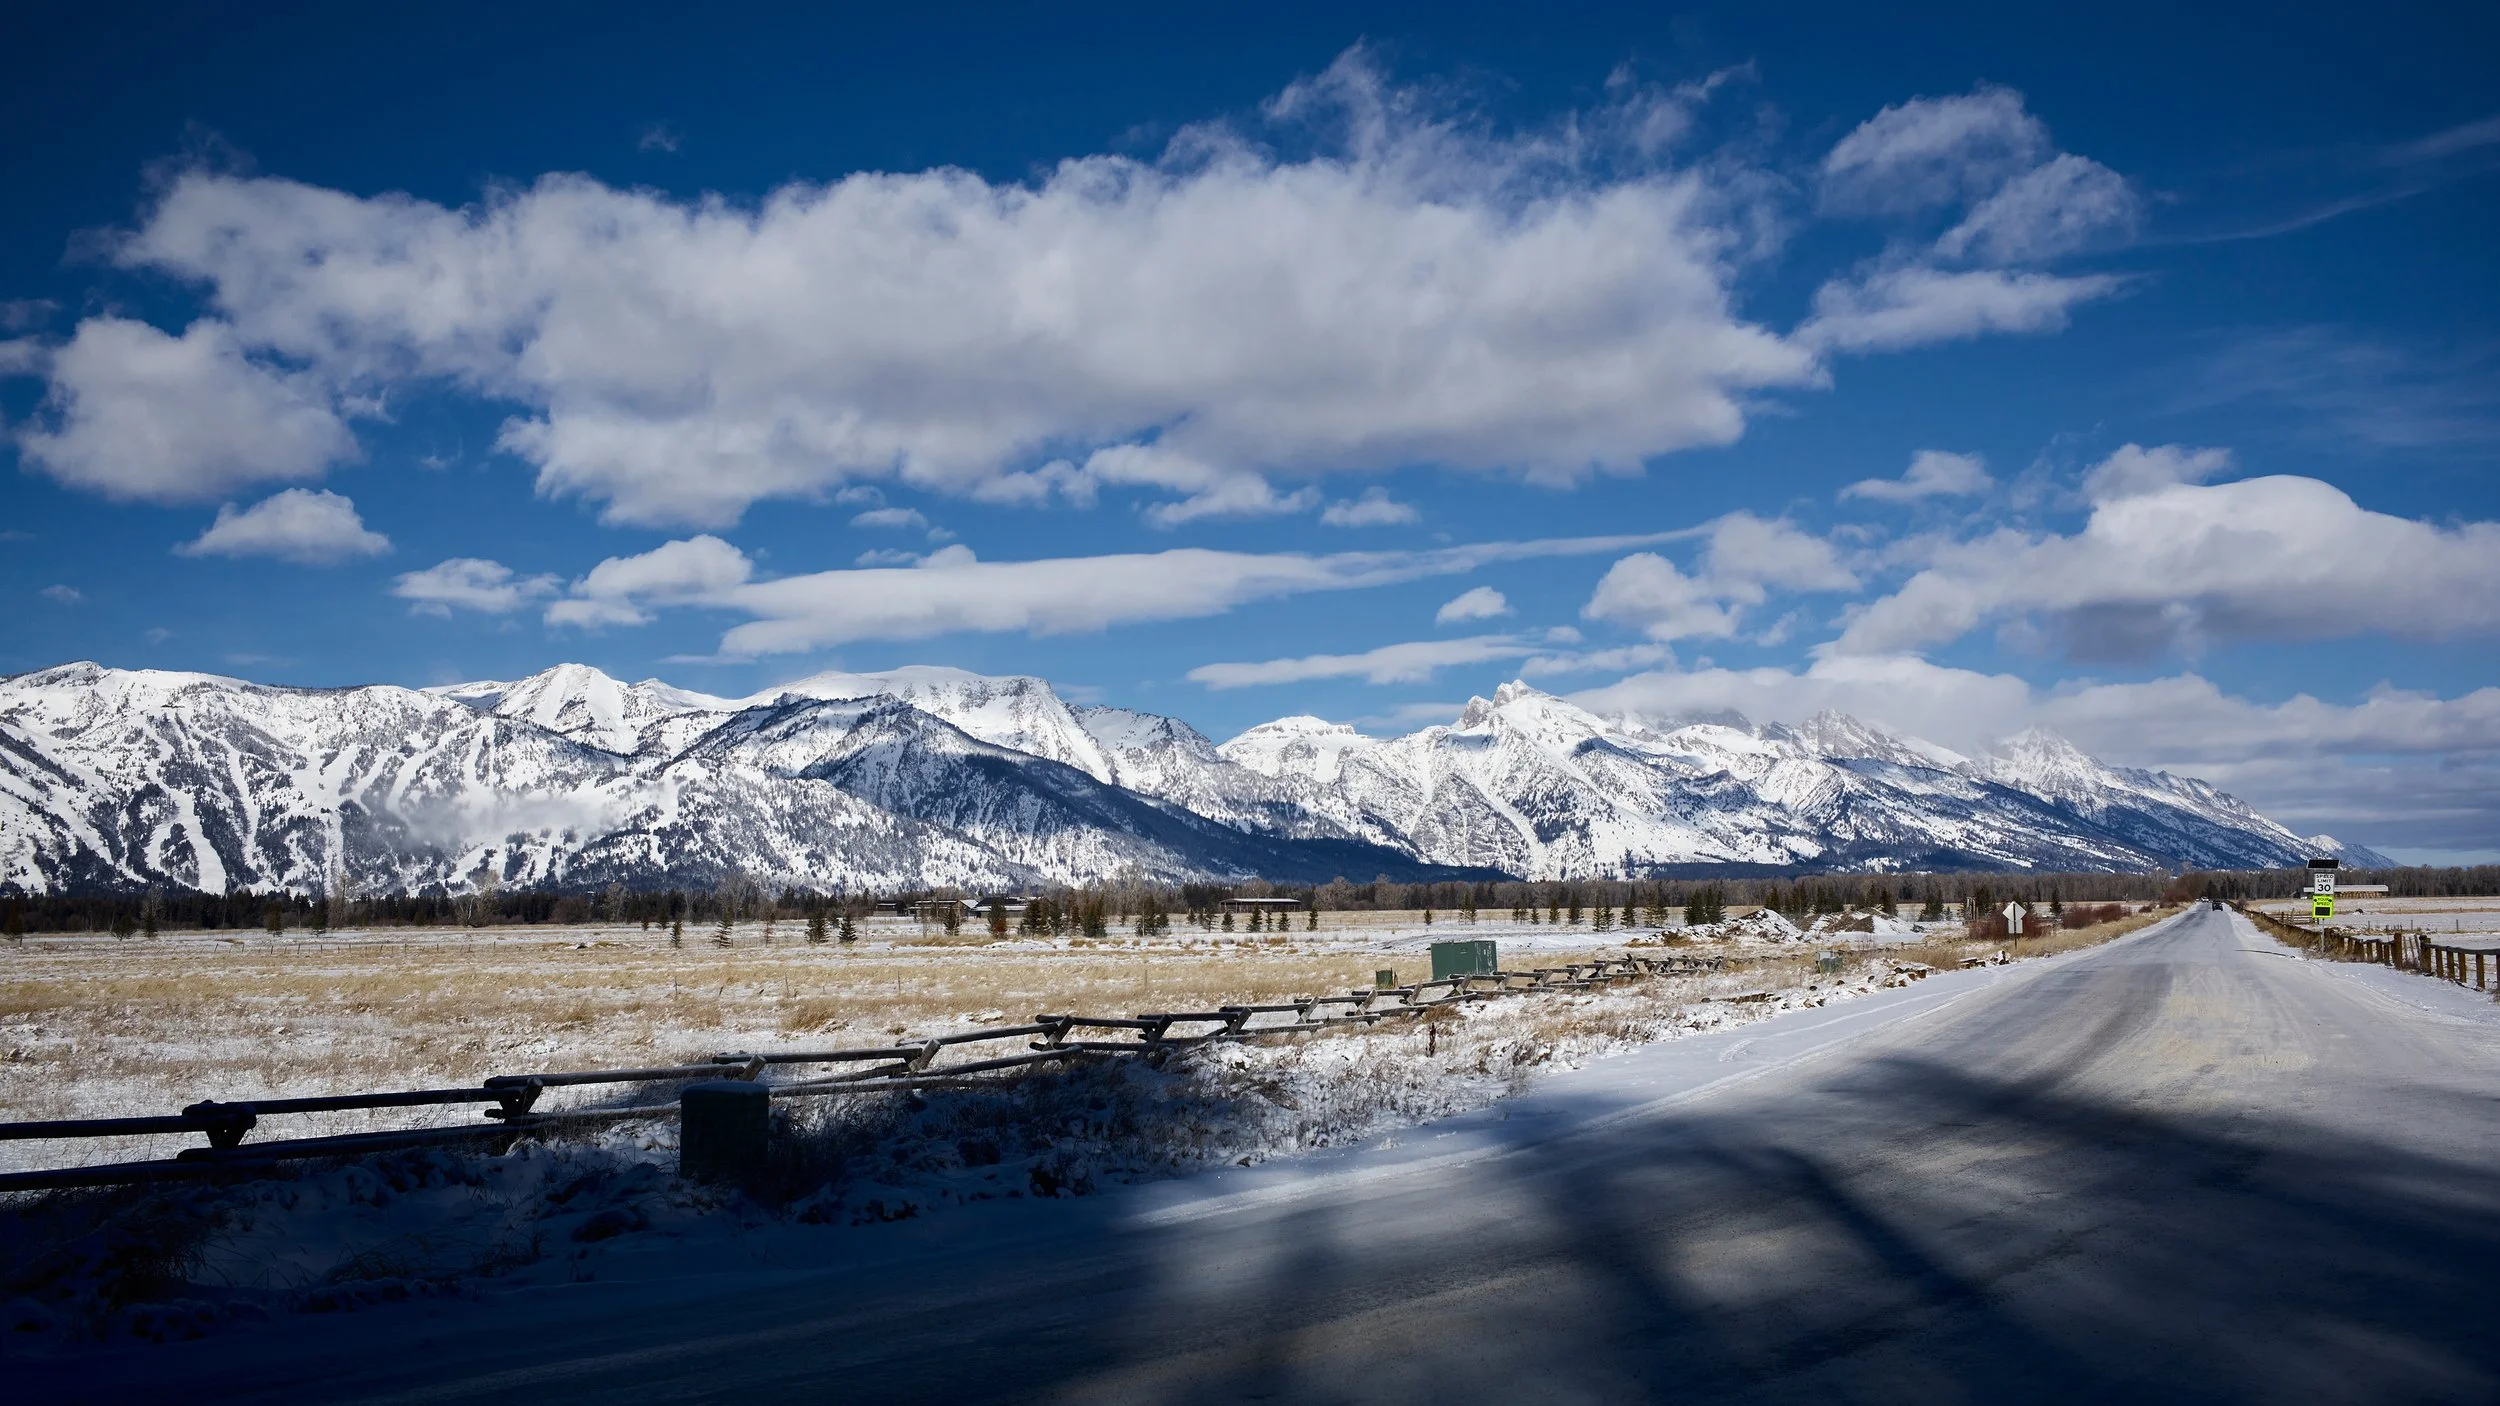
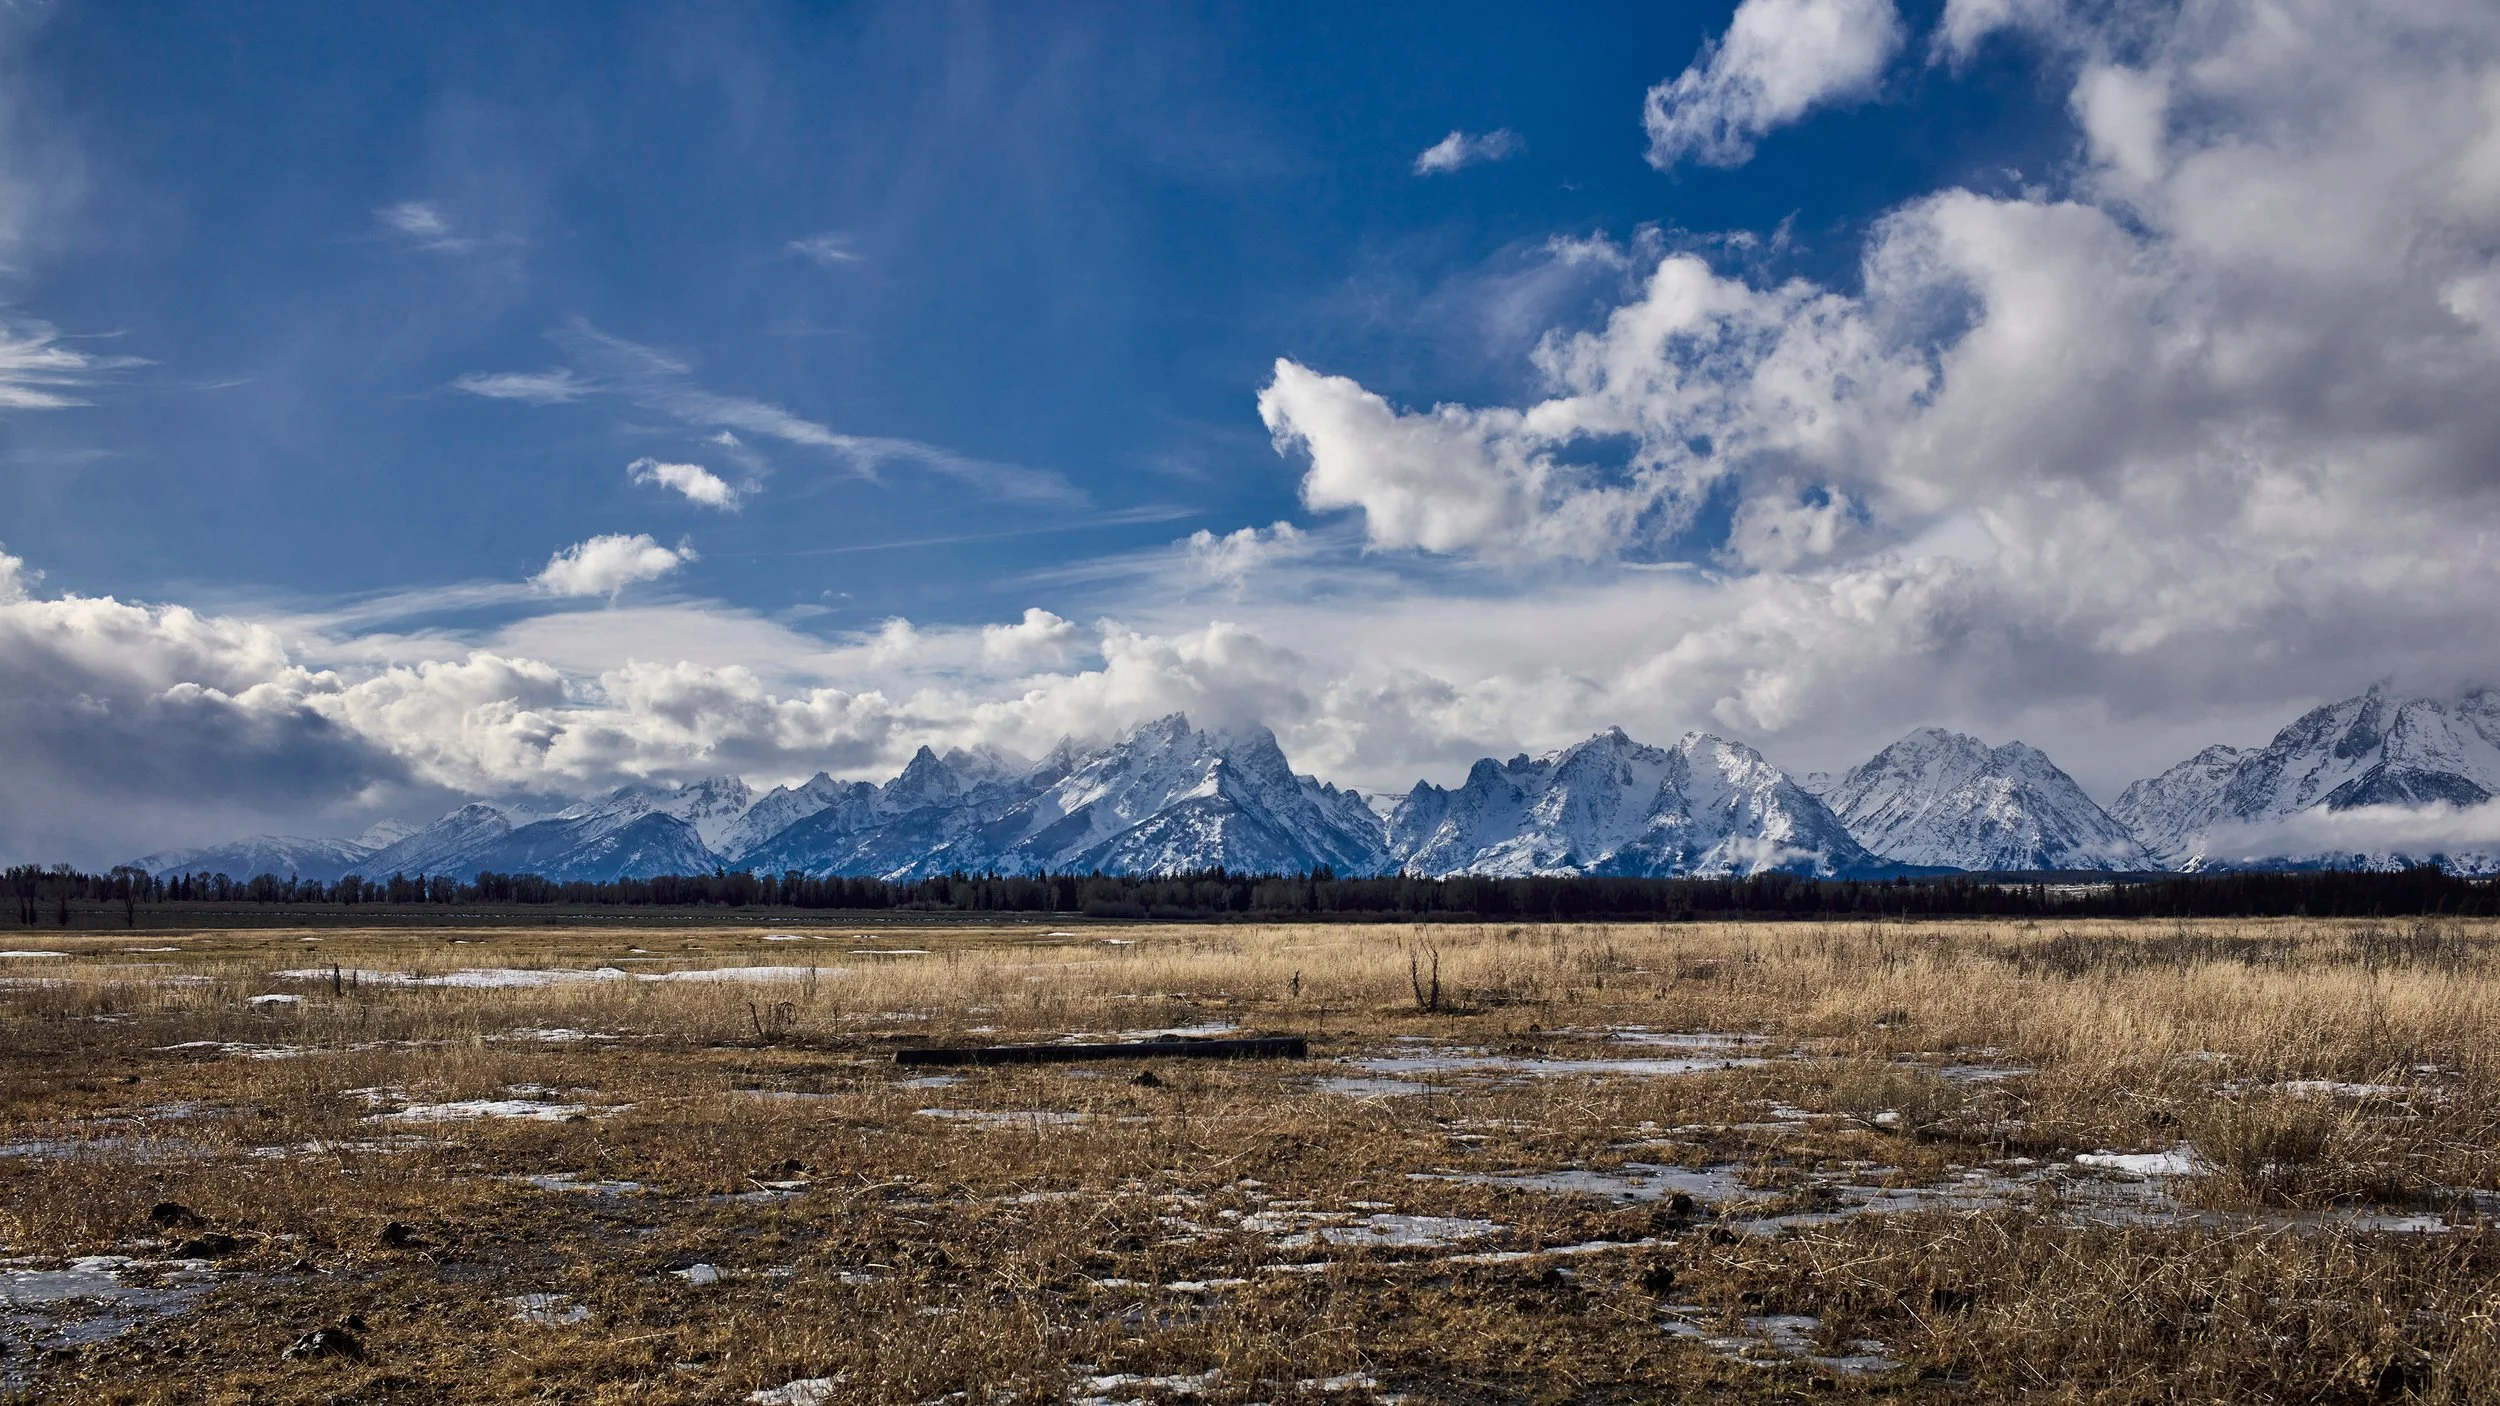
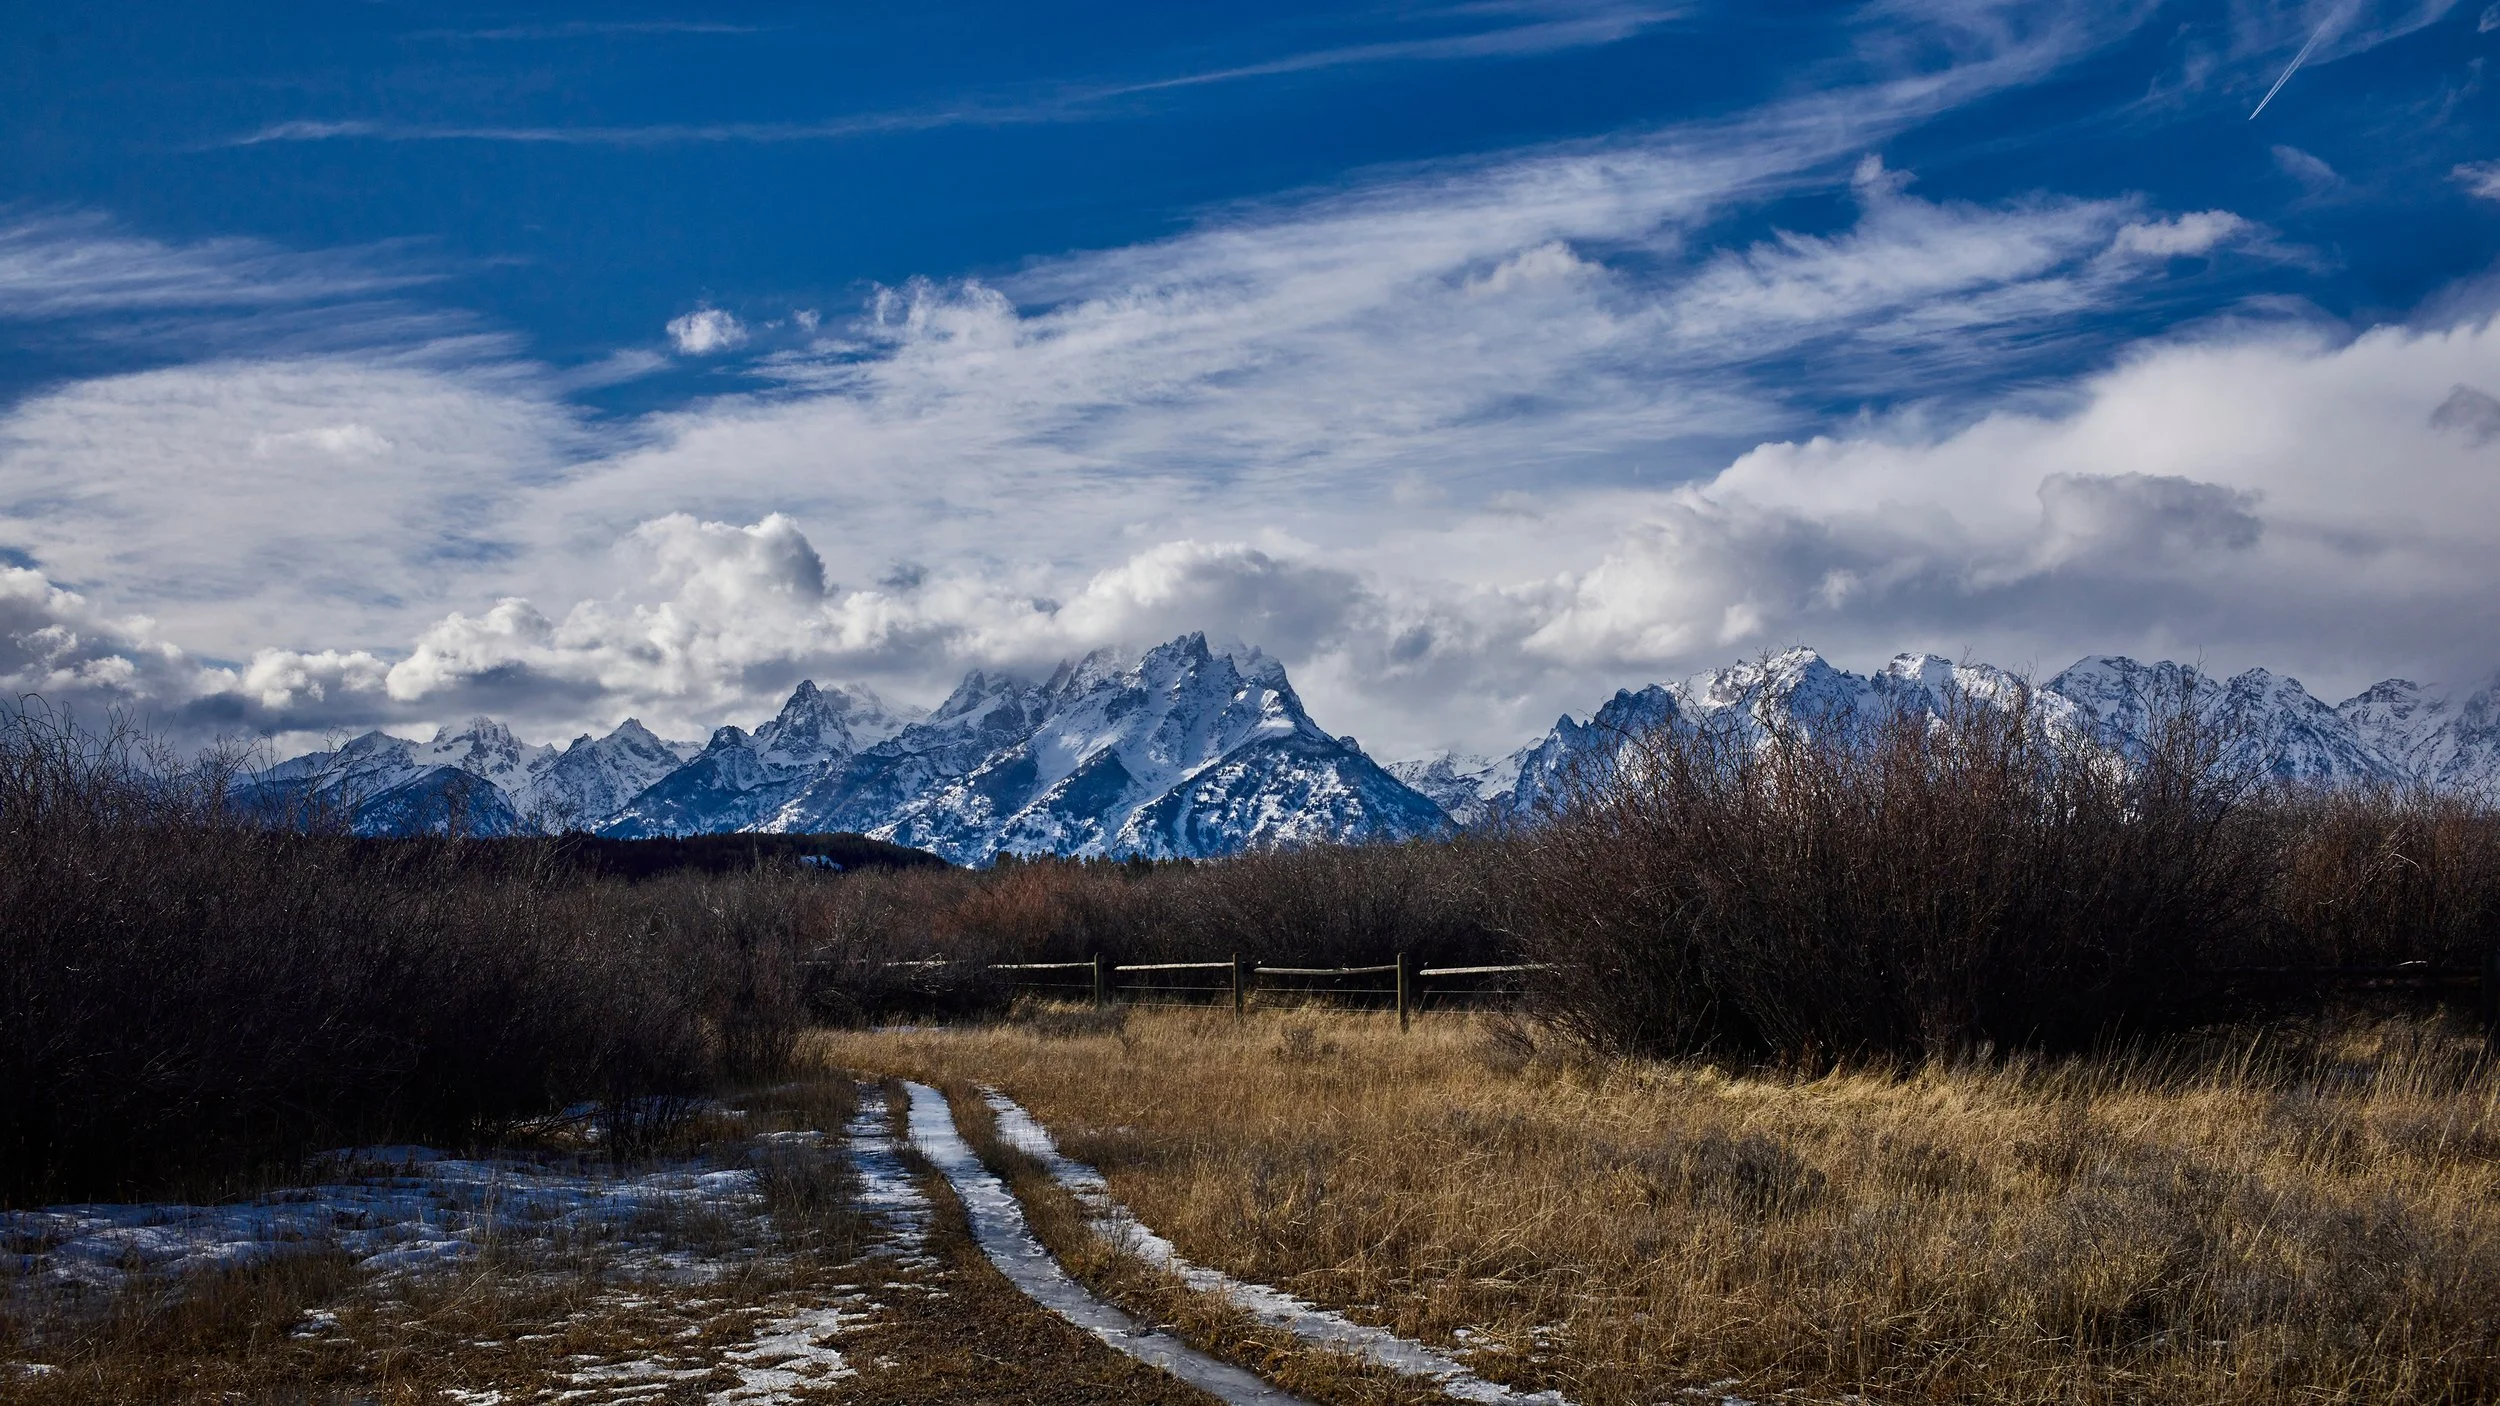
Zion and Southern Utah: Different Light, Same Film
Zion National Park is green. Not desert green — actual green. The Virgin River cuts through red sandstone, and cottonwood trees grow along the canyon floor. The light is different. Softer. More diffused.
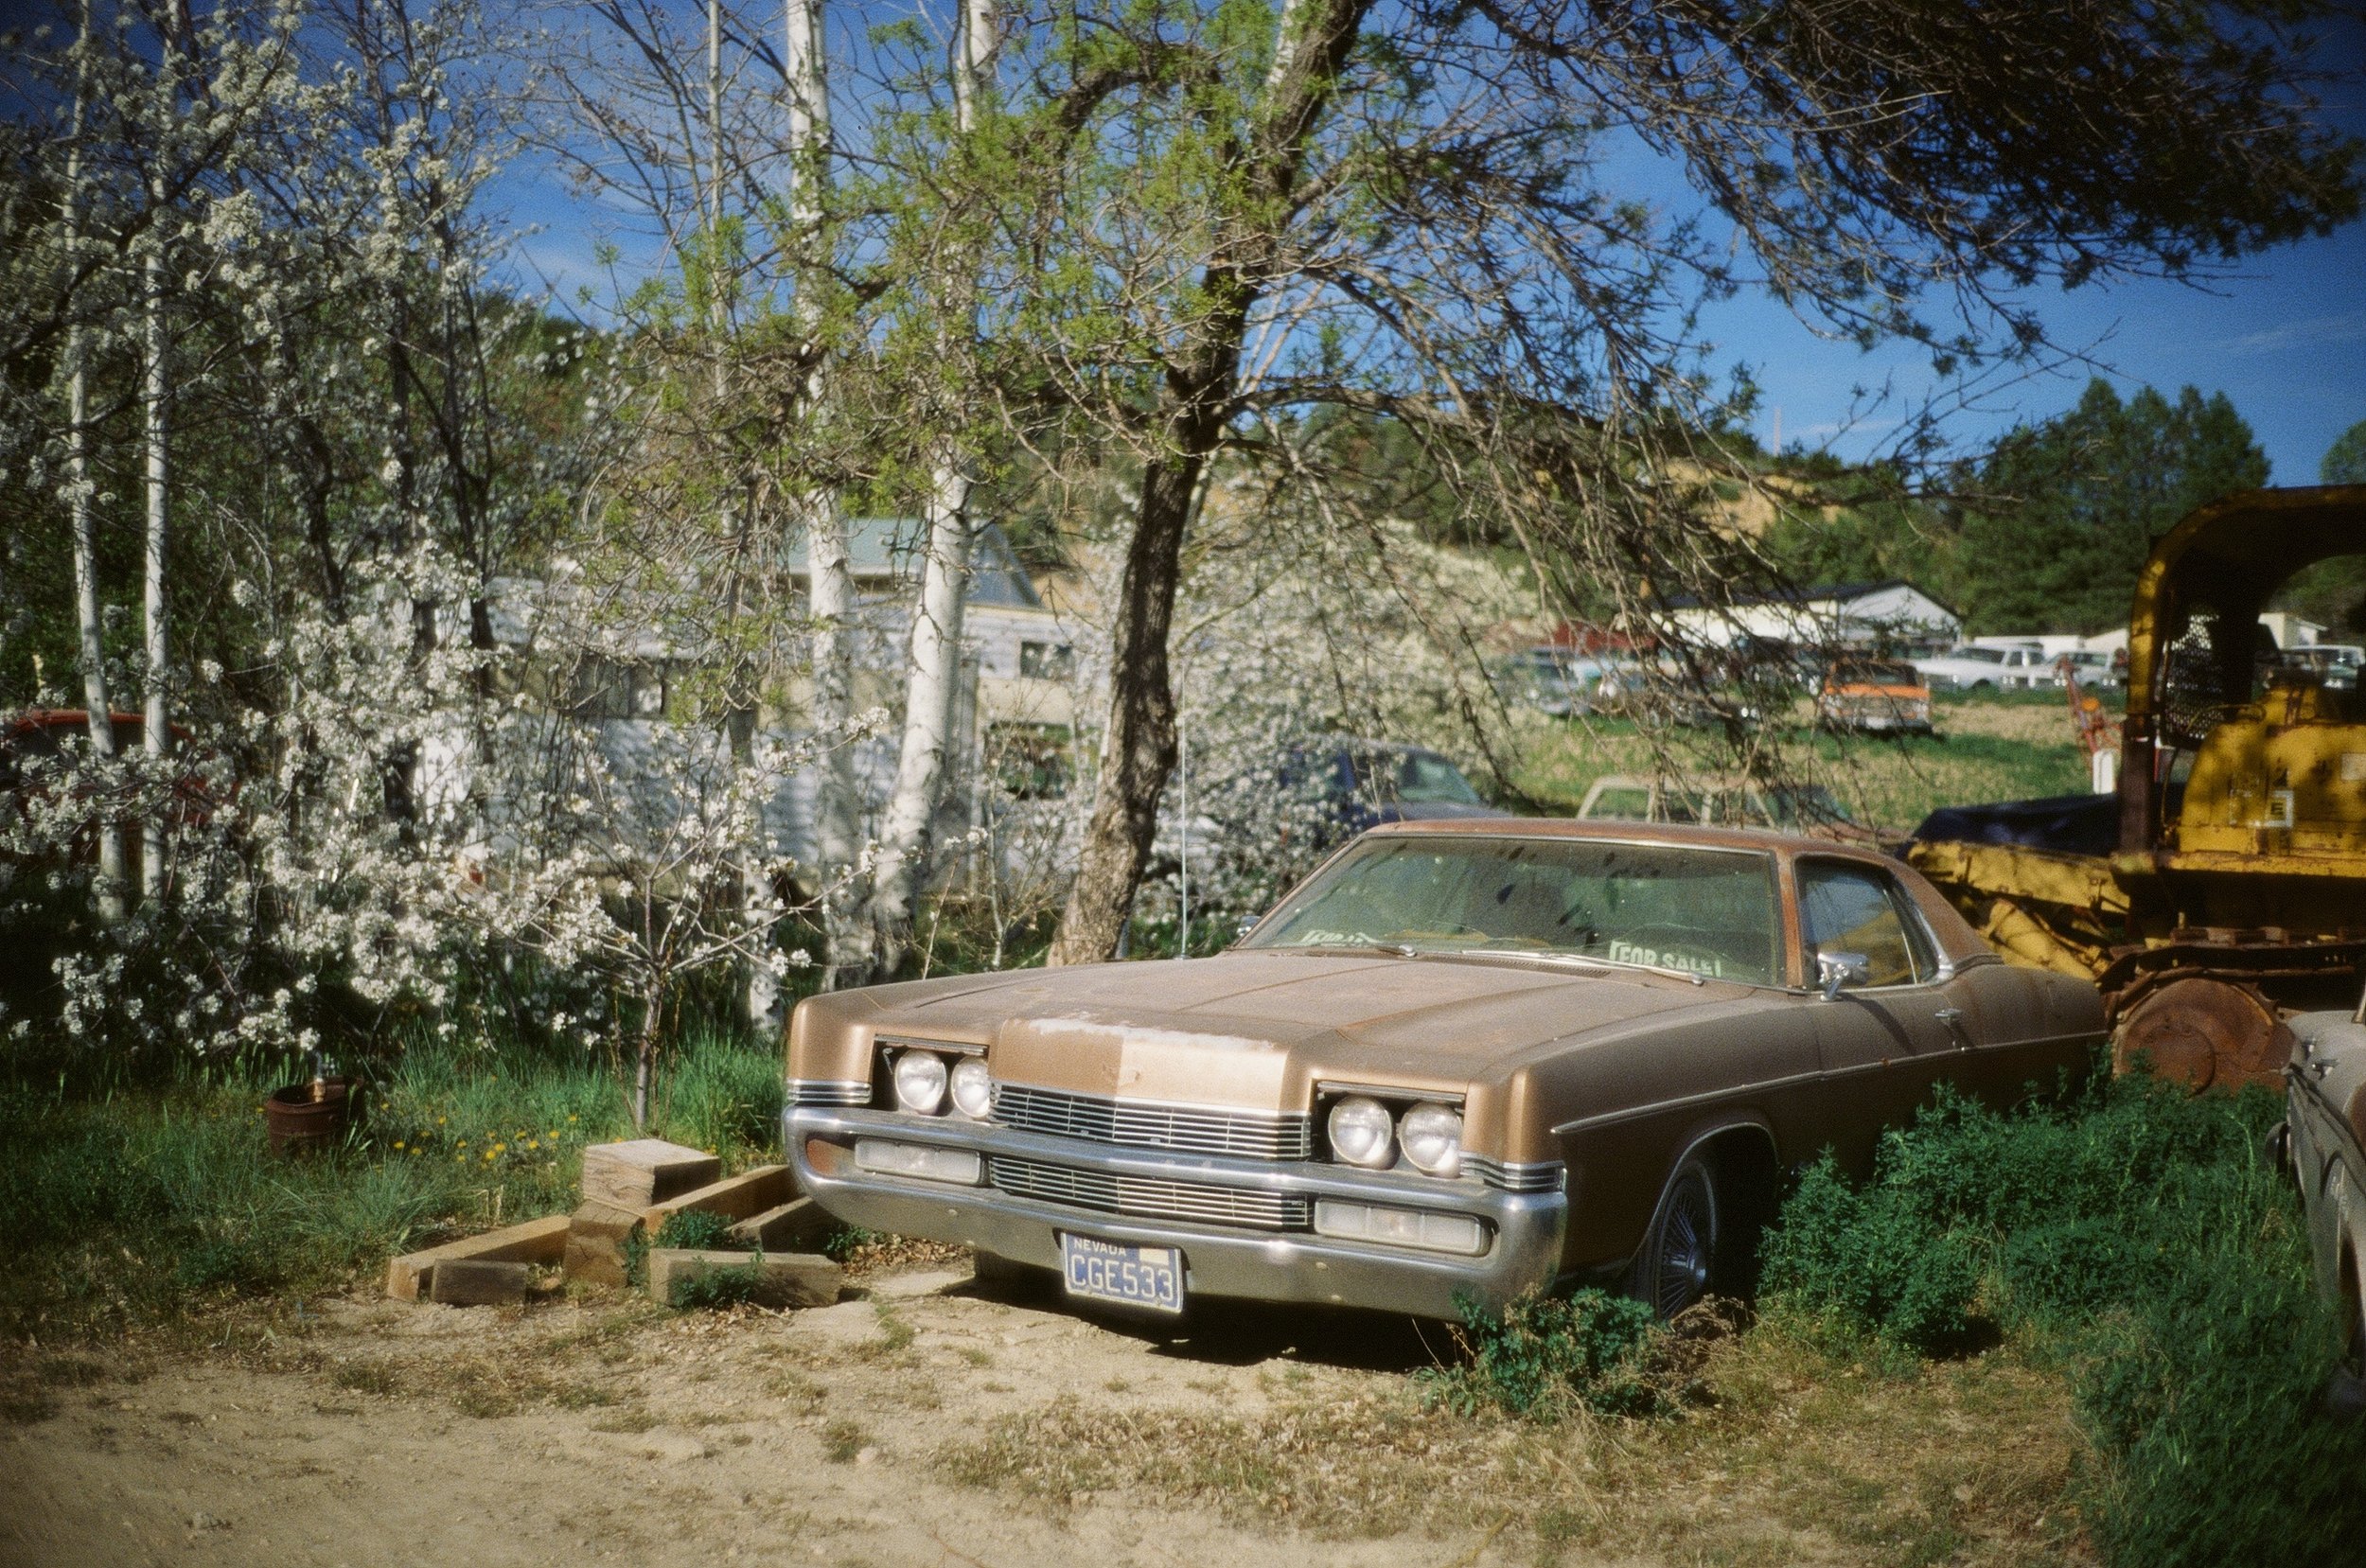
Ektachrome handled the shift without issue. The reds stayed saturated. The greens stayed natural. The shadows went dark but stayed detailed. The film did not care that the landscape had changed. It rendered what was there.
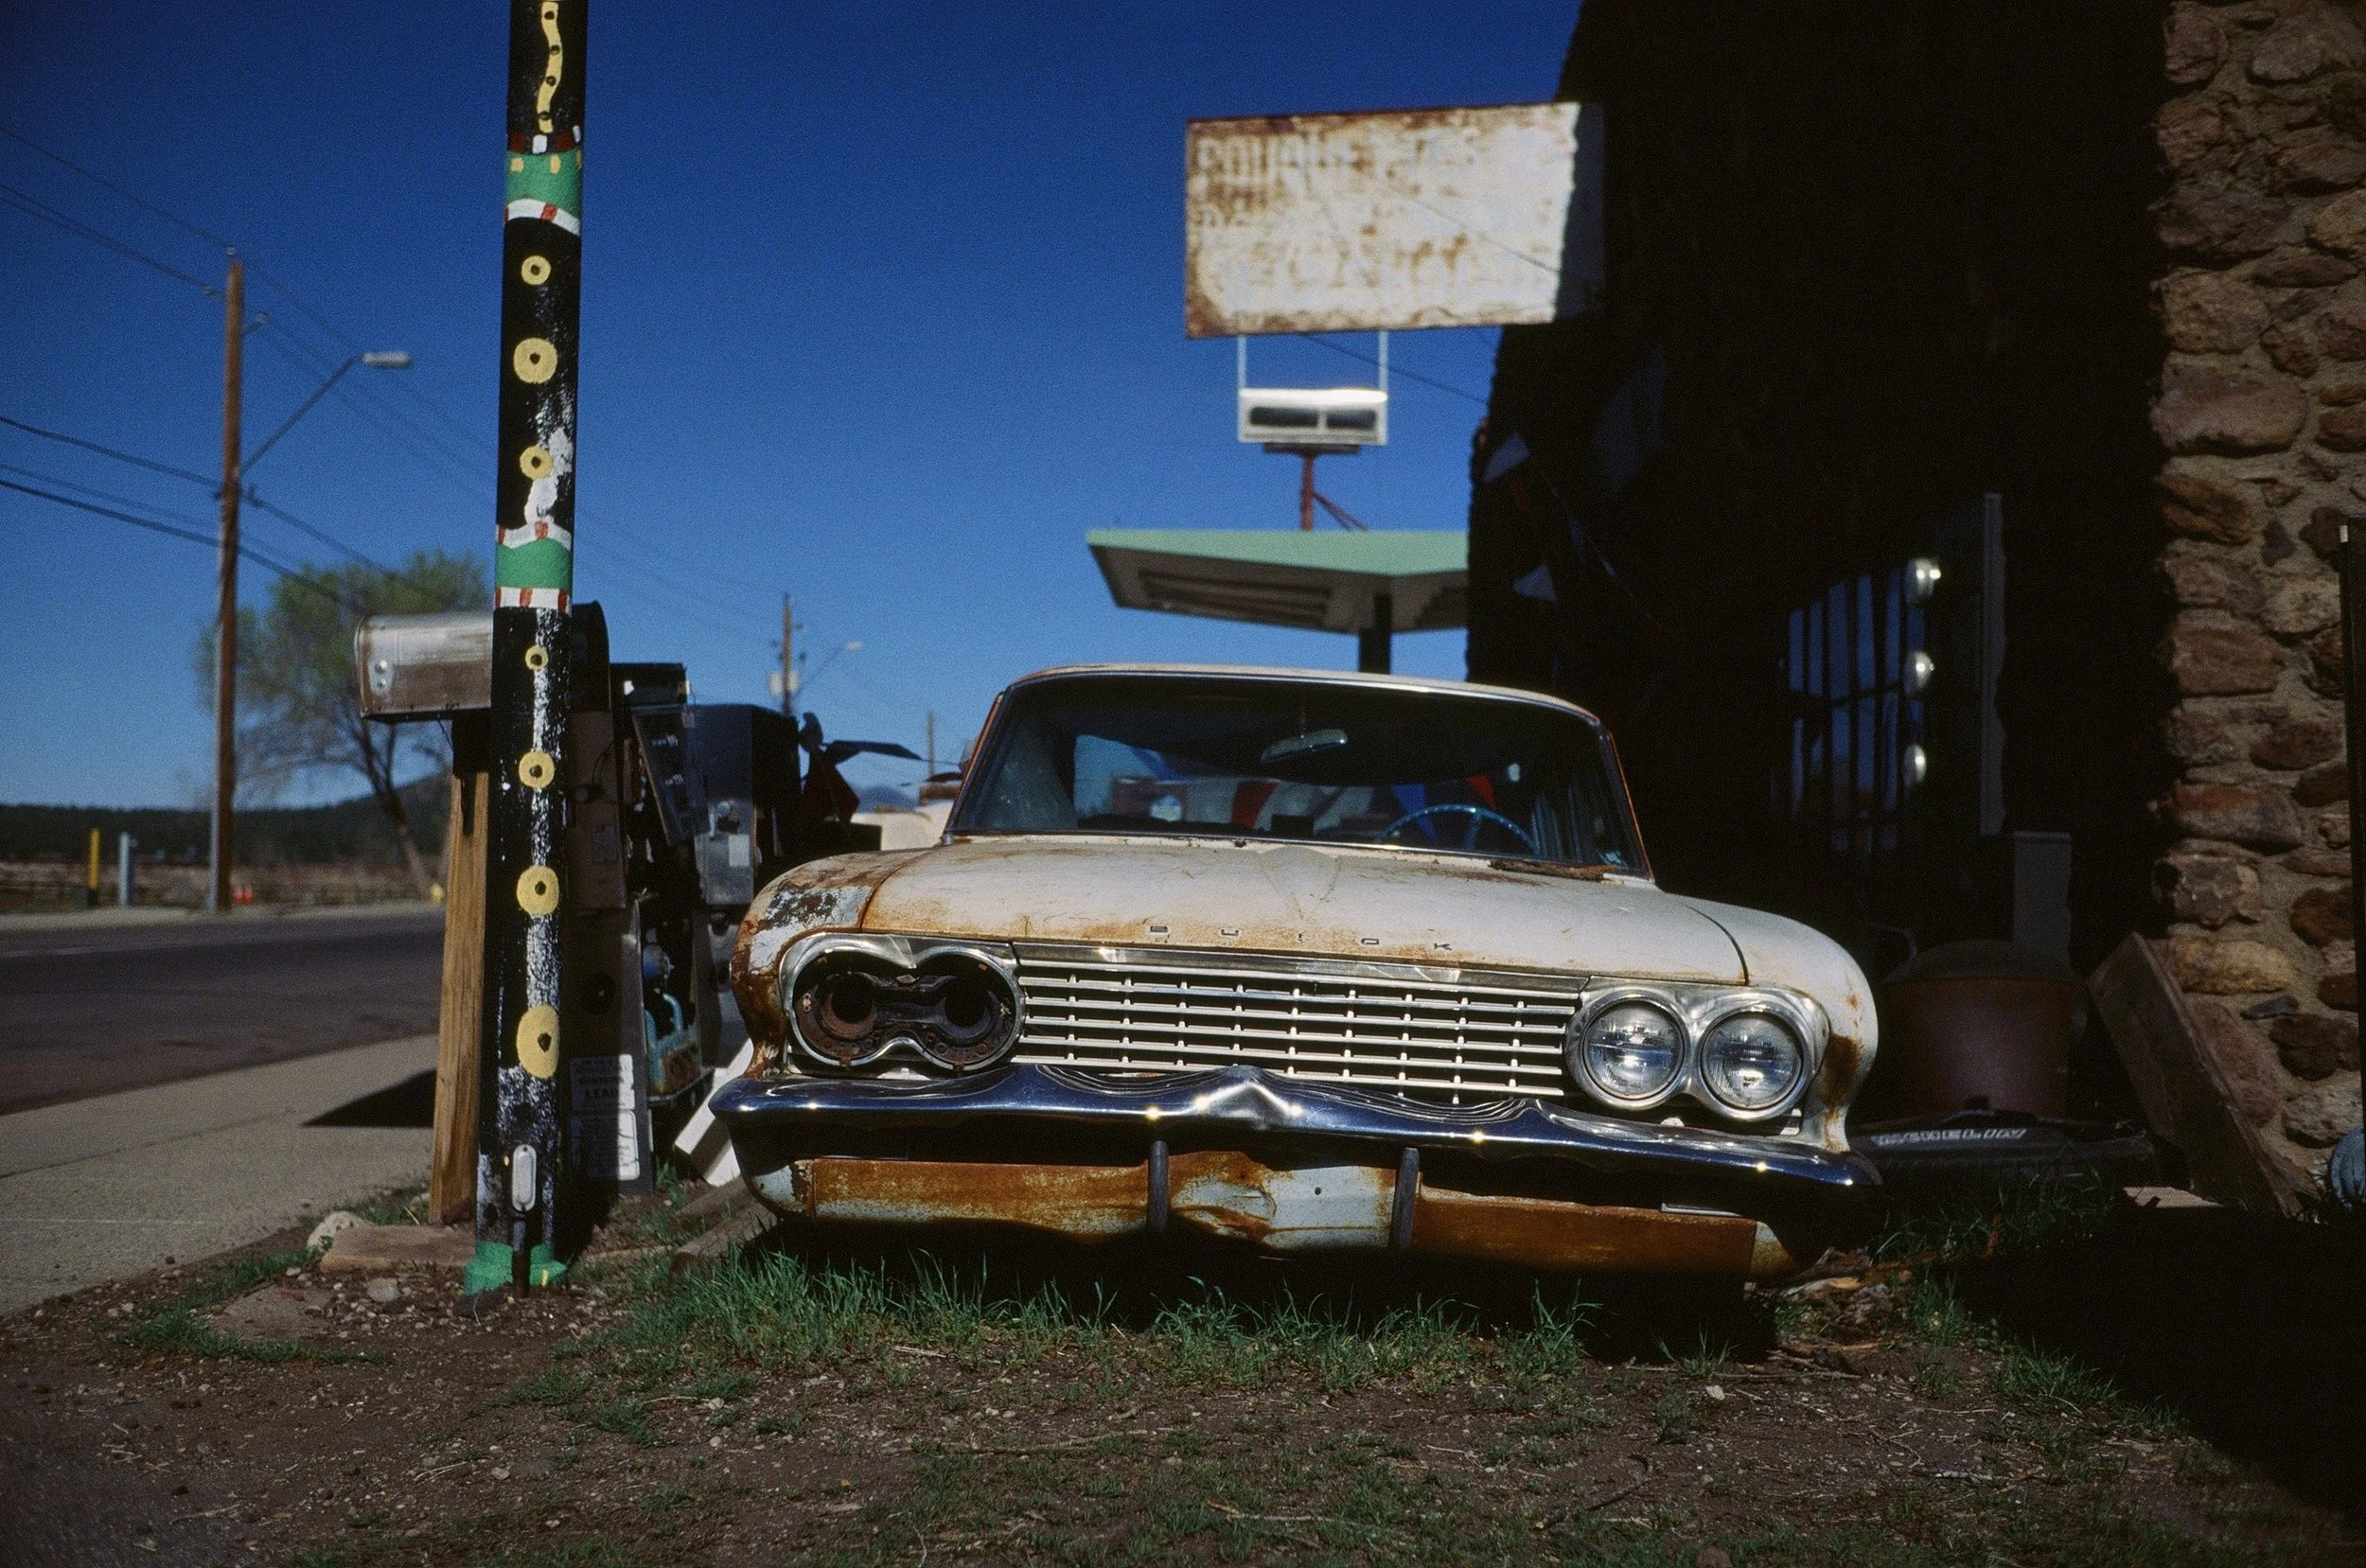
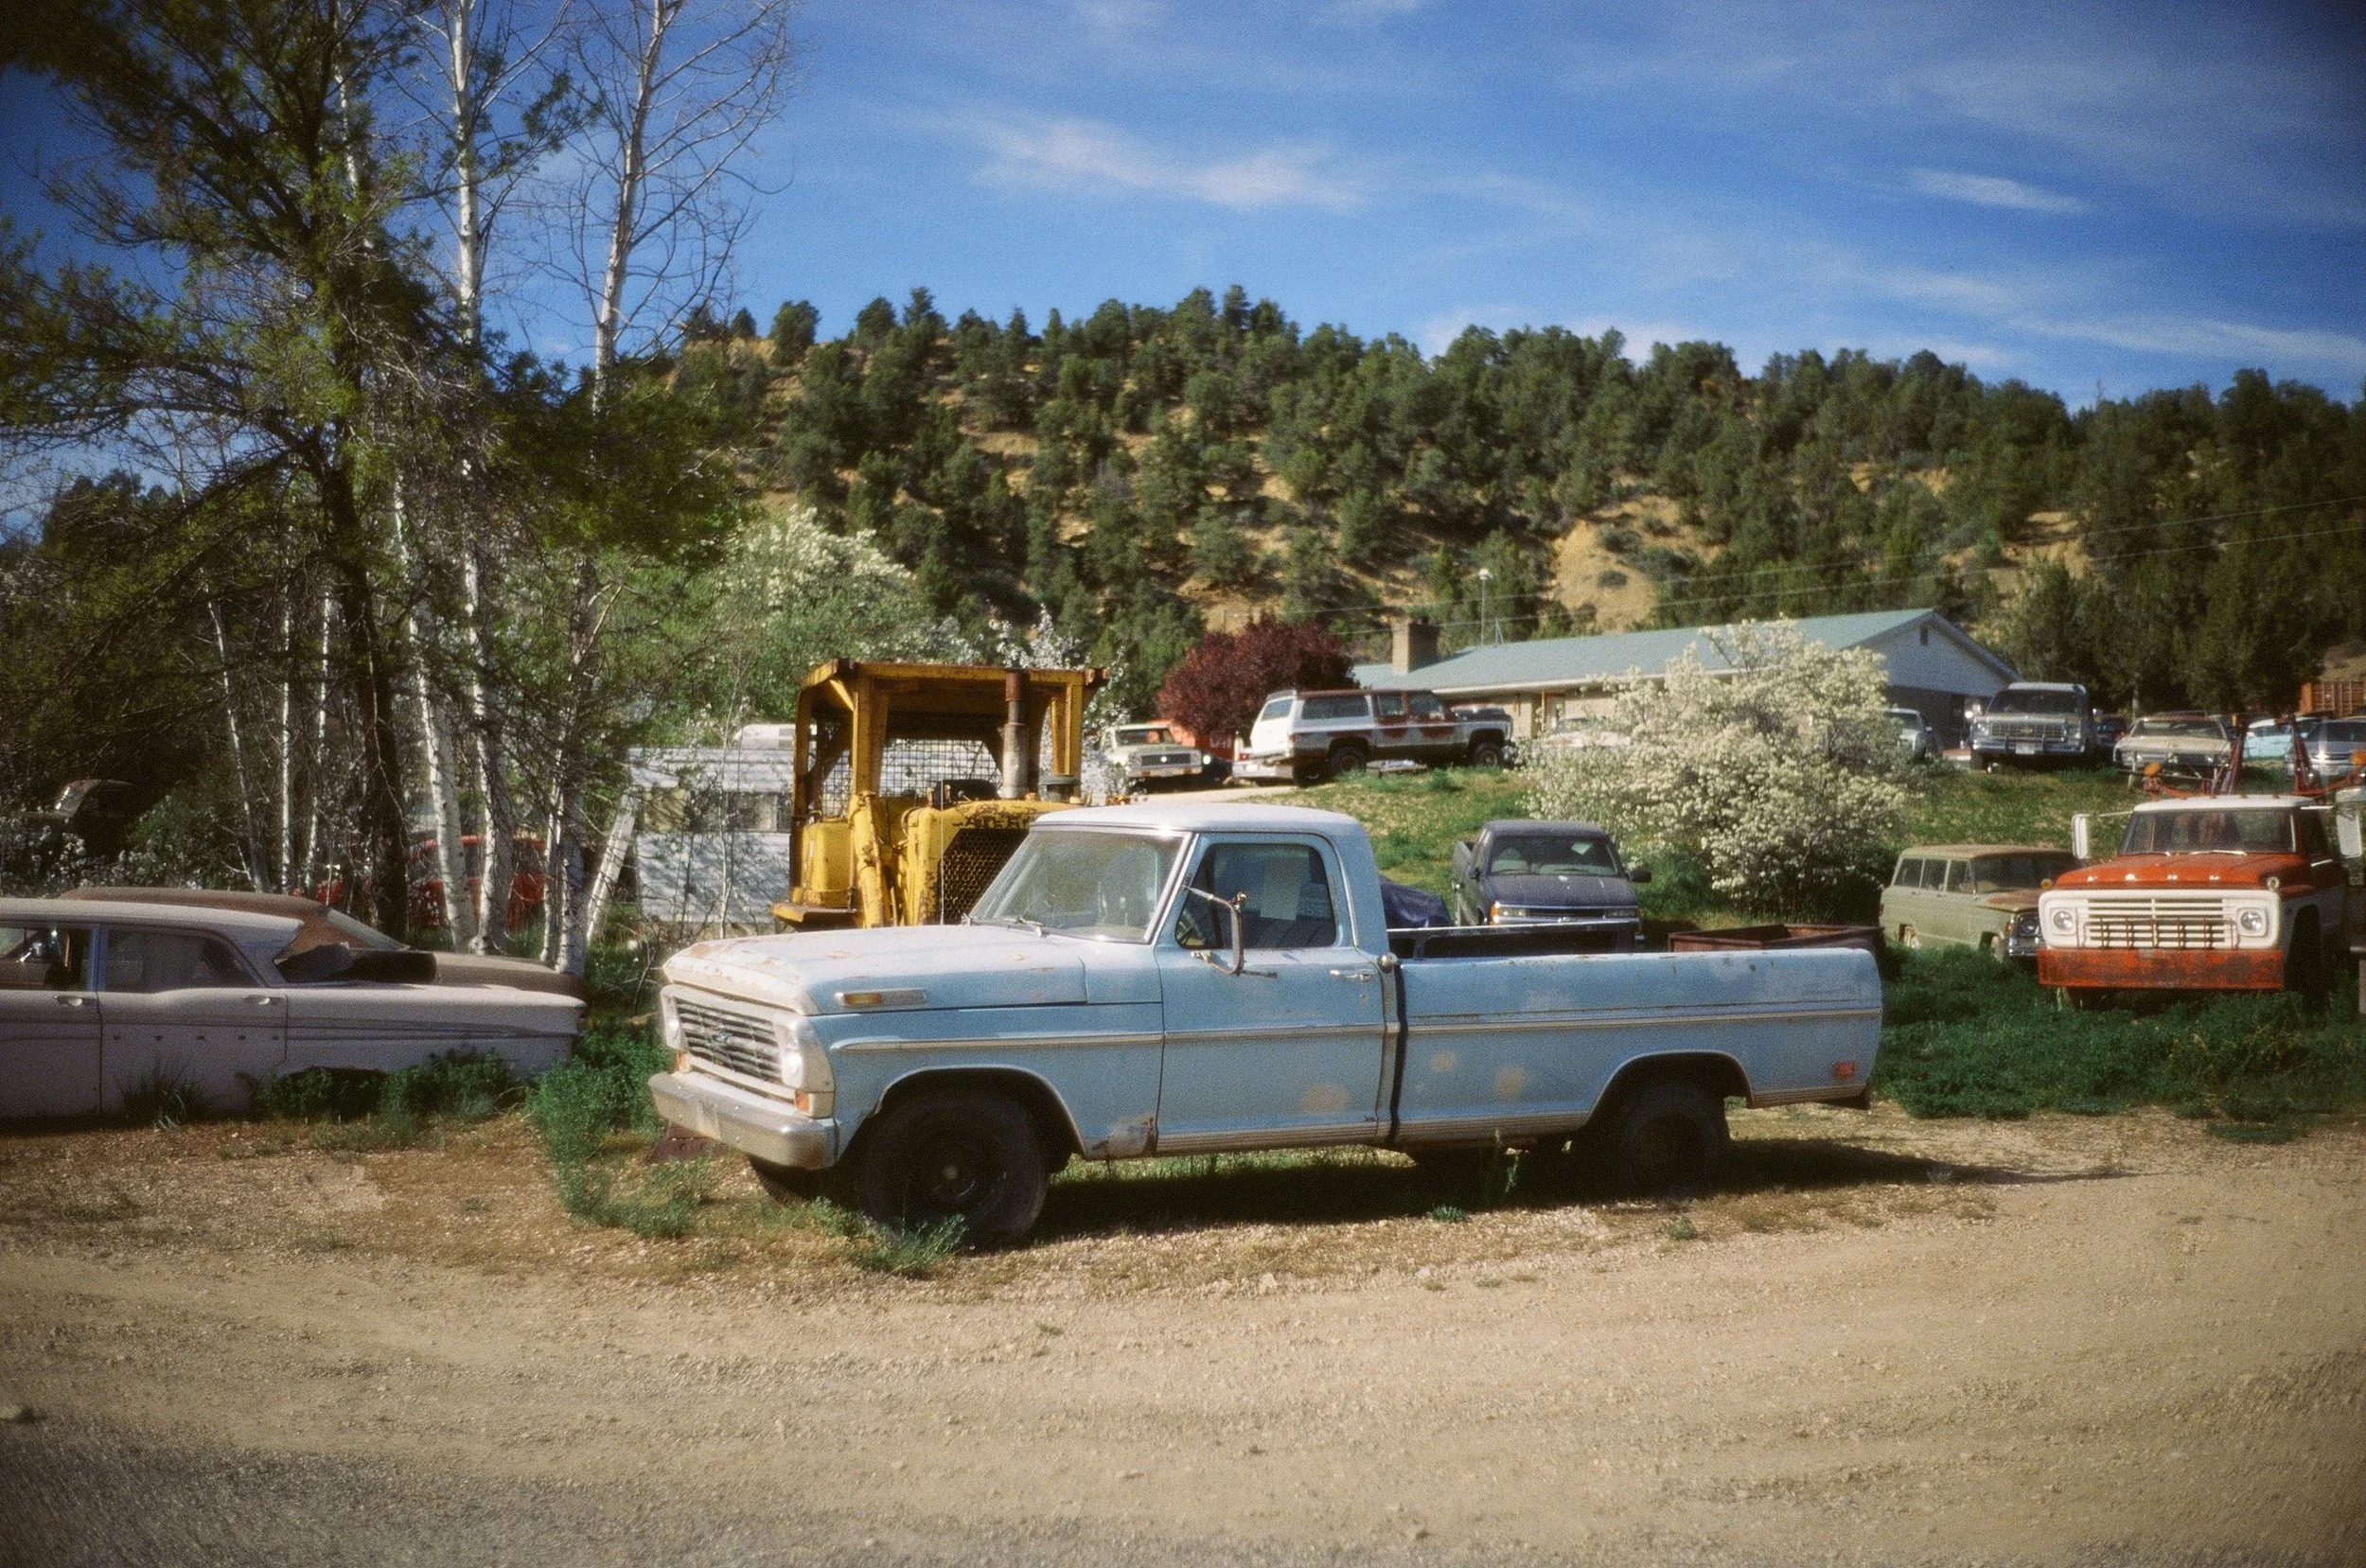
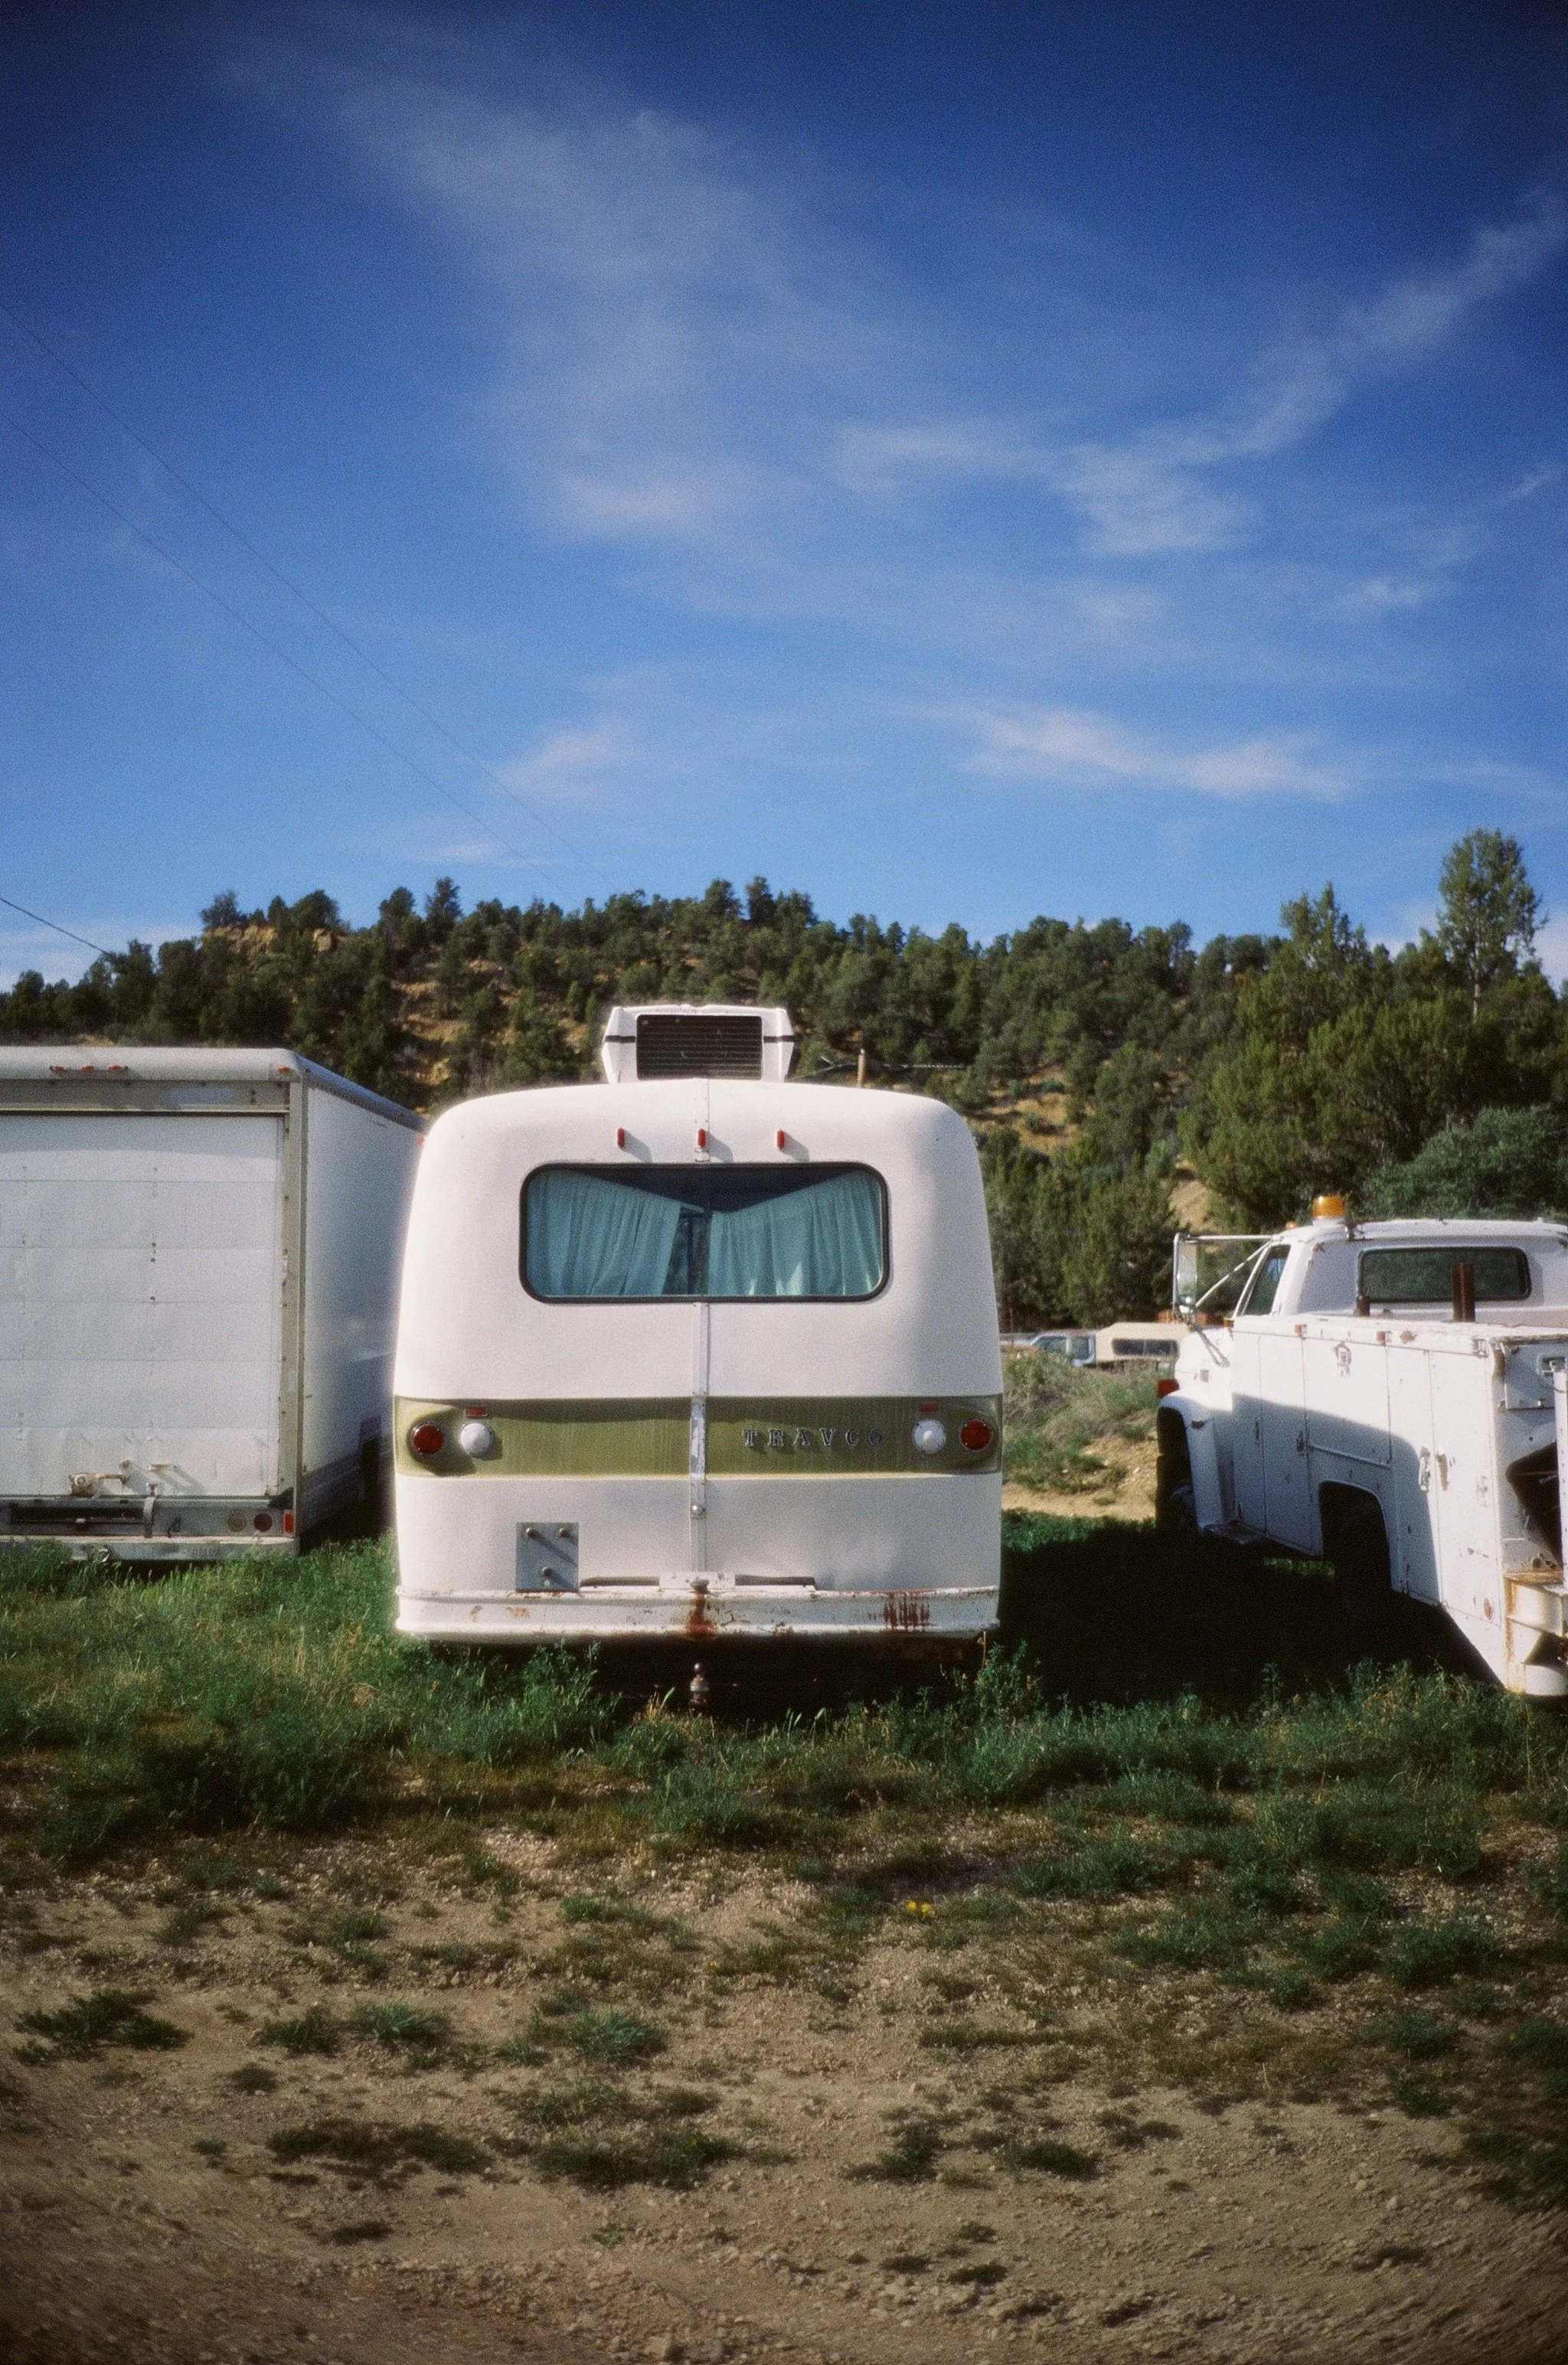
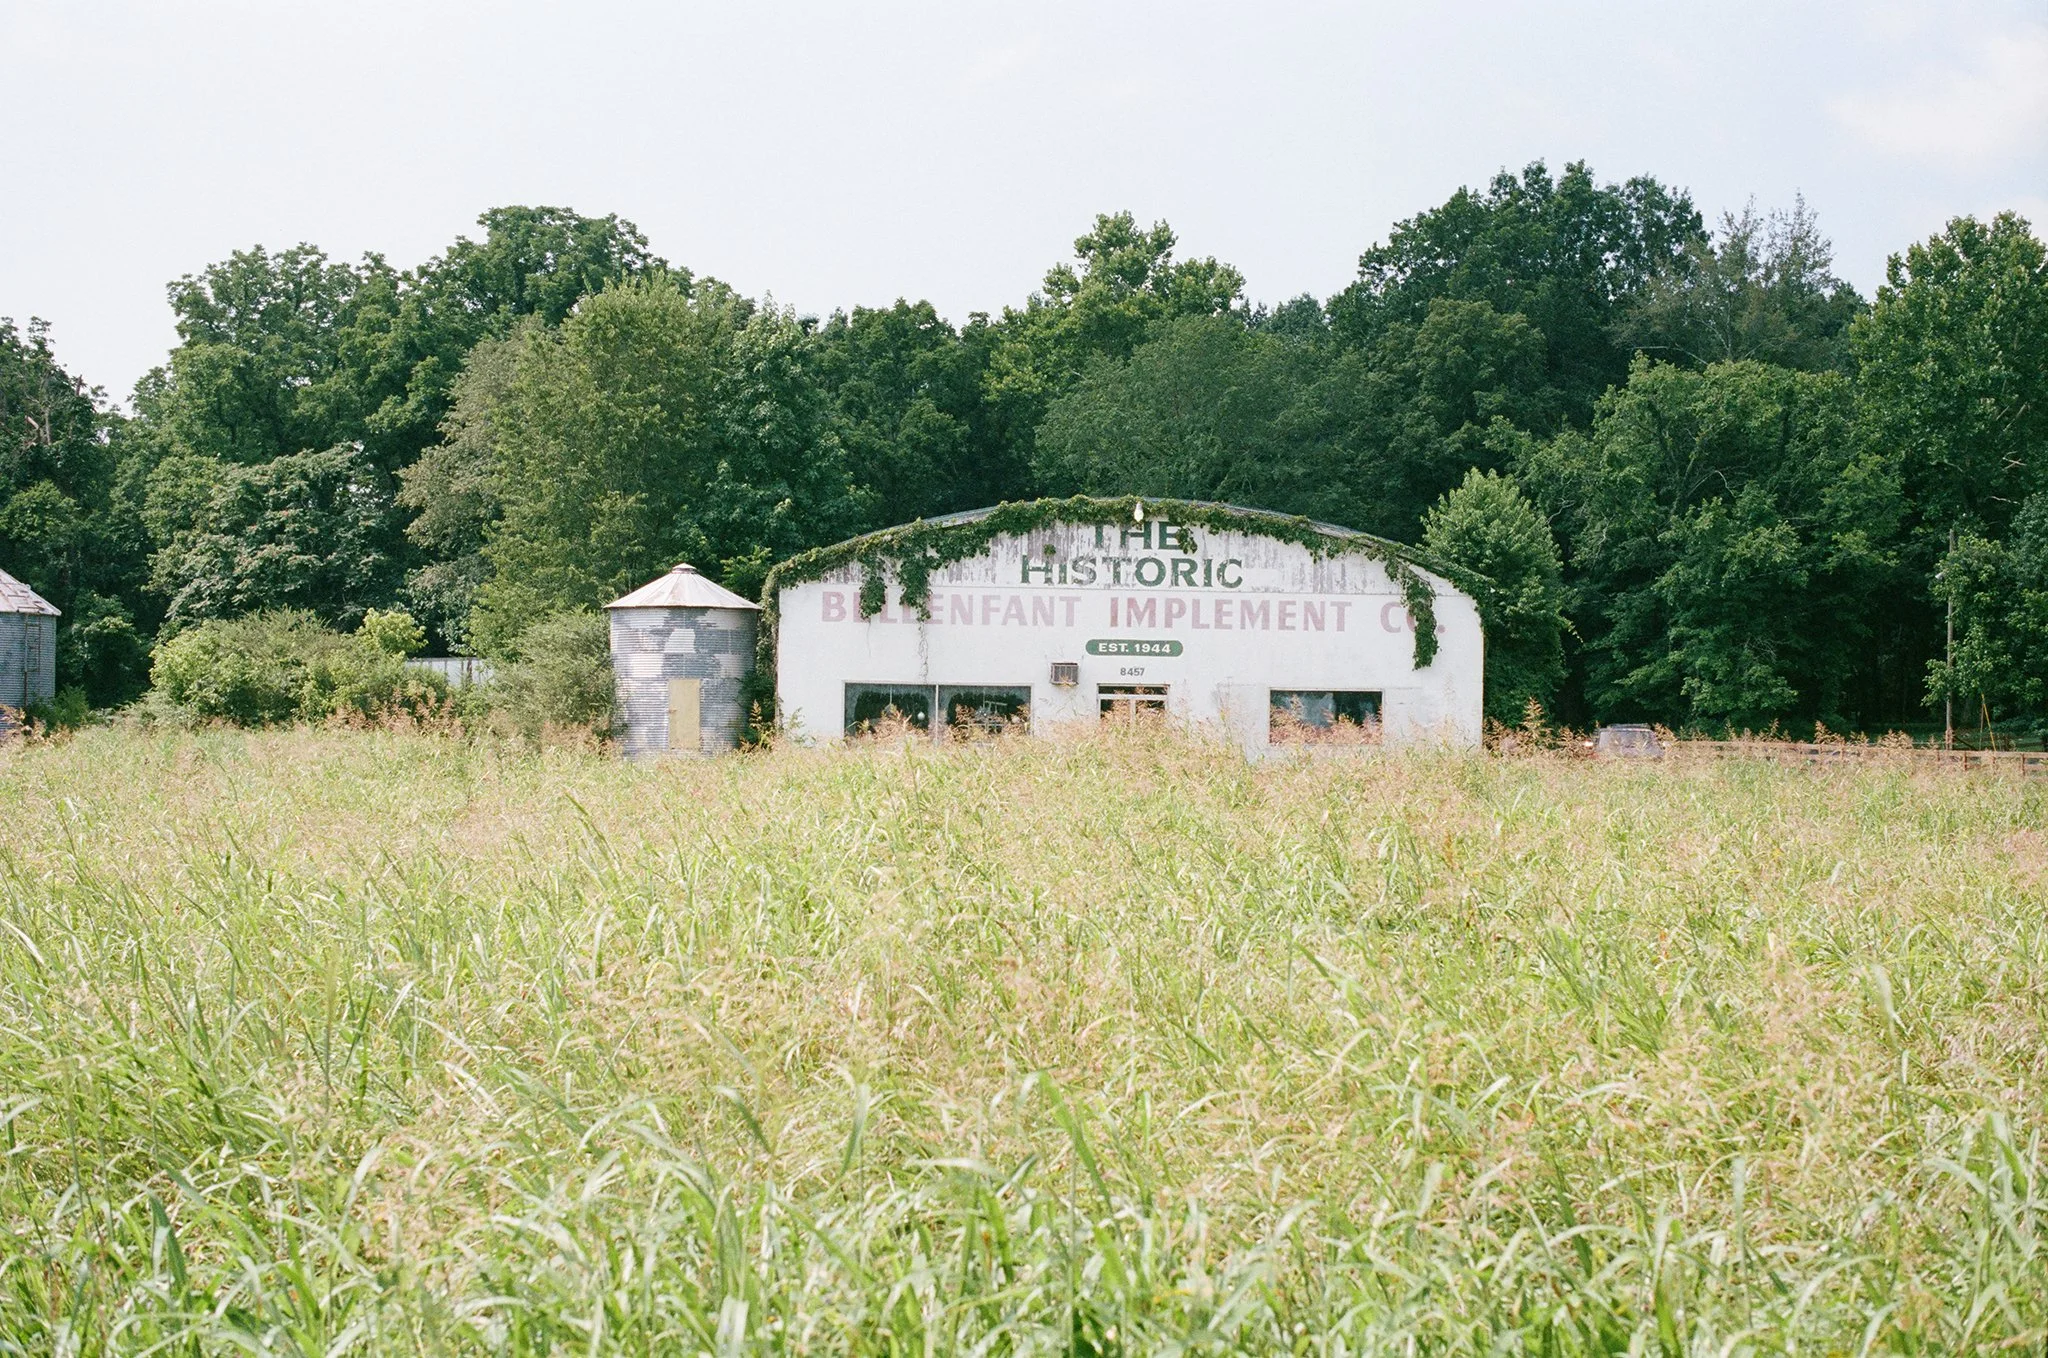
We stayed in Orderville, just outside Zion's east entrance. Small town. One main street. The kind of place you drive through and forget unless you stop.
We stopped.
East of town, vintage cars rust in junkyards — American steel slowly returning to nature. The kind of roadside Americana that Eggleston would have shot. I did.
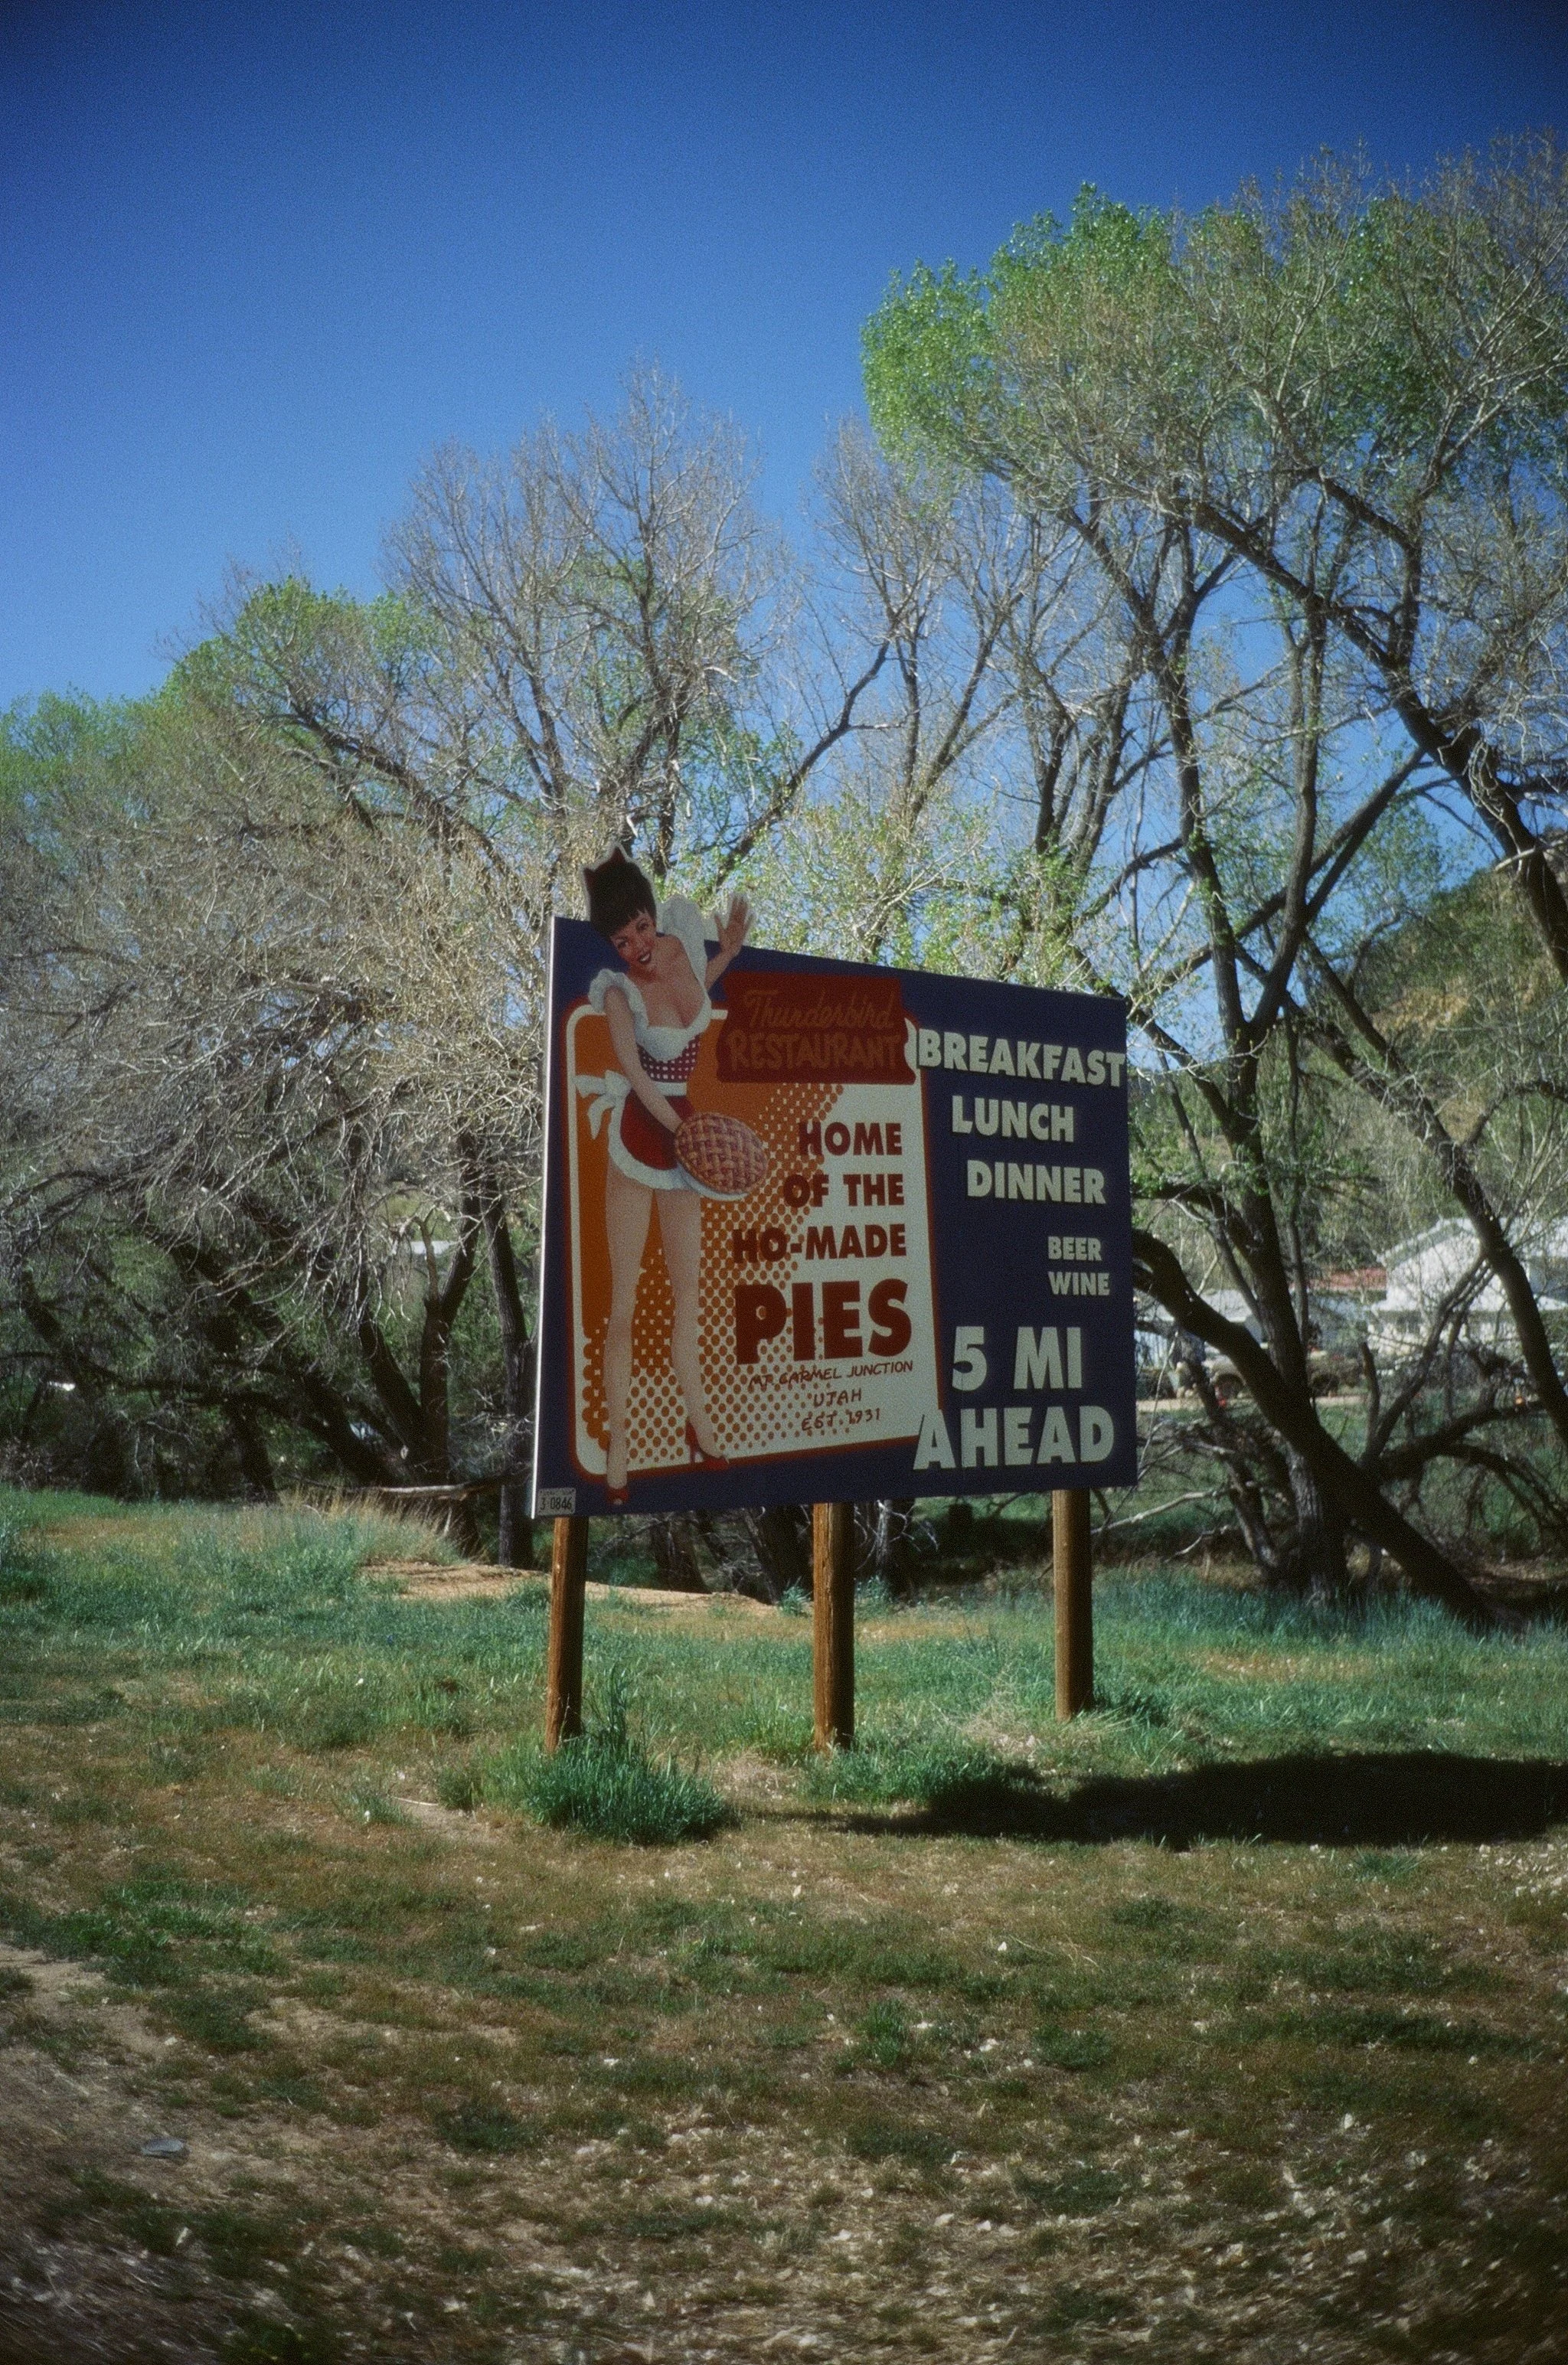
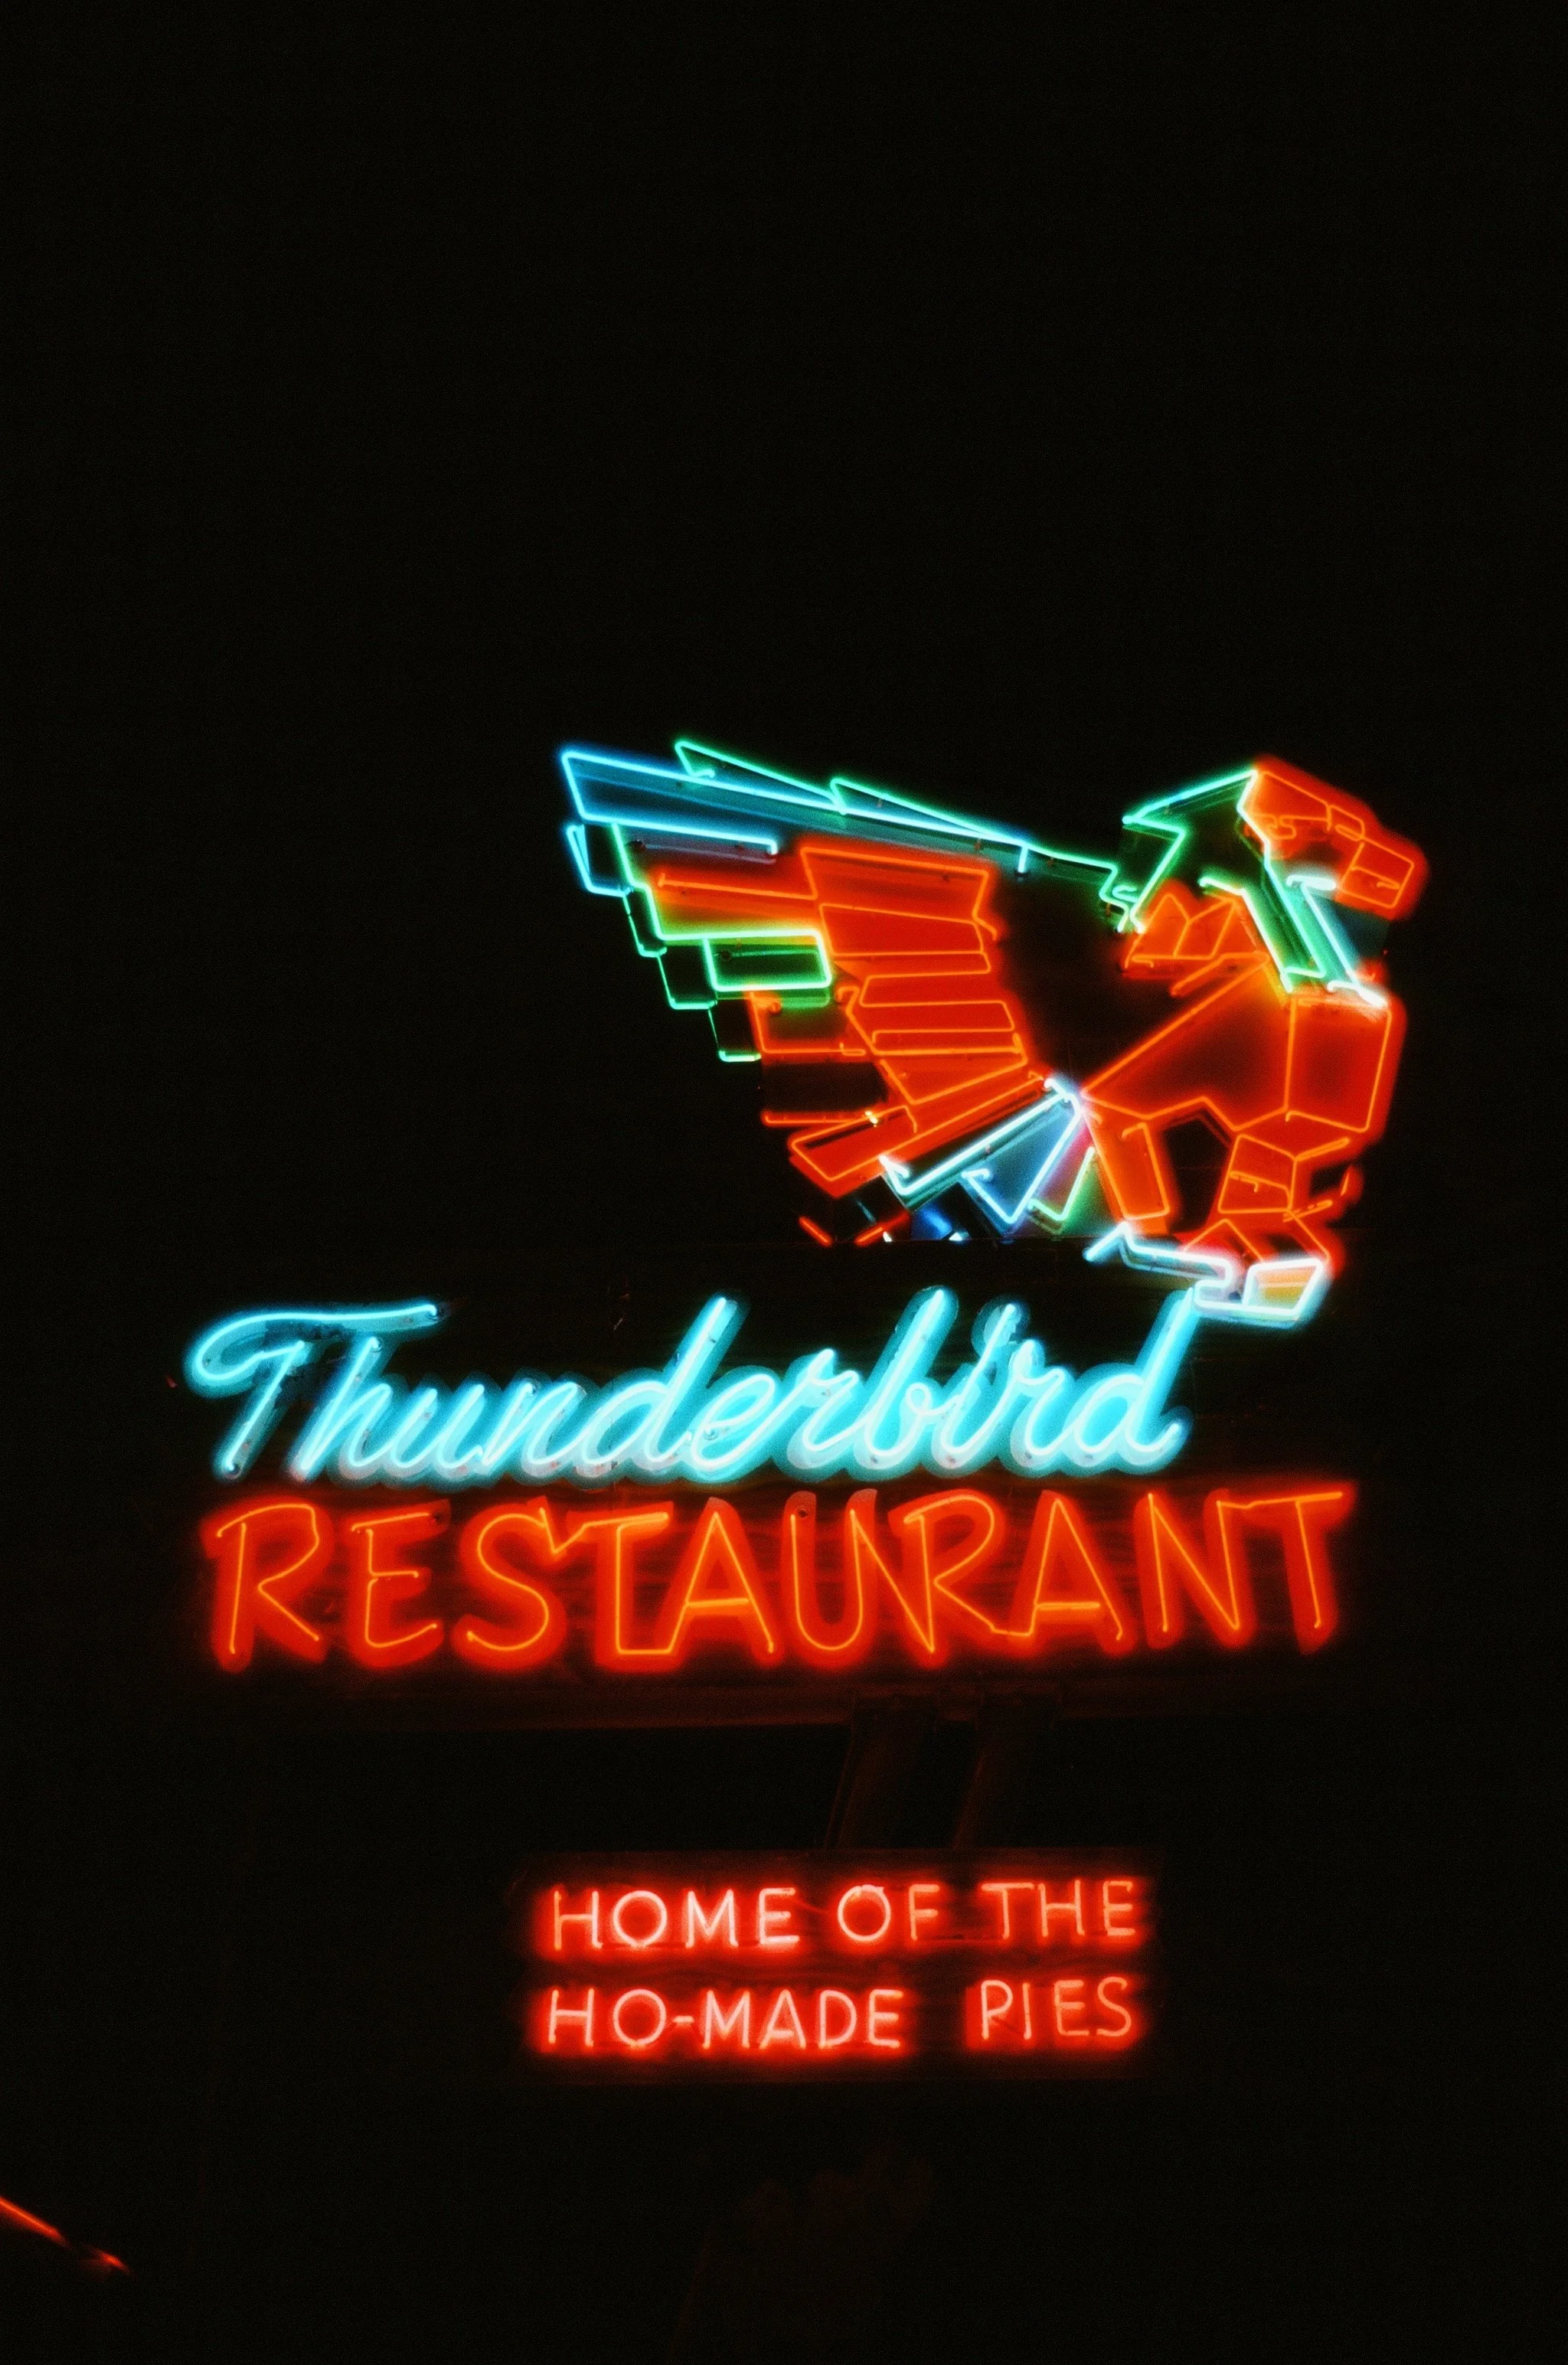
One night we ate at the Thunderbird. Classic American dinner. Country fried steak. Homemade apple pie for dessert. The food was exactly what it needed to be after a day on the road.
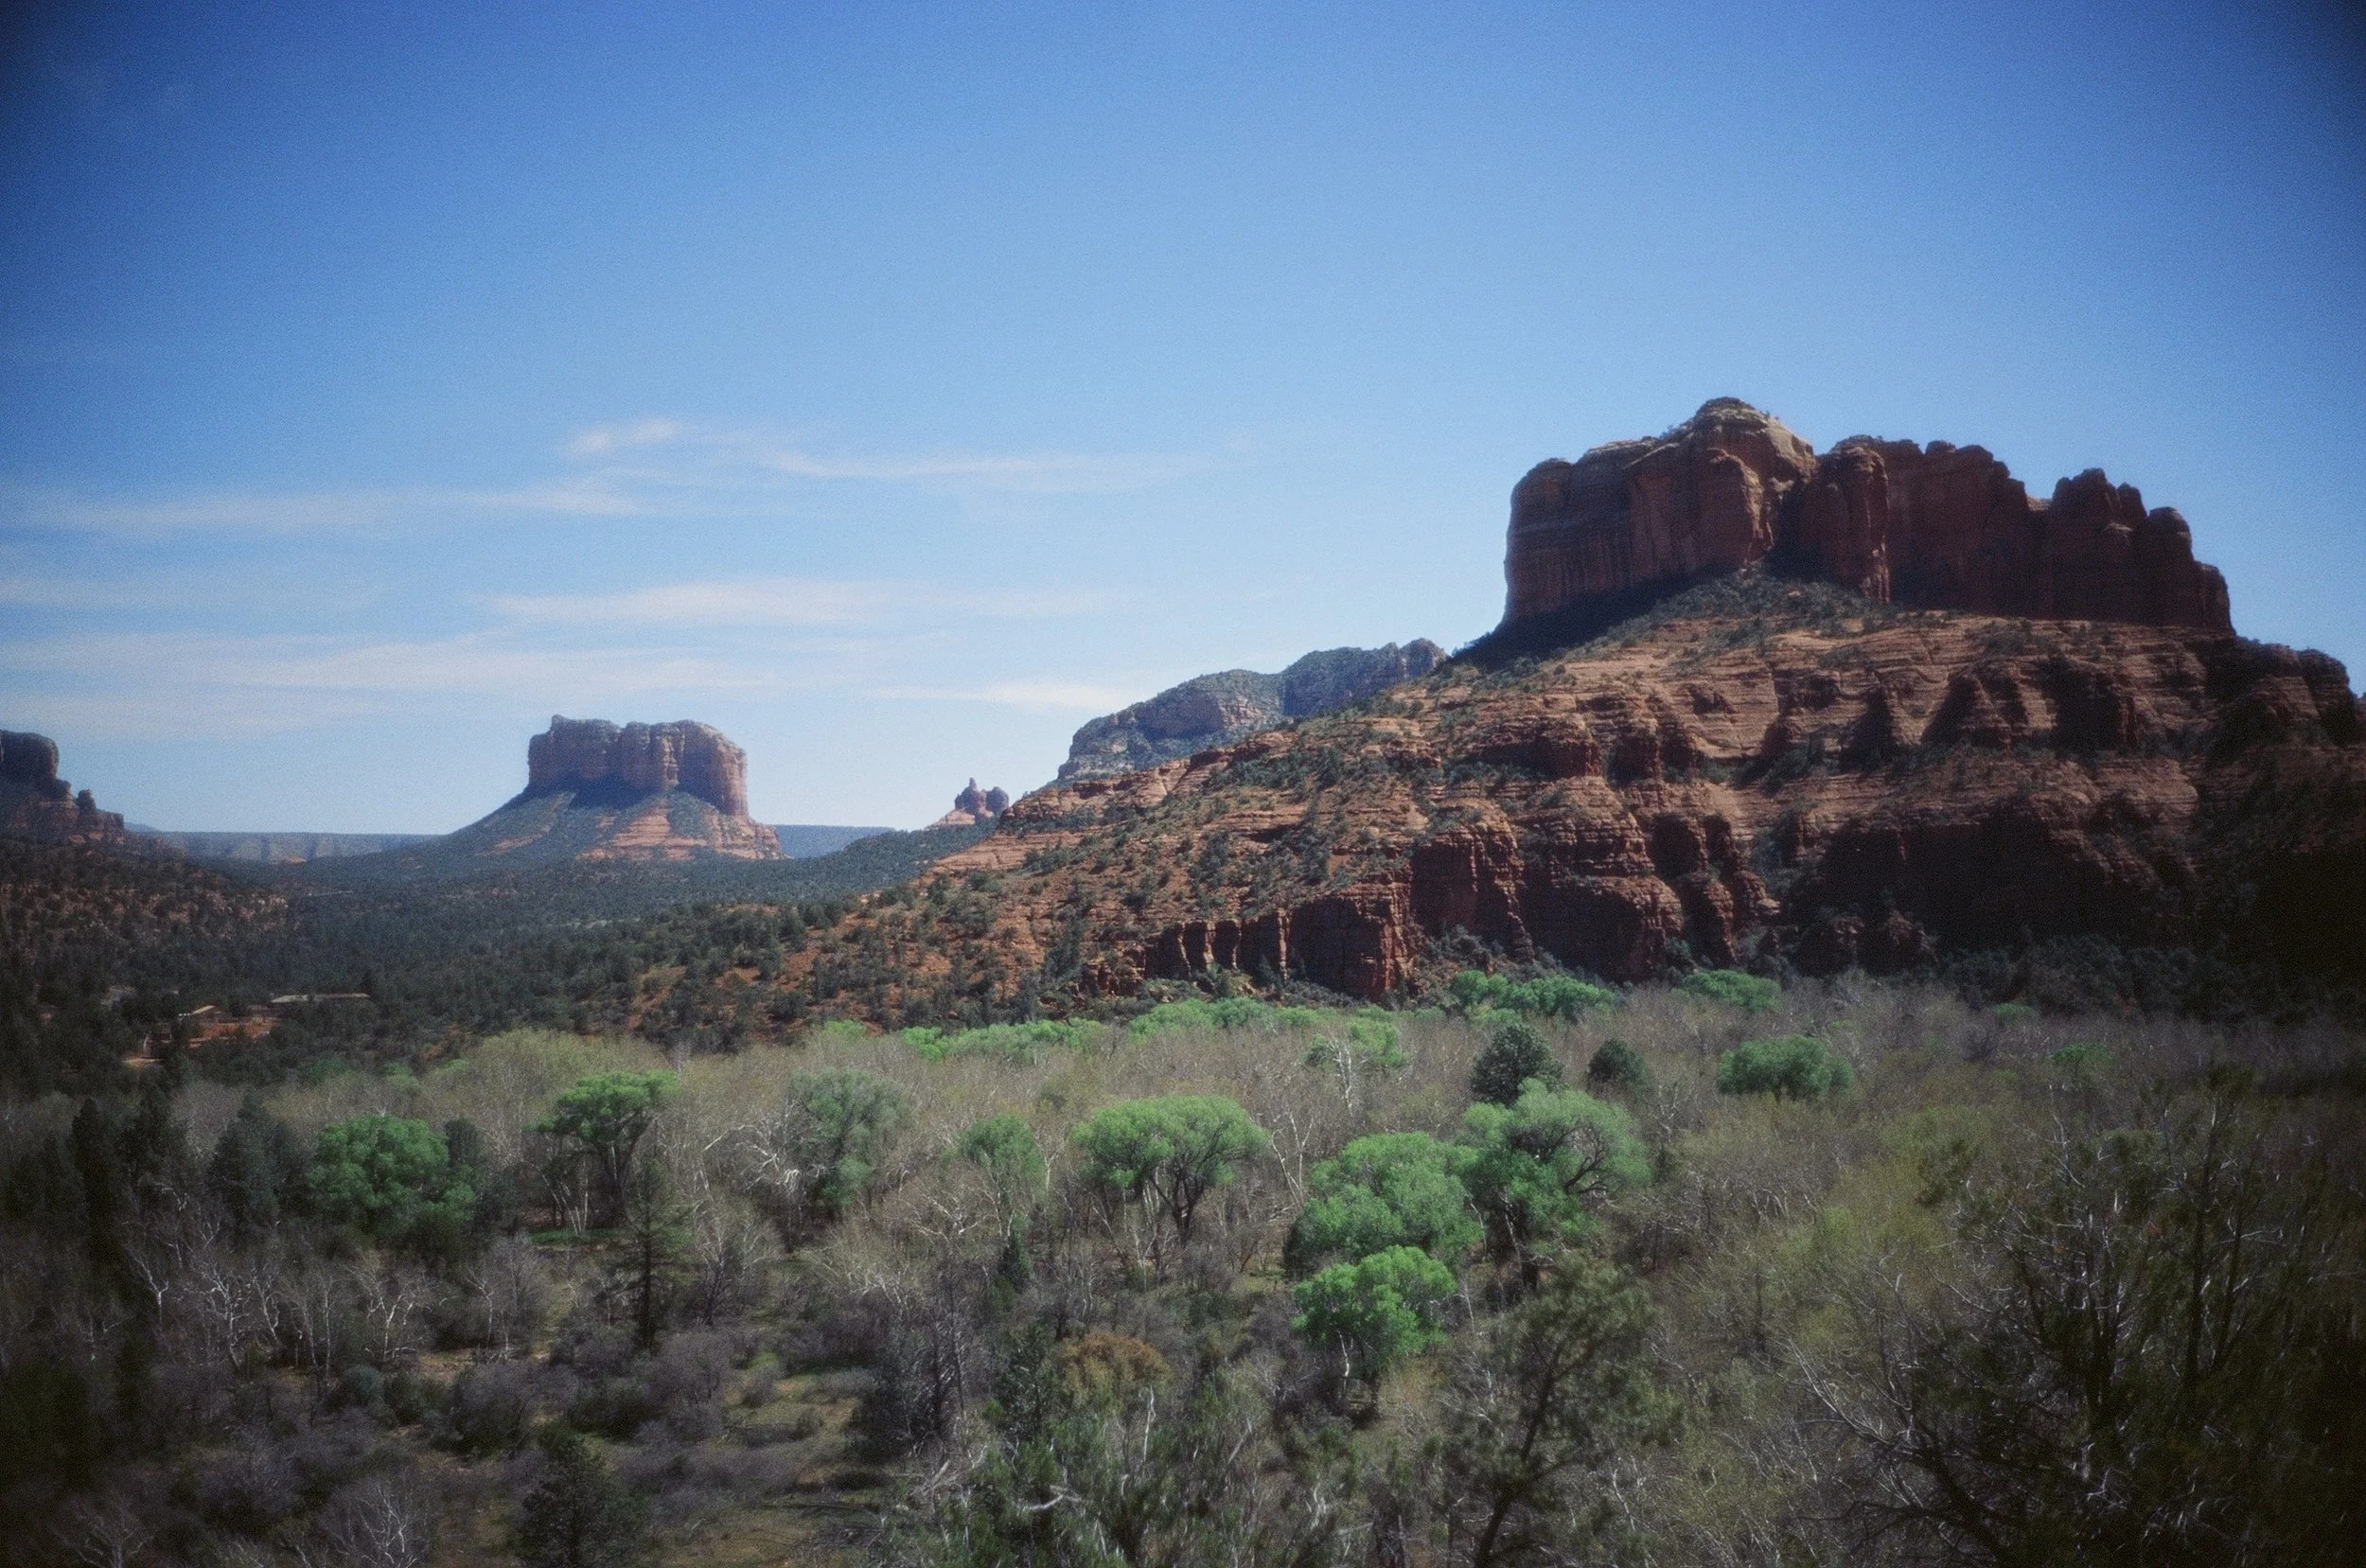
I shot Zion from the Scenic Drive. The Watchman. The Court of the Patriarchs. Angels Landing in the distance. The kids hiked the Riverside Walk. My dad and I drove the Mount Carmel Highway and shot from overlooks.
The 35mm Summilux continued to be the right lens. Wide enough for landscapes. Fast enough (f/1.4) for handheld shooting in canyon shade. The Leica MP never felt like a compromise. Manual focus slowed me down in a way that improved the work.
What Film Captured That Digital Would Not
Ektachrome is unforgiving. You expose correctly or you lose the shot. There is no pulling shadows in post. There is no recovering blown highlights. The latitude is narrow.
That constraint improved the work.
I metered carefully. I thought about composition before pressing the shutter. I shot fewer frames and made each one count. The Leica MP holds 36 exposures per roll. I shot eight rolls. 290 frames total across nine days.
Digital would have given me 2,000 frames and less discipline.
The Misses: Ektachrome's Limitations
I did have failures. Ektachrome is tough to balance in dynamic scenes — areas with both deep shadow and direct sunlight. The film's narrow latitude forces a choice: expose for the highlights and let the shadows go black, or expose for the shadows and blow the highlights.
This is not a problem you can solve in post. This is not recoverable. You make the call when you press the shutter, and you live with it.
I lost shots. Desert canyons with bright sky and dark rock. Roadside structures half in sun, half in shadow. Scenes where Portra 400 would have given me latitude to hold both highlights and shadows — Ektachrome made me choose.
The shots I kept are the ones where I chose correctly. The shots I lost taught me to read light faster and commit harder.
The Color
The color is also different. Ektachrome's saturation is not artificial. It is chemical. The dyes react to light in a specific way that digital sensors approximate but do not replicate. The blues are bluer. The reds are redder. The contrast is higher.
Richard Photo Lab processed the film and scanned at high resolution. The scans came back exactly as I hoped. No color shifts. No grain issues. Just clean, sharp, saturated images that looked like the desert.
Film photography in 2026 is not practical. It is not efficient. It is not cheaper than digital.
It is better for this kind of work.
The Gear: Leica MP and Summilux 35mm steel rim
Camera: Leica MP (film rangefinder)
Lens: Summilux 35mm f/1.4 ASPH steel rim reissue
Film: Kodak Ektachrome 100 (E-6 slide film)
Metering: Built-in Leica MP meter, incident reading for every shot
Lab: Richard Photo Lab, standard E-6 process, high-res scans
The Leica MP is a mechanical rangefinder with a built-in light meter. No autofocus. No motorized film advance. No LCD screen. You compose through the viewfinder, focus manually, meter the scene, and shoot.
The Summilux 35mm f/1.4 is sharp, fast, and renders with the classic Leica look — high contrast, excellent separation, smooth bokeh when needed. The steel rim reissue is a modern version of the original 1960s design. It is compact, well-balanced on the MP, and optically excellent.
I shot everything at f/5.6 or f/8 for landscape work. Occasionally f/1.4 or f/2 for details and road shots where I wanted subject isolation.
Kodak Ektachrome 100 is a slow film by modern standards. ISO 100 means you need good light or a tripod. I shot handheld for everything. The desert provides good light. The Leica's rangefinder focusing is fast and accurate.
Richard Photo Lab in California processed the film and delivered high-resolution scans. Standard E-6 process. No push. No pull. Box speed. Clean results.
The gear did what it was supposed to do. No failures. No compromises.
Reality Check: What Kerouac Did Not Tell You
On the Road is about freedom, movement, and the pursuit of something undefined. It is also about being broke, exhausted, and uncertain.
The road trip delivered the freedom and movement. It did not deliver exhaustion or uncertainty because we had a plan, a minivan, and hotel reservations.
That is fine.
The American West is still vast. The highways are still empty. The roadside Americana is still standing — barely. The desert is still red. The sky is still impossibly blue.
You do not need to be broke and directionless to experience the road. You just need to drive it with intention and pay attention to what is actually there instead of what the mythology promised.
The mythology, in this case, was accurate.
Eggleston shot the South on slide film and rendered it hyper-real. I shot the West on slide film and got the same result. The colors are saturated. The contrast is high. The details are sharp.
The film did its job. The desert did its job. I showed up and pressed the shutter.
Final Take
The American West on Ektachrome delivered everything I came for and more.
The mythology was real. The landscapes were vast. The roadside details were exactly as worn and faded as I hoped. The driving was meditative. The film rendered it all with clarity and saturation that matched the experience.
Traveling with my wife, my kids, and my dad added something I did not expect. The trip was not just about chasing Eggleston or Kerouac. It was about showing my kids what the road looks like before it gets paved over. It was about my dad seeing the West that previously he had only seen in movies. It was about documenting a specific moment in time with a specific medium that may not be around forever.
Ektachrome is still available. The Leica MP still works. The desert is still there.
If you have been putting this off, stop making excuses.
Load the camera. Drive the road. Shoot what you find.
It will blow your mind.
Frequently Asked Questions
What is Ektachrome film?
Ektachrome is a color slide film (E-6 process) known for high saturation and contrast. Originally discontinued in 2012, Kodak reintroduced Ektachrome 100 in 2018. It renders colors more vividly than negative film and requires precise exposure.
Why shoot film instead of digital for landscape photography?
Film forces discipline — limited exposures mean more intentional composition and metering. Ektachrome's color rendering is chemically distinct from digital sensors, producing saturated, contrasty images that match the intensity of desert light.
Is the Leica MP worth it for travel photography?
The Leica MP is a fully mechanical rangefinder with exceptional build quality and optical performance. For travel photography on film, it is reliable, compact, and produces excellent results with Leica M-mount lenses. It is expensive but built to last decades.
How do you meter Ektachrome in bright desert light?
Meter carefully for every shot using the camera's built-in meter. Ektachrome has narrow exposure latitude compared to negative film, so accurate metering is critical. I used incident metering and exposed for midtones.
What is the best film stock for desert photography?
Ektachrome 100 excels in desert environments due to its high saturation and contrast, which match the intensity of red rock formations and blue skies. Alternatives include Velvia 50 (even more saturated) or Portra 400 (more muted, forgiving latitude).
Where should I shoot film in Arizona and Utah?
Sedona (red rocks), Grand Canyon (South Rim), Horseshoe Bend, Zion National Park, and Highway 89A between them. Roadside Americana (vintage signs, abandoned structures, car junkyards) provides excellent subject matter between major landmarks.
What lens is best for desert landscape photography?
A 35mm focal length provides a natural wide-angle perspective for landscapes while remaining compact. The Summilux 35mm f/1.4 ASPH offers sharpness, fast aperture for handheld shooting in variable light, and classic Leica rendering.
How much does it cost to develop and scan Ektachrome?
Richard Photo Lab charges approximately $15-20 per roll for E-6 processing and high-resolution scans. Ektachrome film costs $15-18 per 36-exposure roll. Total cost per roll (film + processing + scans): $30-40.
Bonus: Full Trip Itinerary

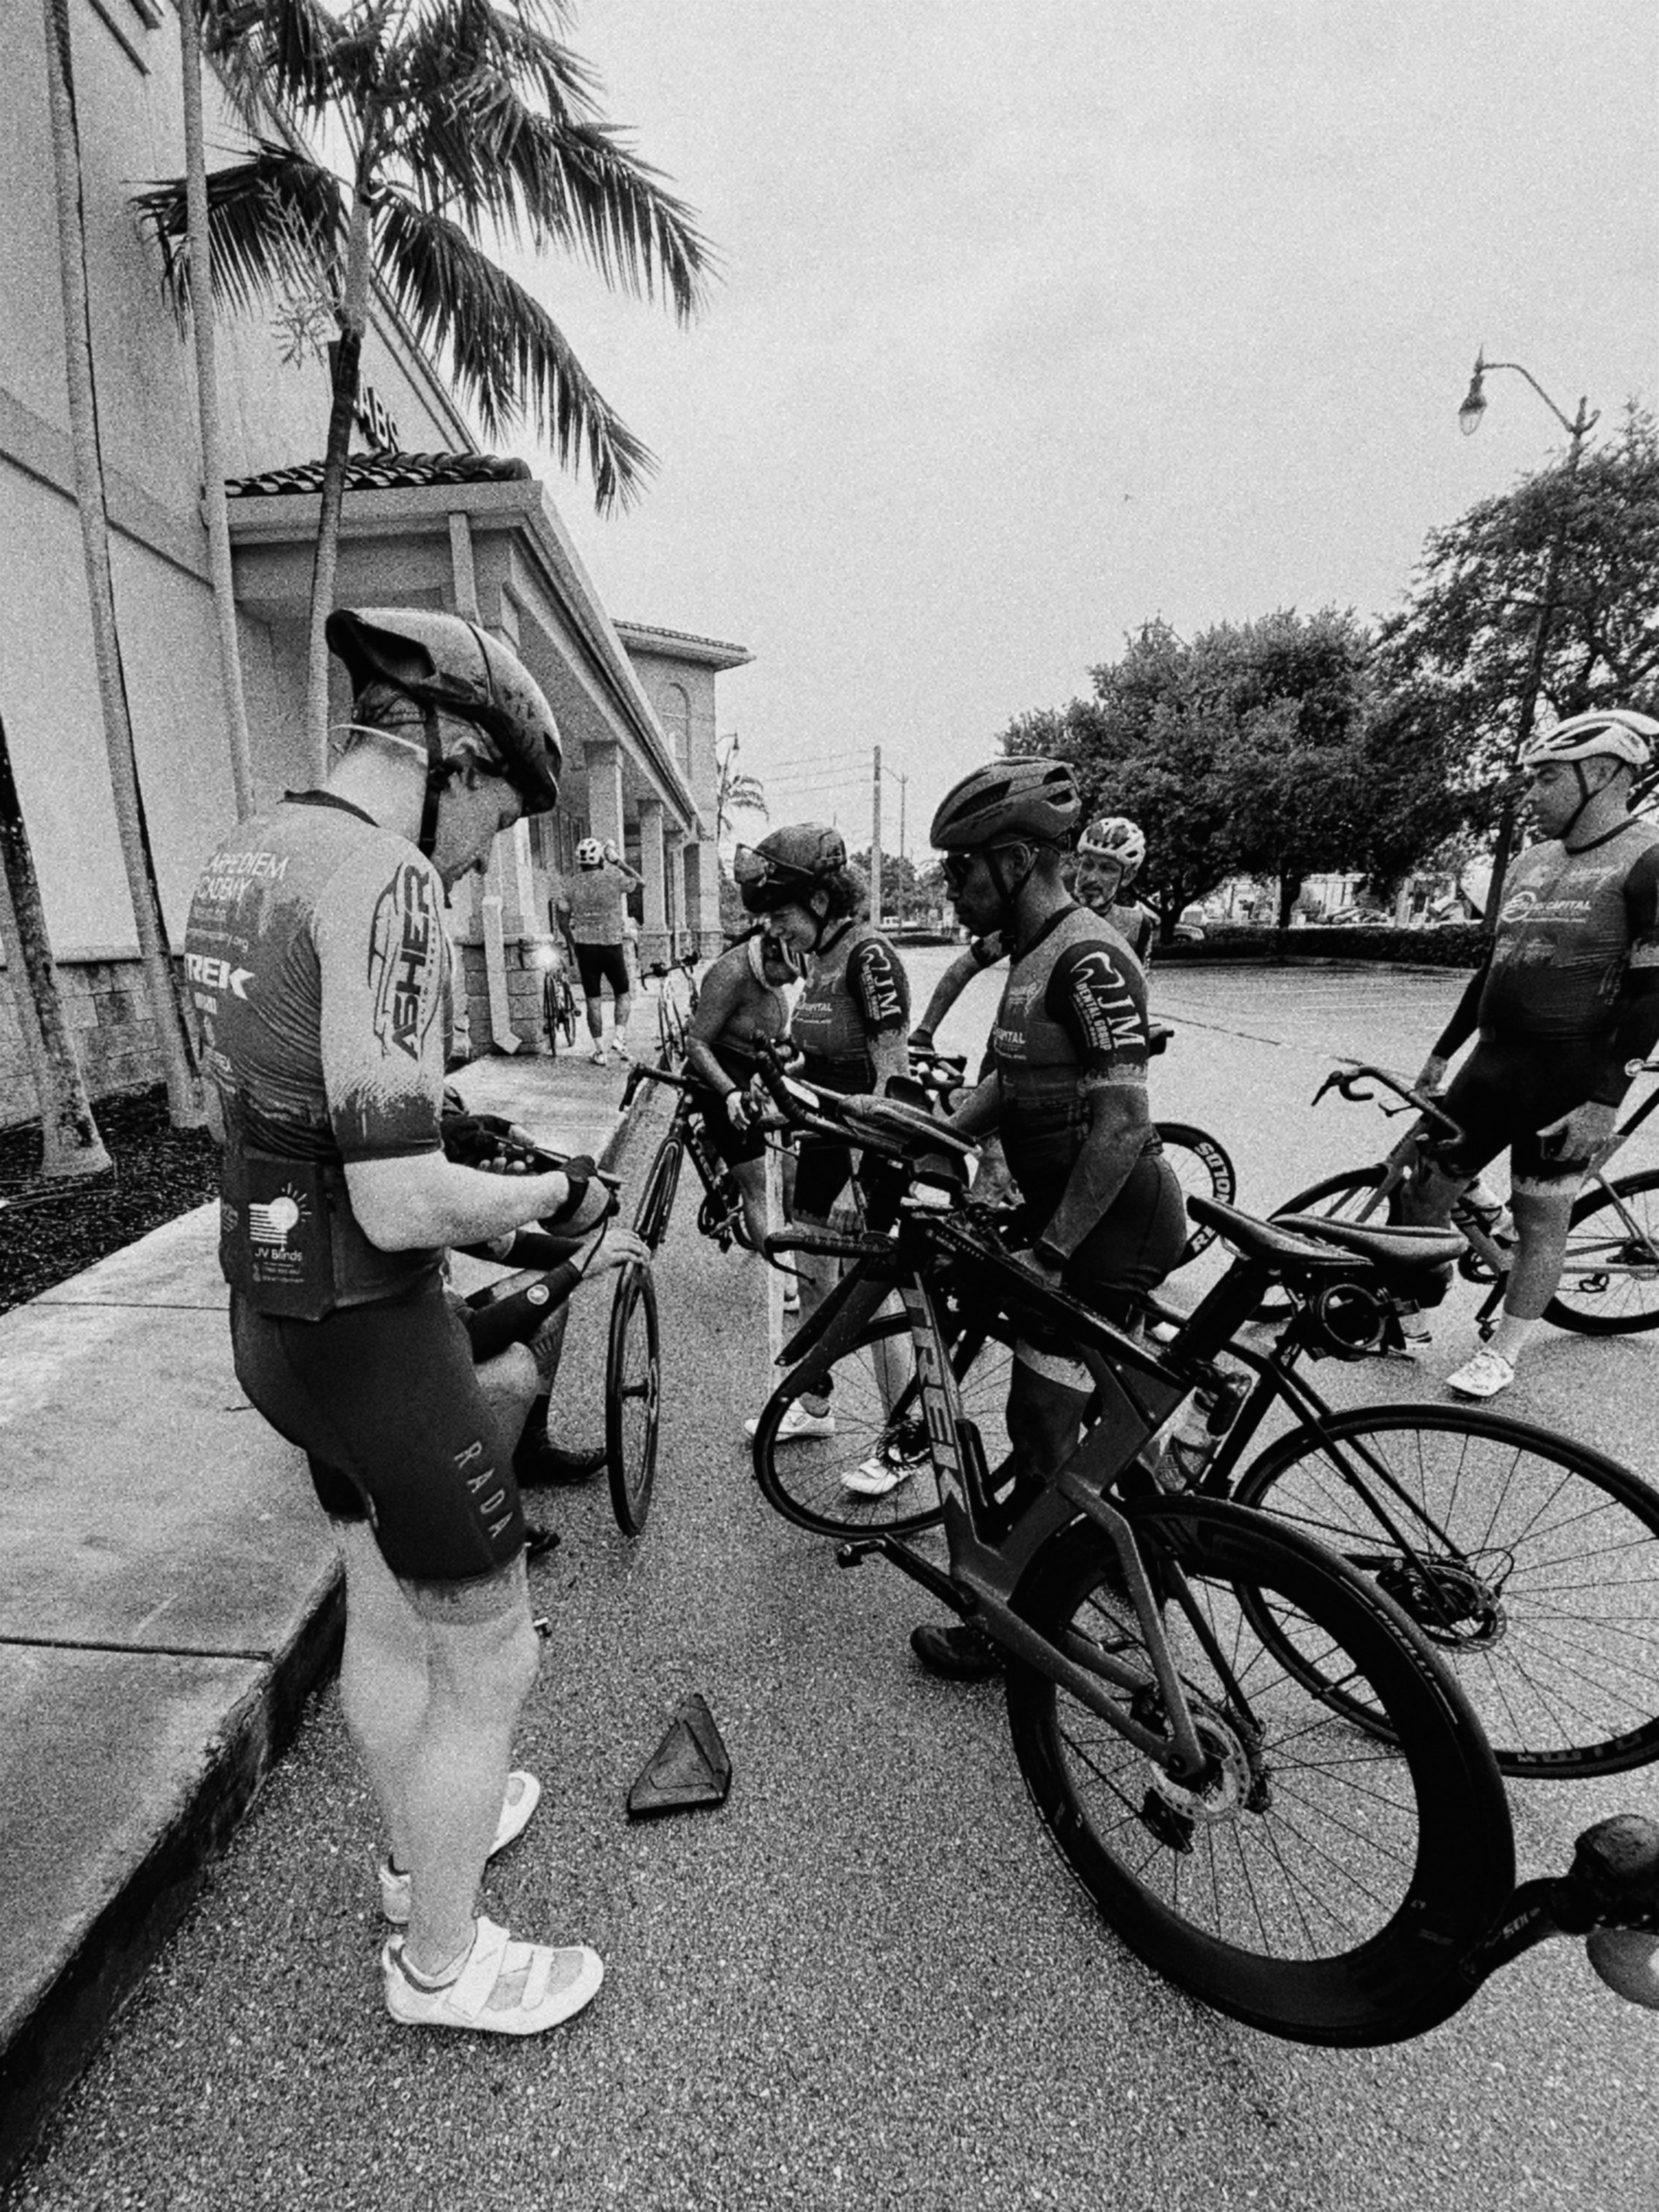
Cycling Routes in Miami: Fast Pavement, Zero Elevation
If you ride in Miami long enough, you stop making excuses about the heat and start showing up at dawn. The terrain is flat. The pace is not. This is a straight breakdown of the routes, the groups, and the reality of cycling in South Florida.
If you ride in Miami long enough, you stop making excuses about the heat and start showing up at dawn. The terrain is flat. The pace is not.
This is a straight breakdown of the routes, the groups, and the reality of cycling in South Florida — without the marketing gloss.
Quick Route Reference
Key Biscayne Loop — 14-18 miles — Sunday — Moderate
The only real climb in Miami. Bridge separates riders. High-speed paceline. Optional Virginia Key extension.South Run (Robert Is Here) — 50-70 miles — Saturday — Hard
Backroads south to Homestead. Optional speedway lap. Heat and distance compound by mid-ride. Return trip is the real test.Don Pan Ride — 40-60 miles — Weekday/Sunday — Very Hard
Starts CVS at Sunset & 57th. KB laps. One lap weekday, two and a half Sunday. Relentless pace. Post-ride meetup on KB.Pinecrest/Gables to South Beach — 30-50 miles — Variable — Moderate
Urban route through Coconut Grove and Brickell. Cross causeway to Miami Beach. Optional KB lap on return. Traffic increases significantly.North Run (Riviera Beach) — 80-100 miles — Variable — Very Hard
Meet at KB tolls. Venetian to South Beach, then coastal push through Miami Beach and Fort Lauderdale to Riviera Beach. Full day commitment.
The North Run: Miami to Fort Lauderdale or Riviera Beach
Distance: 80–100+ miles (one-way or round trip)
Terrain: Flat, coastal
Meetup: Key Biscayne tolls
This is the long haul north. Meet at the KB tolls, cross the Venetian Causeway to South Beach, then push straight up the coast (mainly A1A) through Miami Beach, Fort Lauderdale, and beyond — all the way to Riviera Beach.
The Route:
Start at KB tolls
Cross Venetian Causeway to South Beach
Head north through Miami Beach
Continue through Fort Lauderdale (~60 miles)
Push to Riviera Beach (~100 miles)
What It Is:
This is distance riding. Sustained pace, cumulative fatigue, and a full day commitment. The coastal route (A1A) keeps scenery varied, but the miles add up quickly. Wind off the ocean can help or hurt depending on direction. Route guidance required, otherwise you’ll get lost in the area around Fort Lauderdale airport.
Reality Check:
This is not a recovery ride. By the time you hit Fort Lauderdale, you are committed. The return trip tests mental endurance as much as physical fitness. Nutrition, hydration, and pacing matter more than on shorter routes.
Coastal routes look scenic.
They ride brutal.
70 miles in.
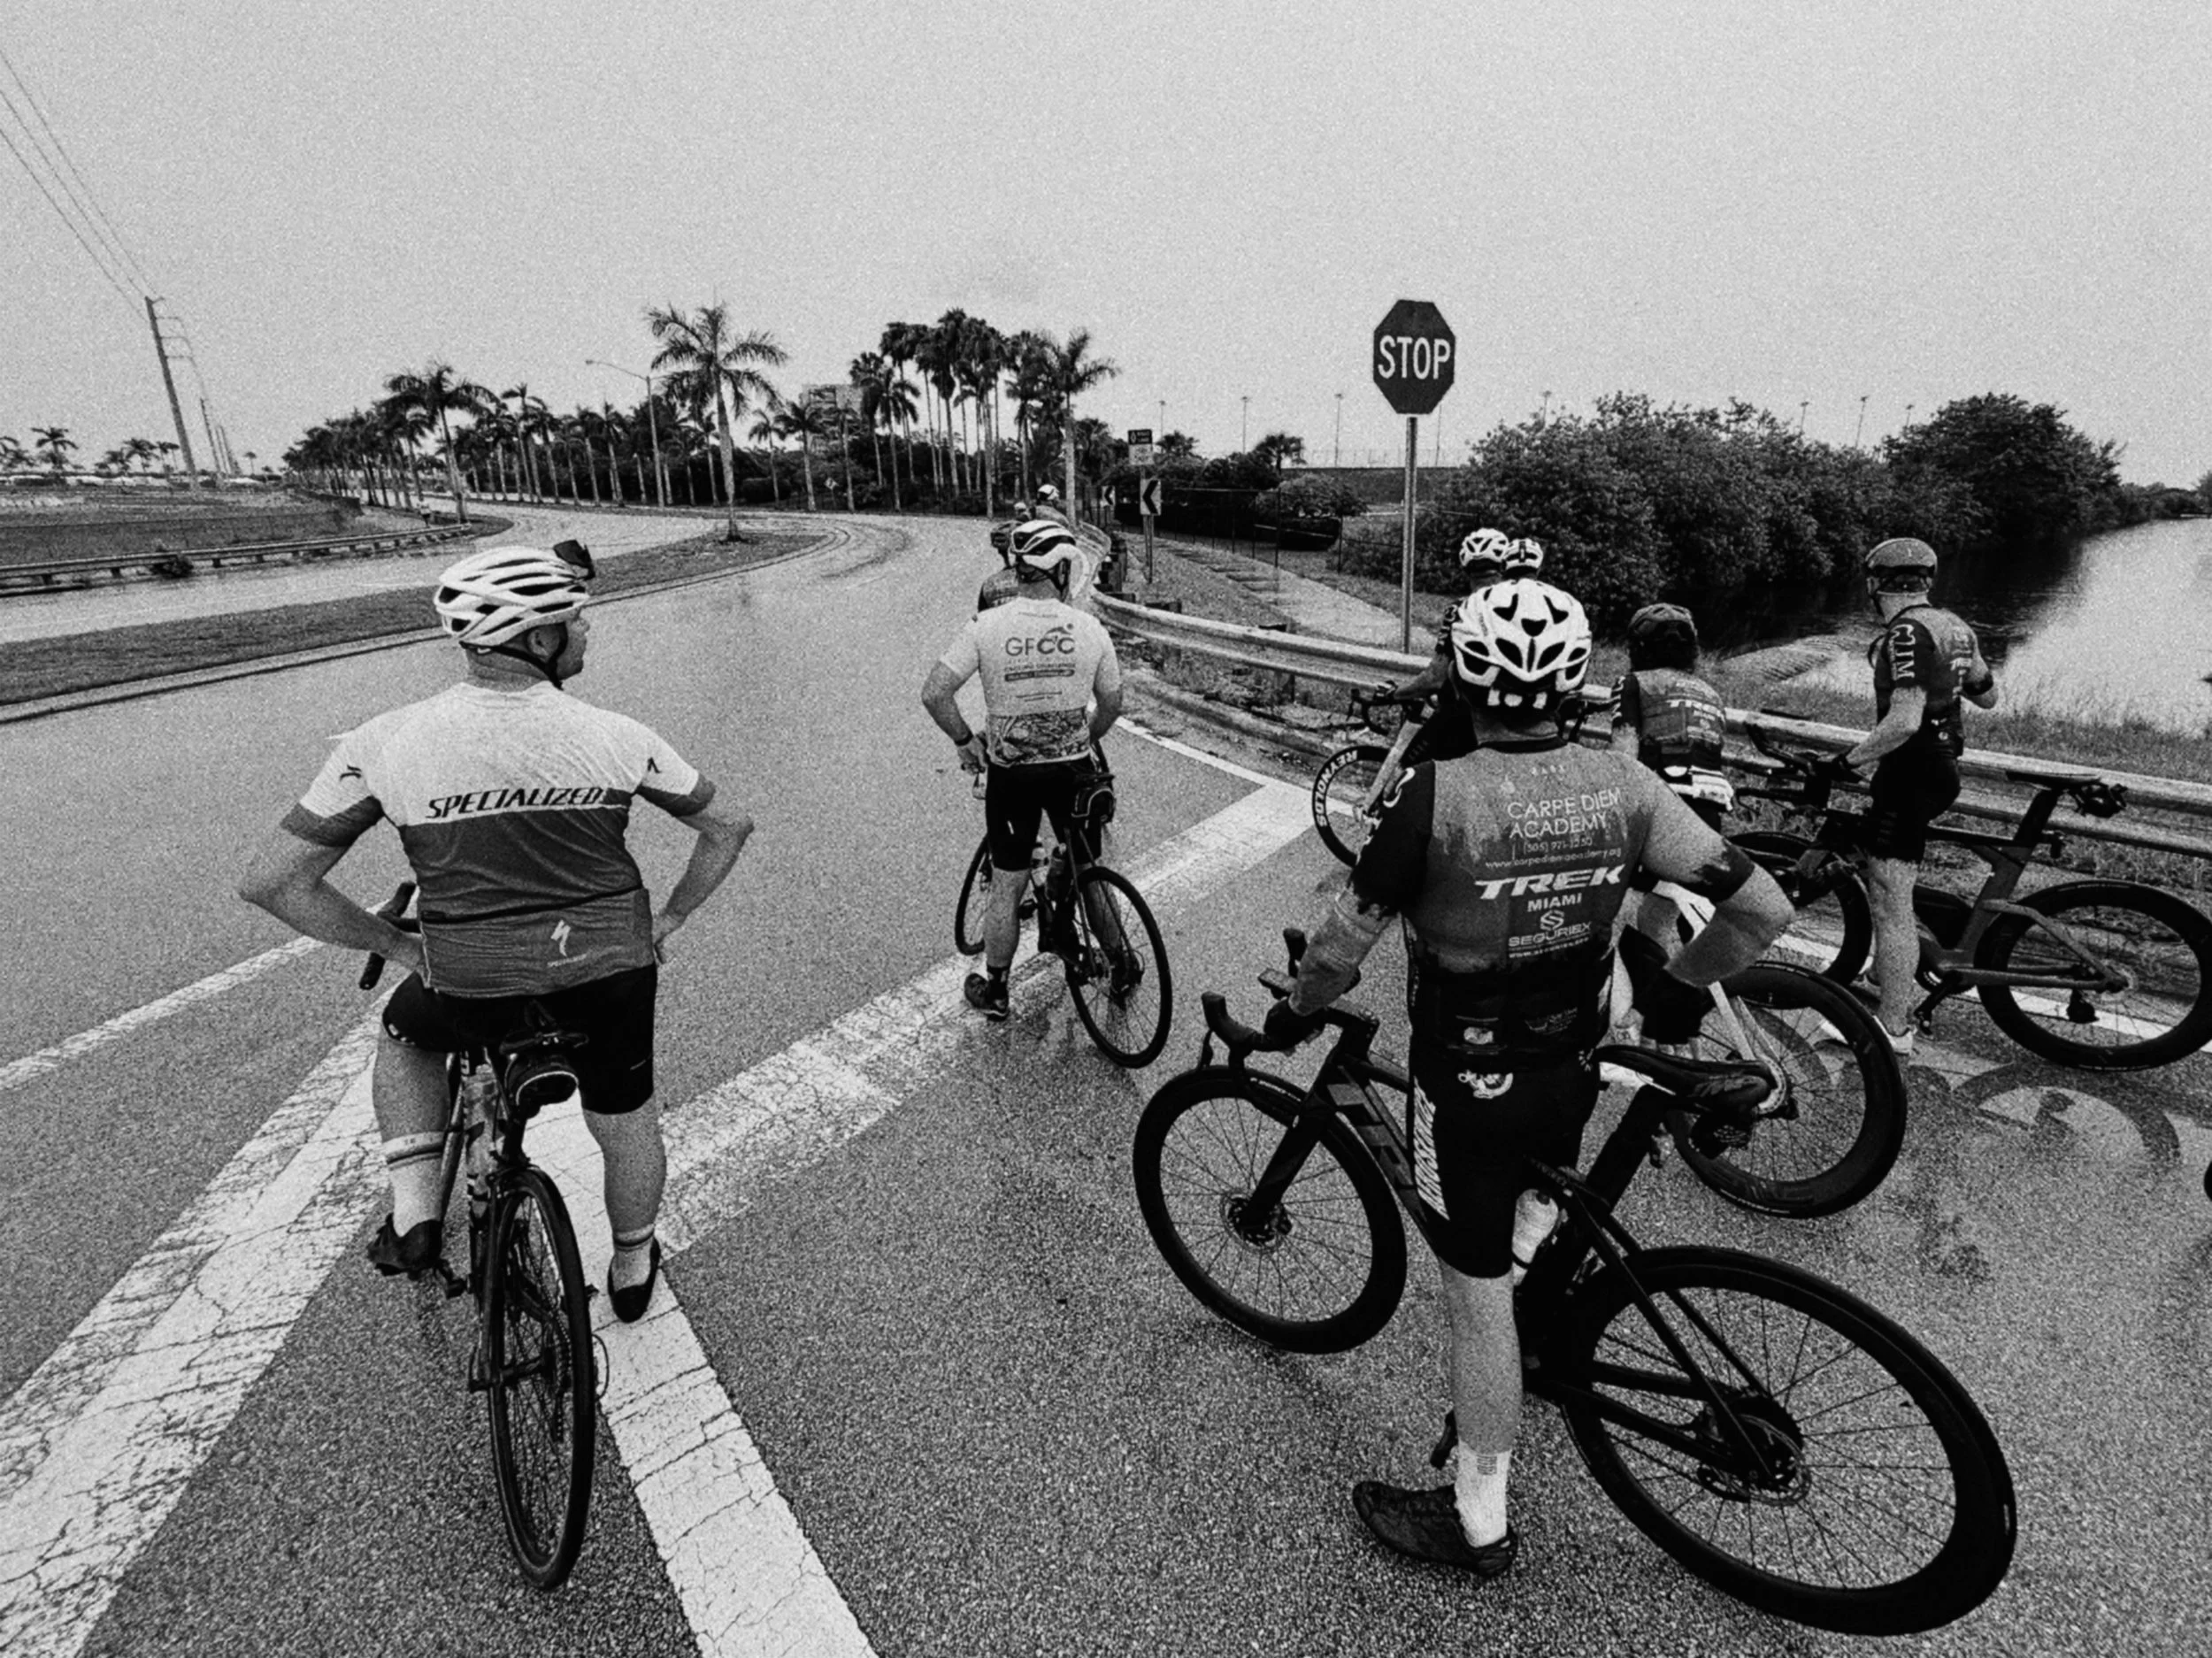
The Main Routes
Key Biscayne Loop
Distance: 15–20 miles (or more depending on how many laps you do)
Terrain: Flat, except for the Rickenbacker Bridge
Primary Day: Sunday mornings
The Rickenbacker Bridge is the only legitimate climb in Miami. It is short, exposed, and trafficked. The rest of the route is flat causeway riding and looping around the island.
The Route:
Start anywhere along Brickell, Coral Gables, South Miami or by the KB tolls
Climb the bridge
Loop Crandon Park or extend to Bill Baggs Cape Florida State Park (have to pay)
Optional Virginia Key loop for additional miles
Return via the same causeway
What It Is:
Sunday is KB day. Groups roll out early from Brickell, the tolls, or anywhere along the route south. The bridge climb separates riders temporarily. The rest is high-speed paceline riding with rotating pulls. Virginia Key adds extra distance and variation for those who want it. Also great for triathlon training.
Reality Check:
The bridge is the only vertical. Everything else is fast, flat group riding. If you cannot hold 20+ mph in a paceline, you will get dropped before the turnaround.

Sunday morning lineup.
The bridge waits ahead.
The South Run: Brickell to Robert Is Here
Distance: 50–70+ miles (depending on start point and route)
Terrain: Flat, backroads (read potholes)
Primary Day: Saturday mornings
Most group rides on Saturday head south. The destination is Robert Is Here, a fruit stand near Homestead that serves as the turnaround point and social gathering spot. The route takes backroads rather than US-1, with an optional lap around the Homestead-Miami Speedway.
The Route:
Start in Brickell or South Miami
Head south on backroads through Pinecrest, Palmetto Bay, and Black Point Marina
Push through into Homestead
Optional lap around Homestead-Miami Speedway
Turn around at Robert Is Here
Return north via the same route or variations further west
What It Is:
This is a full morning. The pace is sustained, the distance is real, and the heat becomes a factor by mid-ride. Groups fragment naturally based on fitness and fatigue. Robert Is Here is less about fruit and more about surviving the return trip.
Reality Check:
Flat does not mean easy. Wind, heat, and cumulative fatigue make the second half harder than the first. Hydration and nutrition are not optional. The speedway lap is either a bonus or a mistake depending on your legs. Best to leave 6:30am, just as the sun rises.
Robert Is Here isn't the destination. Surviving the return is.
Fifty miles south.
No shade.No mercy.
Don Pan Ride
Distance: 40–60+ miles
Terrain: Flat, KB loops
Start Location: 5610 Sunset Dr, Miami, FL 33143 (close to the CVS at the corner of Sunset Drive and 57th Avenue), also collecting riders along the way (KB tolls, Coconut Grove etc.)
Schedule:
Weekday rides: One lap of Key Biscayne, 6:30am meetup
Sunday rides: Two and a half laps of Key Biscayne, 7:30am meetup
Don Pan is not a route — it is a test. The ride starts in South Miami, heads to Key Biscayne through Coconut Grove, and proceeds to hammer out laps. The pace is relentless. Attacks come early and often. Getting dropped is expected.
What It Is:
This is where Miami's fastest cyclists destroy each other. No mercy, no waiting, no soft-pedaling. The weekday one-lap rides are brutal. The Sunday two-and-a-half-lap (or more) version is sustained suffering. Post-ride meetup is on Key Biscayne.
Reality Check:
Show up fit or get spat out the back in the first ten miles. The Rickenbacker Bridge climb happens multiple times. By the second or third lap on Sunday, legs are cooked.

Don Pan doesn't wait.
Don't show up soft.
South Beach
Distance: 30–50 miles (depending on start and finish)
Terrain: Flat, urban
Optional Add-On: Key Biscayne loop on the return
This is a flexible urban route that connects the southern suburbs to Miami Beach via Brickell and the Venetian Causeways. Riders often add a KB loop on the return for additional miles.
The Route:
Start in Pinecrest, South Miami, or Coral Gables
Head north through Coconut Grove and Brickell
Cross to Miami Beach via Venetian causeway
Loop South Beach and grab a coffee
Optional KB loop on the return
What It Is:
A longer, more varied ride that mixes urban cycling (a couple of traffic lights in Brickell, midtown), causeway crossing, and optional climbing. Less intense than Don Pan or the Robert Is Here run, but still fast-paced and distance-heavy.
Reality Check:
Traffic increases significantly once you hit Brickell and Miami Beach. Ride defensively. The optional KB lap on the return is either a victory lap or a mistake depending on your legs.

South Beach.
turnaround Or midpoint mistake.
Miami Cycling Community
Miami's cycling scene is built on group rides, but it extends beyond the road. These are the crews, shops, and photographers documenting the culture.
Cycling Groups & Crews
Details pending
Bike Shops
Details pending
Other Photographers
IG: Alex Beeker
Details pending
Group Ride Culture
Brush up on your Spanish. The social aspect matters, but so does the fitness requirement. If you cannot hold pace, you will ride alone quickly.
Saturday: Most groups head south toward Robert Is Here. Expect long distance, sustained speed, and heat.
Sunday: Key Biscayne is the default. Groups roll from Brickell, the tolls, or anywhere along the route. The bridge is the separator. The rest is paceline discipline.
Weekdays: Don Pan runs one lap. Other group rides happen sporadically depending on the crew and their training schedule.
The Reality of Riding in Miami
Flat Does Not Mean Easy
Miami has no sustained climbing except for the Rickenbacker Bridge. What it has instead is wind, heat, humidity, and relentless pace. Riders who dismiss Miami as "too flat" usually get humbled by the second hour.
Hydration is Not Optional
Carry more water than you think you need. Summer rides without proper hydration end badly. Electrolytes matter.
Start Early or Suffer
Predawn and early morning rides are survivable. Anything after 9 AM in the summer is asking for heat exhaustion.
Weather Turns Fast
Afternoon thunderstorms roll in May through October. Check radar. Have a plan.
WARNING! Traffic Requires Vigilance
Miami drivers are not cyclist-friendly. Ride defensively. Use lights. Claim your lane when necessary. Make eye contact. Do not assume you are seen. Do not assume they signal when turning. Wear a helmet and have a radar light.
The Photography Angle
Shooting cycling in Miami is less about dramatic landscapes and more about capturing the intensity of the riders and the rhythm of the group. The Rickenbacker Bridge offers the only real visual drama with the skyline backdrop. The rest is heat haze, flat roads, and riders grinding.
I shoot most of my cycling work on the Leica M10-R and Leica MP with Kodak black-and-white film. The combination of motion, light, and effort — that is what I am chasing.
There are a bunch of other (great) photographers out there every day. My style is different. My intent is different.
Also check out my “How I Film Road Bike with GoPros and Edit on Mac mini guide here or check out my cycling gallery here.
Frequently Asked Questions
What is the best cycling route in Miami?
Key Biscayne Loop is the most popular and accessible route, especially on Sunday mornings. It offers the only real climb in Miami (Rickenbacker Bridge) and attracts the largest group rides.
How long is the Key Biscayne bike loop?
The standard KB loop is 14-18 miles depending on whether you add Virginia Key or extend to Bill Baggs State Park. Most riders complete it in under an hour at group ride pace.
Where do Miami cyclists meet up?
Common meetup points include KB tolls, Brickell (near Ludlow Coffee), and the CVS at Sunset and 57th Avenue (for Don Pan rides). Coconut Grove is a favorite post-ride gathering spot.
Is Miami good for road cycling?
Yes, if you can handle flat, fast-paced riding in heat and humidity. Miami has an active group ride culture with routes ranging from 15 to 100+ miles. The terrain is flat except for the Rickenbacker Bridge. You easily see 100+ riders out on each weekend day.
What day are the main Miami group rides?
Saturday: Most groups head south toward Robert Is Here (50-70 miles). Sunday: Key Biscayne Loop is the standard ride. Weekdays: Don Pan runs one lap of KB. Timing and exact routes vary by group.
What about coffee shops?
Miami is not short on coffee shops. Some spots that I frequently visit
Ludlow or Rosetta Bakery in Brickell
Panther Coffee, Emissary Cafe, or Navi Coffee in Coconut Grove
Il Dante Caffee in South Beach (760 Ocean Drive, https://www.instagram.com/ildantecaffe/)
Mondi Coffee Bar in Pinecrest
Final Take
Miami cycling is not about elevation or picturesque mountain passes. It is about speed, heat, and showing up consistently. The routes are flat. The rides are not.
These are the main routes I have ridden. There are dozens of other group rides, informal loops, and variations depending on the crew and the day. If you can hold pace, hydrate properly, and survive the heat, Miami has some of the fastest and most consistent group riding in the country.
If you cannot, you will know quickly.
DISCLAIMER
Bicycle riding is an inherently dangerous activity that carries a risk of serious injury or death. The information provided on Permundum is for informational purposes only and does not constitute an endorsement, recommendation, or guarantee of safety for any ride, route, or group listed herein.
The responsibility for each rider's safety, physical fitness, and the mechanical soundness of his or her bicycle lies solely with the individual rider. Permundum does not organize, sponsor, oversee, or assume any liability for any rides, group rides, or cycling activities described or referenced on this site.
Participation in any group ride is entirely voluntary and at your own risk. By joining any ride referenced here, you assume full responsibility for your own safety and well-being. Always wear a helmet and appropriate safety gear, ride within your abilities, and consult a medical professional before engaging in strenuous physical activity.
Snowboarding Jackson Hole: Terrain, Difficulty, Reality

If you watch enough Travis Rice footage, at some point Jackson Hole, Wyoming stops being entertainment and starts feeling like unfinished business. The terrain looks raw, the lines look endless, and the riding looks fundamentally different from most resort snowboarding.
I had snowboarded extensively across Europe — Austria (St. Anton, Zürs, Lech), Switzerland (Titlis), France (Chamonix), Italy, Germany, Slovakia, and the Czech Republic — but never in the United States. After years of putting it off, we finally pulled the plug and went to Jackson Hole over Christmas.
This is an honest assessment of snowboarding Jackson Hole — the terrain, the difficulty, and the reality — without marketing gloss.
Quick Facts:
📍 Location: Teton Village, Wyoming
📅 When we went: Christmas 2025
❄️ Conditions: Fresh powder after initial rain/sleet
🏂 Difficulty: Advanced to Expert
⏱️ Time needed: 3-5 days minimum
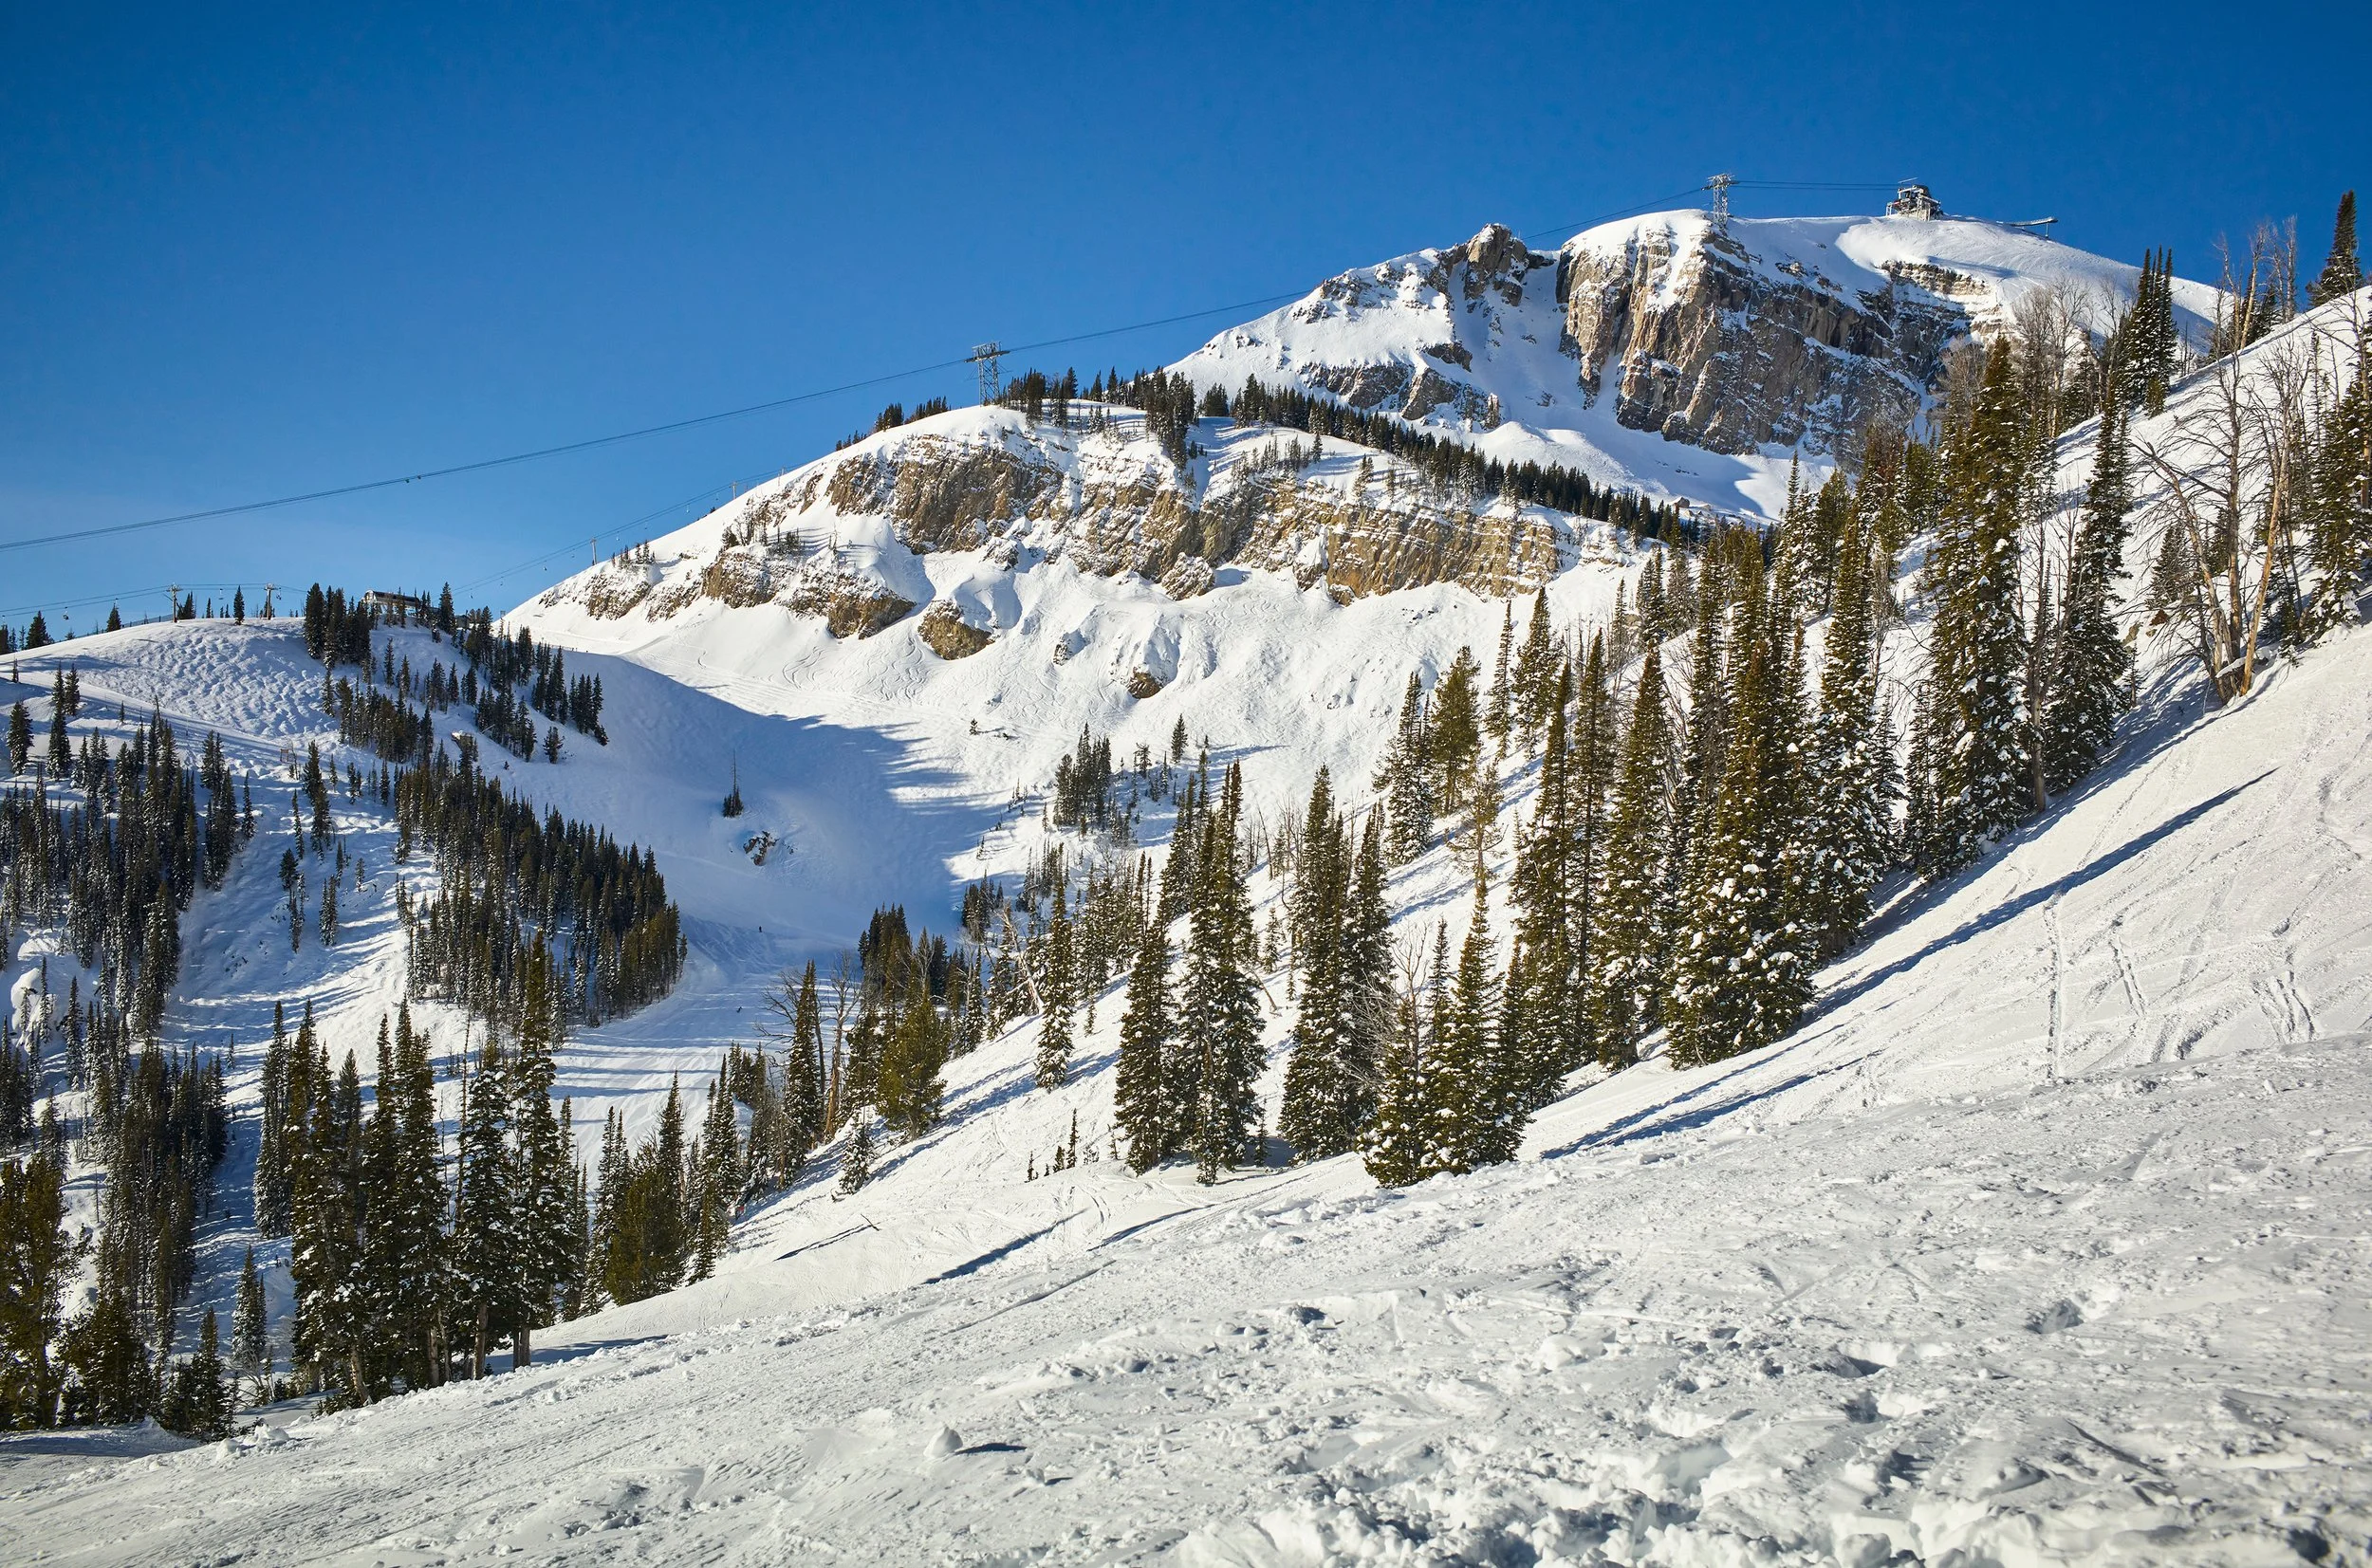
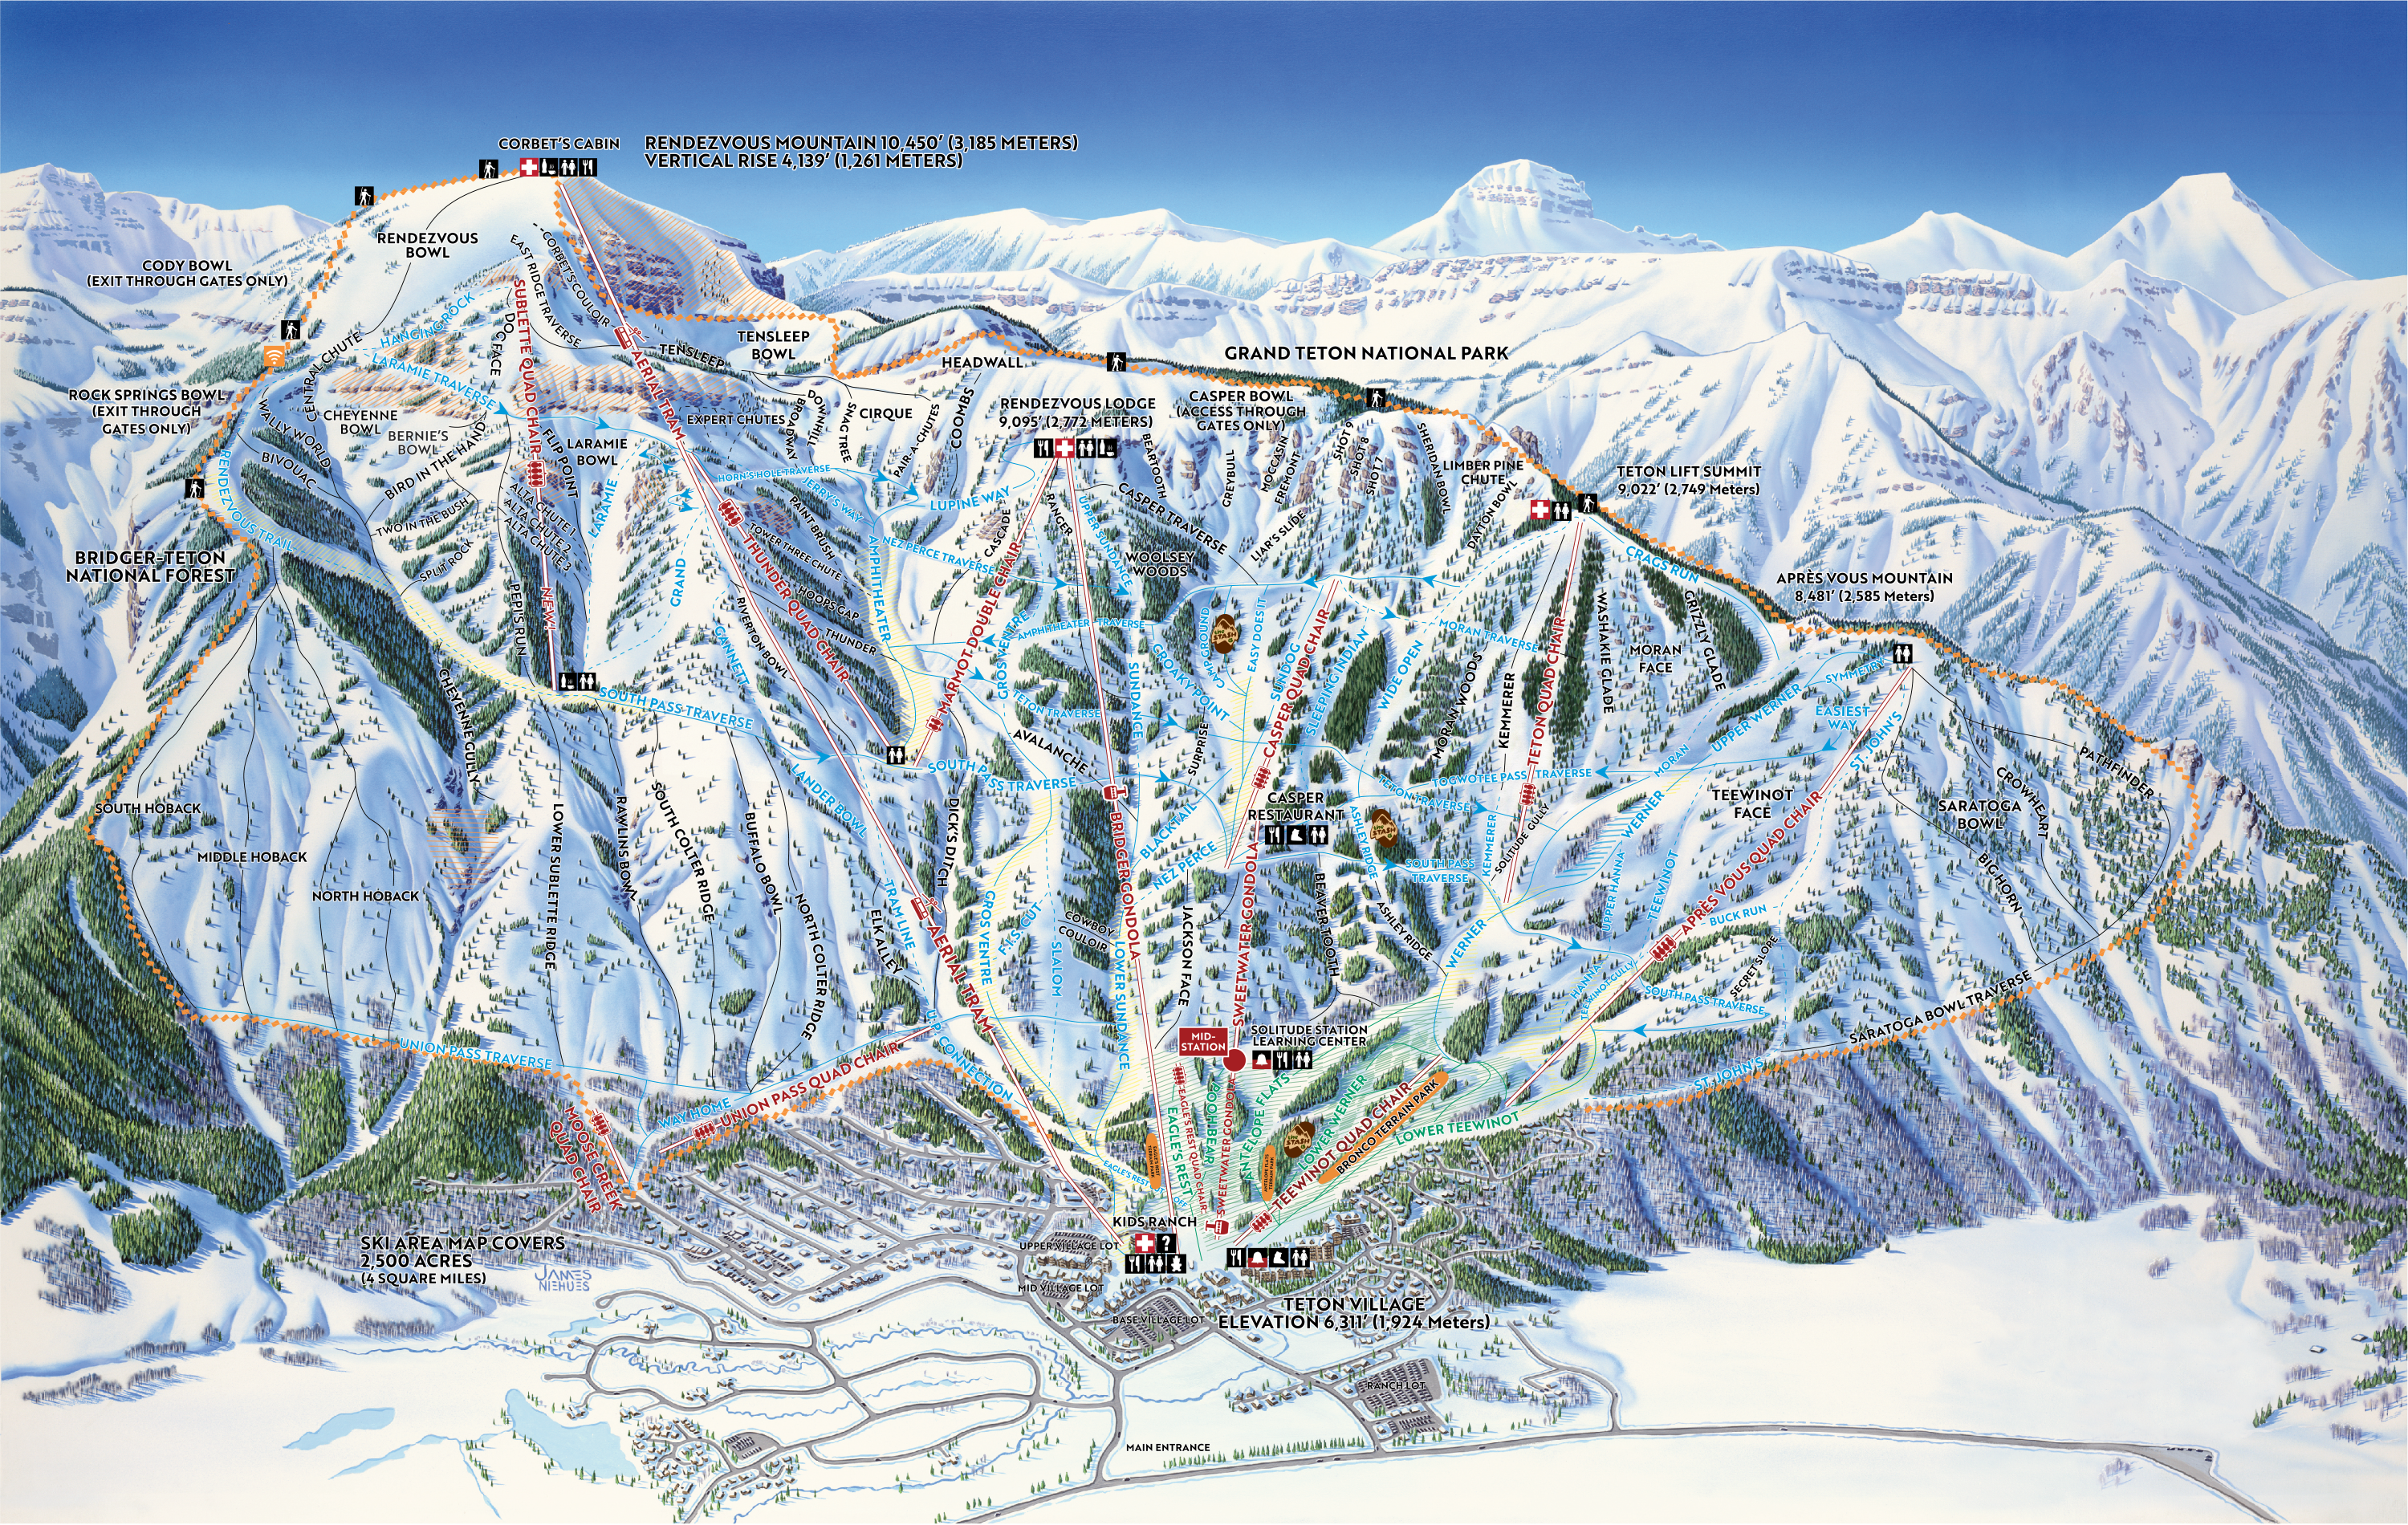
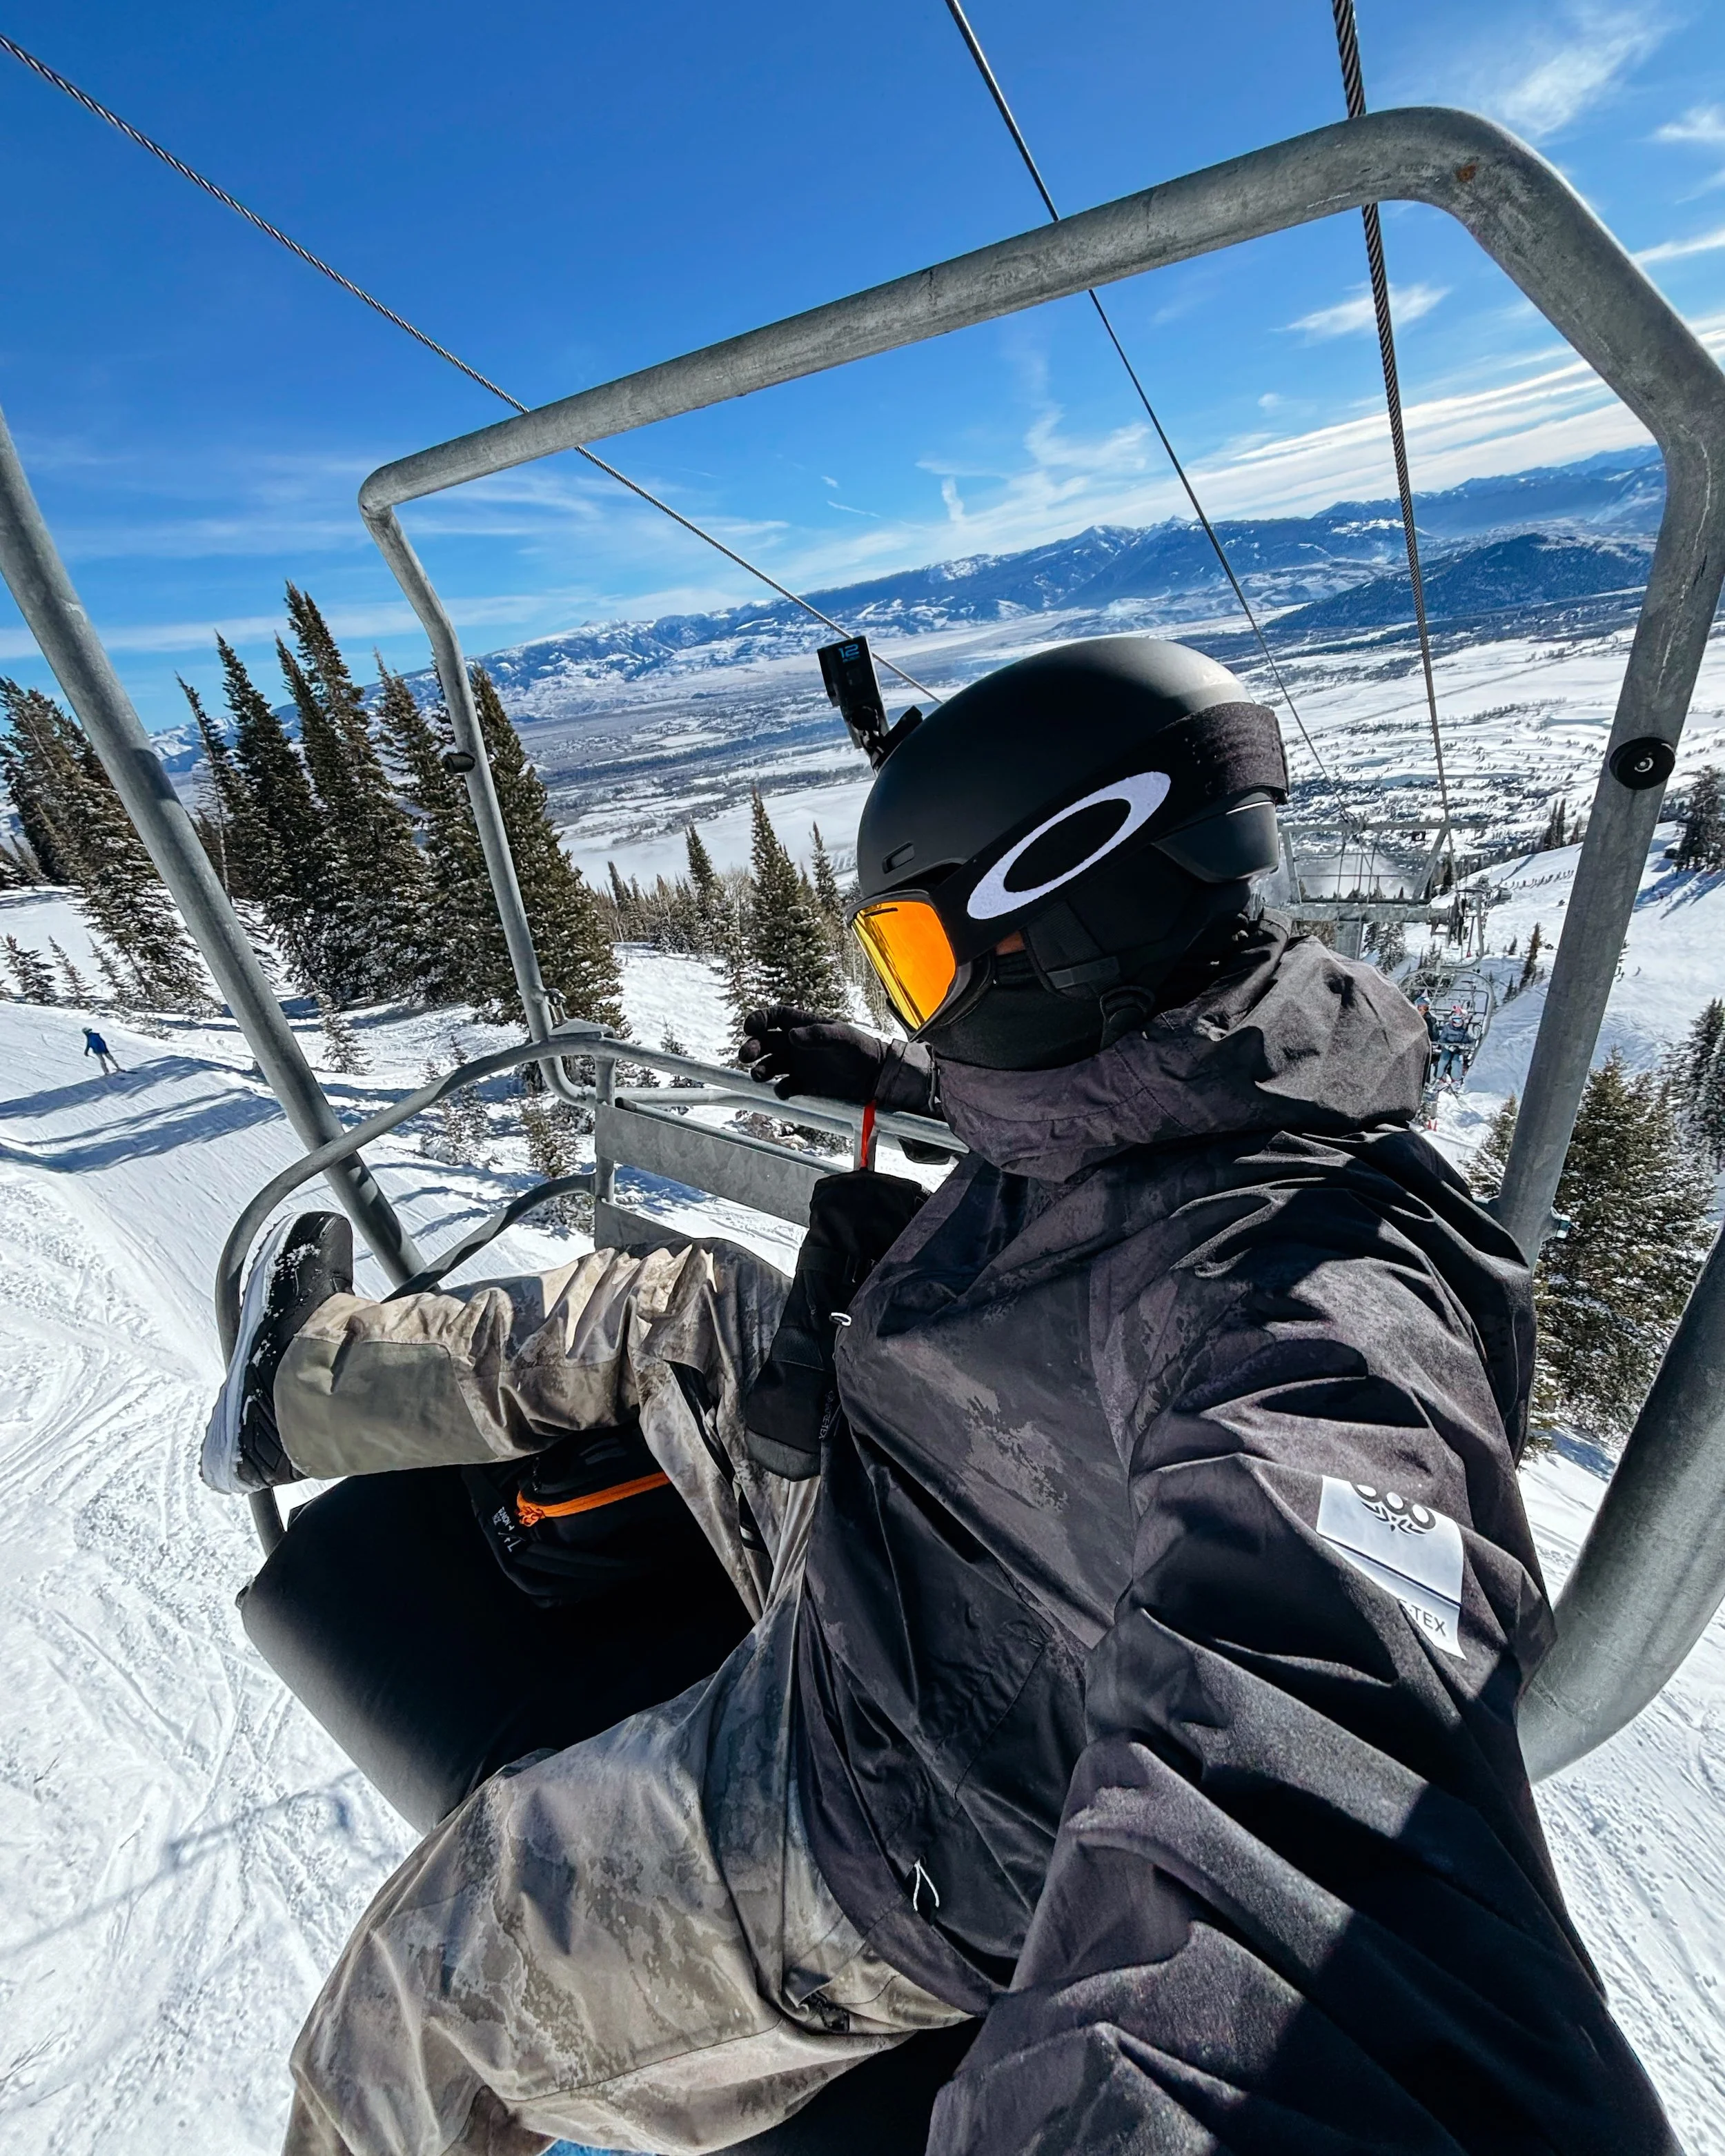
Jackson Hole Mountain Resort
Vertical drop: 4,139 ft
Summit elevation: 10,450 ft
Skiable acres: 2,500
Trails: 131 (this understates how much is ungroomed)
13 Lifts
5 Green Runs
31 Blue Runs
26 Double Blue Runs
53 Black Runs
26 Double Black Runs
4 Pipe/Park/Race
Lifts: 13 total, including the Aerial Tram
Average snowfall: ~459 inches annually
Terrain split: Roughly 50% expert
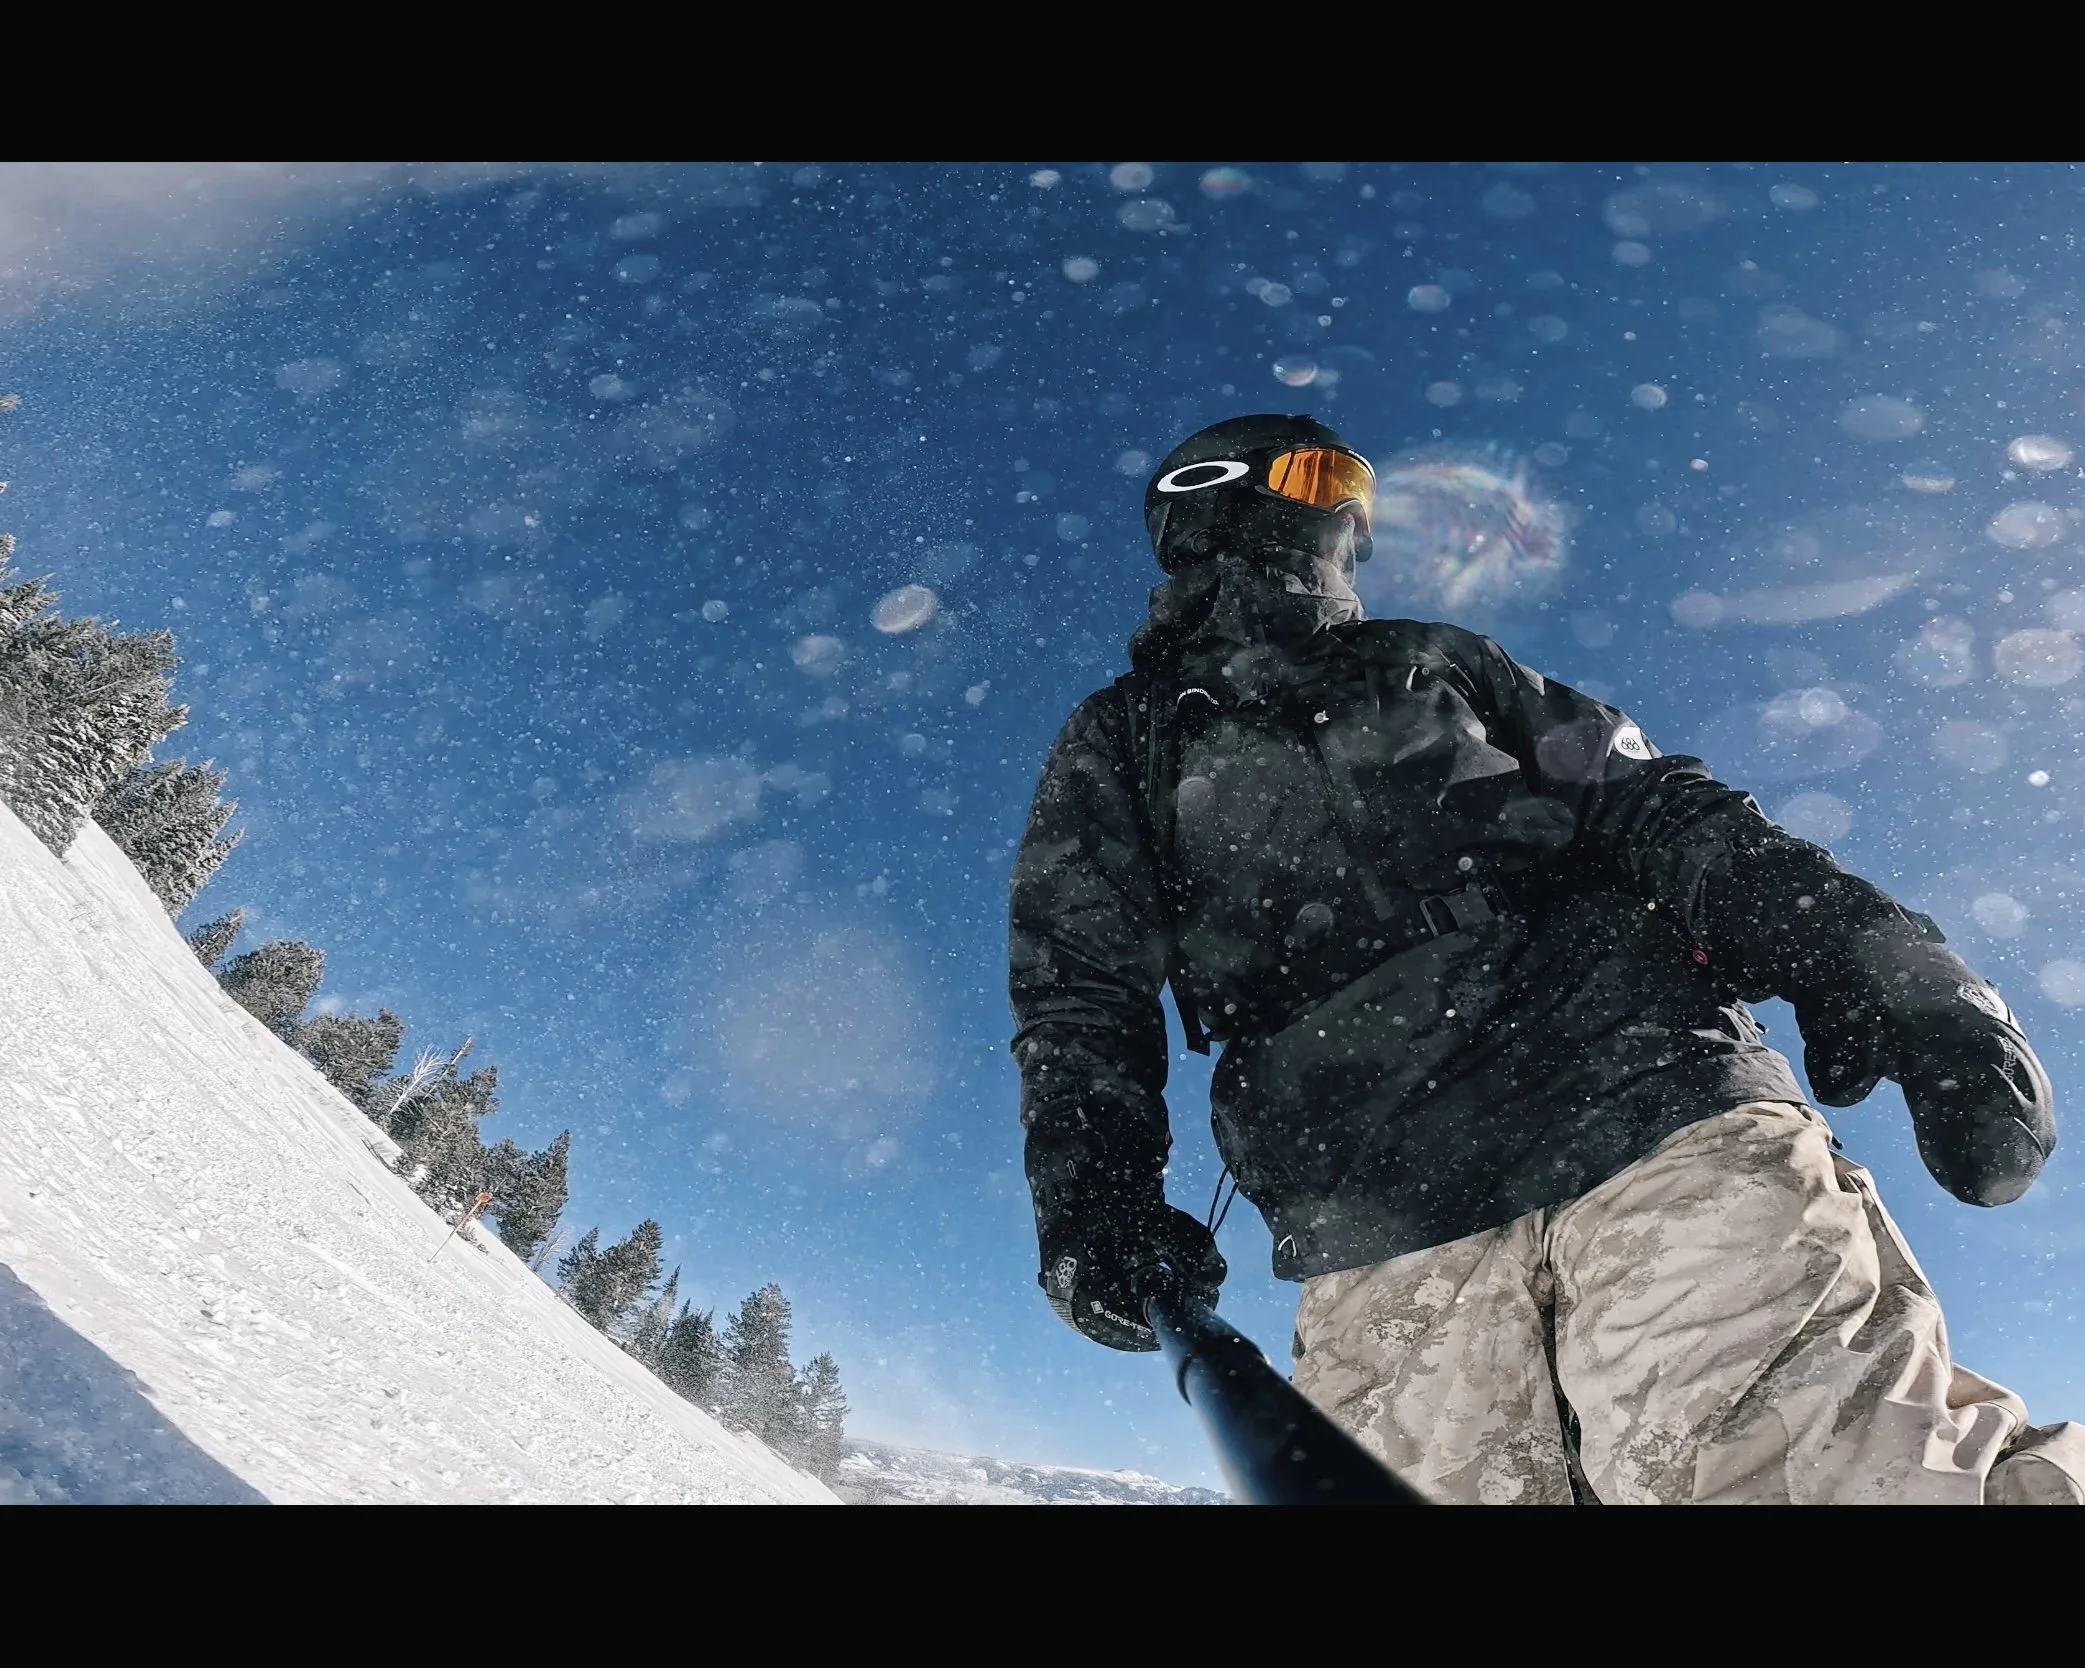
Jackson Hole is not big because of sprawl. It is big because of vertical, pitch, and consequence.
Arrival Reality: Weather Whiplash
When we arrived in Jackson on Christmas Eve, the first reaction was disappointment. In town, it was raining and sleeting — the kind of weather that immediately makes you question your timing and your decision-making.
What the valley does, however, is not what the mountain does.
Up on the summit, it was snowing, with the rain line clearly below the resort. By the time I rode my first day, the weather had flipped completely and delivered fresh pow.
That first day on the mountain was a bluebird day — clear skies, fresh snow, and full visibility across the upper terrain. The contrast was sharp and instructive: Jackson Hole can look discouraging at town level while delivering exactly what you came for above it.
That variability is not a footnote. It is part of the Jackson Hole experience, and it rewards patience.
Terrain Breakdown: What Snowboarding Jackson Hole Is Actually Like
The Tram Changes Everything
The Aerial Tram is the defining feature of Jackson Hole. It drops you directly into steep, sustained terrain with no warm-up and no easy reset. Unlike many European resorts, there is very little easing into the mountain. You are either ready or adapting immediately.
Bowls That Demand Control
Rendezvous Bowl and adjacent zones are wide, open, and steep — but not forgiving. Snow quality shifts quickly with wind and exposure. This is not automatic hero snow. Edge control and line choice matter more than style.
Trees That Punish Mistakes
Tree runs are tight, irregular, and often steep. Spacing is inconsistent, visibility can change quickly, and mistakes carry consequences. These are not casual glade runs.
Groomers Exist — But That’s Not the Point
Yes, Jackson Hole has groomed runs. No, they are not why people travel here. If your riding depends on corduroy, you will only be scratching the surface.
Difficulty: A Straight Assessment
Jackson Hole is legitimately difficult, but not in a theatrical way.
Steeps are sustained, not short pitches
Many runs are ungroomed by default
Conditions vary daily and must be read, not assumed
Fatigue sets in faster due to vertical and pitch
Rating of the runs (blue, black etc.) is set in the context of the resort (a blue run here is not the same as a blue somewhere else, it’s more difficult)
If you are comfortable riding off-piste terrain in St. Anton or Chamonix, you have the technical foundation. What changes is how dense the expert terrain is and how quickly you are committed to it.
Jackson Hole does not allow much hesitation.
Reality Check: Hype vs. Experience
Jackson Hole earns its reputation — but it does not hand anything to you.
It is not cinematic every day
Powder is not guaranteed
Conditions can be firm, wind-affected, or demanding
The mountain exposes weaknesses quickly
That is precisely why it is respected. This is a place where terrain dictates behavior, not the other way around.
Jackson Hole vs. European Riding
Having ridden extensively in Europe, the differences are clear:
Less infrastructure above treeline
Fewer traverse-heavy routes
More fall-line riding
Fewer chances to reset once committed
European resorts often give you options. Jackson Hole often gives you a decision — and then expects you to live with it.
Who Jackson Hole Is (and Is Not) For
You should go if:
You are comfortable on steep, ungroomed terrain
You enjoy problem-solving terrain rather than cruising
You want a mountain that demands focus and respect
You should reconsider if:
You rely on grooming
You dislike variable conditions
You want a relaxed, scenic experience
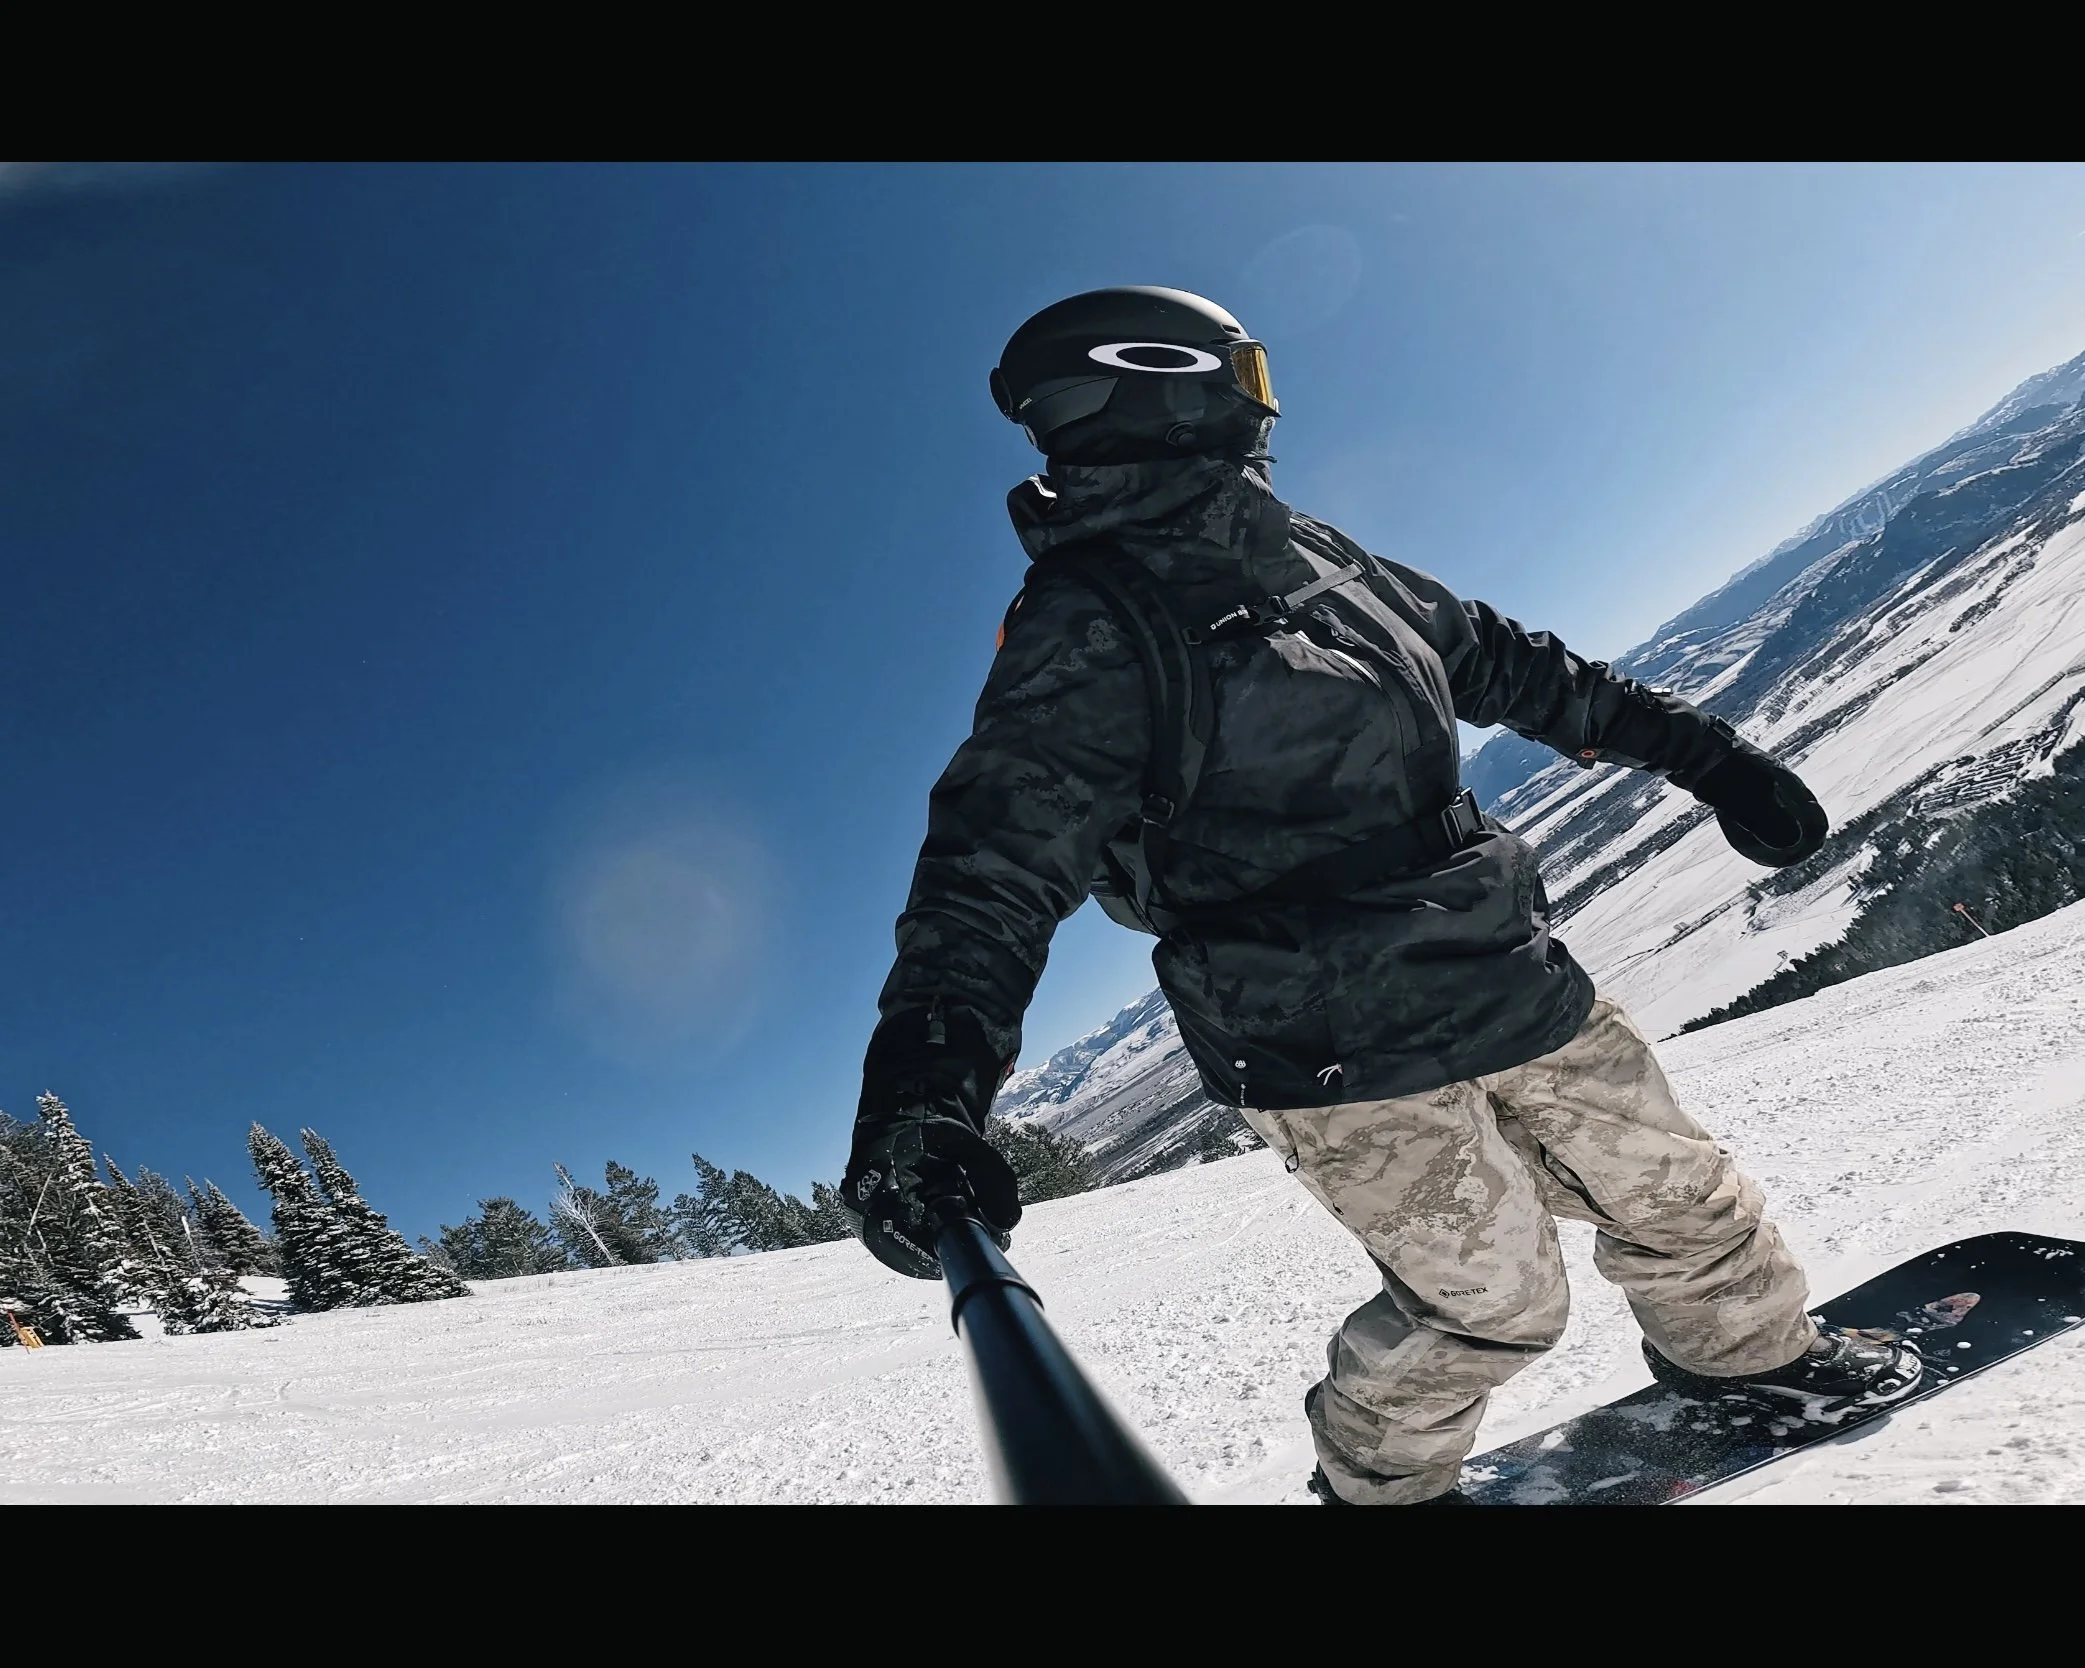
Snowboarding Gear I Rode at Jackson Hole
Gear
Snowboard: LibTech T Rice Pro 2026
Binding: Union Atlas
Boots: Thirty Two TM-2
Clothing:686 (Gore-Tex)
Helmet: Anon Windham Wavecel
Jackson Hole is not forgiving of soft, park-oriented setups. Stability matters more than playfulness. I also have a Libtech Skate Banana and an old Ride free ride board but switched on purpose for this trip.
What worked well:
A stiffer, performance-oriented board with strong edge hold and stability at speed
Responsive bindings
Boots that prioritized control over comfort
If your board chatters at speed or folds under pressure, Jackson Hole will make that obvious.


Ski Lessons for Kids: An Underrated Strength
We also signed the kids (7 and 5) up for ski lessons through Jackson Hole Mountain Resort, including full equipment rentals. The process was efficient, well-organized, and professional — no chaos, no wasted mornings, and no confusion. The staff also made it fun and entertaining for the kids. It was their first time, including first time seeing snow.
More importantly, the instruction worked. The kids had a genuinely great experience, progressed quickly, and came off the mountain energized rather than frustrated. By the end of the trip, skiing was no longer something they were being guided through — it was something they wanted more of.
That matters. Jackson Hole is known for expert terrain, but it is equally capable of building confidence at the beginner level. The result was simple: the trip didn’t just deliver on riding — it ignited their desire to keep improving and come back.
Frequently Asked Questions (FAQ)
Is Jackson Hole too difficult for intermediate snowboarders?
Yes, for most intermediates. The terrain is 50% expert, and even blue runs here would be black diamonds at other resorts. If you're not comfortable on ungroomed steeps, reconsider.
What's the best time to snowboard Jackson Hole?
January through March for consistent snowfall. Early season (December) can be variable, as we experienced with rain/sleet in town.
How does Jackson Hole compare to European resorts?
Less infrastructure, more fall-line riding, fewer traverse options. Similar difficulty to Chamonix or St. Anton but more vertically dense expert terrain.
What snowboard setup do you need for Jackson Hole?
Stiff, directional board with strong edge hold. Avoid park boards. I rode the LibTech T Rice Pro 2026 with Union Atlas bindings - prioritize stability over playfulness.
Final Take
Snowboarding Jackson Hole is not about checking a box. It is about riding a mountain that does not soften itself for the rider. The terrain dictates the experience, and the experience exposes your strengths and weaknesses quickly.
If Travis Rice planted the seed, Jackson Hole will tell you whether it was earned.
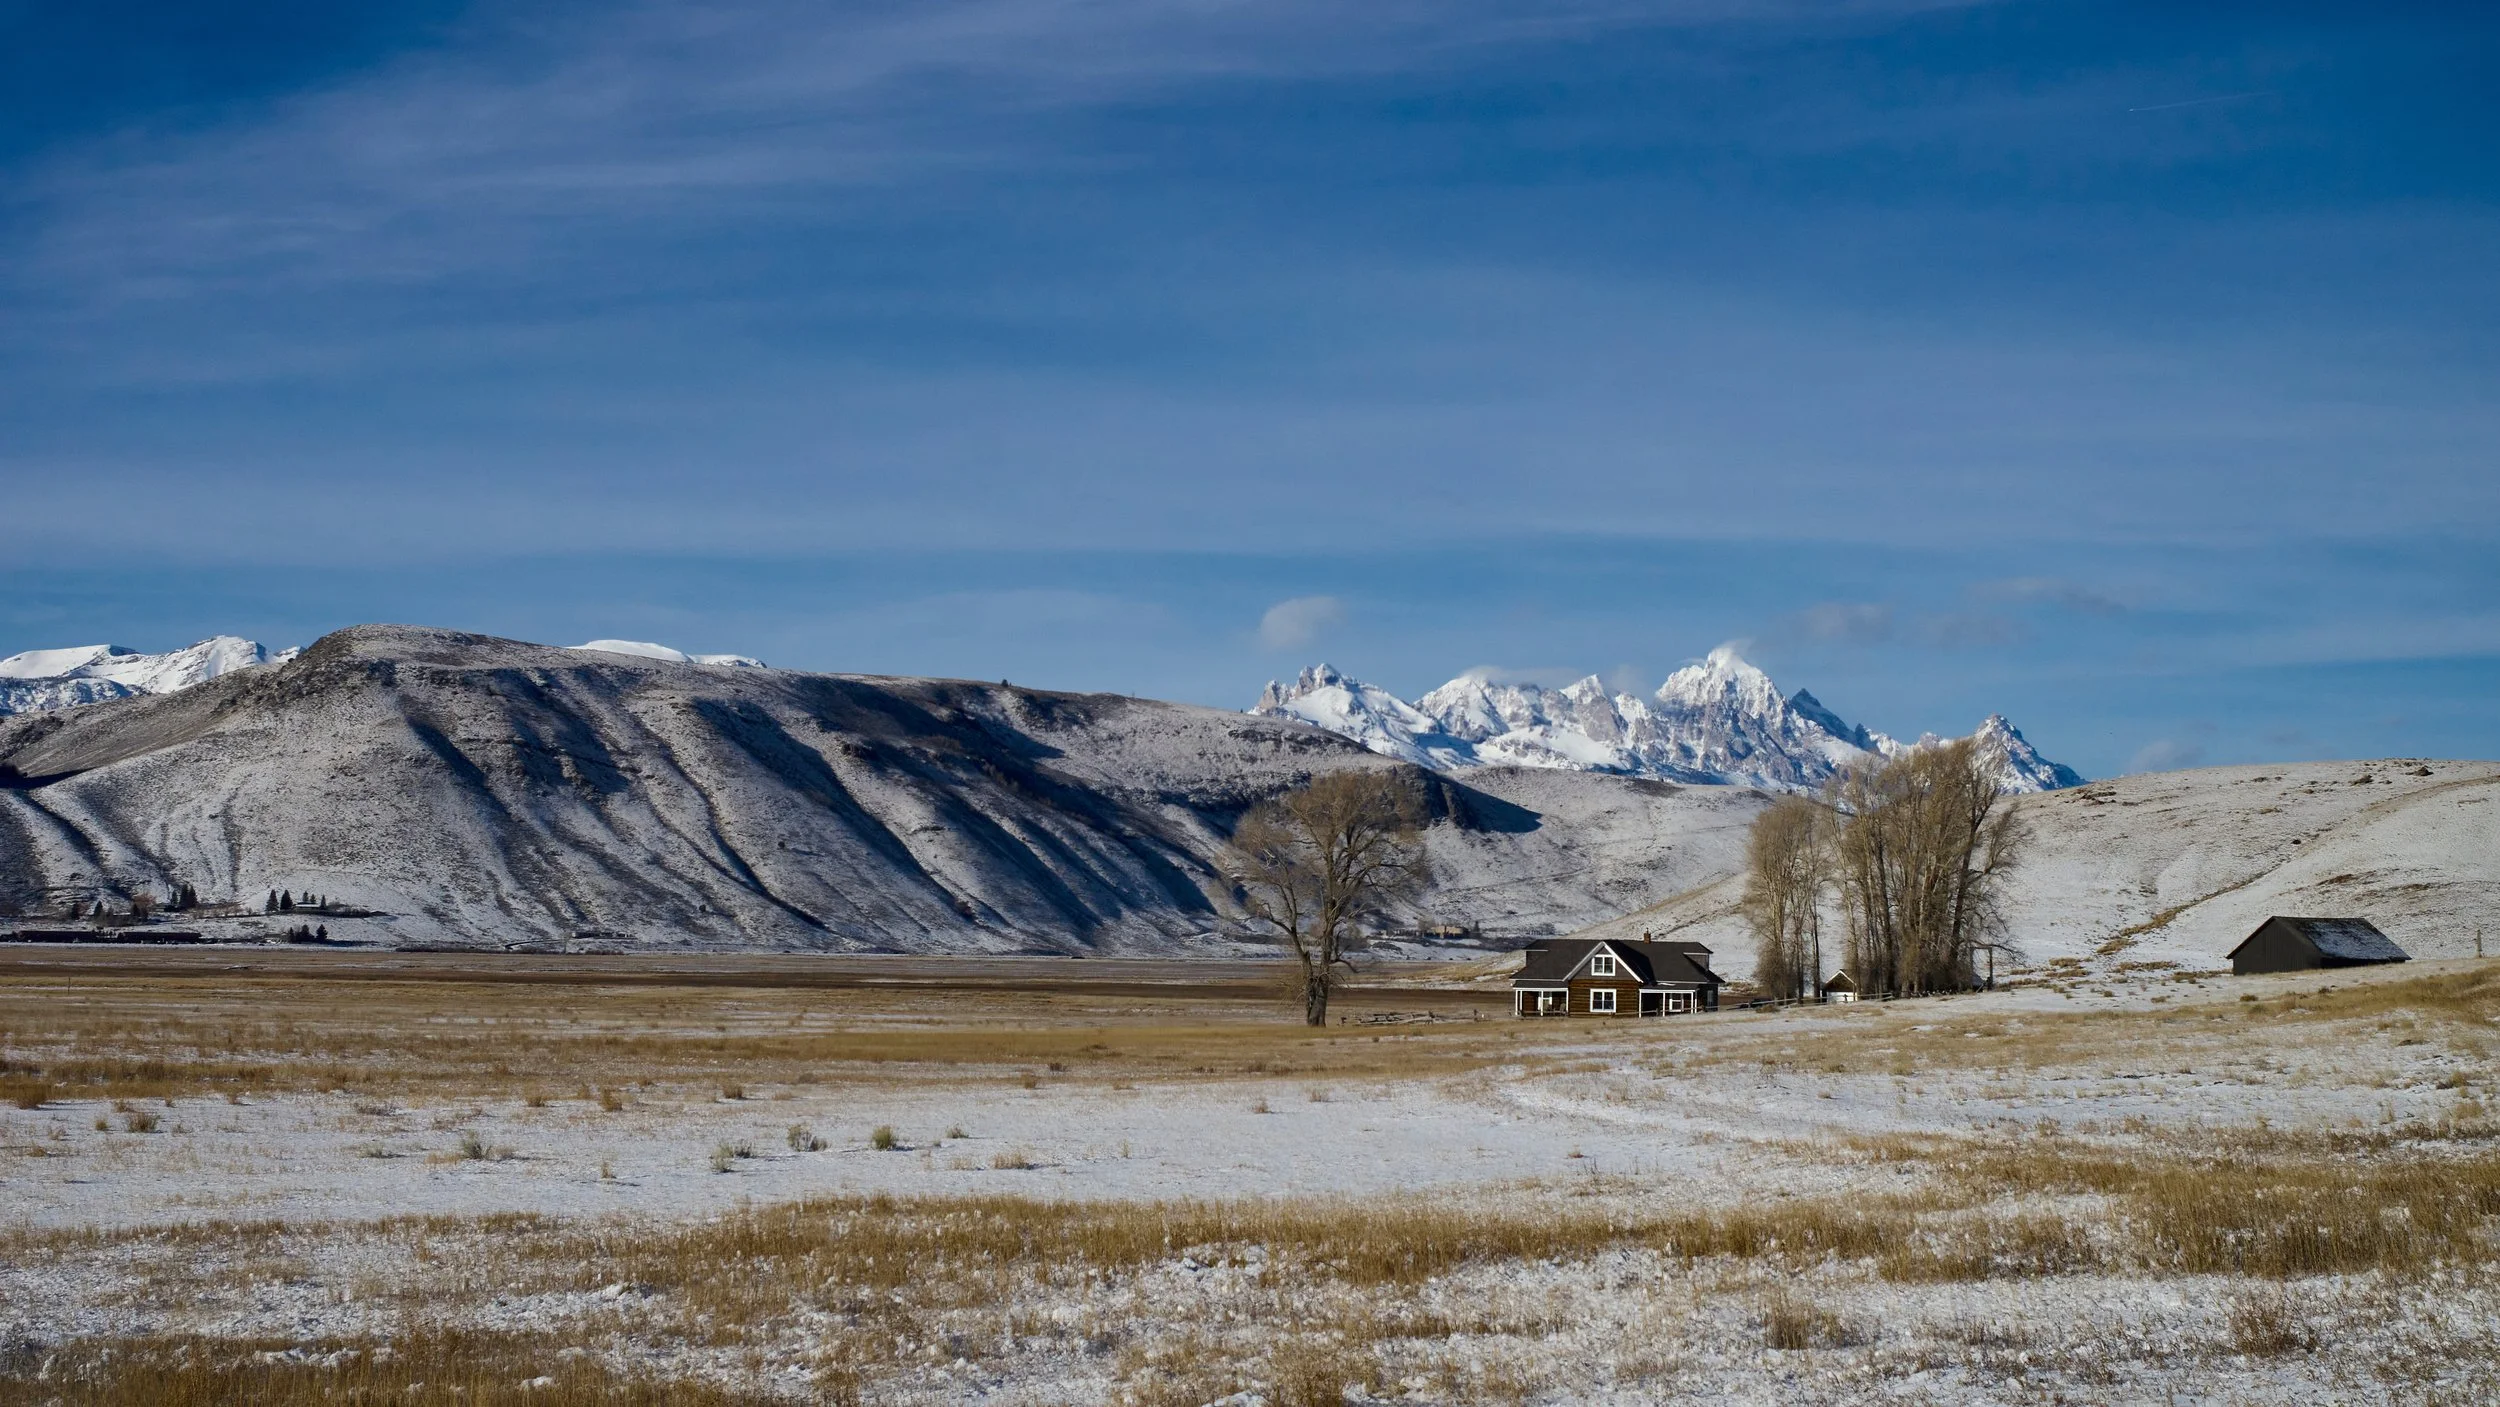
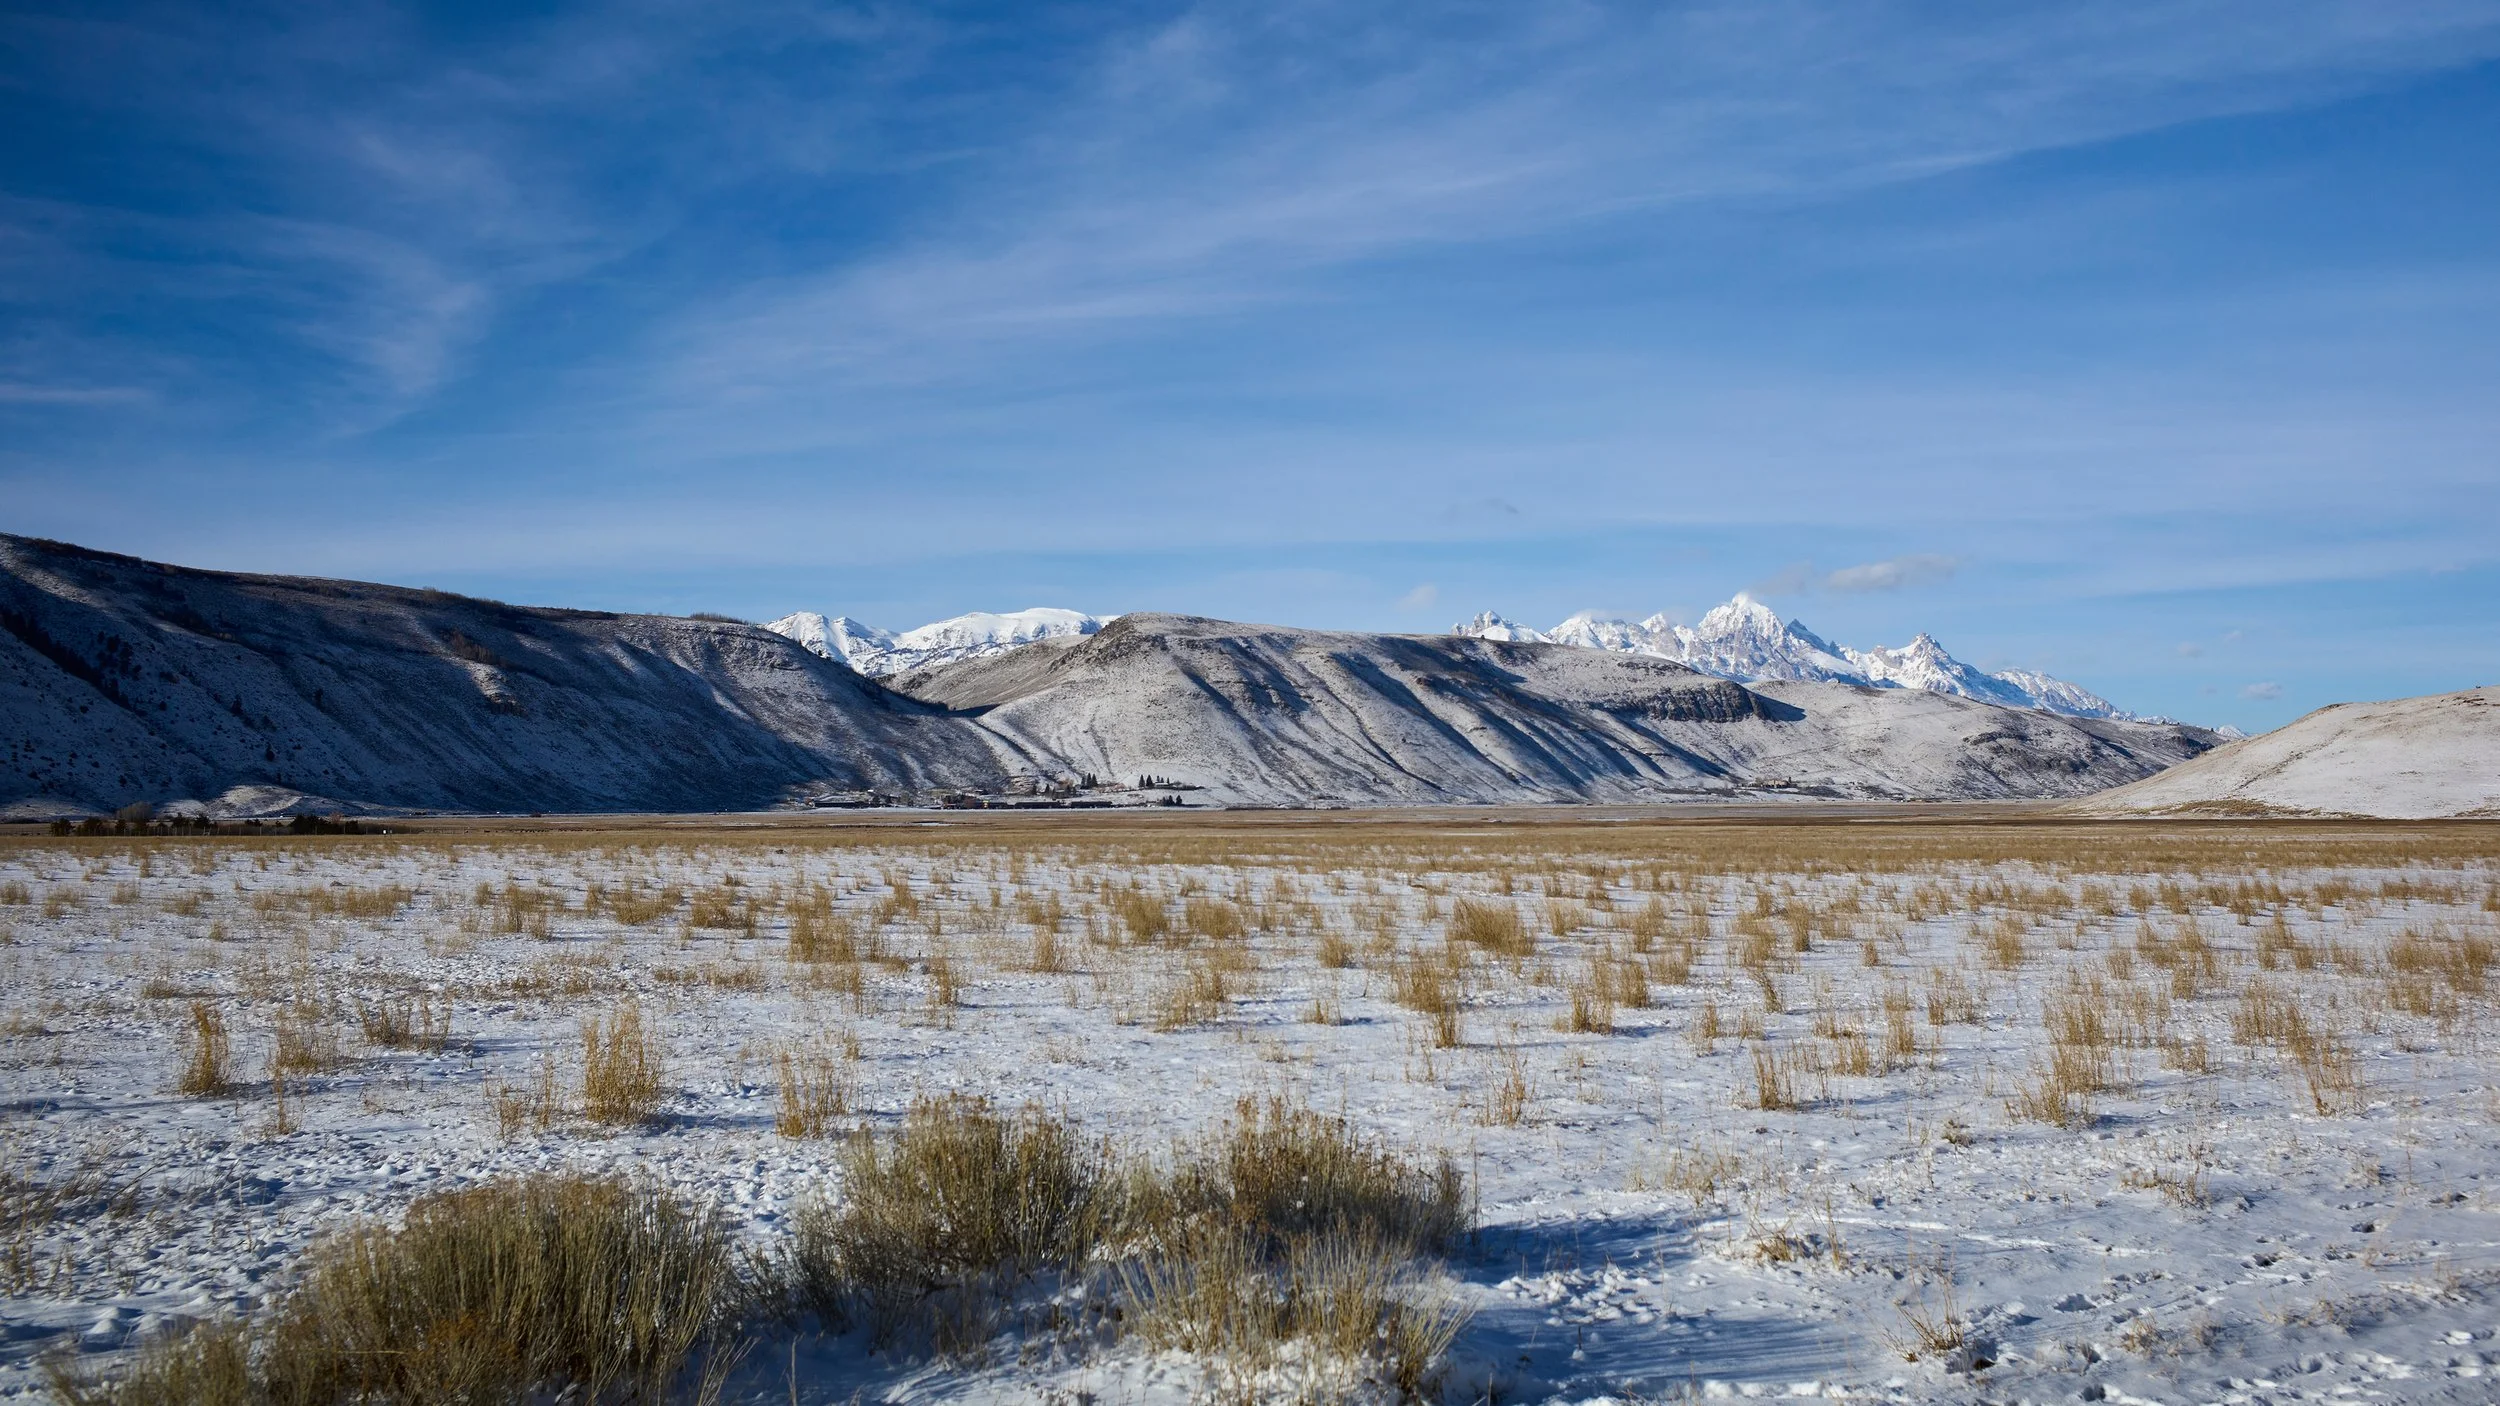
Jackson Hole Winter LandscapeS: Grand Tetons & BEYOND in Snow
Jackson Hole, Wyoming is usually framed through action. Step back, and it reveals something quieter: perspective.

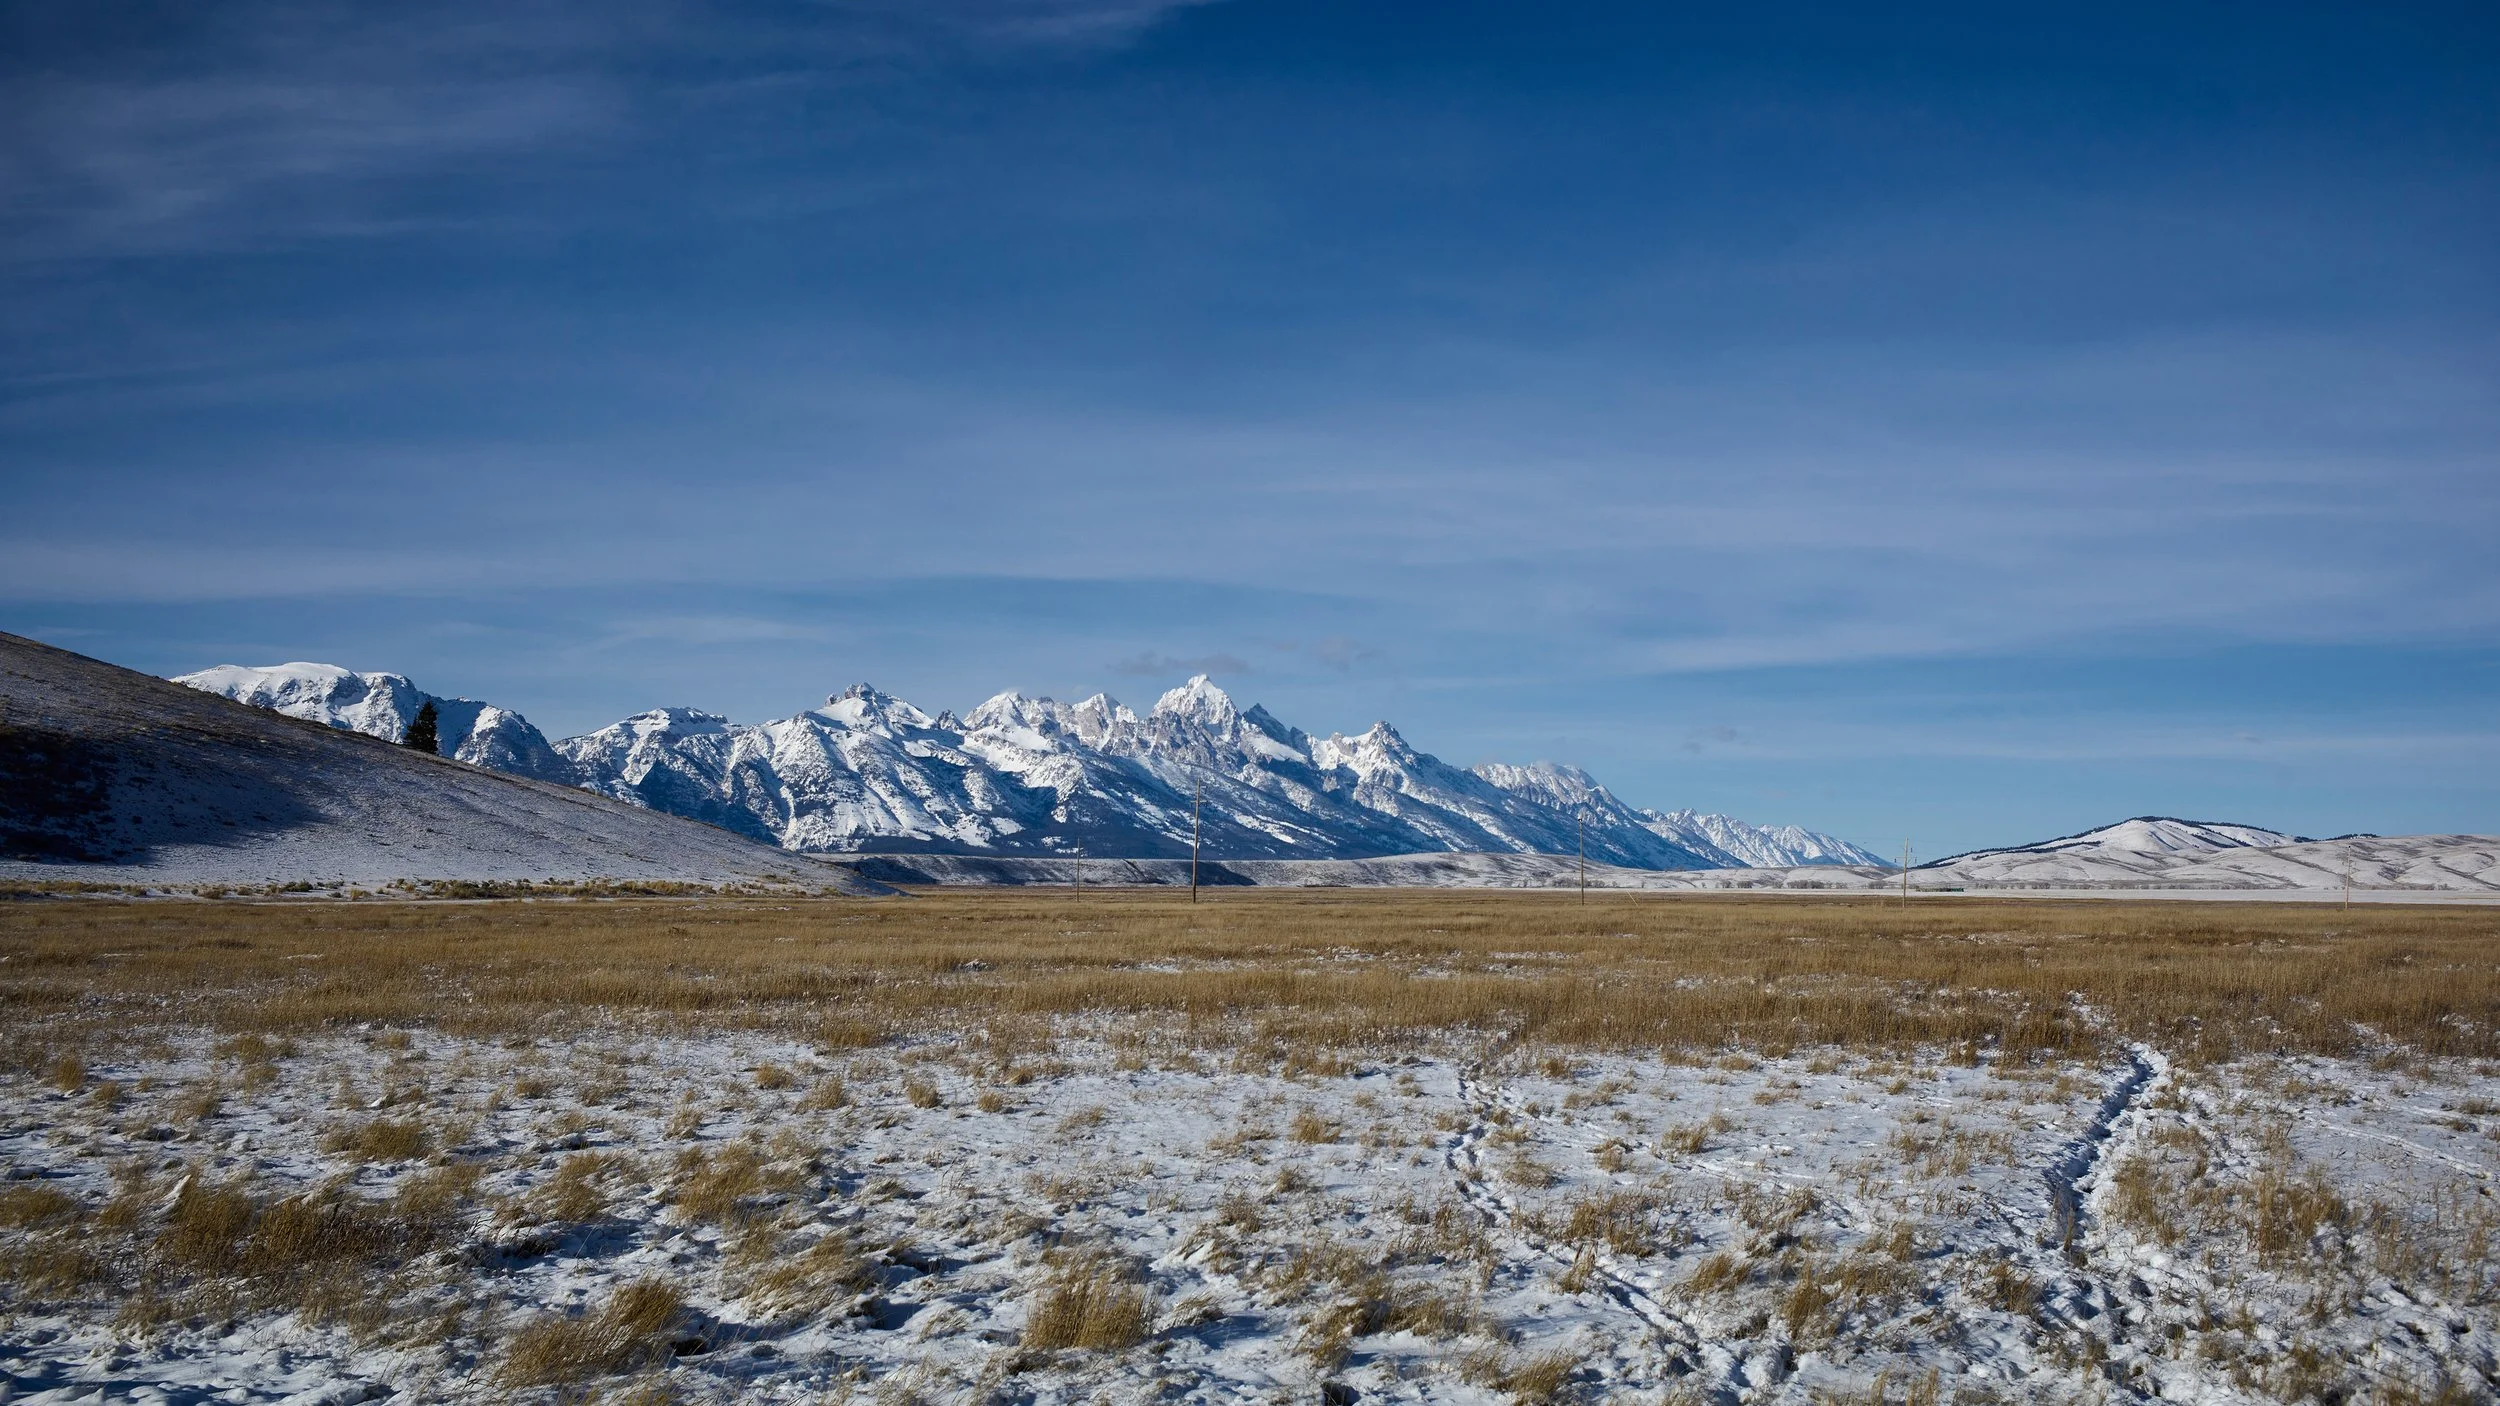
The Teton Range rises abruptly from the valley floor. Peaks like Grand Teton and Mount Moran dominate the skyline. From different viewpoints, the same mountains change character — sharp and imposing up close, layered and softened from distance. Light shifts perception further: morning highlights contrast, midday flattens depth, late afternoon restores it. Clouds can fragment scale, revealing only fragments of peaks. The mountains themselves remain constant; our view does not.
Distance and angle alter everything. Up close, the Tetons feel confrontational. Step back, and they become composed. Quiet. Measured. Restraint matters here.
The final image, Broken Spectre, departs from clarity. Fractured and unresolved, it mirrors the range’s inherent imperfection — wind, erosion, and shifting light constantly shape what we see. Jackson Hole is often framed as pristine; in reality, it is defined by exposure, pressure, and time.
From Schwabacher’s Landing to Oxbow Bend, every vantage point offers a different Teton composition. Observing the mountains from Jackson Lake emphasizes depth and distance, while valley floor perspectives reveal dramatic relief and jagged ridge lines. These viewpoints are critical for capturing the grand scale of Jackson Hole’s landscapes.
The Tetons do not need explanation. They reveal themselves based on where you stand, how long you look, and the light that catches them. For landscape photographers and visitors alike, Jackson Hole offers endless variation — each view distinct, each moment unique.

All photos made with Leica M10R and Leica Summicron 35mm lens.

Don Pan // Sunday // Oct19
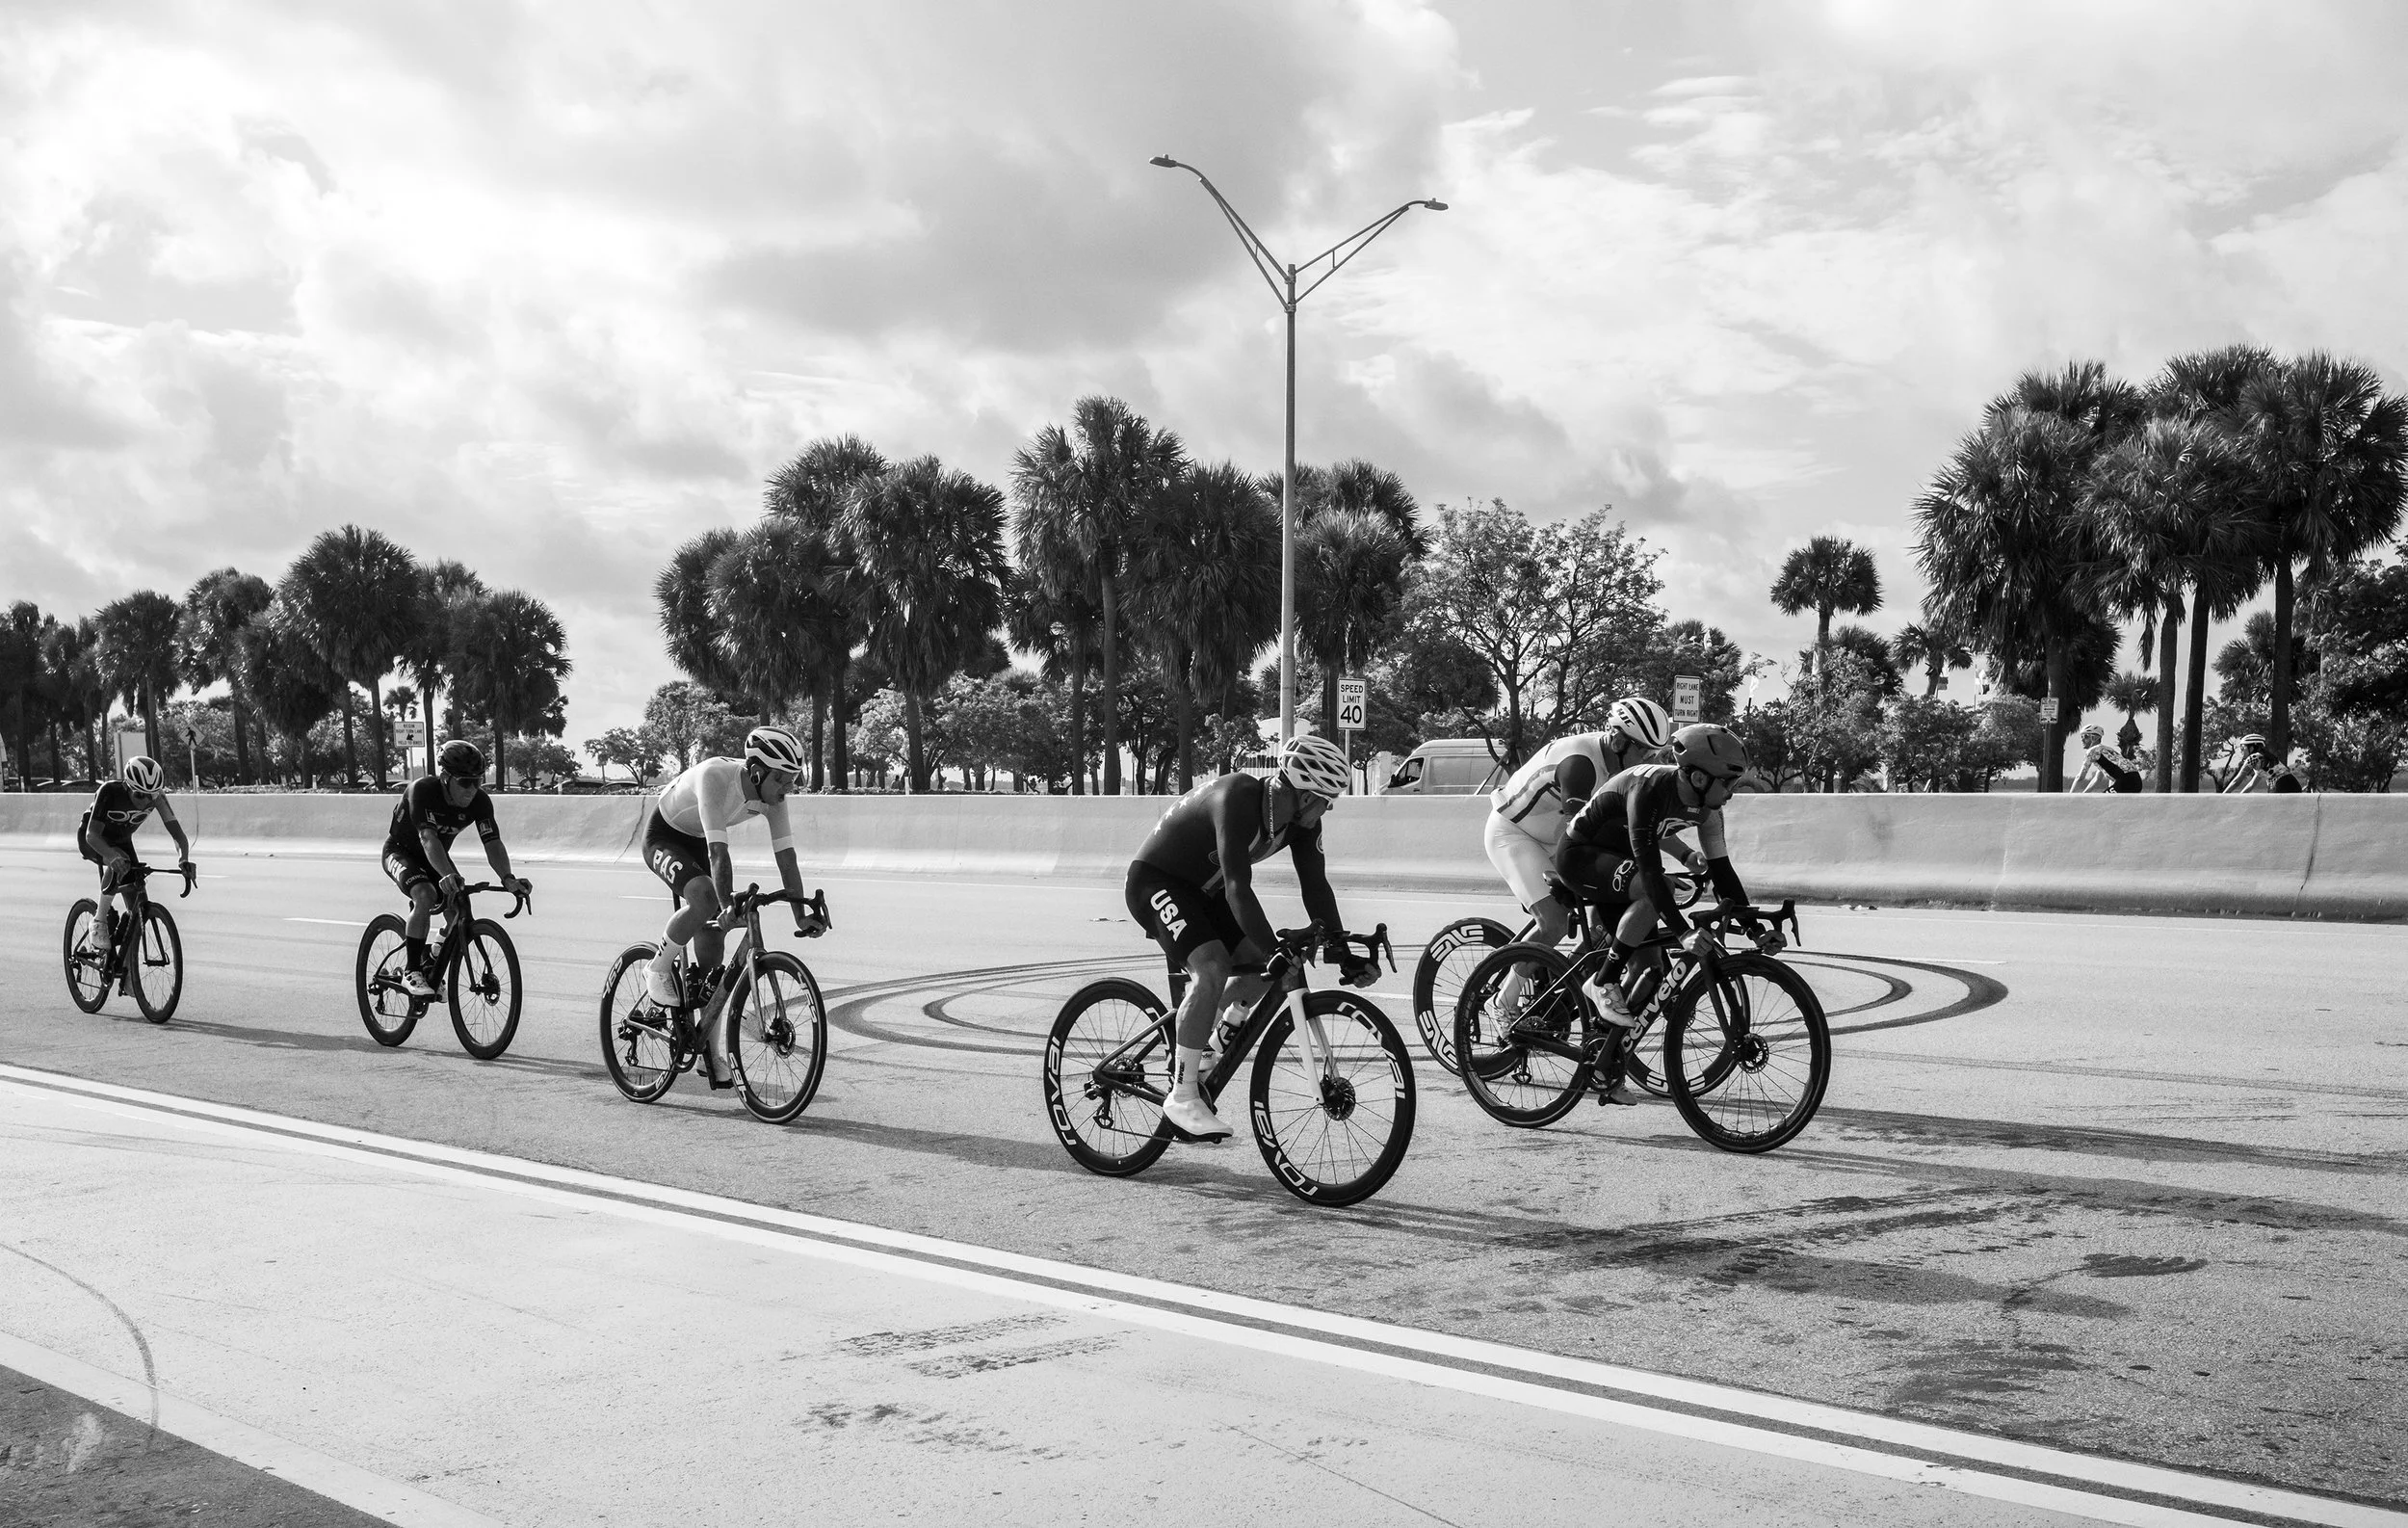
Today, sore muscles grounded my bike, but I turned the day into a visual adventure instead. Skipping the Don Pan Hammer Ride group on wheels, I captured their thrilling approach to Key Biscayne. The energy as they surged toward the bridge, then sped down it in a blur of motion, was electrifying through my lens—a different kind of rush entirely.


Puerto Rico + Bad Bunny
NOW BOARDING: Flight AA1341 MIA to SJU
〰️
NOW BOARDING: Flight AA1341 MIA to SJU 〰️
A few snapshots from recent trip to Puerto Rico to see Bad Bunny La Residencia en el Choli
Old San Juan
Condado

787 Coffee


ERIN

Residencia En El Choli


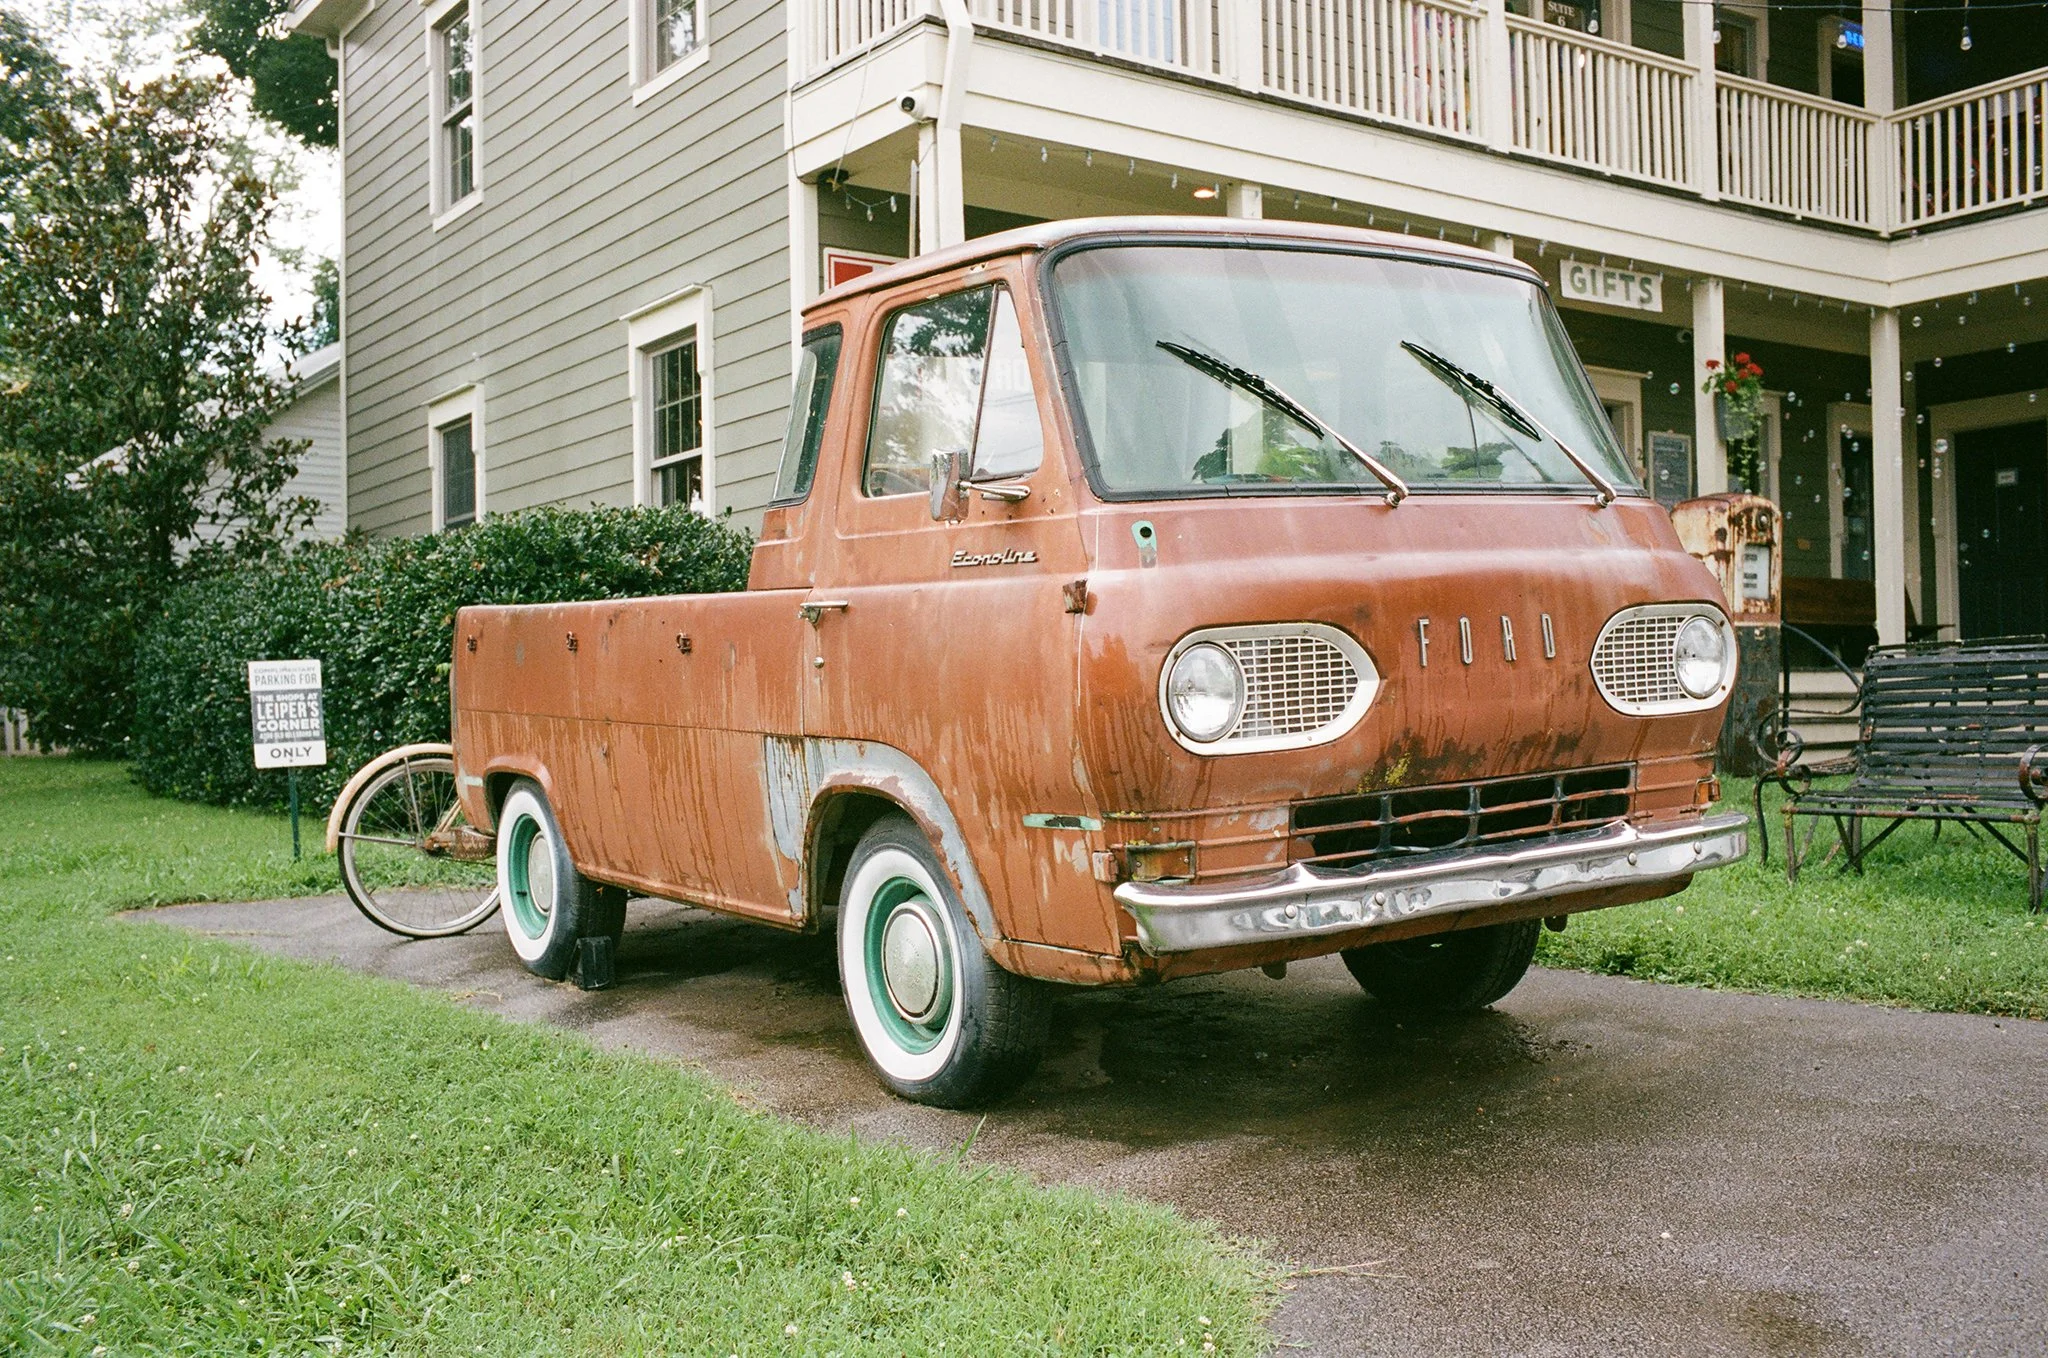
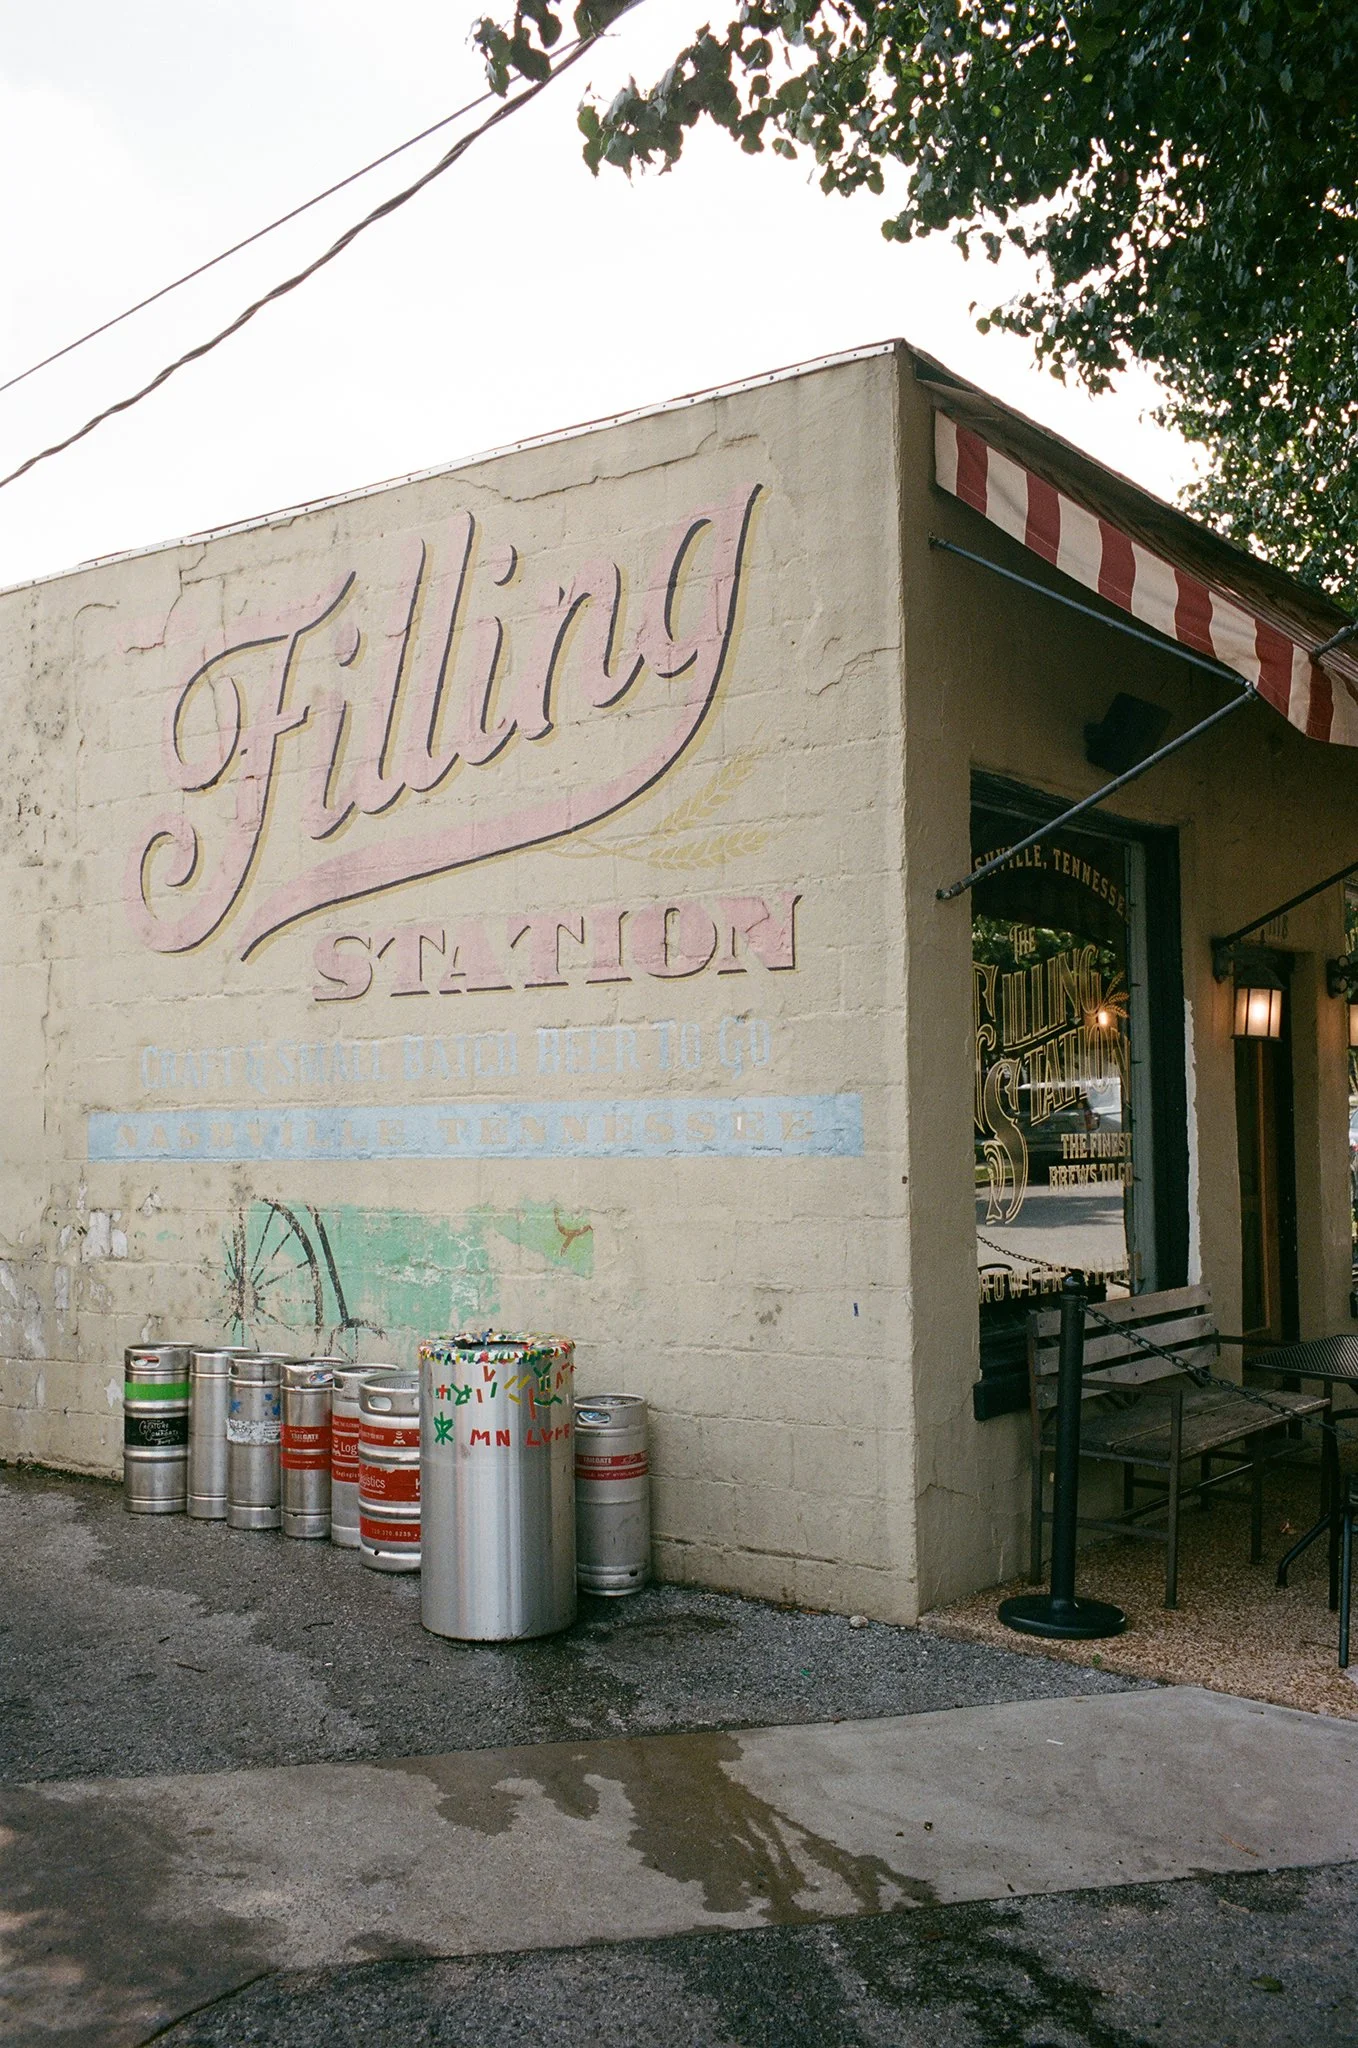
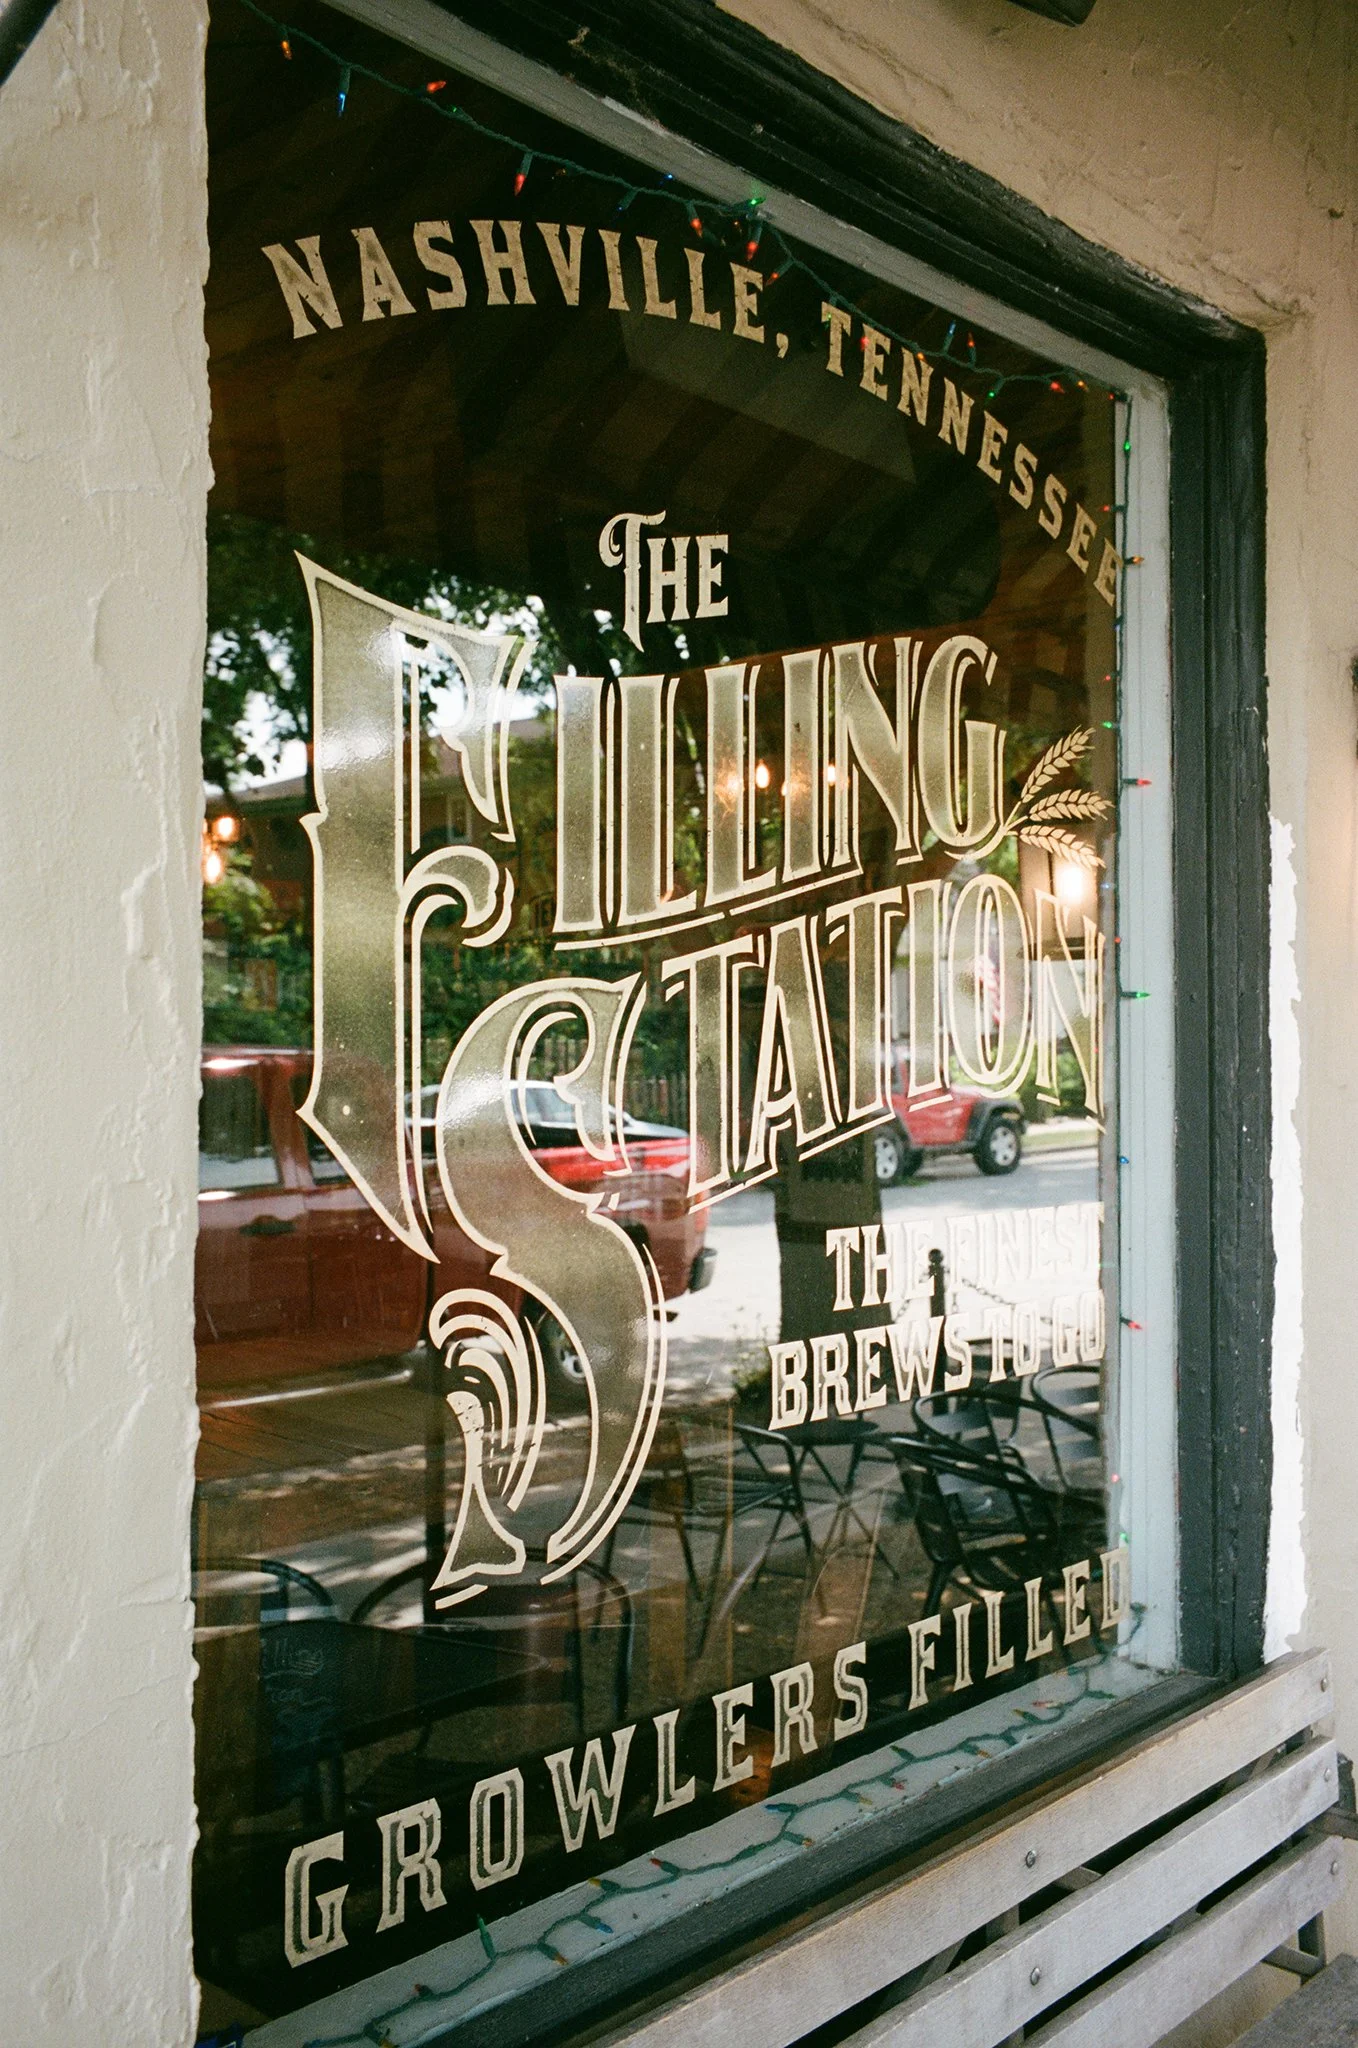
Whispers of Tennessee: A Family Journey Through Green Hills and Rainy Roads
At the edge of June, we traded the salt and rhythm of Miami for the hush of Tennessee hills. We stayed in Kingston Springs, tucked away in a house that felt more like a gentle invitation than a rental. Decorated in the quiet luxury of Restoration Hardware tones—linen sofas, soft neutrals, moody lighting—it had a piano in the corner, a banjo hanging on the wall, and a guitar leaning in wait. Music felt like part of the architecture.
Mornings started slowly. Steam curled from coffee mugs while rabbits hopped across the dewy front lawn like they owned the place. The kids played in socked feet, chasing each other between wooden beams and window light. It was a different rhythm—a little looser, a little softer.

We wandered.
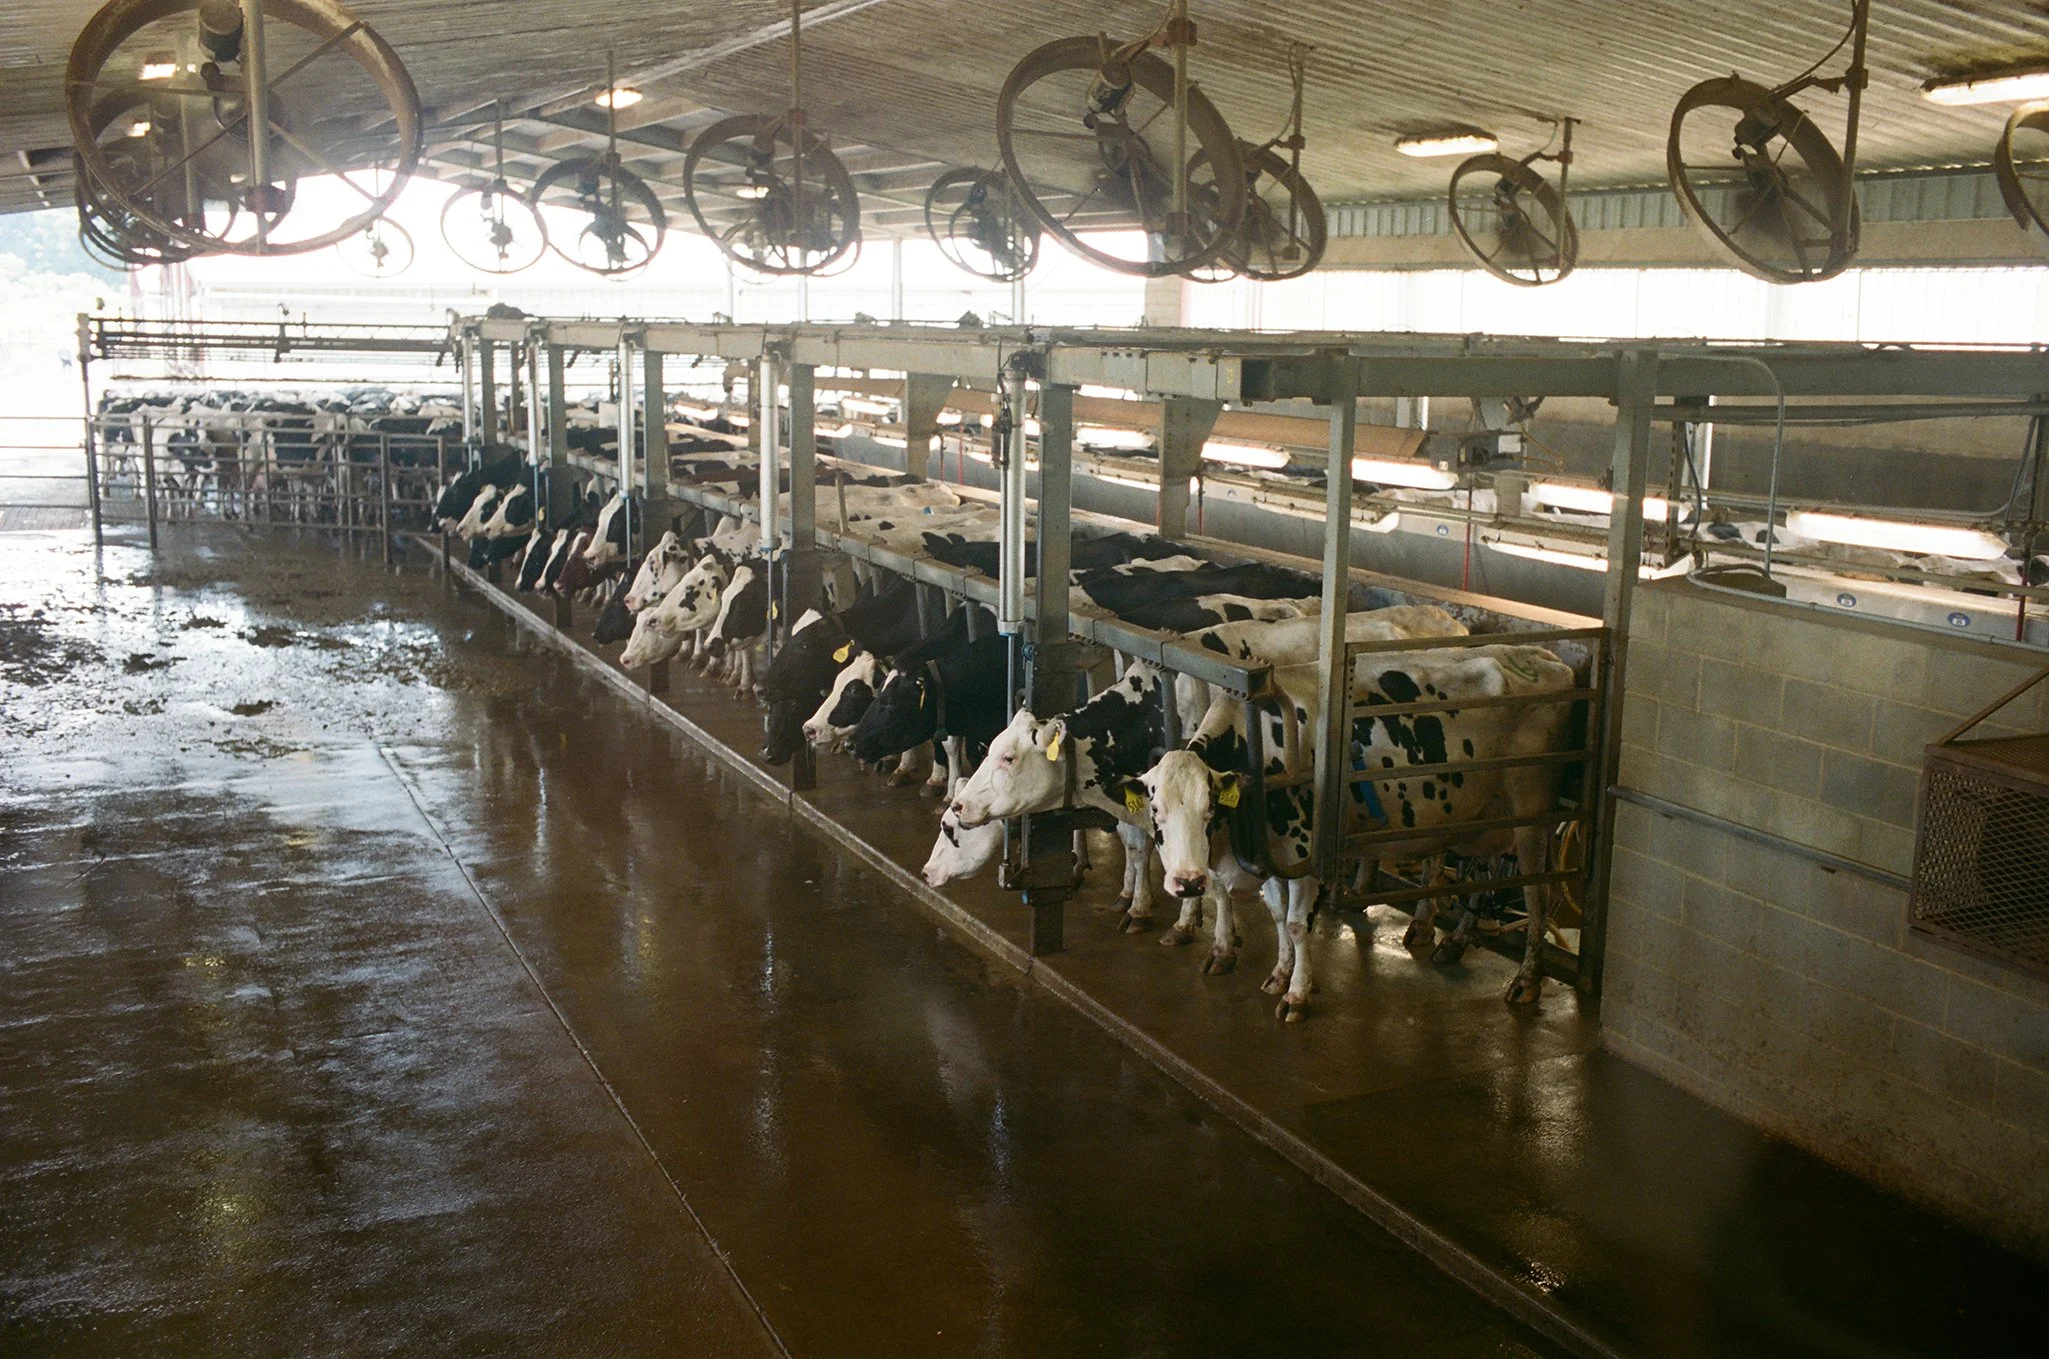
Nash Family Creamery
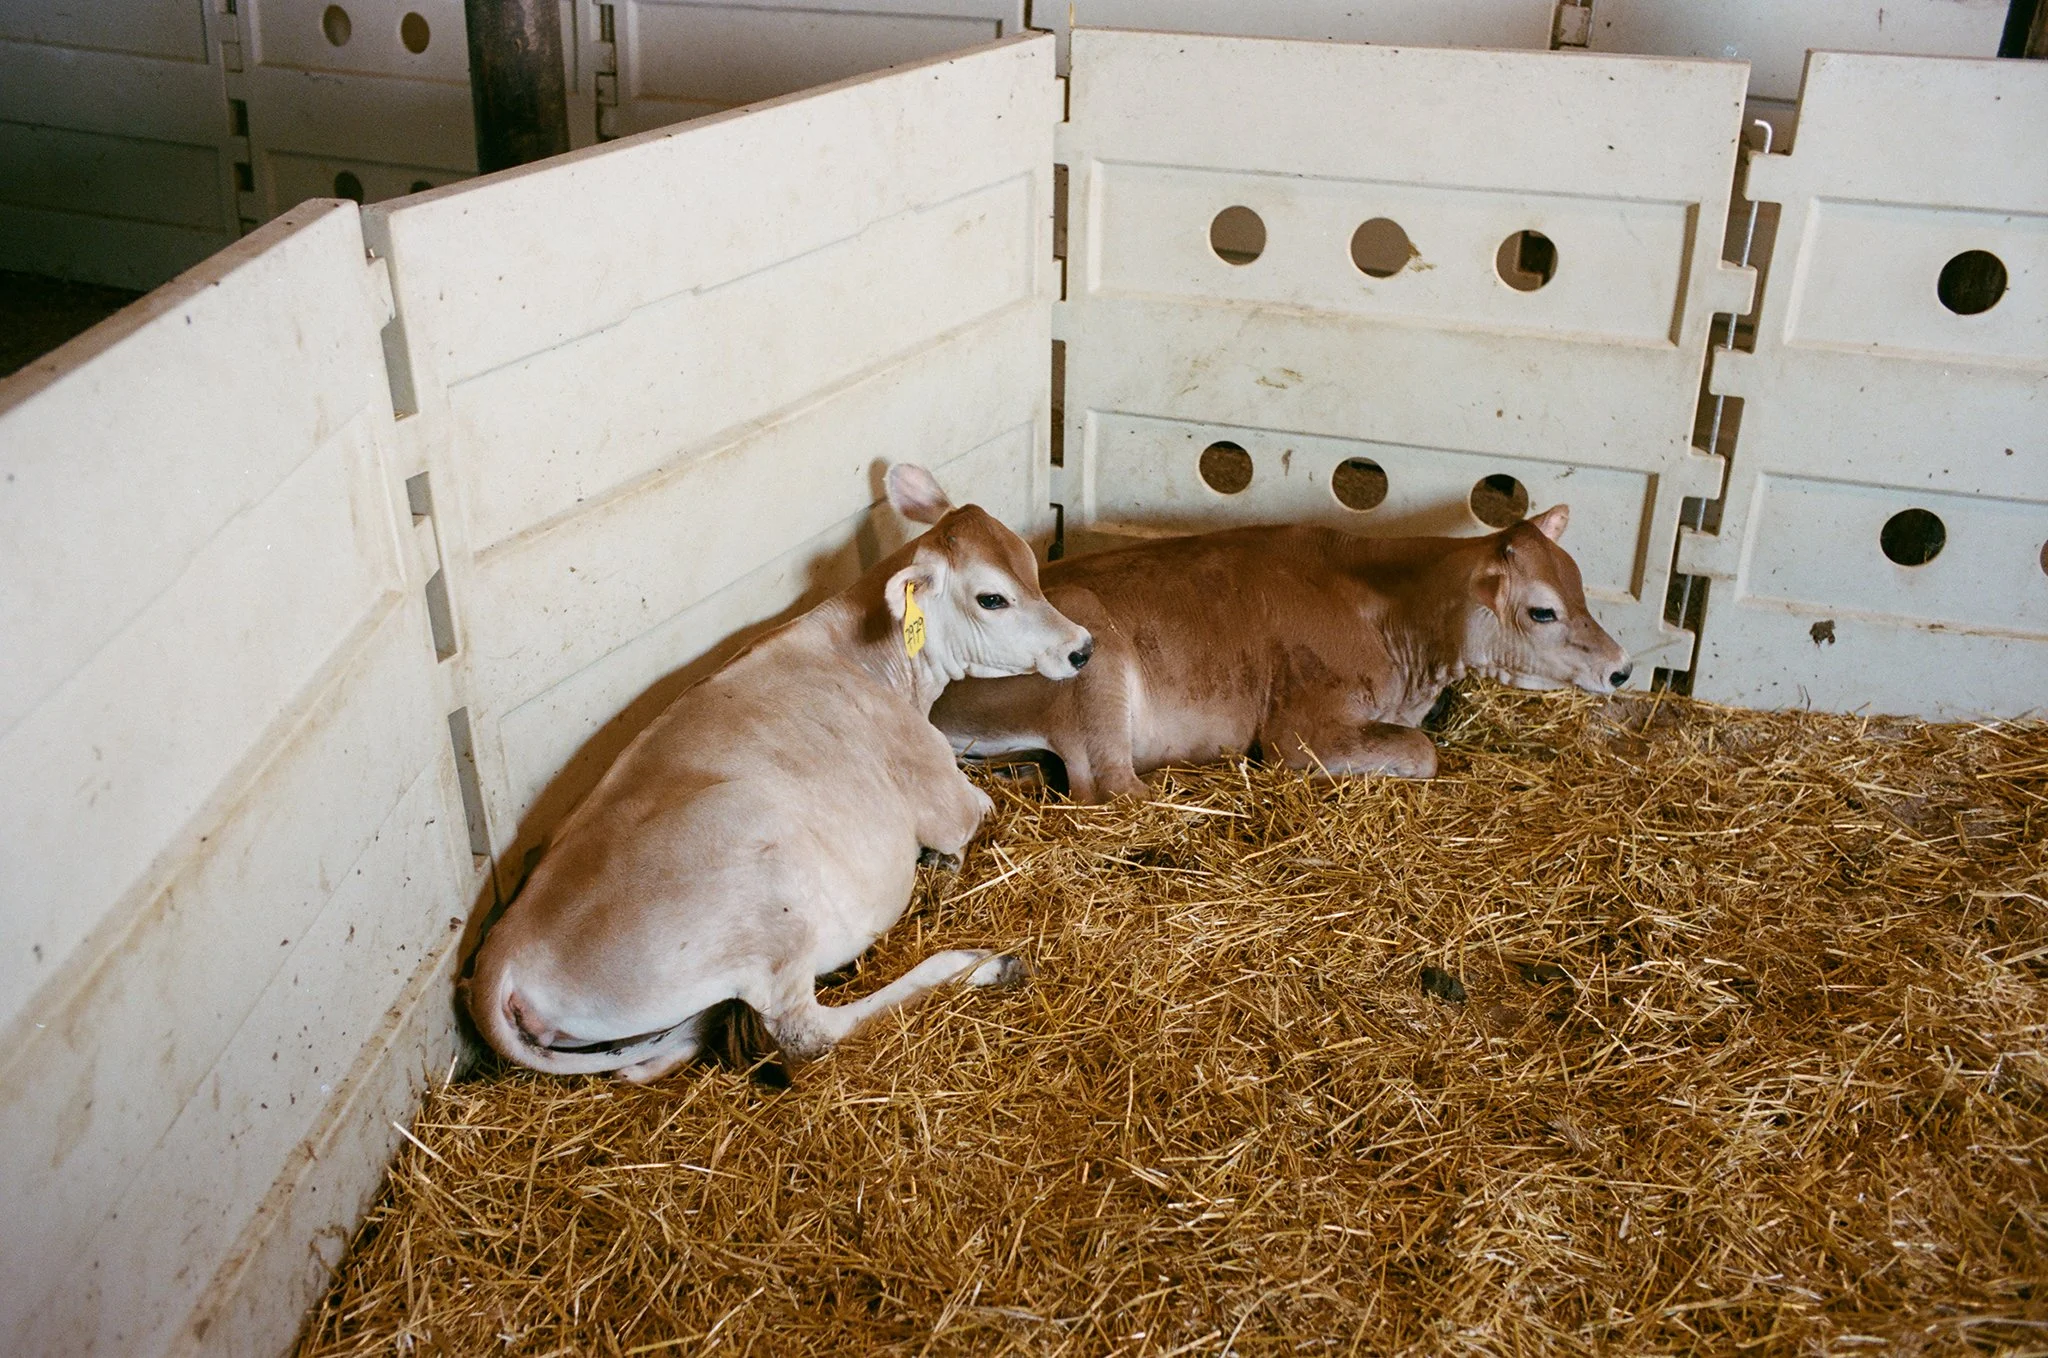
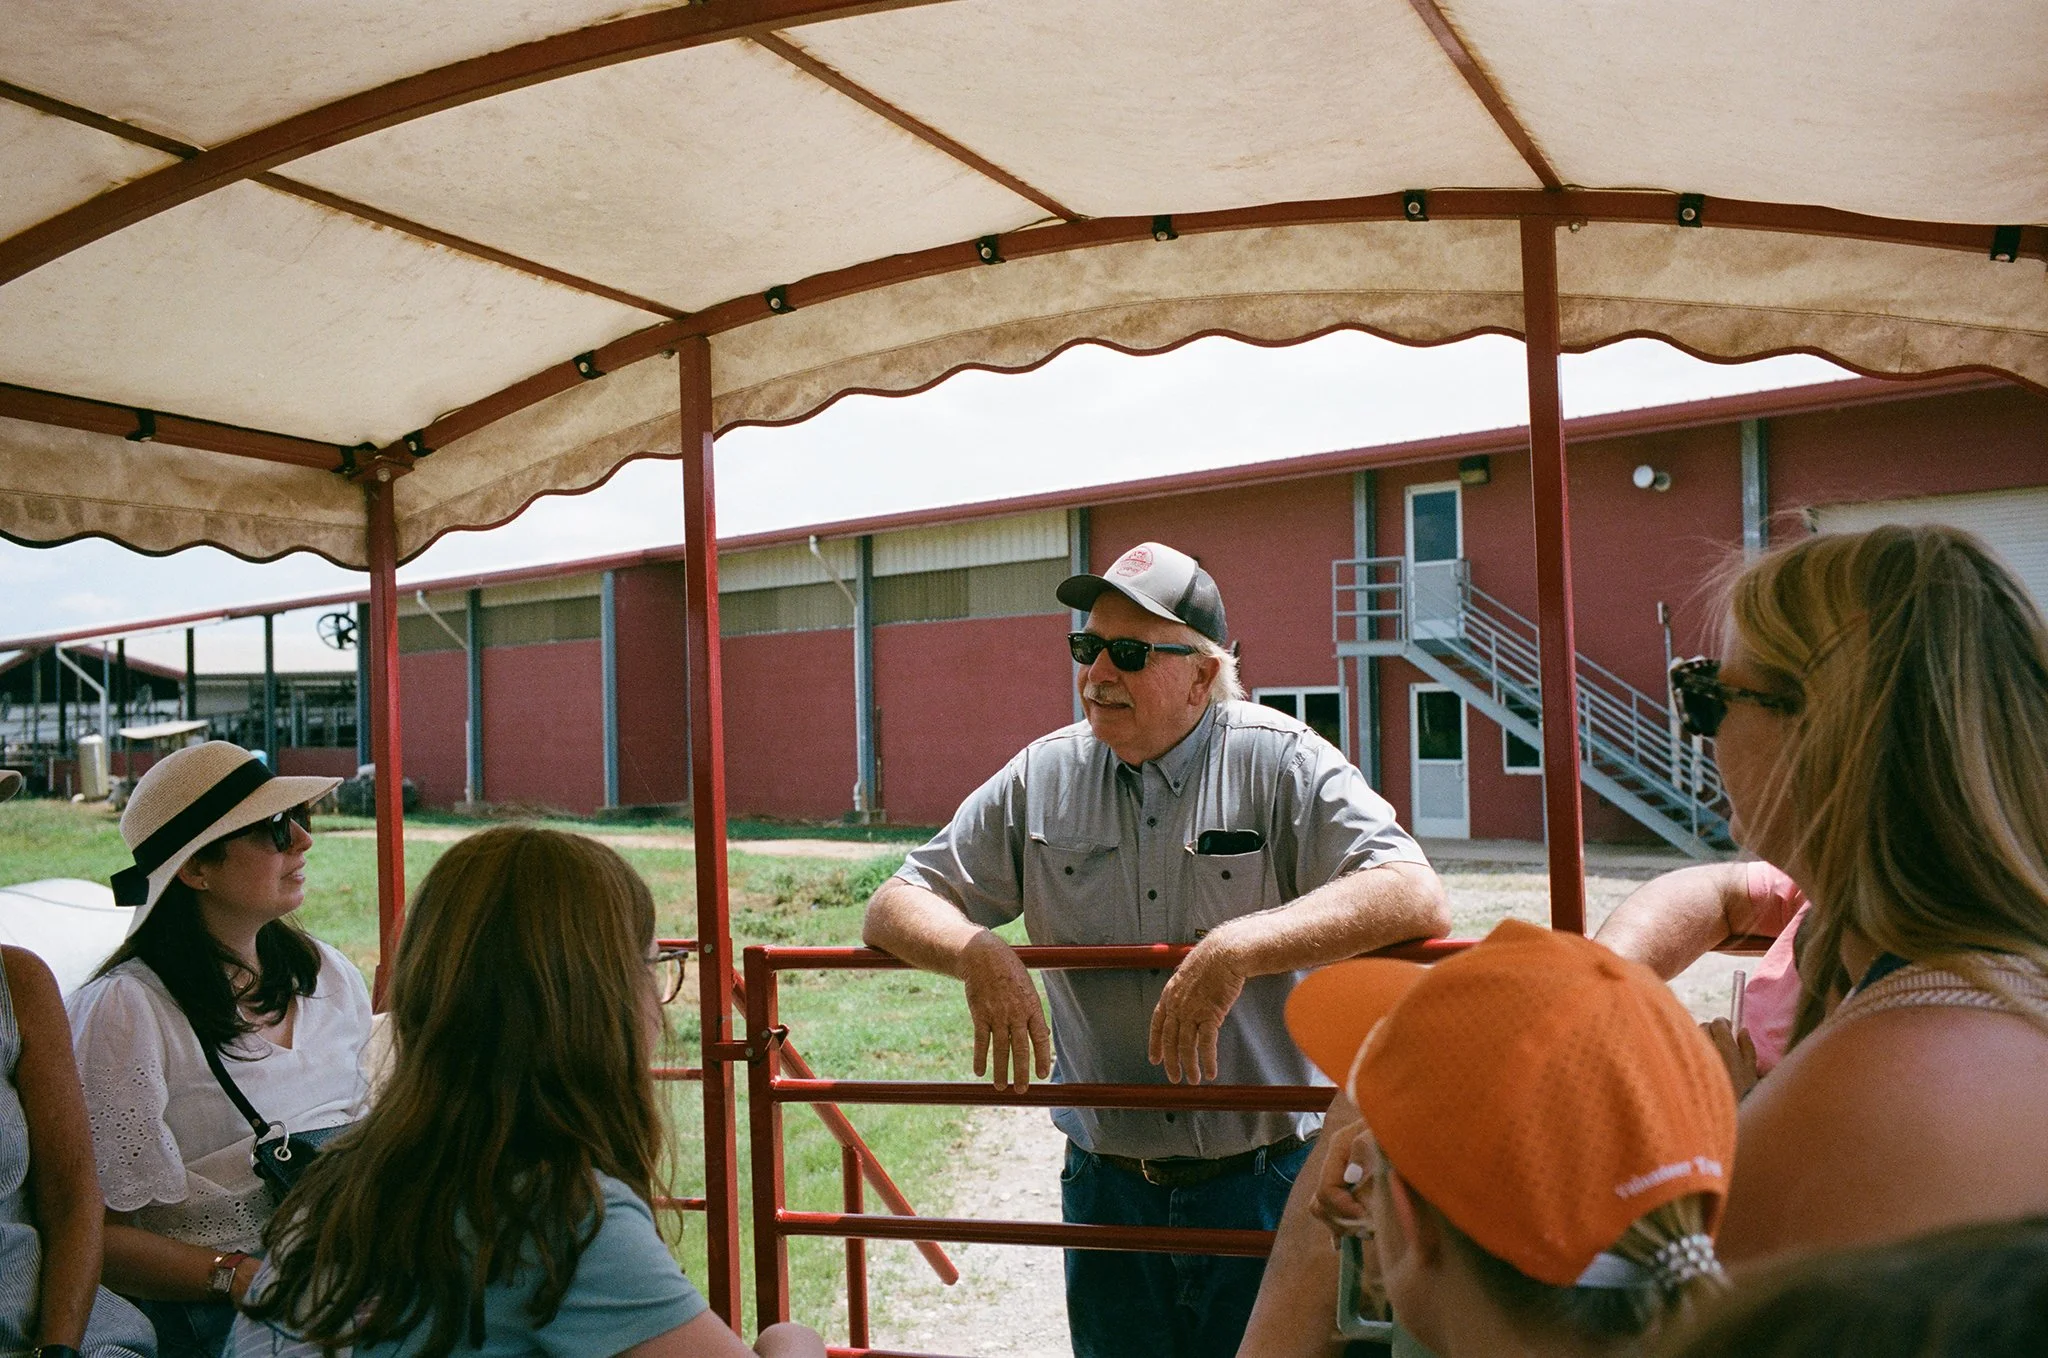
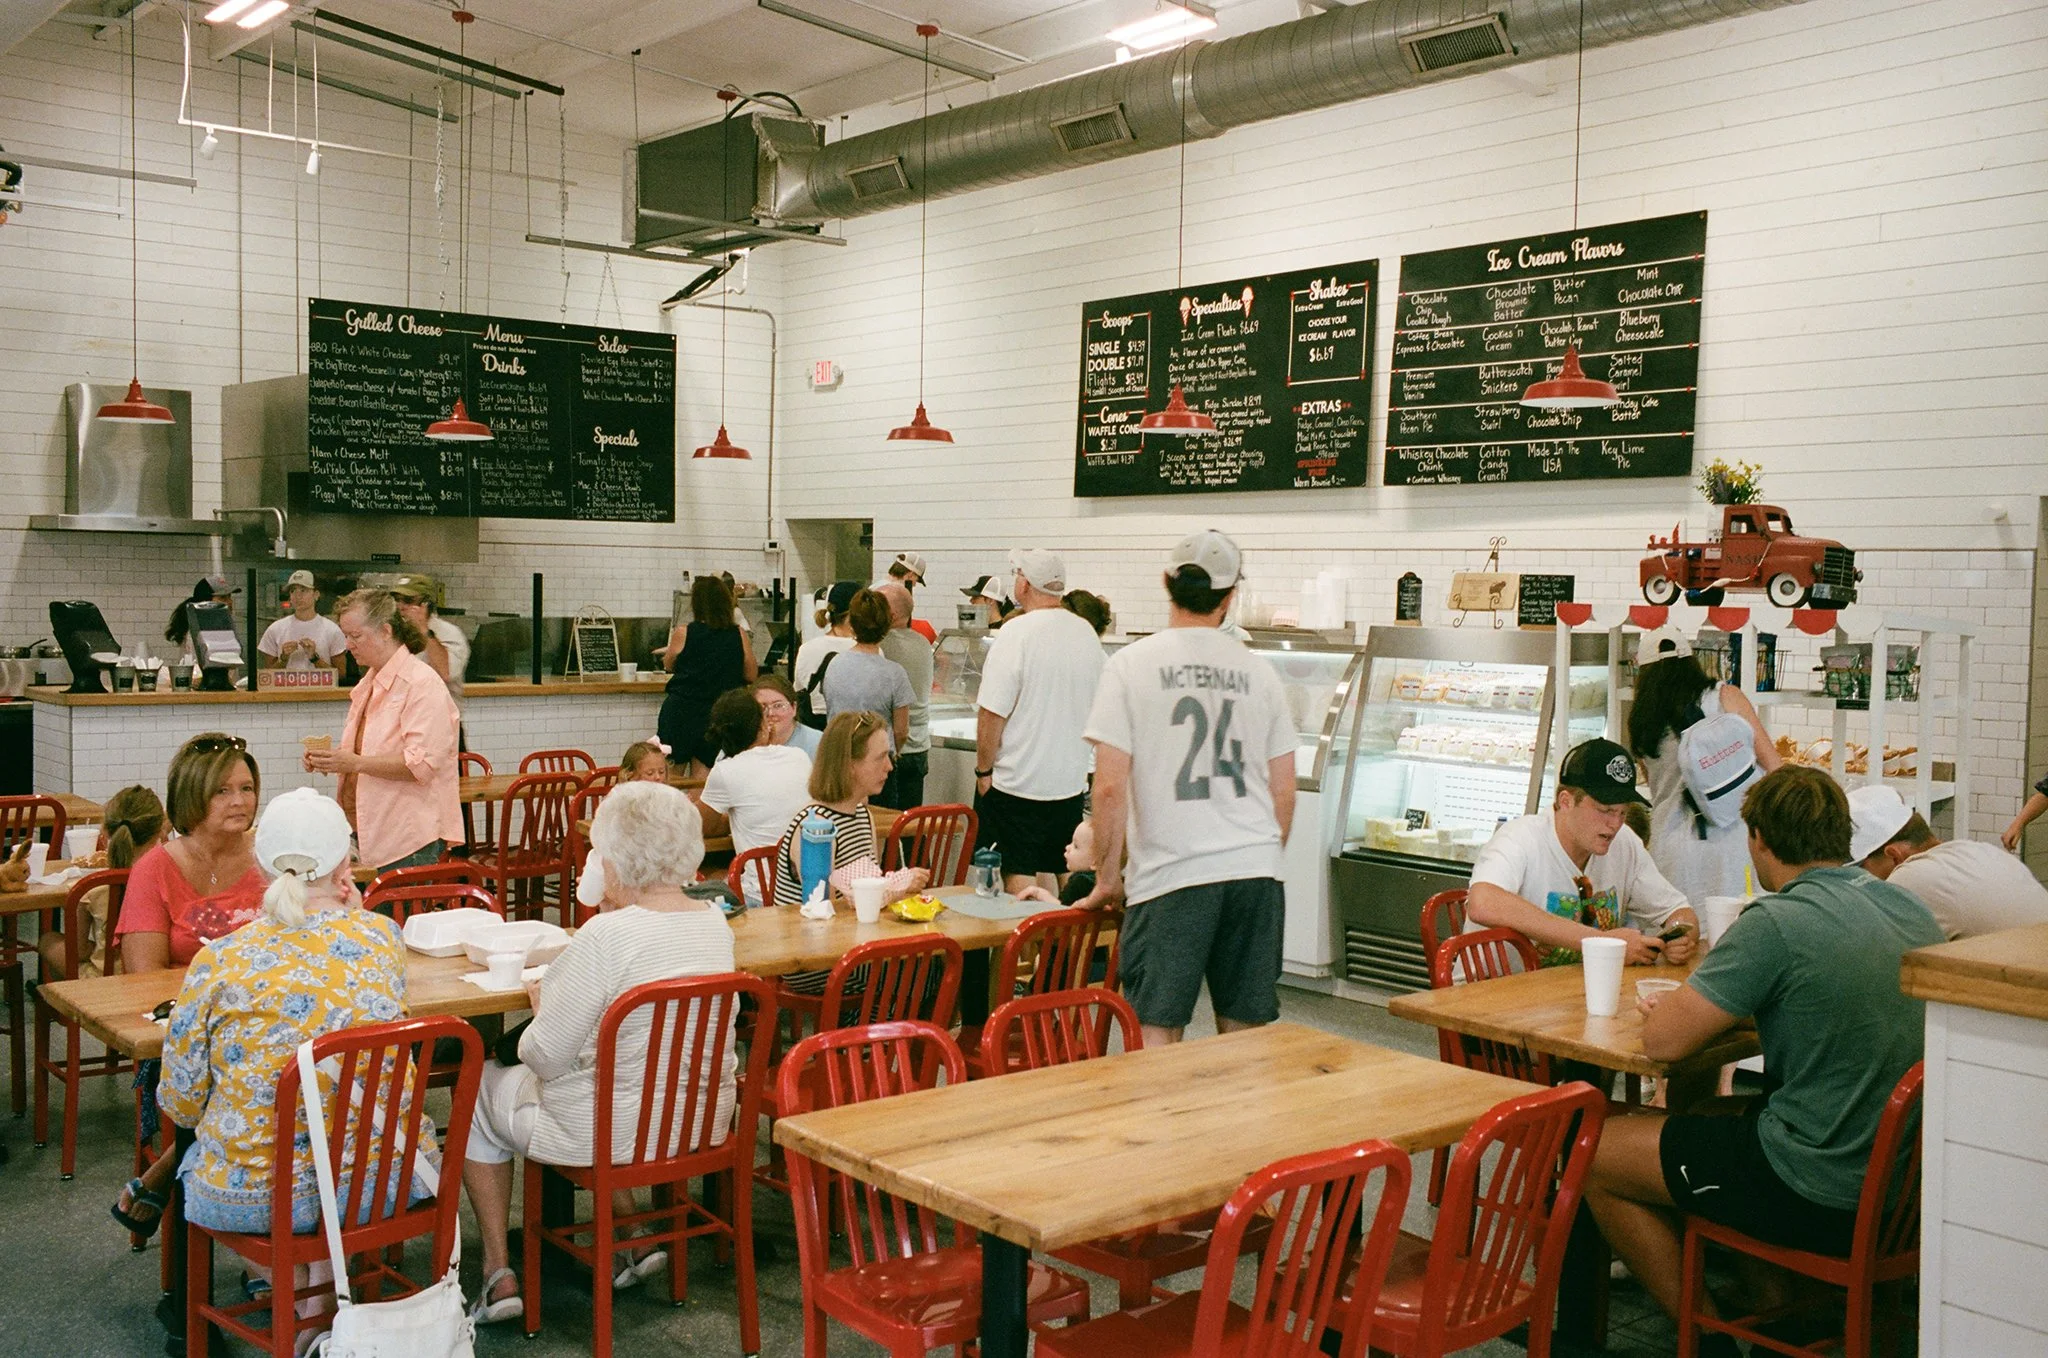
To Nash Family Creamery, where the day began not with dessert, but with dirt, grass, and the earthy heartbeat of a working farm. We took a tour first, tracing the path from pasture to table. We stood beside calm-eyed cows being milked, watched calves nuzzle in the shade, and learned the quiet mechanics of how milk becomes memory. Afterward, we rewarded ourselves with grilled cheese sandwiches on thick slices of bread, buttery and warm, and ice cream under the sun—melting just fast enough to make you grateful.


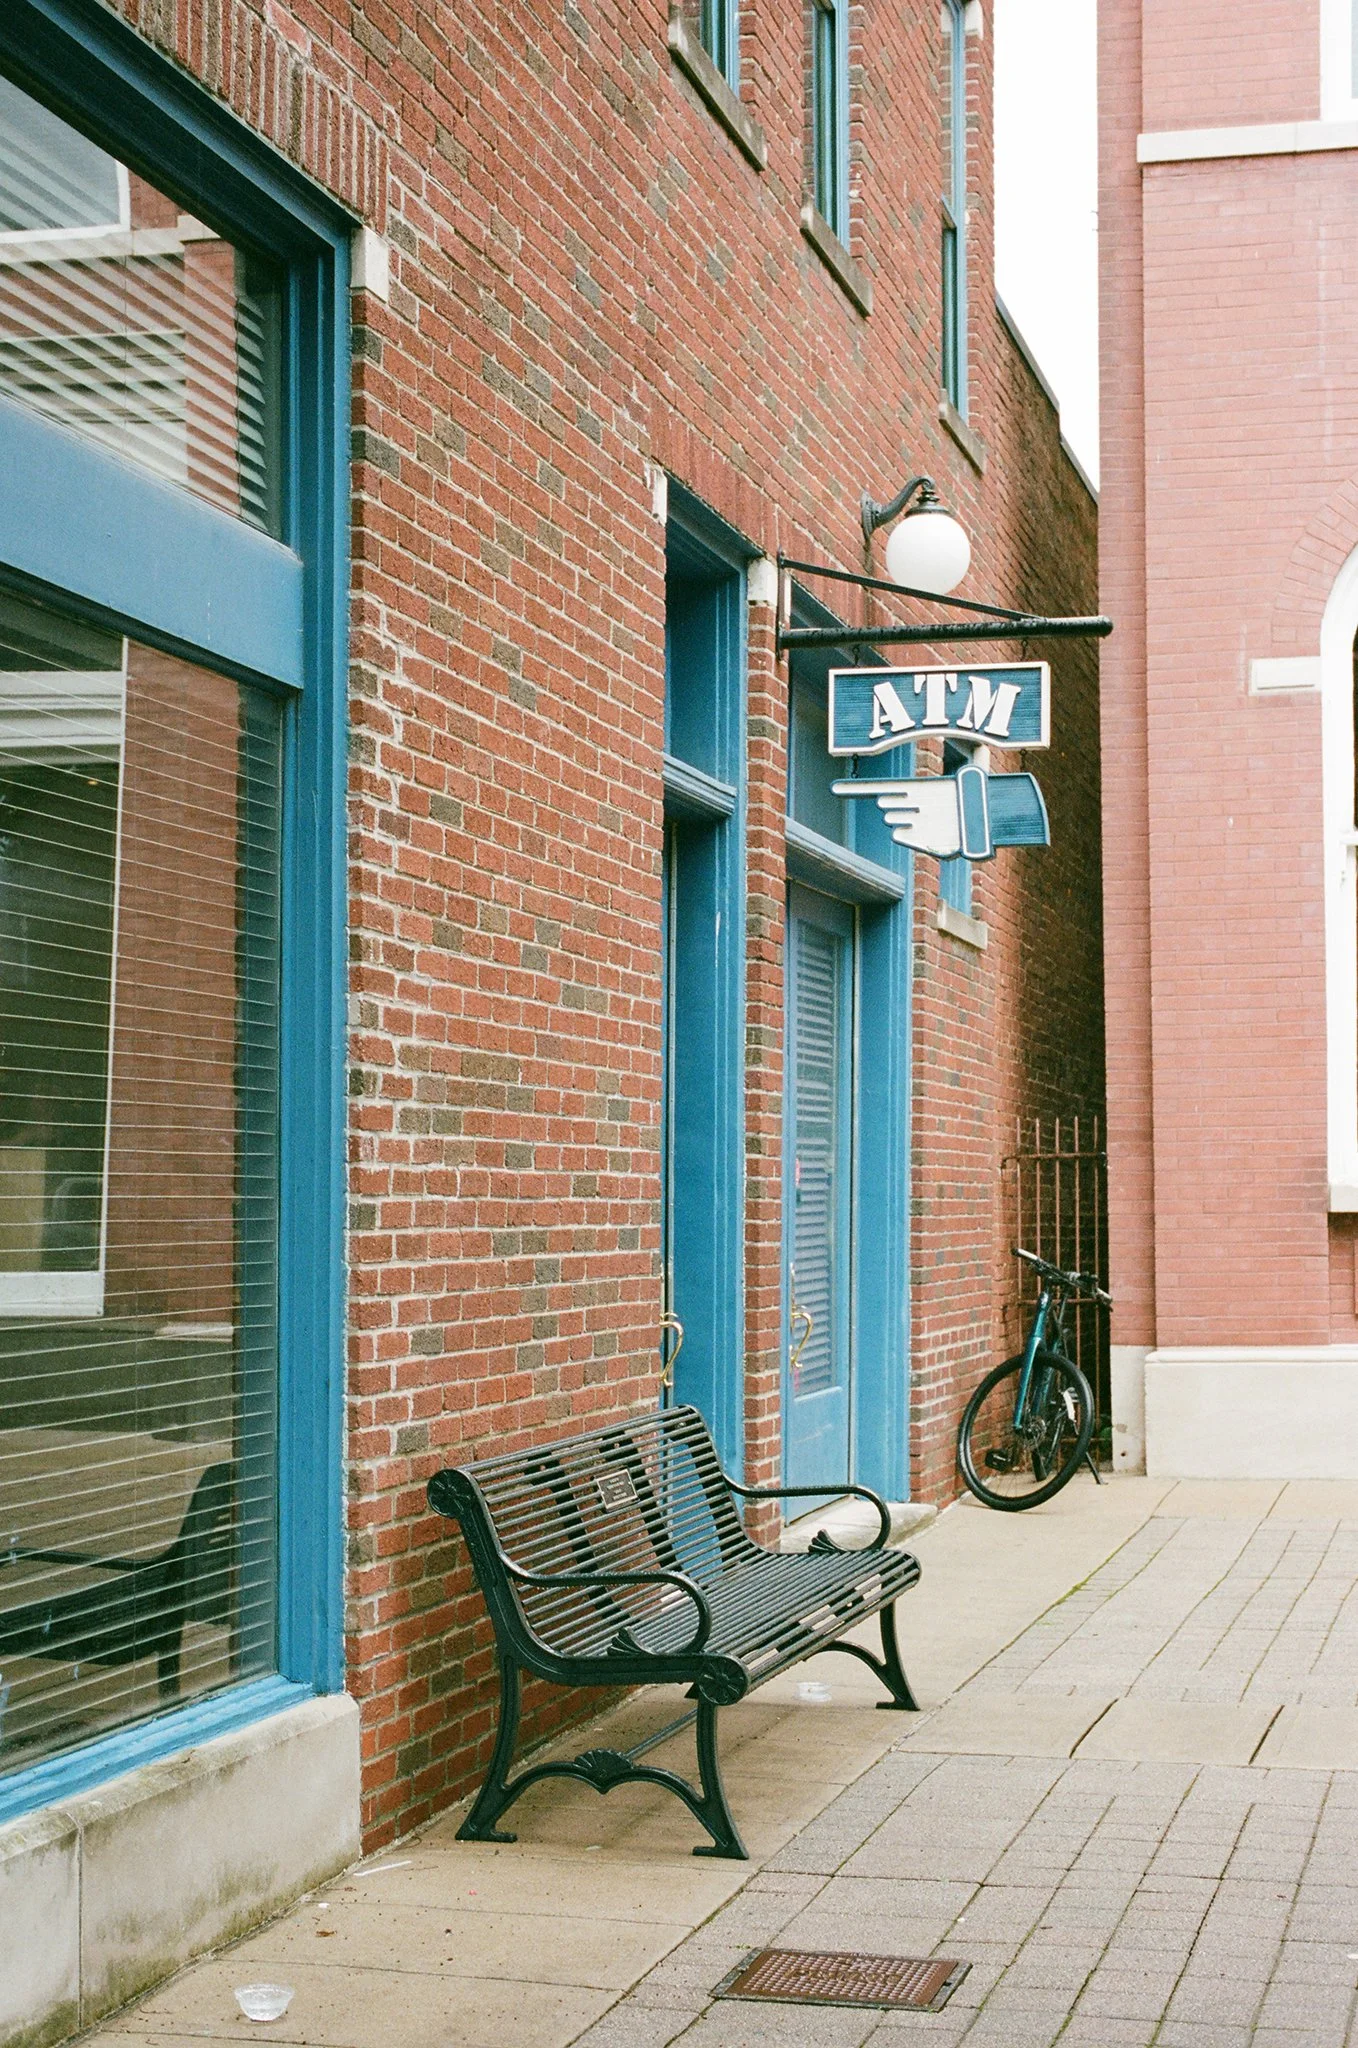
Franklin
To Franklin, with its Main Street charm and antique storefronts, perfect for walking hand-in-hand under a shifting sky.


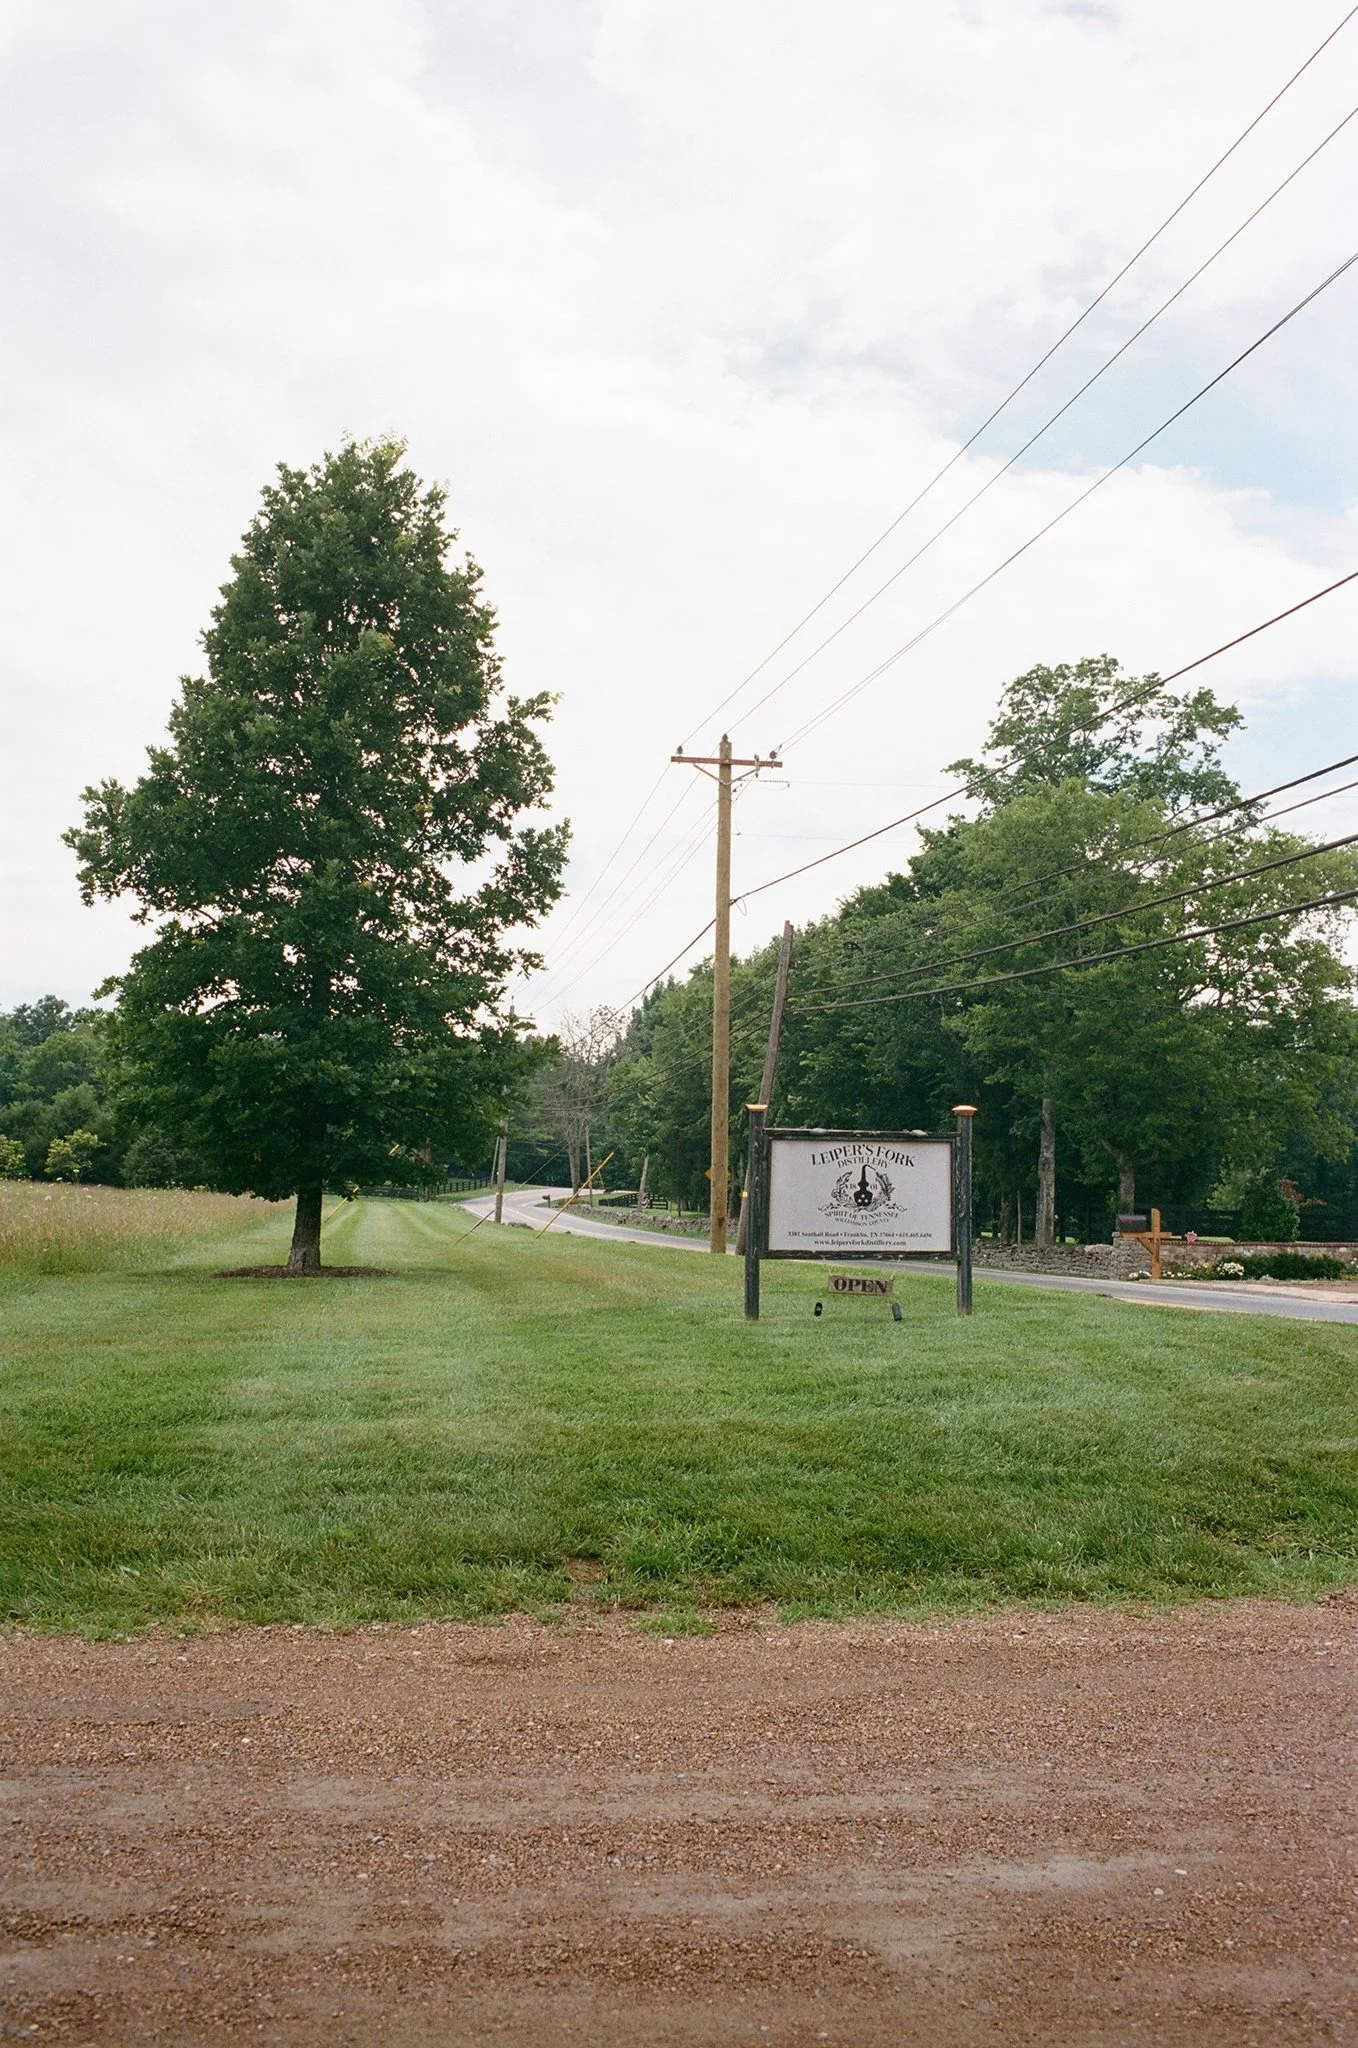
Leiper’s Fork
To Leiper’s Fork, where Americana lives and breathes—a town that feels like the past isn’t gone, just slower.


Leiper’s Fork Distillery
The distillery there offers grown-ups a taste of smoke and spice.


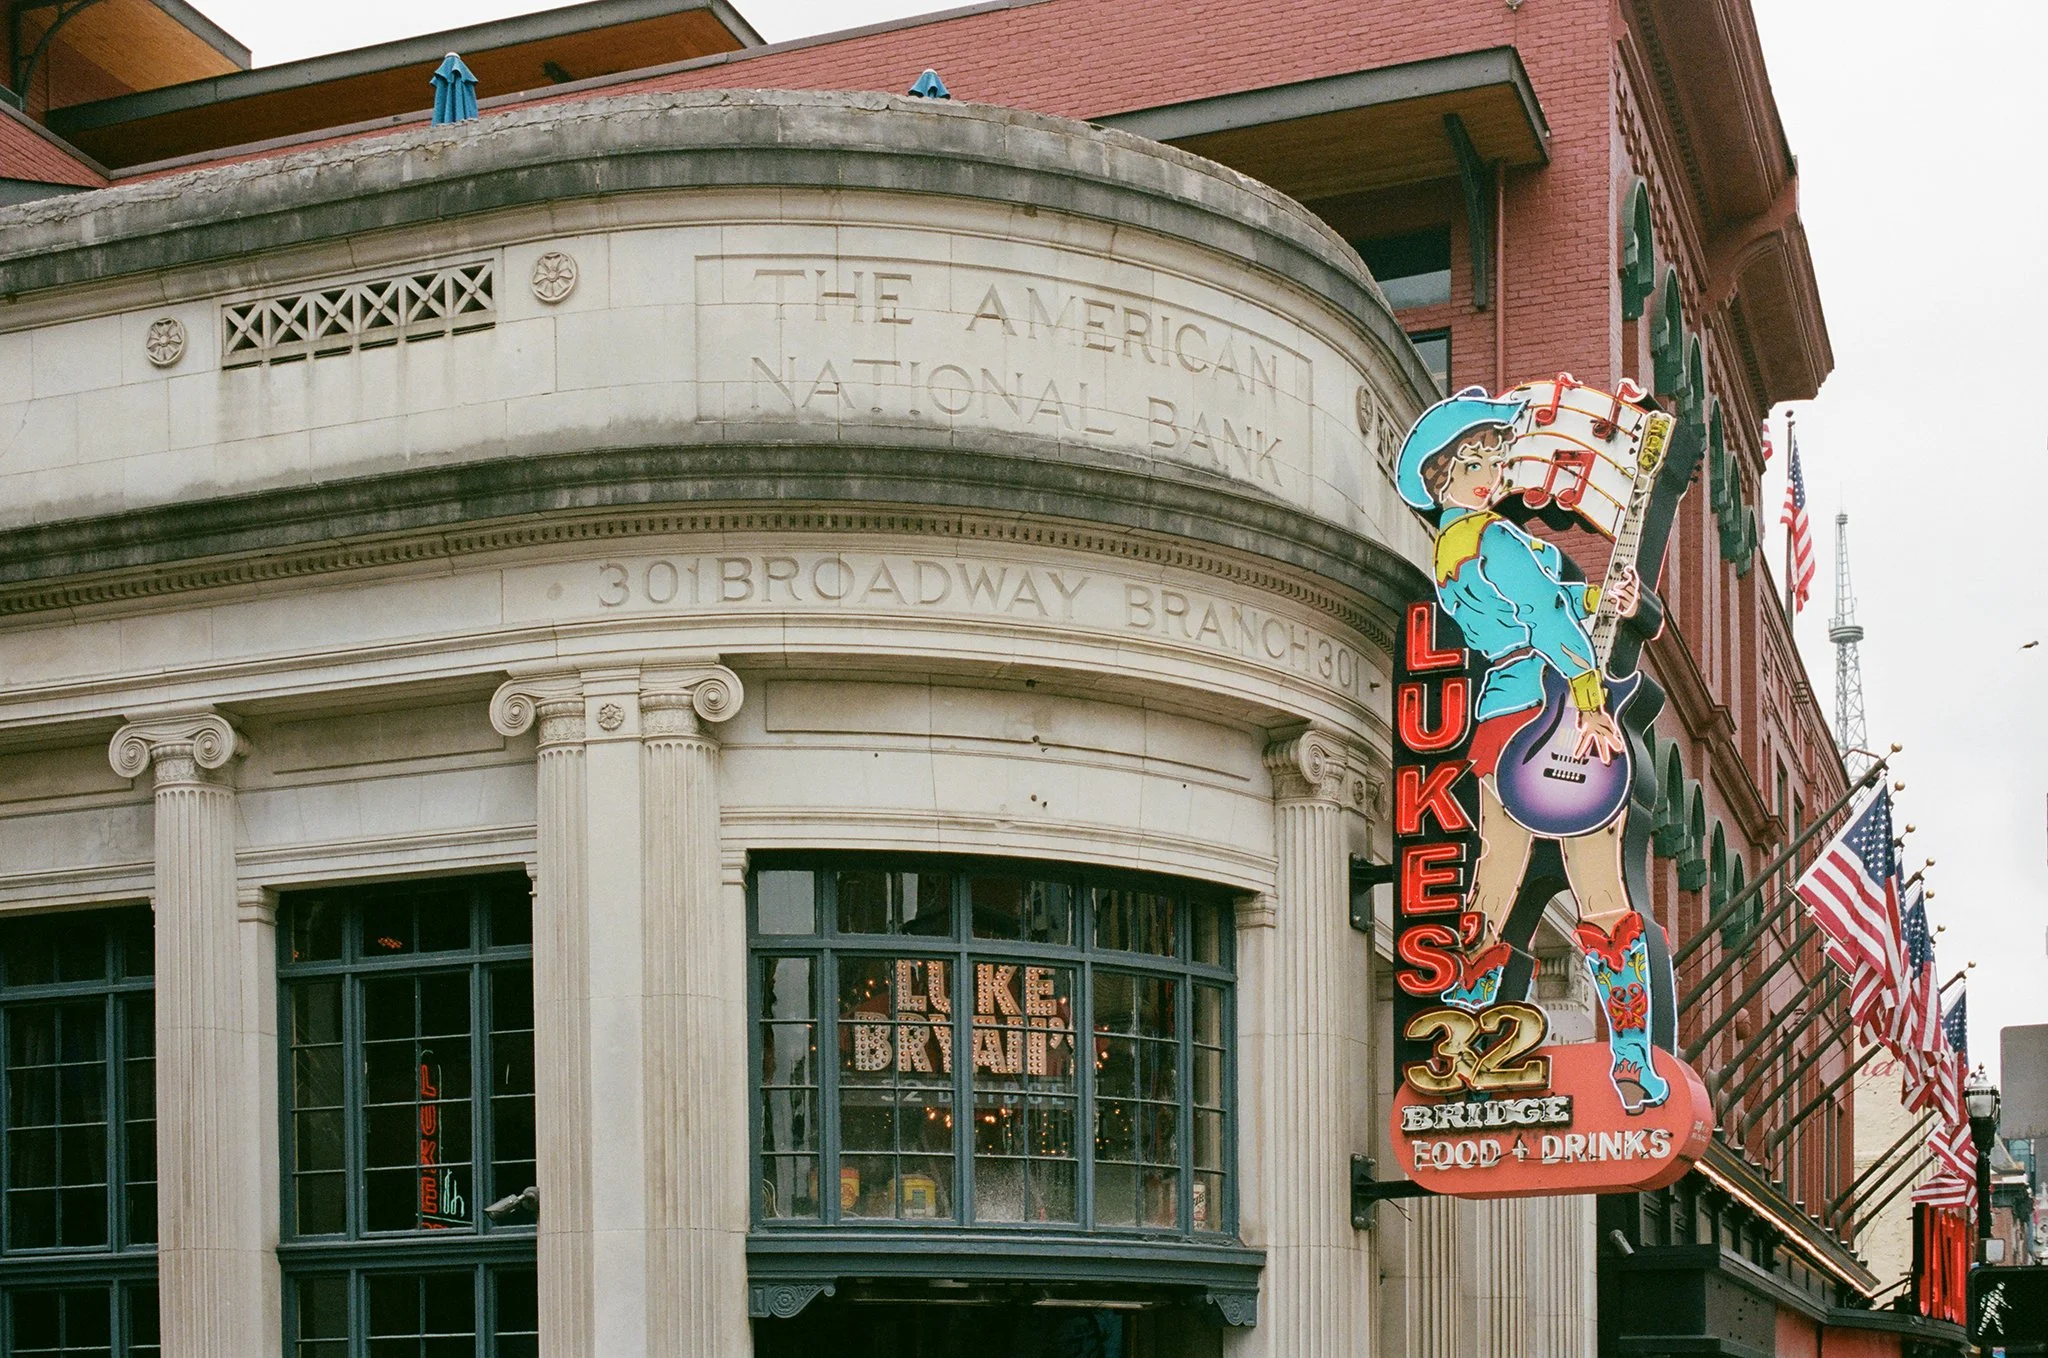
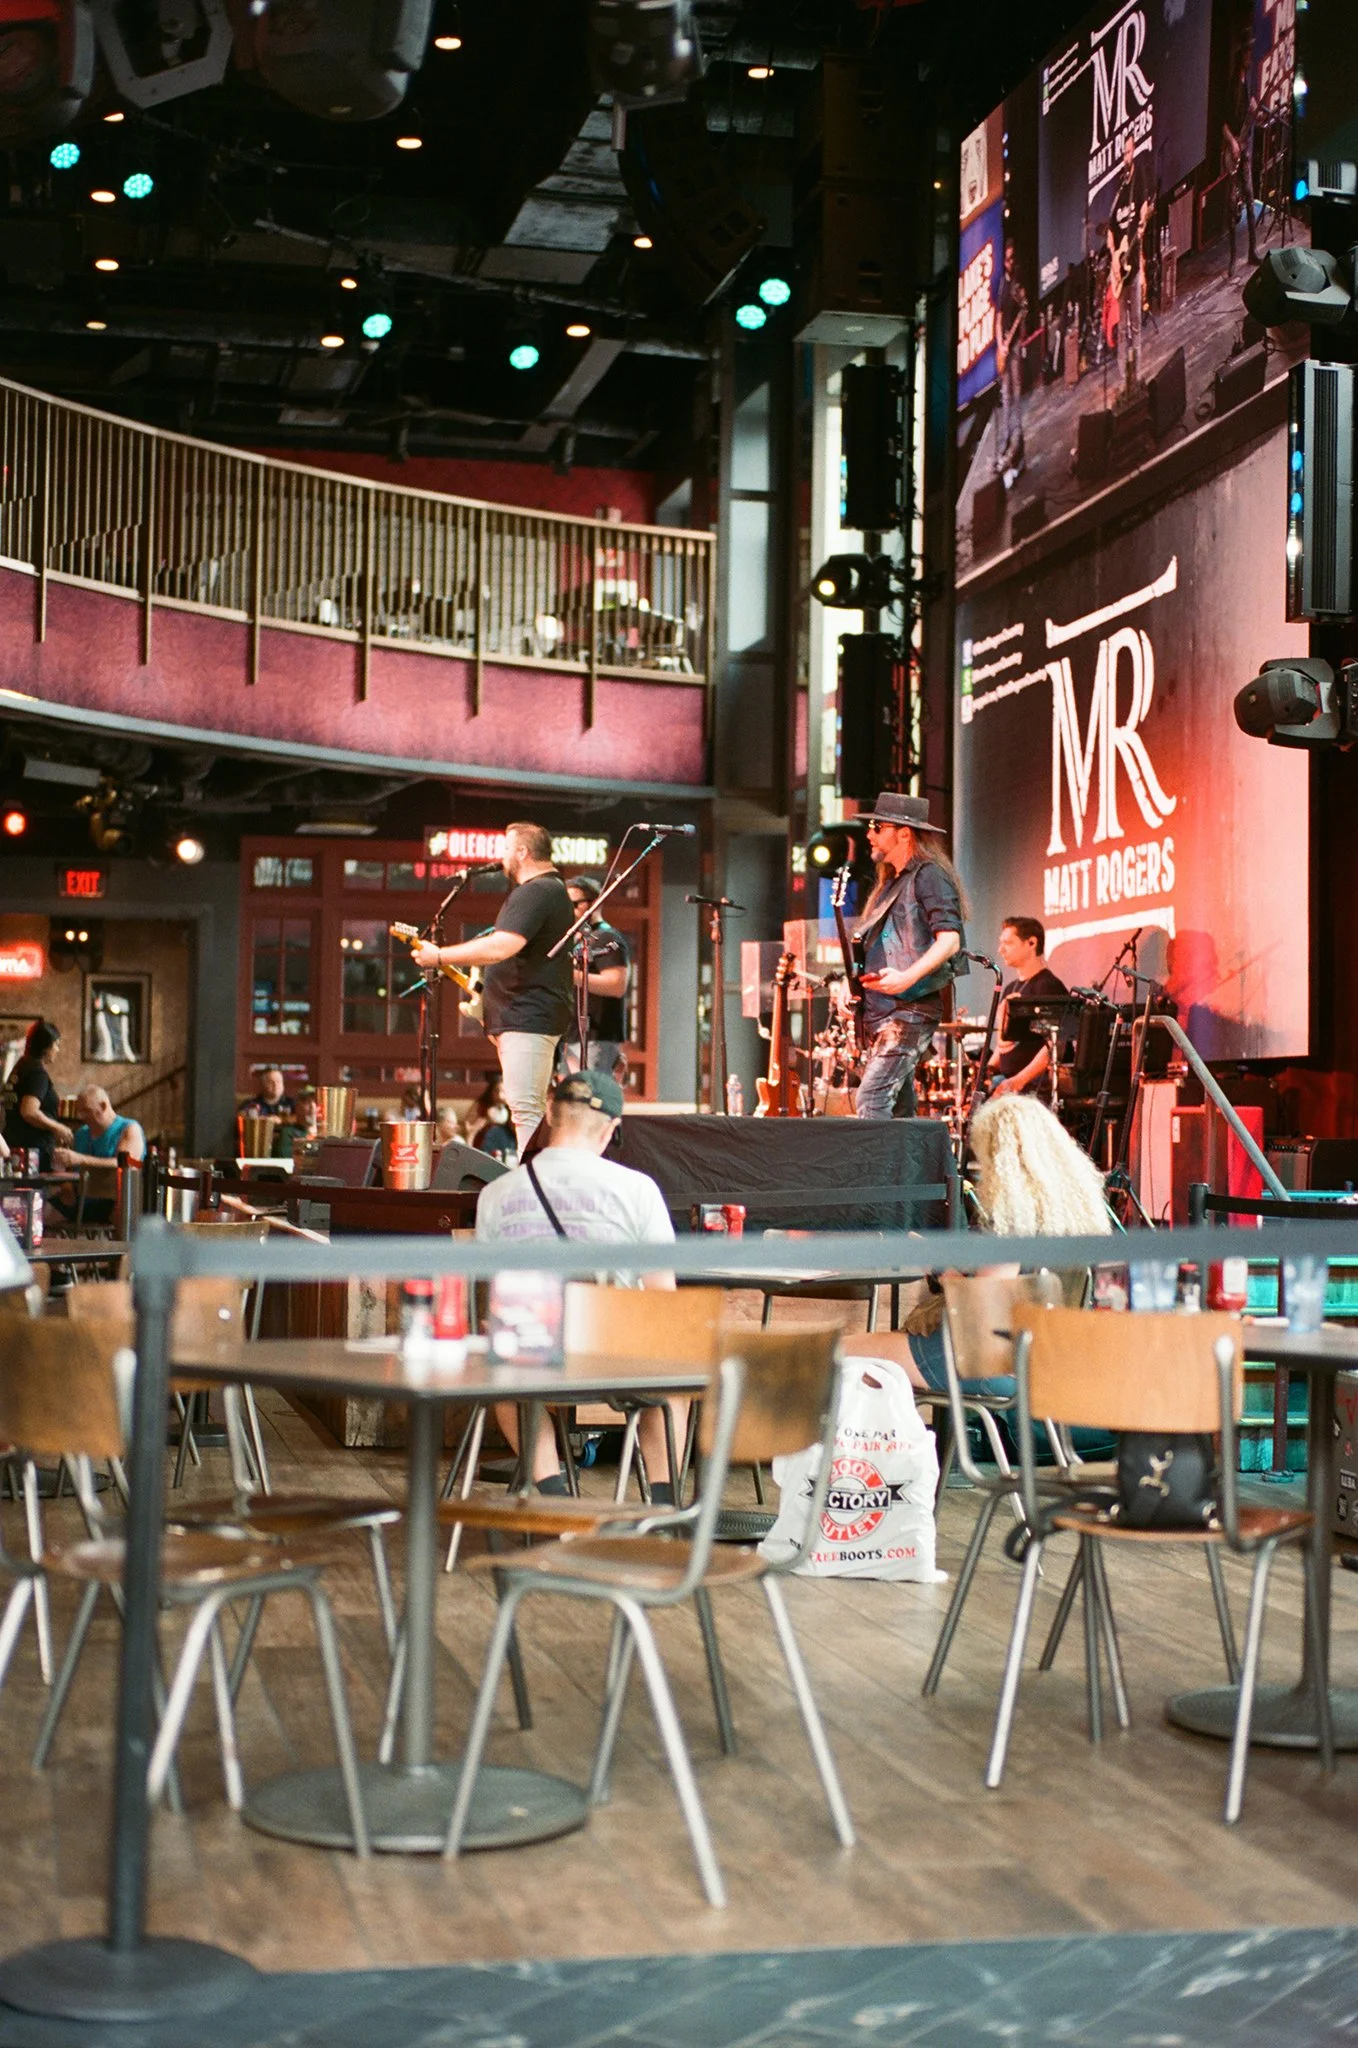
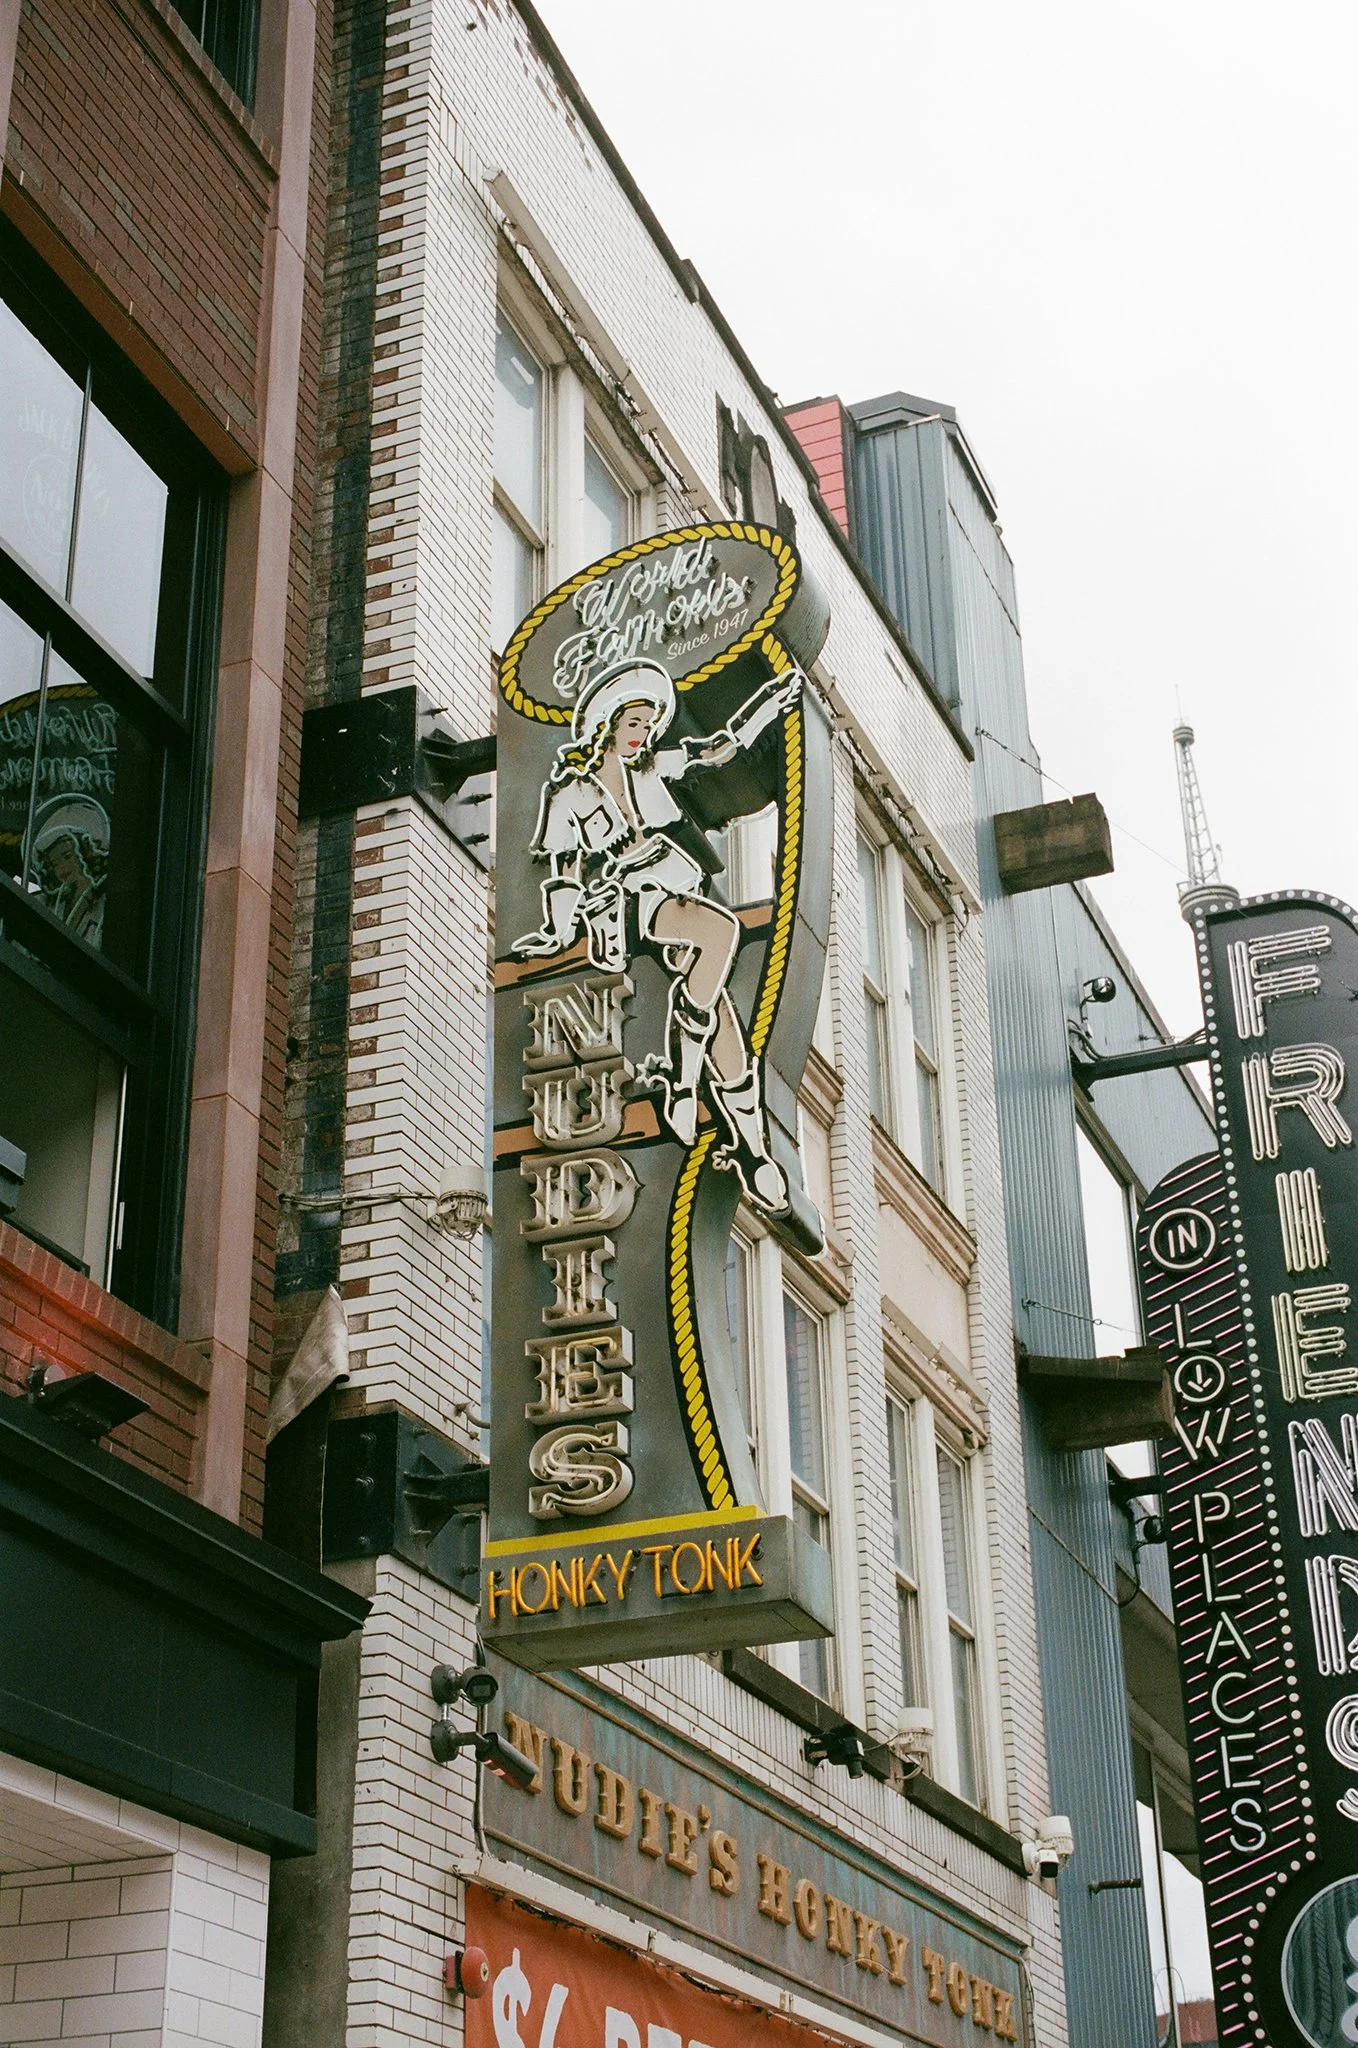
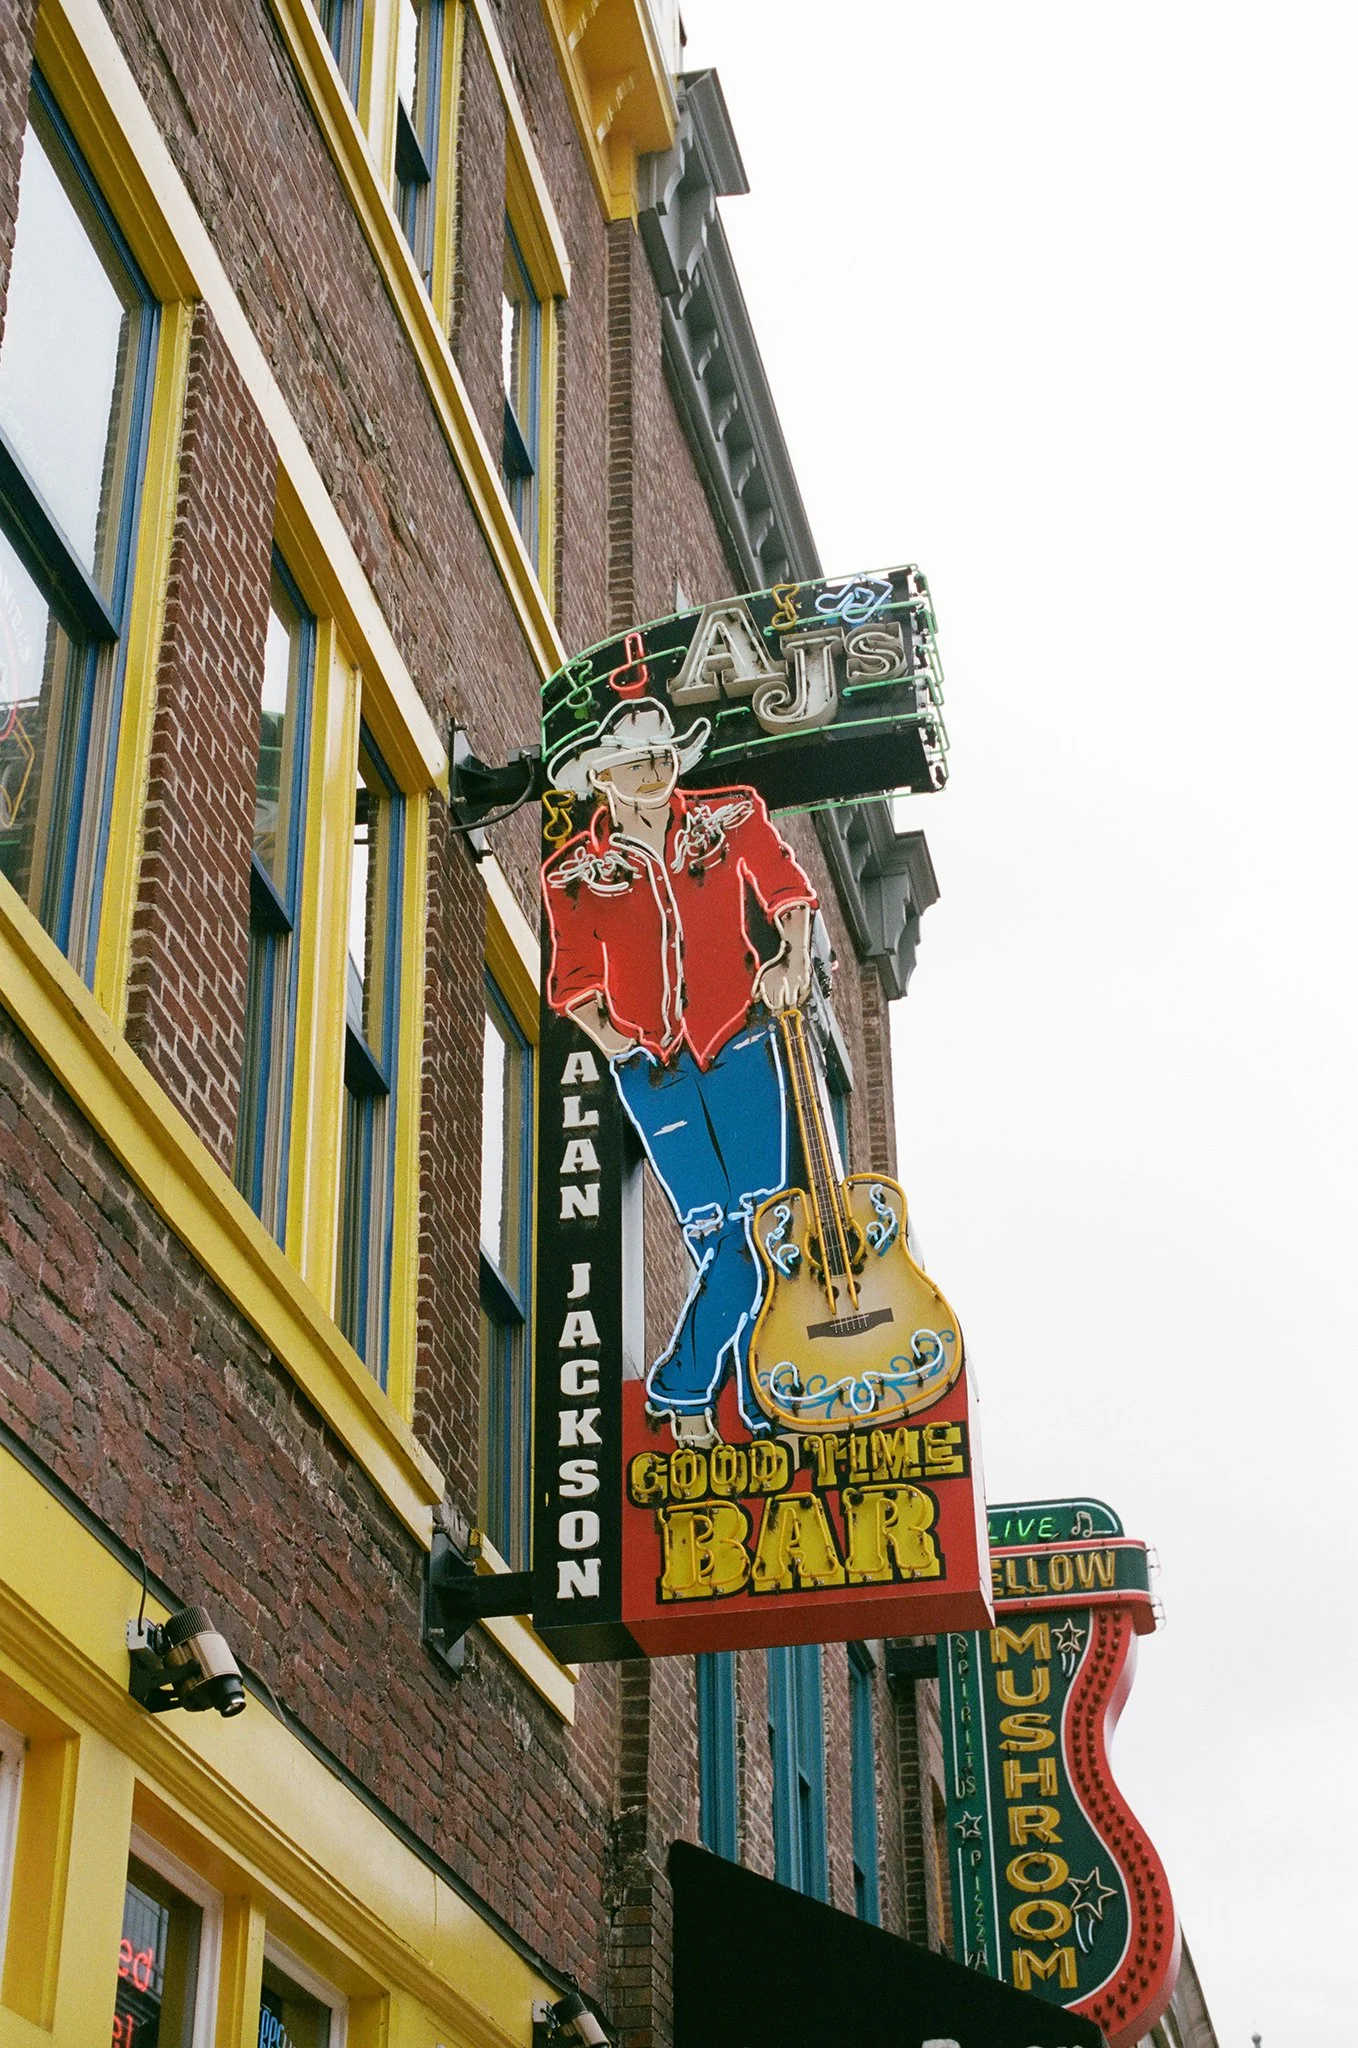
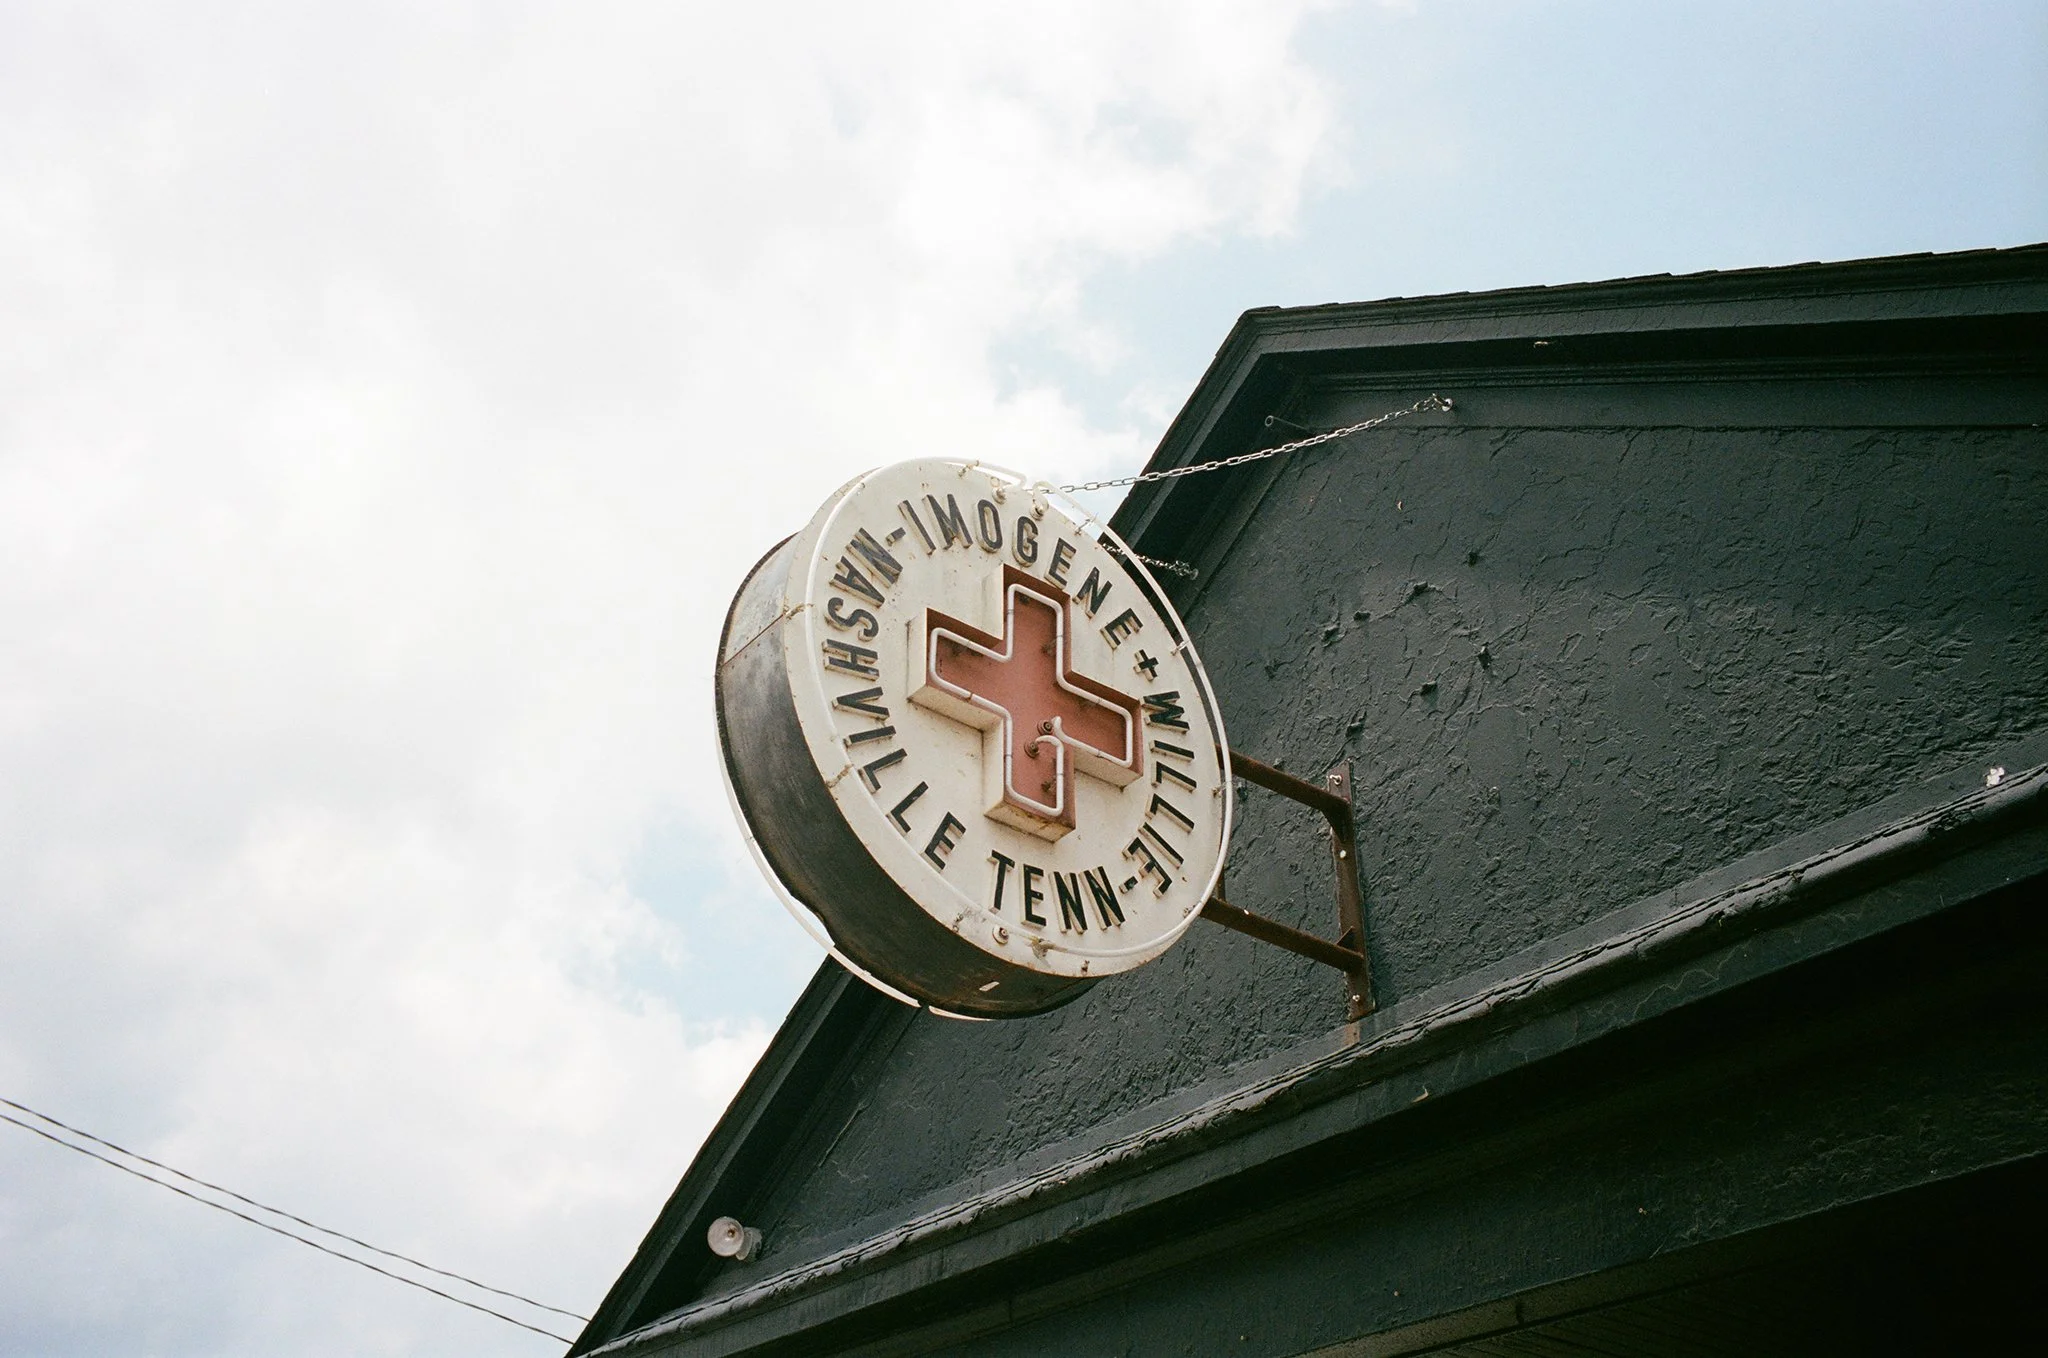
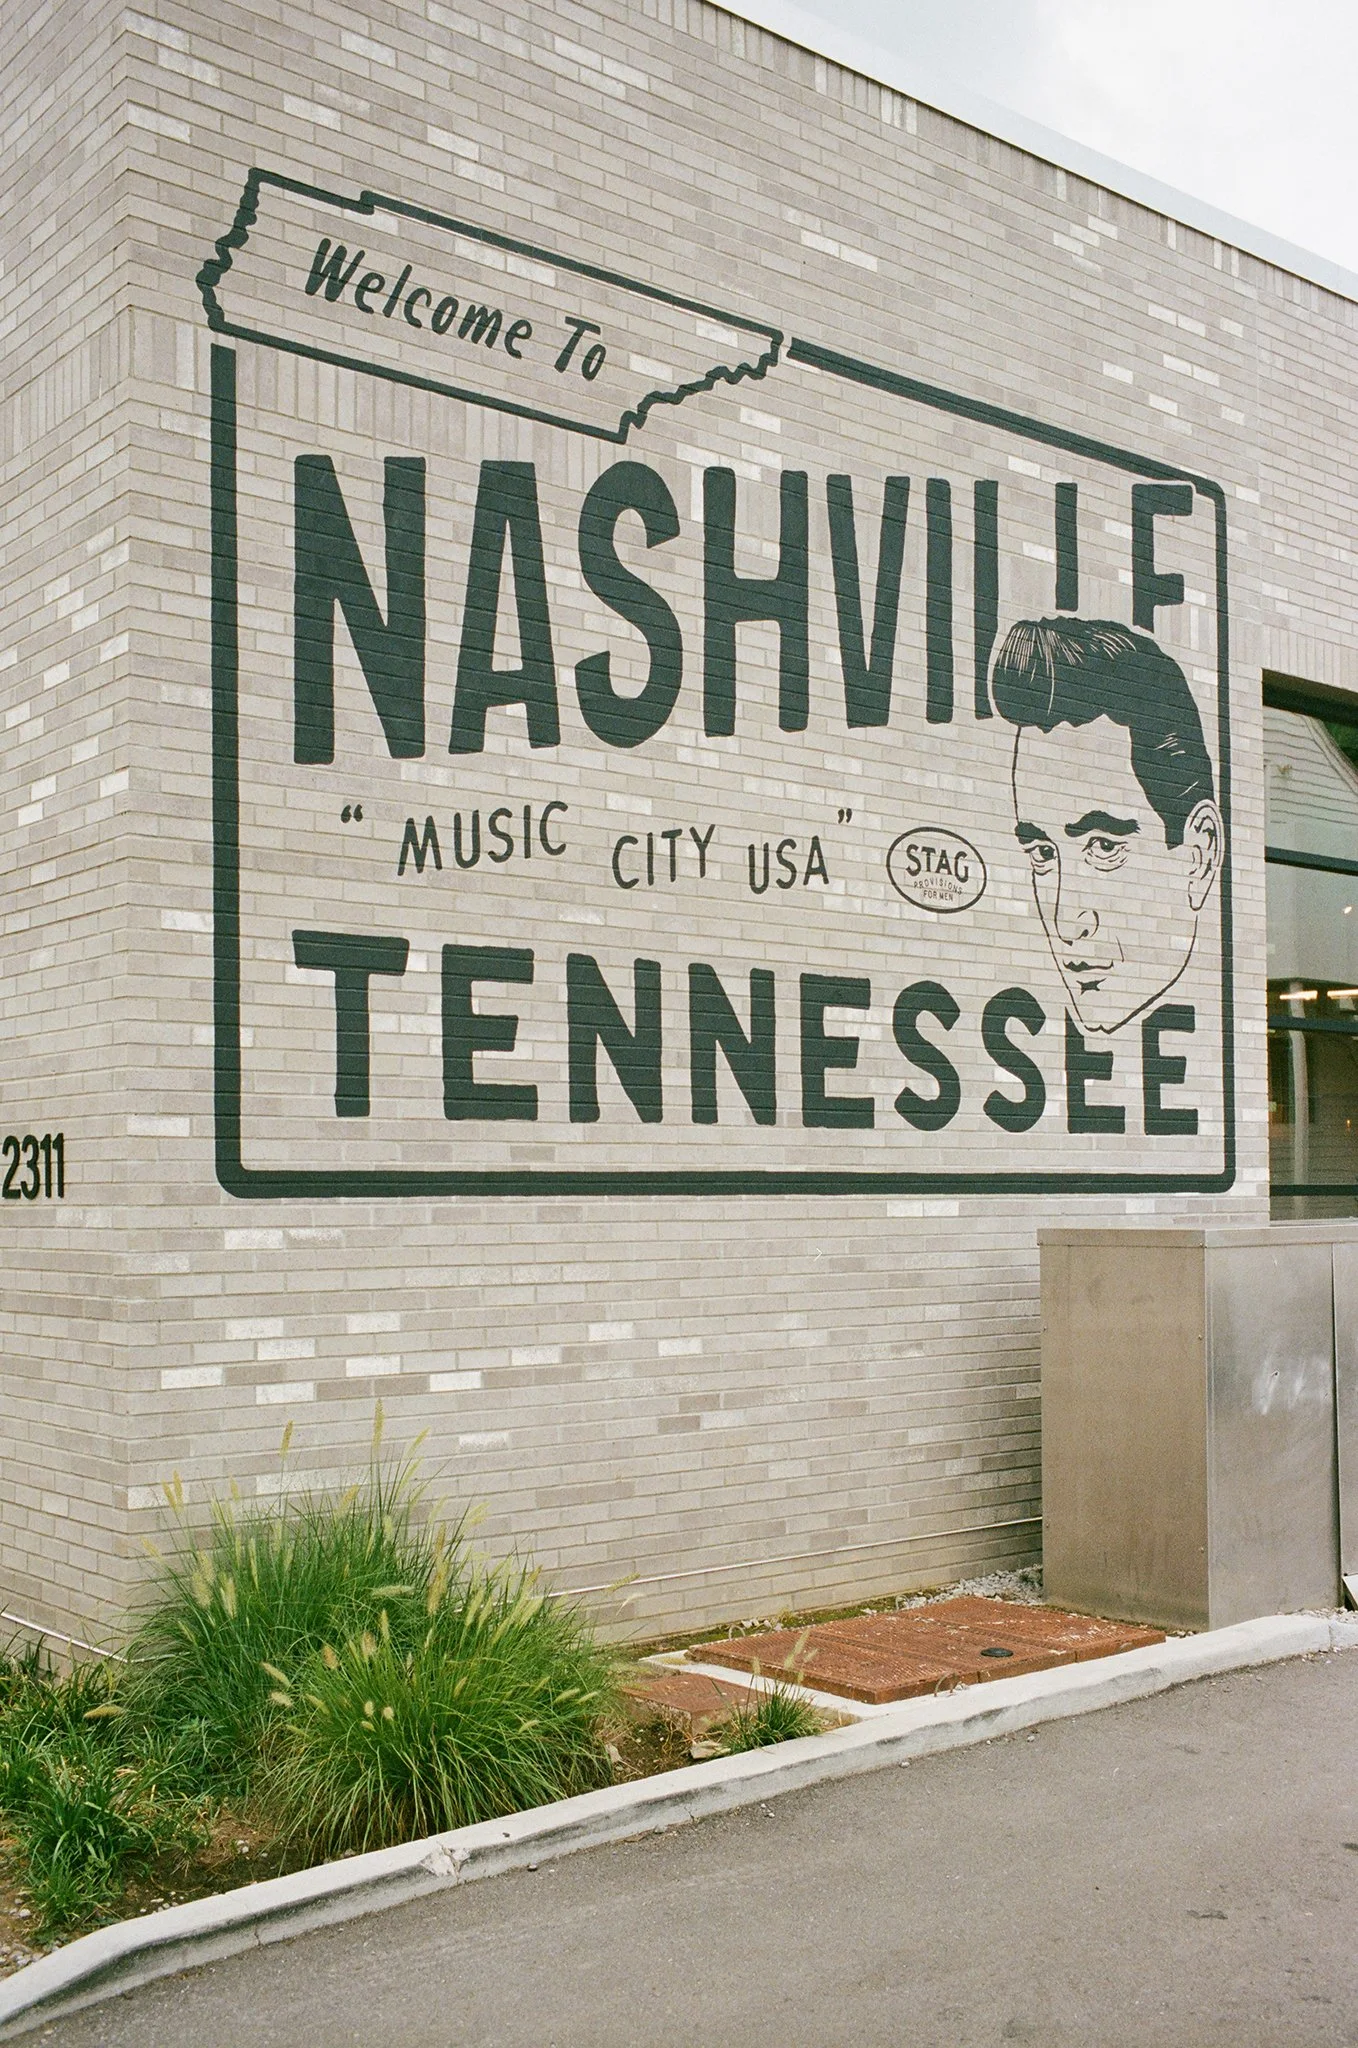
Nashville
There were bursts of city too. We made our way into Nashville—Broadway for neon chaos and live guitars that spilled onto the street, 12 South for boutiques and donuts.
The rain met us there, warm and sudden, washing over concrete and laughter alike. We didn’t mind. We ducked into shops and soaked it all in. Sunshine returned in time to dry our shoes.


The trip wasn’t polished or perfect, but it was textured—soft where it needed to be, rough around the edges where memories are made. Rain and music, road trips and naps, and sticky fingers from melting chocolate.
Tennessee gave us space to just be—together, quiet, loud, curious.
And that little house in Kingston Springs? It gave us something else: a pause. A way to hold the summer in our hands before it slipped too far ahead.
Shot entirely on Kodak Portra 400 35mm film with a Leica MP, these photos showcase the rich tones and nostalgic feel of film photography across rural and urban Tennessee.
Developed and scanned by Palm Film Lab in Miami, FL.

How I Film Road Bike Rides with GoPros and Edit on Mac Mini
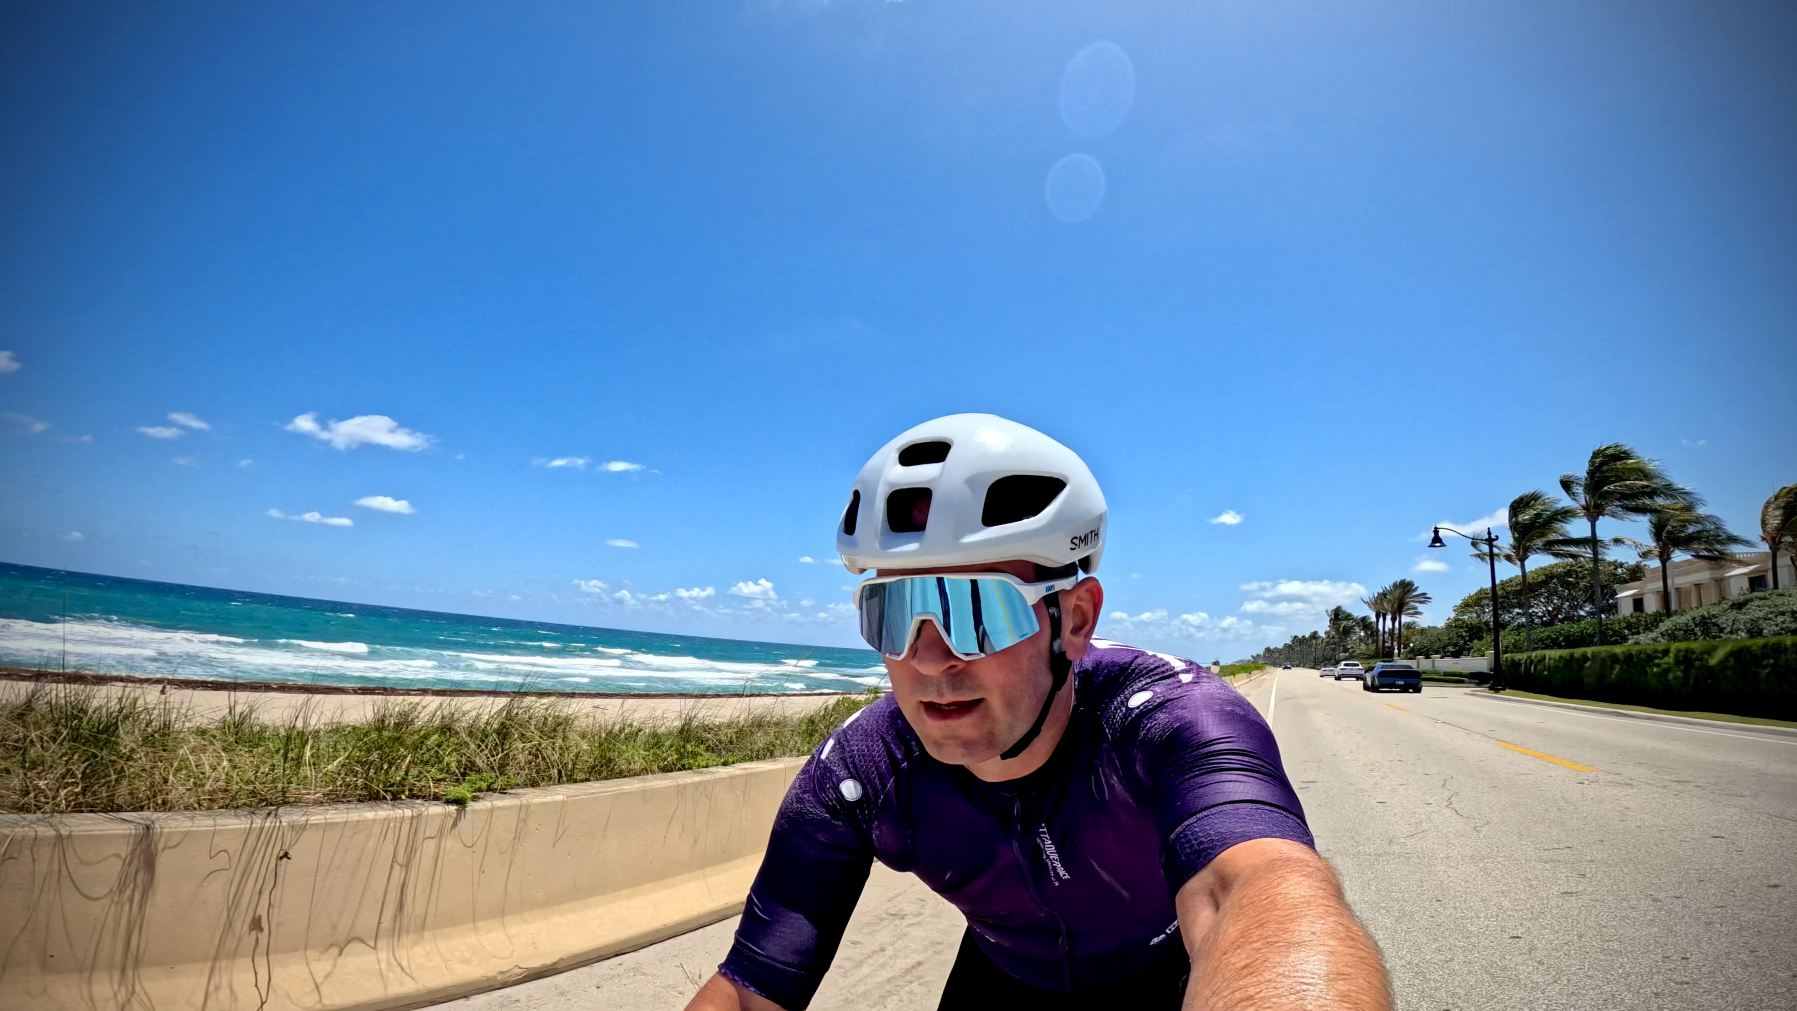
Most weekends, I’m out riding. Sometimes it’s me and a buddy. Other days, it’s a small crew—five to ten of us rotating and pulling. And now and then, it’s a bigger group roll-out from one of the local bike shops. We hit the usual: Key Biscayne at sunrise, Robert Is Here, the stretch up to Riviera Beach. The rides are therapy. Filming them just captures the motion.
Here’s how I do it without overcomplicating anything.
The Setup: Two GoPros, Front and Rear
I keep it simple: two GoPros (Hero 12 Black), one mounted up front underneath my Wahoo Bolt, the other under the saddle or saddle stem. That gives me both forward motion and a clean rear view—perfect for group rides and catching drafting lines, breakaways, or those tight moments when the group gets spicy.
Both cameras shoot in 5.3K at 24 fps, with 10-bit color turned on. Everything else stays default—no flat profiles, over-sharpening or over-tuning. I want the footage to look how the ride felt: clear, fast, real.


The detailed settings…
Video: Standard
Aspect Ratio: 16:9
Resolution: 5.3K
Color: Natural
Raw Audio: Off
Wind: Auto
Shutter: Auto (unless you use ND filter, in which case you can sync it with your fps, of example 1/48 at 24fps)
EV Comp: 0
White Balance: Auto
ISO Min: 100
ISO Max: 1600
Sharpness: Medium
Lens: Linear
Hypersmooth: Off for Neewer 1.2 anamorphic, On for regular GoPro lens
ProTune: On
Encoding: 10-bit
Optional: Anamorphic Lens for Extra Width and 16:9 format
Sometimes I’ll throw on a Neewer 1.2x anamorphic lens on the front and back GoPro (see photos above). It stretches the field of view a bit and brings in a little more light and road. It’s got a raw, gritty feel—something between skate video and handheld doc. Great flares as well. But when I use it, I always turn off HyperSmooth—the stabilization otherwise results in warping.
Editing: Fast Cuts, Real Pace
Once I’m back, everything goes into DaVinci Resolve on a Mac mini M4 base model. It handles the high-res clips fine, no lag. I don’t spend hours color grading or adding effects, just some simple preset transitions.
Scenes are 4 to 6 seconds max—keeps it tight and lets me sync to music easier.
I edit to the beat of a specific song, something that rolls like the ride. I usually have the specific song picked before editing.
Final video stays under 120 seconds. No filler. Just rhythm, motion, and light.

Where We Ride
It’s mostly Miami and South Florida. Key Biscayne is the go-to, but we’ll head south to Homestead (Robert is Here) or swing north for 100-mile ride to West Palm or further. Depending on the weekend, I might be riding tempo with a friend, rotating pulls in a tight group of ten, or hanging on with one of the faster shop rides.
Why I Film
I don’t film to make something cinematic. I film to remember the ride. There’s something about the sound of the tires, the wind off the causeway, the buzz of the pack—that’s hard to explain but easy to feel when you watch it back.
The footage doesn’t need to be perfect. It just needs to move.